Developing a cross-platform application using the Ionic Framework

Hello! Not so long ago, in one of the comments, I promised to write an introductory article for a quick acquaintance with the features of the Ionic Framework (hereinafter IF). I try to keep my promises. To begin, I would like to post a list of links that I often use when developing with IF:
- List of IF Interface Components
- AngularJS API Components for IF
- CLI IF Documentation
- IF training materials
- IF development cycle
- Basic Icon Set
')
What are we going to write? A small application that will take weather data from openweathermap.org for Moscow and display it. Development will be carried out in Linux Mint for the target platform Android . To compile under iOS, you must have a laptop or a PC from Apple . It is assumed that the reader is familiar with the JavaScript JavaScript and the basics of AngularJS (well, or quickly understands everything).
- Introduction
- Installation
- Project creation
- Project structure
- Work with routes
- Data acquisition
- Creating a view
- Data refresh (pull-to-refresh)
- Compiling and Publishing the Application
- Conclusion
Introduction
IF is an open source SDK for developing hybrid mobile applications using the full power of HTML5, CSS3 and JavaScript, an excellent example of the symbiosis of Cordova and AngularJS . Applications created with it can be viewed at showcase.ionicframework.com . The threshold of entry is low, but to create a serious application requires advanced knowledge of AngularJS and the features of the work of Cordova for the target platform. So let's install it soon!
Installation
This step is simple enough if you already have a NodeJS . To do this, type in the console:
sudo npm i -g cordova ionic Do you have Android SDK installed and configured? If not, this guide will help you. For Windows developers, there is an introductory video on installation . There is also a Vagrant build with all pre-installed software. We will assume that you didn’t have any problems (and if they did, then the forum definitely has a description of how to solve similar problems, mainly installation and configuration of the Android SDK , but there are also troubles with plug-ins. You can also look at SO , there’s a lot of information on topic). It is time to create.
Project creation
Here, too, everything is quite simple. IF offers a choice of 3 templates for the application - blank (blank), tabs (based on tabs) and sidemenu (with sidebar). Intuitive enough, isn’t it? All you need is to type in the console:
ionic start MSKWeather tabs Thus, we say IF to create a project with the name MSKWeather and the tabs template. Do not forget to go to your project folder and execute this command there. After creation, you can go to the folder with the template:
cd MSKWeather I deliberately use a non-empty project in order to save my and your time and show the capabilities of the framework, because it is much easier and faster to throw out the unnecessary and change it for yourself than to program from scratch. For a quick start, this approach will come down. Nevertheless, I hope that by the end of the article you will have an understanding of the architecture of the framework and you will easily begin with a blank template, and then thank me for my laziness. So, let's analyze the structure of the project IF.
Project structure
At the root of the project there is a config.xml file, which is responsible for the basic settings of our application. We will return to it (as well as to other files) a little later, but for now we will go to the www folder (by the way, I use Sublime and have already opened the project folder in it) and we will see the preparation of our application. The presence of index.html is striking - this is the link for all components of the future application (suddenly!). Consider what the framework provides out of the box:
<meta charset="utf-8"> <meta name="viewport" content="initial-scale=1, maximum-scale=1, user-scalable=no, width=device-width"> Cool encoding and prohibiting user scaling of the application. Already connected styles and scripts, as well as binding AngularJS in the body tag, but most importantly:
<ion-nav-bar class="bar-stable"> <ion-nav-back-button> </ion-nav-back-button> </ion-nav-bar> <ion-nav-view></ion-nav-view> There is a blank for the tab bar with the “Back” button, and the presentation in which our templates will be rendered (rendered). Let's now take a look at the templates folder. We are interested in the tabs.html file in which there is a list of tabs for opening inside the application. Let's remove 2 unnecessary tabs:
<!-- Chats Tab --> <ion-tab title="Chats" icon-off="ion-ios-chatboxes-outline" icon-on="ion-ios-chatboxes" href="#/tab/chats"> <ion-nav-view name="tab-chats"></ion-nav-view> </ion-tab> <!-- Account Tab --> <ion-tab title="Account" icon-off="ion-ios-gear-outline" icon-on="ion-ios-gear" href="#/tab/account"> <ion-nav-view name="tab-account"></ion-nav-view> </ion-tab> And in the remaining replace the icon, and as a result, the contents of the file you will have the following:
<ion-tabs class="tabs-icon-top tabs-color-active-positive"> <ion-tab title="Status" icon-off="ion-cloud" icon-on="ion-cloud" href="#/tab/dash"> <ion-nav-view name="tab-dash"></ion-nav-view> </ion-tab> </ion-tabs> It's time to see what we have done, for this, in the root folder of the project, run the command:
ionic serve If everything is successful, you will be transferred to the browser at the address http: // localhost: 8100 / # / tab / dash where the live-reload web version of the future application will start.
Wow!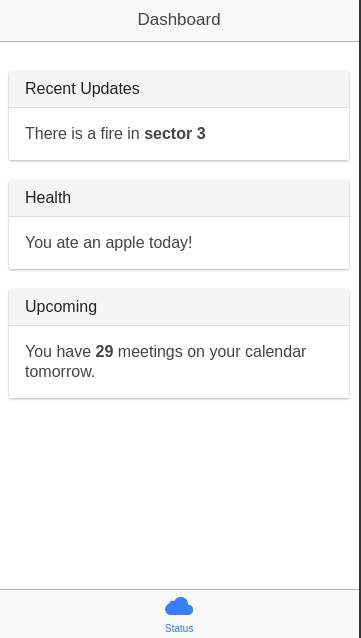
As you can see, the changes picked up and we still have one tab with a cloud icon. Now we need to delete tab-account.html and tab-chats.html (because they are no longer needed), and also rename chat-detail.html to city-detail.html , and tab-dash.html to tab-city.html respectively . These will be our templates for selecting a city and its details, respectively. And let's change the view name and url for access. The tabs.html file should now look like this:
<ion-tabs class="tabs-icon-top tabs-color-active-positive"> <ion-tab title="Status" icon-off="ion-cloud" icon-on="ion-cloud" href="#/tab/city"> <ion-nav-view name="tab-city"></ion-nav-view> </ion-tab> </ion-tabs> Now it's time to play around with routing in our application.
Work with routes
Changes we made to the templates should be taken into account in the configuration of the routes and the IF states. To do this, find the file app.js in the www / js folder , and all this information is stored in it.
angular.module('starter', ['ionic', 'starter.controllers', 'starter.services']) Here we are witnessing the creation of the main module of the application and the connection of the IF module to it, the module with controllers, and the module providing data (maybe I called it clumsily). We are mostly interested in the config section of the application, which accepts 2 $ stateProvider and $ urlRouterProvider objects (state manager and path manager, respectively). Let's remove the excess and change the parameters of the paths. The app.js file needs to be converted to this:
app.js
angular.module('starter', ['ionic', 'starter.controllers', 'starter.services']) .run(function($ionicPlatform) { $ionicPlatform.ready(function() { if (window.cordova && window.cordova.plugins && window.cordova.plugins.Keyboard) { cordova.plugins.Keyboard.hideKeyboardAccessoryBar(true); } if (window.StatusBar) { StatusBar.styleLightContent(); } }); }) .config(function($stateProvider, $urlRouterProvider) { $stateProvider .state('tab', { url: "/tab", abstract: true, templateUrl: "templates/tabs.html" }) .state('tab.city', { url: '/city', views: { 'tab-city': { templateUrl: 'templates/tab-city.html', controller: 'CityCtrl' } } }) .state('tab.city-detail', { url: '/city/:id', views: { 'tab-city': { templateUrl: 'templates/city-detail.html', controller: 'CityDetailCtrl' } } }) $urlRouterProvider.otherwise('/tab/city'); }); The attentive reader will notice that we have changed, namely, we set up $ stateProvider for our routes, controllers and templates. The state setting is trivial - “state name”, the setting object in which the access url is specified, the view with the name of the view (the name we changed in the last step), the path to the template, and the name of the controller. In fact, there are many ways to configure the state, to the extent that instead of the controller name, you can substitute the controller function itself, but we will not touch it (by the way, I advise you to look at the Ionic presentation by Andrew Joslin on ngEurope ). Notice that the view name of the tab.city and tab.city-detail states is the same to load the template into the same (only) view we have configured. $ urlRouterProvider.otherwise ('/ tab / city') provides default routing if no path is present (simply redirect the application to tab / city). If we see how the edits were applied in the browser, then visually nothing should change, except, of course, the address bar. If everything is right, then it's time to go to the goodies, namely - to receive data and their subsequent display.
Data acquisition
Now we need to open the file controllers.js in order to further configure the application. As you remember, in the router we marked the binding of states to the CityCtrl and CityDetailCtrl controllers , so in this file you need to declare them:
angular.module('starter.controllers', []) .controller('CityCtrl', function($scope) { }) .controller('CityDetailCtrl', function($scope) { }); Now open the services.js file and bring it to this view:
services.js
angular.module('starter.services', []) .factory('Cities', function() { var cities = [{ id: 524901, name: '', desc: ' ', emblem: 'http://upload.wikimedia.org/wikipedia/commons/d/da/Coat_of_Arms_of_Moscow.png' }]; return { all: function() { return cities; }, get: function(id) { for (var i = 0; i < cities.length; i++) { if (cities[i].id === parseInt(id)) { return cities[i]; } } return null; } }; }); In principle, we no longer need it, so you can save and close it. In the future, all the magic will be inside controllers.js .
With the above code, we created a data factory to use in our application. It is very simple to connect this factory; it is enough to register its name 'Cities' in the controller dependencies in order to use its methods. Write:
.controller('CityCtrl', function($scope, Cities) { $scope.cities = Cities.all(); }) So we get an array of cities and store it in the scope of the controller. Let's write in the dependencies of CityDetailCtrl what we use inside it, namely $ http (to get data using AJAX), $ stateParams (to get the parameter from the target date) and $ ionicPopup (for error message). And also we will write a request for obtaining weather for the selected city. As a result, we should have such a wonderful controller:
CityDetailCtrl
.controller('CityDetailCtrl', function($scope, $http, $stateParams, $ionicPopup) { $scope.data = {}; $scope.id = $stateParams.id; $scope.showAlert = function(title, text) { $ionicPopup.alert({ title: title, template: text }); }; $scope.refresh = function() { $http.get('http://api.openweathermap.org/data/2.5/forecast/daily?id='+$scope.id) .success(function(data, status, headers, config){ $scope.data = data; $scope.$broadcast('scroll.refreshComplete'); }) .error(function(data, status, headers, config){ $scope.showAlert(status, data); $scope.$broadcast('scroll.refreshComplete'); }); }; $scope.refresh(); }) Well, we have almost everything ready! It remains to edit our templates and get the finished application =)
Editing templates
Open to start tab-city.html . I remember that in the controller we received a list of all cities from the factory in the controller's scop. Let's implement their list with avatars . To do this, write in the file the following structure:
<ion-view view-title=""> <ion-content class="padding"> <ion-list> <a class="item item-avatar" ng-repeat="city in cities" href="#/tab/city/{{city.id}}"> <img ng-src="{{city.emblem}}"> <h2>{{city.name}}</h2> <p>{{city.desc}}</p> </a> </ion-list> </ion-content> </ion-view> Save the file and see in the browser:
Russia is our sacred state!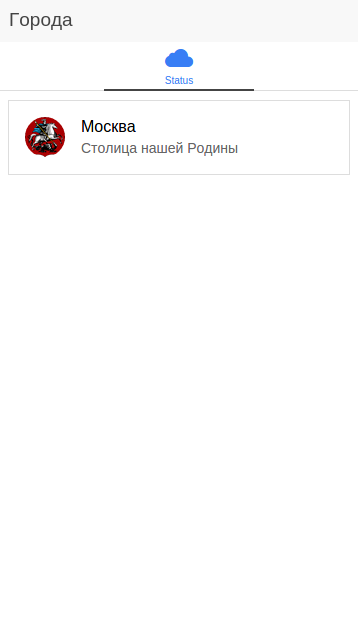
Wonderful! Now for the city-detail.html . Data is requested for the week, so we also need a list here. To understand what exactly to display, go to api.openweathermap.org/data/2.5/forecast/daily?id=524901 , and look at the structure of the server response (I like the jsoneditoronline.org service for viewing and formatting).
Server response
{ "cod": "200", "message": 0.0165, "city": { "id": 524901, "name": "Moscow", "coord": { "lon": 37.615555, "lat": 55.75222 }, "country": "RU", "population": 1000000 }, "cnt": 7, "list": [ { "dt": 1428915600, "temp": { "day": 283.84, "min": 278.31, "max": 284.09, "night": 278.31, "eve": 283.05, "morn": 281.75 }, "pressure": 1010.15, "humidity": 74, "weather": [ { "id": 802, "main": "Clouds", "description": "scattered clouds", "icon": "03d" } ], "speed": 5.02, "deg": 243, "clouds": 32 }, { "dt": 1429002000, "temp": { "day": 279.6, "min": 275.65, "max": 280.3, "night": 275.65, "eve": 279.3, "morn": 278.04 }, "pressure": 994.7, "humidity": 89, "weather": [ { "id": 500, "main": "Rain", "description": "light rain", "icon": "10d" } ], "speed": 5.01, "deg": 200, "clouds": 64, "rain": 1.86 }, { "dt": 1429088400, "temp": { "day": 277.79, "min": 273.76, "max": 278.35, "night": 277.3, "eve": 278.35, "morn": 273.76 }, "pressure": 998.51, "humidity": 73, "weather": [ { "id": 500, "main": "Rain", "description": "light rain", "icon": "10d" } ], "speed": 6.53, "deg": 221, "clouds": 76, "rain": 0.53 }, { "dt": 1429174800, "temp": { "day": 282.85, "min": 276.5, "max": 282.85, "night": 276.5, "eve": 278.69, "morn": 279.93 }, "pressure": 991.07, "humidity": 0, "weather": [ { "id": 501, "main": "Rain", "description": "moderate rain", "icon": "10d" } ], "speed": 5.36, "deg": 287, "clouds": 47, "rain": 4.22 }, { "dt": 1429261200, "temp": { "day": 280.71, "min": 274.5, "max": 280.71, "night": 274.5, "eve": 277.19, "morn": 280.17 }, "pressure": 995.12, "humidity": 0, "weather": [ { "id": 501, "main": "Rain", "description": "moderate rain", "icon": "10d" } ], "speed": 5.32, "deg": 285, "clouds": 65, "rain": 3.23 }, { "dt": 1429347600, "temp": { "day": 281.27, "min": 276.59, "max": 281.27, "night": 276.59, "eve": 278.67, "morn": 279.17 }, "pressure": 1002.53, "humidity": 0, "weather": [ { "id": 500, "main": "Rain", "description": "light rain", "icon": "10d" } ], "speed": 9.51, "deg": 359, "clouds": 67, "rain": 0.62 }, { "dt": 1429434000, "temp": { "day": 282.04, "min": 278.38, "max": 282.04, "night": 279.1, "eve": 280.23, "morn": 278.38 }, "pressure": 1006.22, "humidity": 0, "weather": [ { "id": 500, "main": "Rain", "description": "light rain", "icon": "10d" } ], "speed": 5.5, "deg": 311, "clouds": 88, "rain": 0.97 } ] } Well, for this data you need to create a simple template, an example of which is shown below:
city-detail.html
<ion-view view-title="{{data.city.name}}"> <ion-content class="padding"> <h2> : {{data.city.name}} </h2> <p> : {{data.city.country}} </p> <p> : {{data.city.population}} . </p> <p> : {{data.city.coord.lon}} : {{data.city.coord.lat}} </p> <ion-list> <a class="item item-avatar" ng-repeat="day in data.list" href="#"> <img ng-src="http://openweathermap.org/img/w/{{day.weather[0].icon}}.png"> <h2>: {{(day.temp.day - 273.15).toFixed(2)}} C</h2> <p> : <span ng-bind="day.dt*1000 | date: 'dd.MM.yyyy'"></span></p> </a> </ion-list> </ion-content> </ion-view> There is no time to explain - we save, run and watch!
Weather pleases)
And how to make the avatar is not round? Open the css / style.css file and write:
.item-avatar>img:first-child { border-radius: 5%; } This will remove the standard border-radius as much as 50% (for an avatar, maybe just right, but for a coat of arms ugly). In this file, as you may have guessed, you can prescribe your own styles for components (and you can also intimately rewrite the styles of the IF itself).
I will of course attach the archive with the code to the article, so that you will have the opportunity to play with the fields in every possible way. As you can see, the development process is simple, clear and pleasant (honestly, I hope I don’t need to explain what is going on in this template?). And finally ...
Data refresh (pull-to-refresh)
I like this snack. What do you need? Just add
<ion-refresher pulling-text="-" on-refresh="refresh()"> </ion-refresher> to the previous file at the very beginning of the ion-content tag. And also register
$scope.$broadcast('scroll.refreshComplete'); to the successors and error handlers of the $ http.get request. Try to do this and pull the page down.
Compiling and Publishing the Application
At this stage we can compile and debug our application on devices and emulators. To view the application immediately in iOS and Android, run:
ionic serve --lab and see the following:
It's alive!
To compile the application and run it in the emulator, you need to run:
ionic platform add android ( ios) ionic build android (ios) ionic emulate android (ios) In the case of Apple technology , you will need to install ios-sym . For deployment, see the instructions for your target platform. For example, for Android, you will need to generate a key and sign an application, which is well described here . How to generate icons and splash to the platforms described here
Archive with the project
Conclusion
I hope I managed to bring the basic concepts of IF, and also to encourage you to try this framework for your projects. Comments and suggestions are accepted strictly in the LAN, the article will be edited and supplemented based on your feedback (I plan to make a best practices collection from this post). Thank you all for your attention and good coding!
Source: https://habr.com/ru/post/255653/
All Articles