Features of creating programs in NODEMCU ESP8266 for the “Internet of Things”
I started exploring the capabilities of the ESP8266 chip a couple of months ago. Initially, like most, I purchased the ESP-01 module, but almost immediately found a new solution at that time based on the ESD-12 module in the form of DEVKIT and nodeMCU firmware, which has VM LUA version 5.1.4 embedded (without debug and OS * modules ).
There are several ways to join the world of beauty - the “Internet of Things”. You can take the ESP-01 module, in which 512 Kbytes of flash, there is a UART interface, a pair of ESP contacts, add an interface to the USB to subsequently rewire the flash to a larger volume. For those who have no desire or ability to work on modifying the module, but I want to join and start programming right away, there is another way - this is the DEVKIT board mentioned above.
')
If we take into account the price difference of a solution of $ 10 - the choice is yours.
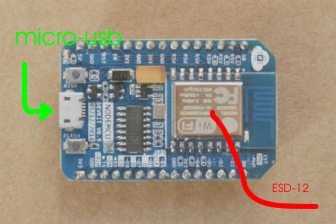
First , it already contains a UART-USB interface with a micro USB connector. Therefore, to connect it to a computer, only a USB-microUSB cable is needed.
Secondly , it has outputs of all available signals from the ESP8266. Here is my connection diagram for the module of various sensors:

To connect sensors to DEVKIT board contacts, I used a cable from an old computer to connect peripherals (disks, CD-ROMs, ports, etc.). As you see, I connected everything or almost everything to the module. In the project - the frequency control of the engine and PID regulation of power plants (heaters and switches).
Thirdly , the module already has flash 4 MB, and NODEMCU has a built-in spiffs file system.
Fourth , it is possible to update the firmware from the cloud or via USB.
Fifth , you can create multiple scripts on the LUA and write them to the file system.
After that, via WIFI, you can call the necessary scripts for execution.
The LUA extension library contains the following modules:
json, file, timer, pwm, i2c, spi, 1-wire, net, mqtt, coap, gpio, wifi, adc, uart and system api.
Board contracts can be programmed for gpio, i2c, pwm.
Two firmware versions are available with the format of integers or real numbers.
It should be noted that you can program your development on the SI.
But the problem is that to debug every change in your program, you need to assemble a 200 KB firmware and load it into the module for about 1 minute. Those. how many mistakes - so many minutes.
Another way is to debug the modules of the LUA and subsequently (if necessary) transfer them to the SI using the API SI for the LUA (I actually do this).
One error is about 1-2KB and loading 1-2 seconds. Those. how many mistakes - so many seconds.
The main disadvantage is that VM LUA executes LUA scripts only placed in the RAM of the crystal. And this memory for scripts is only 20 KB. This amount of memory is enough to execute the script in about 110 lines.
Therefore, the creation of relatively large scripts for this module has its own specifics.
First , it is necessary to divide the algorithm into linear blocks.
Second , write these blocks into separate files of the module file system.
Third , execute these modules using the dofile statement.
When writing modules, you must adhere to the following rules:
- At the end of each module, explicitly call the garbage collector;
- To exchange data between modules, use global variables, and for calculations inside modules, local variables.
As a result, the main lua program looks like this (one of the working options):
- dofile ('nk_start.lc') - call the initial sensor initialization module
- function cb () - callback function for periodic measurement of sensor readings
collectgarbage () - call the garbage collector
if ip == nil then
dofile ('wifi_1.lua') - initialization function of a wifi station or server
end
- if ip ~ = nil and is == nil then
dofile ('srv_1.lua'); - in this embodiment, a web server is implemented
is = 1;
end
- dofile ('cbAM2302.lc'); - data acquisition from the humidity and temperature sensor AM2302
dofile ('cb18b20.lua'); - obtaining readings from DS18B20 temperature sensors (I have three)
dofile ('get_tp.lc'); dofile ('norm.lc'); - receiving indications from the sensor of pressure and temperature (BMP180)
end
tmr.alarm (3,1000,1, cb) - discretization timer - calls the callback function. sampling frequency 1 Hz
Since in this program each module takes the place of the previous one, there may be many such modules. All of them are stored in the file system.
If you implement the algorithm of this program without using moduleization, then the program can only accommodate one sensor in the module’s memory (either AM2302, or 18b20, or BMP180).
There are several ways to join the world of beauty - the “Internet of Things”. You can take the ESP-01 module, in which 512 Kbytes of flash, there is a UART interface, a pair of ESP contacts, add an interface to the USB to subsequently rewire the flash to a larger volume. For those who have no desire or ability to work on modifying the module, but I want to join and start programming right away, there is another way - this is the DEVKIT board mentioned above.
')
If we take into account the price difference of a solution of $ 10 - the choice is yours.
What is good about this DEVKIT module?
First , it already contains a UART-USB interface with a micro USB connector. Therefore, to connect it to a computer, only a USB-microUSB cable is needed.
Secondly , it has outputs of all available signals from the ESP8266. Here is my connection diagram for the module of various sensors:
To connect sensors to DEVKIT board contacts, I used a cable from an old computer to connect peripherals (disks, CD-ROMs, ports, etc.). As you see, I connected everything or almost everything to the module. In the project - the frequency control of the engine and PID regulation of power plants (heaters and switches).
Thirdly , the module already has flash 4 MB, and NODEMCU has a built-in spiffs file system.
Fourth , it is possible to update the firmware from the cloud or via USB.
Fifth , you can create multiple scripts on the LUA and write them to the file system.
After that, via WIFI, you can call the necessary scripts for execution.
The LUA extension library contains the following modules:
json, file, timer, pwm, i2c, spi, 1-wire, net, mqtt, coap, gpio, wifi, adc, uart and system api.
Board contracts can be programmed for gpio, i2c, pwm.
Two firmware versions are available with the format of integers or real numbers.
It should be noted that you can program your development on the SI.
But the problem is that to debug every change in your program, you need to assemble a 200 KB firmware and load it into the module for about 1 minute. Those. how many mistakes - so many minutes.
Another way is to debug the modules of the LUA and subsequently (if necessary) transfer them to the SI using the API SI for the LUA (I actually do this).
One error is about 1-2KB and loading 1-2 seconds. Those. how many mistakes - so many seconds.
What are the disadvantages of this module?
The main disadvantage is that VM LUA executes LUA scripts only placed in the RAM of the crystal. And this memory for scripts is only 20 KB. This amount of memory is enough to execute the script in about 110 lines.
Therefore, the creation of relatively large scripts for this module has its own specifics.
First , it is necessary to divide the algorithm into linear blocks.
Second , write these blocks into separate files of the module file system.
Third , execute these modules using the dofile statement.
When writing modules, you must adhere to the following rules:
- At the end of each module, explicitly call the garbage collector;
- To exchange data between modules, use global variables, and for calculations inside modules, local variables.
As a result, the main lua program looks like this (one of the working options):
- dofile ('nk_start.lc') - call the initial sensor initialization module
- function cb () - callback function for periodic measurement of sensor readings
collectgarbage () - call the garbage collector
if ip == nil then
dofile ('wifi_1.lua') - initialization function of a wifi station or server
end
- if ip ~ = nil and is == nil then
dofile ('srv_1.lua'); - in this embodiment, a web server is implemented
is = 1;
end
- dofile ('cbAM2302.lc'); - data acquisition from the humidity and temperature sensor AM2302
dofile ('cb18b20.lua'); - obtaining readings from DS18B20 temperature sensors (I have three)
dofile ('get_tp.lc'); dofile ('norm.lc'); - receiving indications from the sensor of pressure and temperature (BMP180)
end
tmr.alarm (3,1000,1, cb) - discretization timer - calls the callback function. sampling frequency 1 Hz
Since in this program each module takes the place of the previous one, there may be many such modules. All of them are stored in the file system.
If you implement the algorithm of this program without using moduleization, then the program can only accommodate one sensor in the module’s memory (either AM2302, or 18b20, or BMP180).
Source: https://habr.com/ru/post/255625/
All Articles