Install SQL Server 2012 for SharePoint 2013
This instruction is intended for beginners looking for a simple guide in Russian to install the English version of SQL Server 2012, which will then be used for SharePoint 2013.
This article is not for professionals.
All work is divided into 3 stages:
The article also describes the process of installing Microsoft .NET Framework 3.5 in MS Windows Server 2012 R2 Standart.
Attention: there are a lot of pictures under the cut!
1. Before installing, you should make sure that the hard disk has enough free space (in my case it took 2.7 GB).
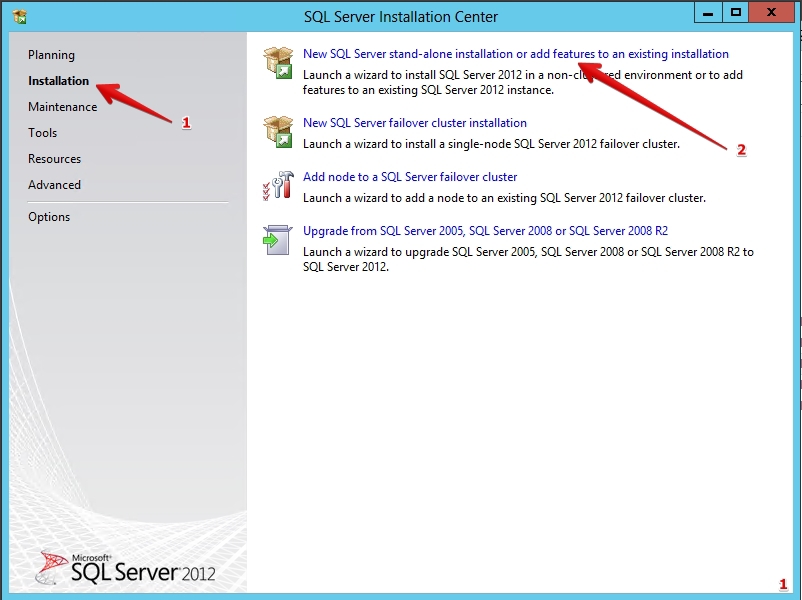
After launching the distribution, select the " Installation " item in the left menu, then "click" the item " New SQL Server ":
')
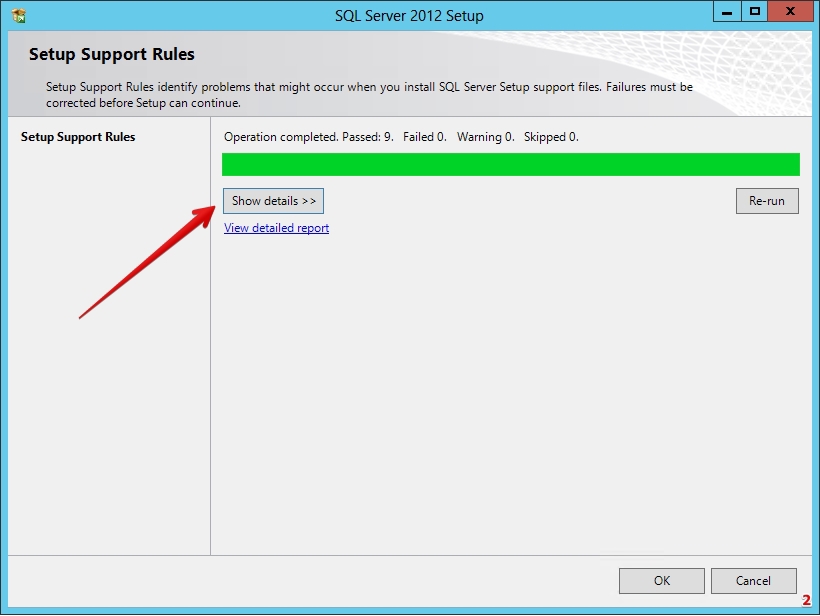
2. The installation wizard will start. He will perform a check. You can click on the “Show details” button and see a detailed report:
3. Detailed report. Press the "OK" button:

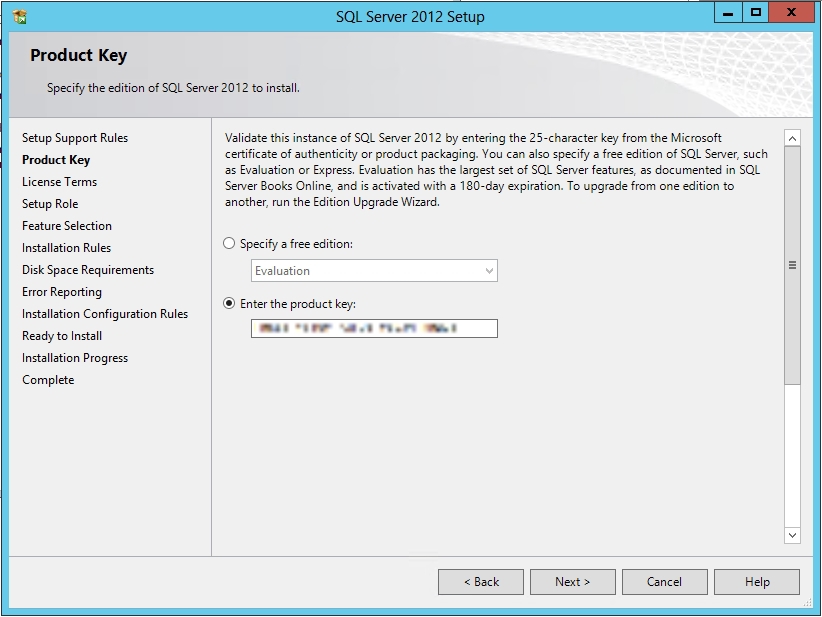
4. Enter the product key and click the Next button:
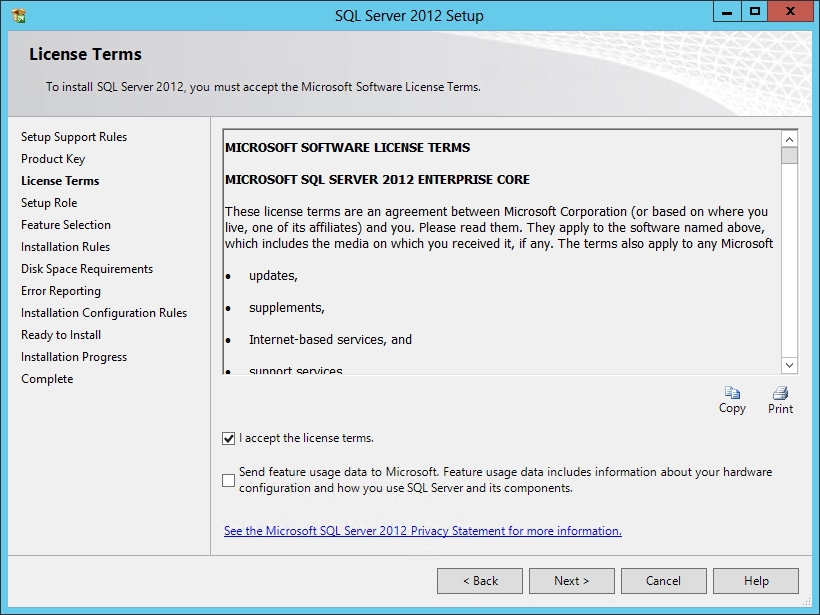
5. We agree with the terms of the license agreement.
To do this, tick the " I accept the license terms ". Then click the Next button:
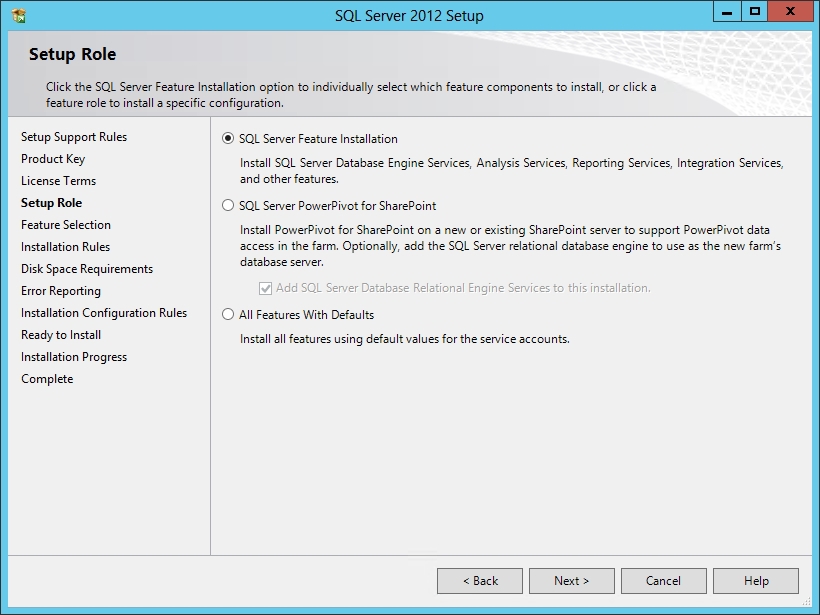
6. In the “Setup Role” step, select the first item “ SQL Server Feature Installation ”. Click the Next button:
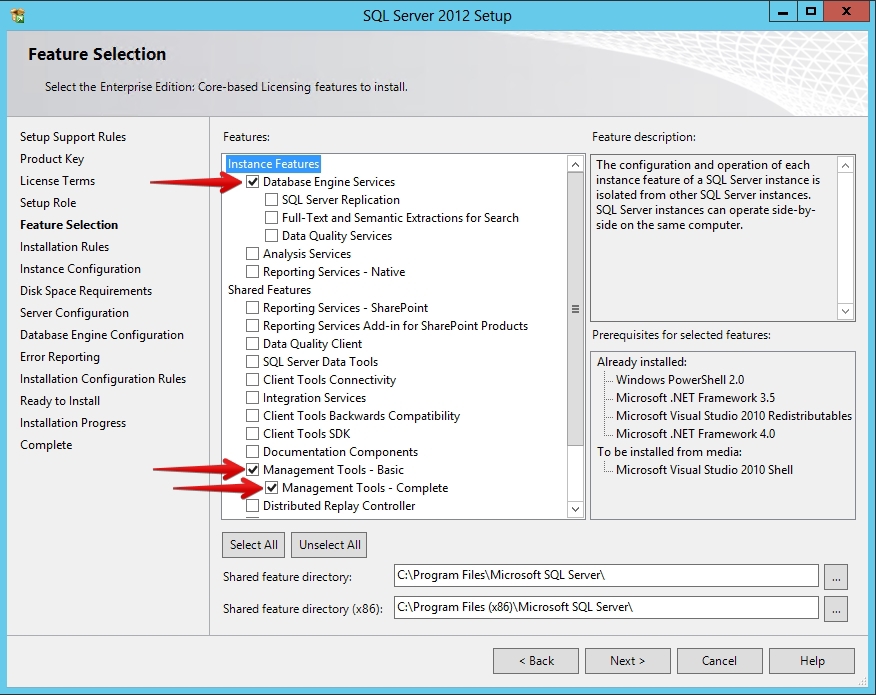
7. In the “Feature Selection” step, mark “ Database Engine Services ”, “ Management Tools - Basic ” and “ Management Tools - Complete ”. Then click the Next button:
8. Then the installer will perform another check. You can click on the “Show details” button and see a detailed report:

9. Detailed report. (At this stage, I had an error in the rule "Microsoft .NET Framework 3.5 is installed ...". About this below.) Click the Next button:

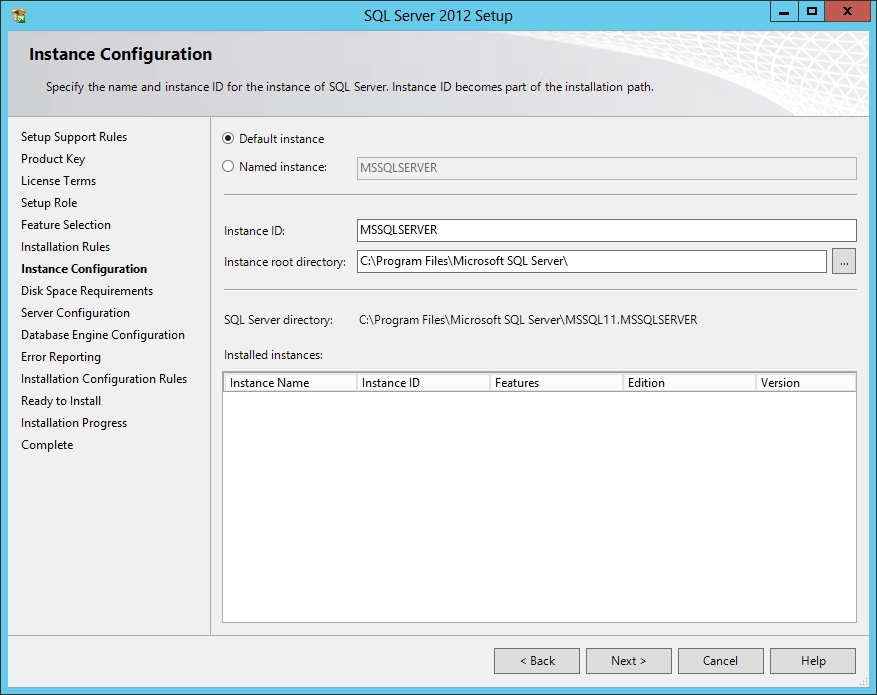
10. In the “Instance Configuration” step, you need to configure an instance of the SQL Server service.
I repeat that this article is intended for beginners. Therefore, we make an assumption that SQL Server was not installed on your server before, which means we will leave all the default settings. Click the Next button:
11. In this step, the installation wizard will display the disk space requirements. Click the Next button:

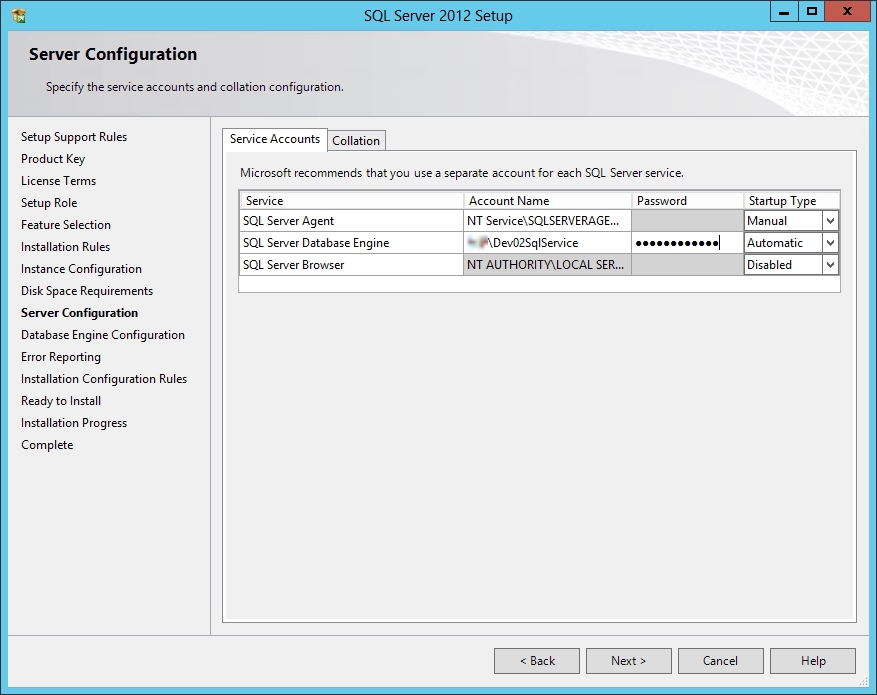
12. In the “Server Configuration” step, you must specify a domain account for the “ SQL Server Database Engine ” service. After filling in the “Account Name” and “Password” fields, click the “Next” button:
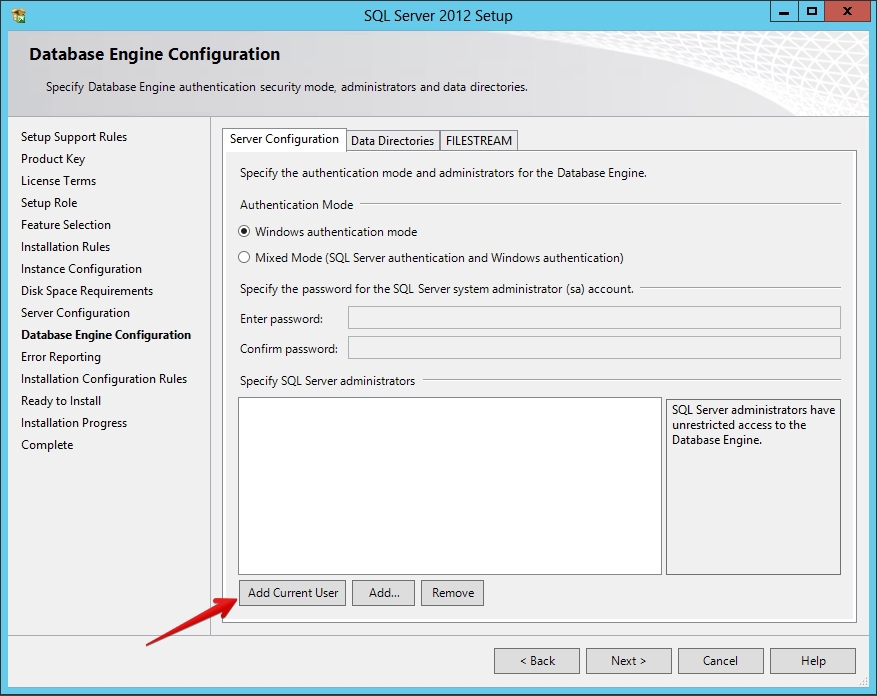
13. In the “Database Engine Configuration” step, it is sufficient to add the current user to the SQL Server administrators. To do this, click the Add Current User button, then click the Next button:
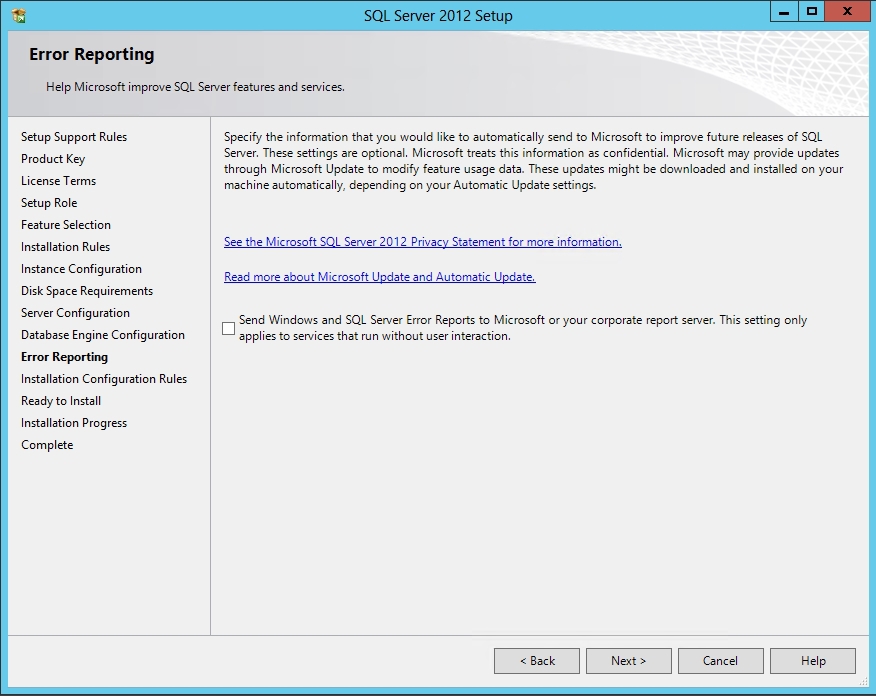
14. In the next step, click the Next button:
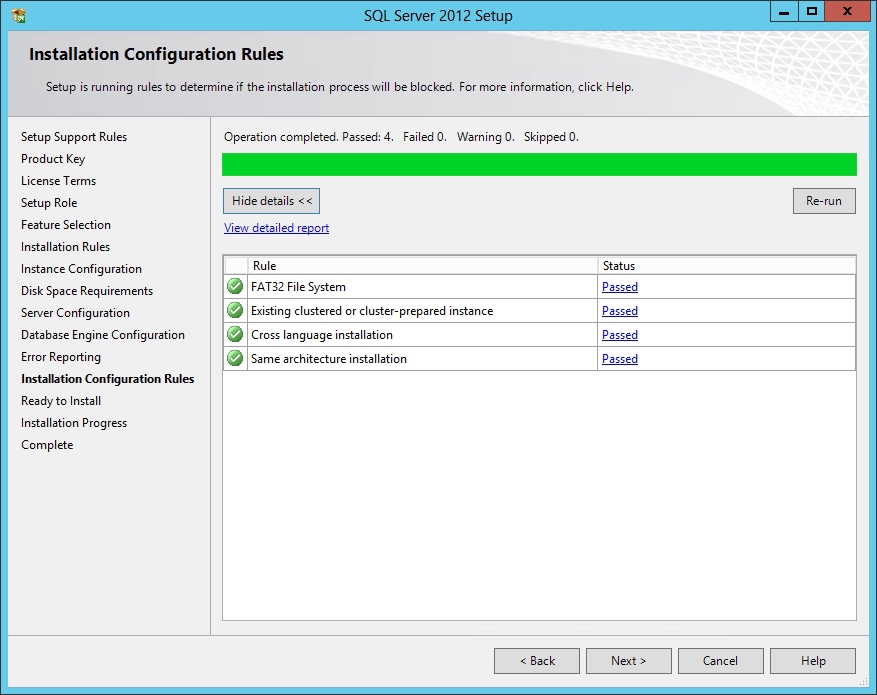
15. Next, the installation wizard will run the check again and display its results. Click the Next button:
16. In the “Ready to Install” step, the wizard will display a summary information. Here you need to click the “Install” button:

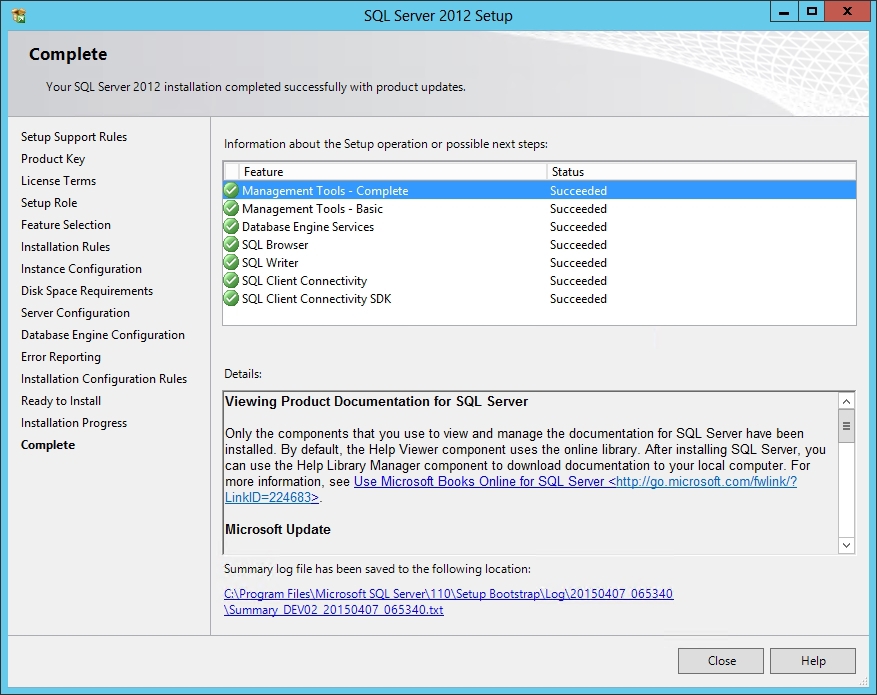
17. After the installation is completed, information on the operations performed will be displayed:
18. I highly recommend restarting your computer at this stage. In some cases (for example, when installing Microsoft .NET Framework 3.5), the installation wizard itself will display a window asking you to restart the computer. Do not refuse.
The default value of the Max Degree of Parallelism parameter is 0.
SharePoint 2013 requires this parameter to be 1.
It is easy to fix!
1. Start Microsoft SQL Server Management Studio (Start - All Programs - Microsoft SQL Server 2012 - SQL Server Management Studio).
2. On the server connection screen, click the “Connect” button.
3. Right-click on your server in the " Object Explorer " window and select " Properties ":

4. In the server properties window that opens, select the " Advanced " page in the left menu and scroll through the property list to the bottom of the screen. Set the value of " Max Degree of Parallelism " to 1 and click "OK":

5. Do not close the SQL Server Management Studio, we still need it.
The account on behalf of which the installation of SharePoint 2013 will be performed must have elevated privileges in the SQL server.
This account is recommended to give the following roles:
1. In SQL Server Management Studio, in the " Object Explorer " window, expand the " Security " item. Then right-click on the " Logins " item and select the " New Login " item:

2. In the “Login name” field, enter the domain name of the account from which you plan to install and configure SharePoint 2013.
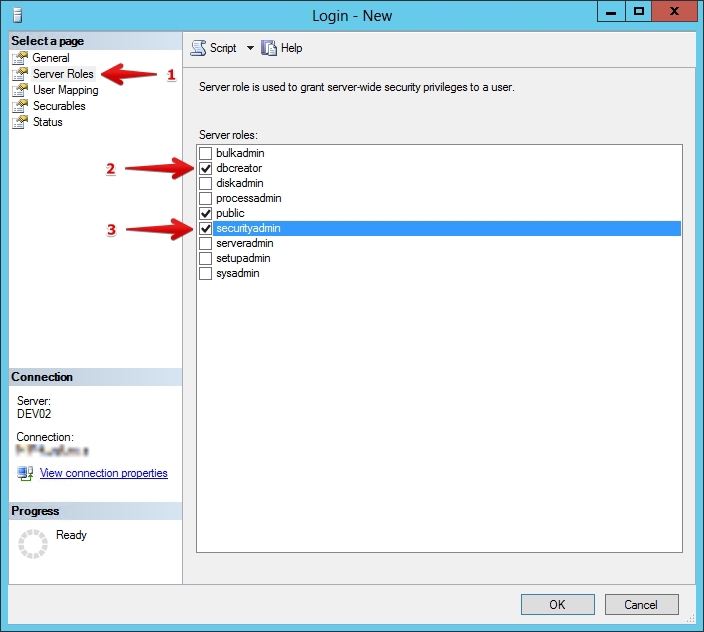
3. In the left menu, select the “ Server Roles ” page and check the “dbcreator” and “securityadmin” roles, and also make sure that the “public” role is already marked. Then click "OK":
SQL Server is now ready to install SharePoint 2013.
In step 9 of the item " Installing SQL Server 2012 " I had an error: the .NET Framework 3.5 was not installed.
To solve this problem, follow these steps:
1. You need to open the " Server Manager " console .
2. In the left menu, select the item "Dashboard".
3. In the center of the window, click on the item "Add roles and features".
4. In the opened wizard, skip the “Before You Begin” step.
5. In the “Installation Type” step, select the item " Role-based or feature-based installation ". Click the Next button.
6. In the next step, we leave everything by default and click the Next button.
7. Skip the “Server Roles” step by clicking the “Next” button.
8. At the “Features” step, check the ".NET Framework 3.5 Features" box. Click the Next button.
9. After the installation process is complete, you can close the Add Roles and Features Wizard.
10. Done!
All good and peaceful sky over your head!
PS Happy Cosmonautics Day!
This article is not for professionals.
All work is divided into 3 stages:
- Installing SQL Server 2012
- Setting the server configuration parameter max degree of parallelism
- Configure rights for an account to install SharePoint 2013
The article also describes the process of installing Microsoft .NET Framework 3.5 in MS Windows Server 2012 R2 Standart.
Attention: there are a lot of pictures under the cut!
Installing SQL Server 2012
1. Before installing, you should make sure that the hard disk has enough free space (in my case it took 2.7 GB).
After launching the distribution, select the " Installation " item in the left menu, then "click" the item " New SQL Server ":
')
2. The installation wizard will start. He will perform a check. You can click on the “Show details” button and see a detailed report:
3. Detailed report. Press the "OK" button:
4. Enter the product key and click the Next button:
5. We agree with the terms of the license agreement.
To do this, tick the " I accept the license terms ". Then click the Next button:
6. In the “Setup Role” step, select the first item “ SQL Server Feature Installation ”. Click the Next button:
7. In the “Feature Selection” step, mark “ Database Engine Services ”, “ Management Tools - Basic ” and “ Management Tools - Complete ”. Then click the Next button:
8. Then the installer will perform another check. You can click on the “Show details” button and see a detailed report:
9. Detailed report. (At this stage, I had an error in the rule "Microsoft .NET Framework 3.5 is installed ...". About this below.) Click the Next button:
10. In the “Instance Configuration” step, you need to configure an instance of the SQL Server service.
I repeat that this article is intended for beginners. Therefore, we make an assumption that SQL Server was not installed on your server before, which means we will leave all the default settings. Click the Next button:
11. In this step, the installation wizard will display the disk space requirements. Click the Next button:
12. In the “Server Configuration” step, you must specify a domain account for the “ SQL Server Database Engine ” service. After filling in the “Account Name” and “Password” fields, click the “Next” button:
13. In the “Database Engine Configuration” step, it is sufficient to add the current user to the SQL Server administrators. To do this, click the Add Current User button, then click the Next button:
14. In the next step, click the Next button:
15. Next, the installation wizard will run the check again and display its results. Click the Next button:
16. In the “Ready to Install” step, the wizard will display a summary information. Here you need to click the “Install” button:
17. After the installation is completed, information on the operations performed will be displayed:
18. I highly recommend restarting your computer at this stage. In some cases (for example, when installing Microsoft .NET Framework 3.5), the installation wizard itself will display a window asking you to restart the computer. Do not refuse.
Setting the server configuration parameter max degree of parallelism
The default value of the Max Degree of Parallelism parameter is 0.
SharePoint 2013 requires this parameter to be 1.
It is easy to fix!
1. Start Microsoft SQL Server Management Studio (Start - All Programs - Microsoft SQL Server 2012 - SQL Server Management Studio).
2. On the server connection screen, click the “Connect” button.
3. Right-click on your server in the " Object Explorer " window and select " Properties ":
4. In the server properties window that opens, select the " Advanced " page in the left menu and scroll through the property list to the bottom of the screen. Set the value of " Max Degree of Parallelism " to 1 and click "OK":
5. Do not close the SQL Server Management Studio, we still need it.
Configure rights for an account to install SharePoint 2013
The account on behalf of which the installation of SharePoint 2013 will be performed must have elevated privileges in the SQL server.
This account is recommended to give the following roles:
- dbcreator
- securityadmin
- public
1. In SQL Server Management Studio, in the " Object Explorer " window, expand the " Security " item. Then right-click on the " Logins " item and select the " New Login " item:
2. In the “Login name” field, enter the domain name of the account from which you plan to install and configure SharePoint 2013.
3. In the left menu, select the “ Server Roles ” page and check the “dbcreator” and “securityadmin” roles, and also make sure that the “public” role is already marked. Then click "OK":
SQL Server is now ready to install SharePoint 2013.
Installing Microsoft .NET Framework 3.5 in MS Windows Server 2012 R2 Standart
In step 9 of the item " Installing SQL Server 2012 " I had an error: the .NET Framework 3.5 was not installed.
To solve this problem, follow these steps:
1. You need to open the " Server Manager " console .
2. In the left menu, select the item "Dashboard".
3. In the center of the window, click on the item "Add roles and features".
4. In the opened wizard, skip the “Before You Begin” step.
5. In the “Installation Type” step, select the item " Role-based or feature-based installation ". Click the Next button.
6. In the next step, we leave everything by default and click the Next button.
7. Skip the “Server Roles” step by clicking the “Next” button.
8. At the “Features” step, check the ".NET Framework 3.5 Features" box. Click the Next button.
9. After the installation process is complete, you can close the Add Roles and Features Wizard.
10. Done!
All good and peaceful sky over your head!
PS Happy Cosmonautics Day!
Source: https://habr.com/ru/post/255259/
All Articles