IO Ninja - programmable terminal emulator / sniffer (part 2)
 This article is a continuation of the previous introductory article , which dealt with the motivation and the history of the creation of the terminal / sniffer IO Ninja , and was a little told about the built-in capabilities of our product. We continue the story of what is available out of the box, but with a more practical bias.
IO Ninja was originally conceived as an all-in-one utility, and a large number of built-in plug-ins for working with various transport in different modes are included in the package. However, instead of a dry listing of the plug-ins and their capabilities, I decided to demonstrate a small sample of life tasks that our company encountered in practice and that well-known terminals and monitors do worse than IO Ninja (and more often they don’t cope at all).
TCP Redirect to Serial
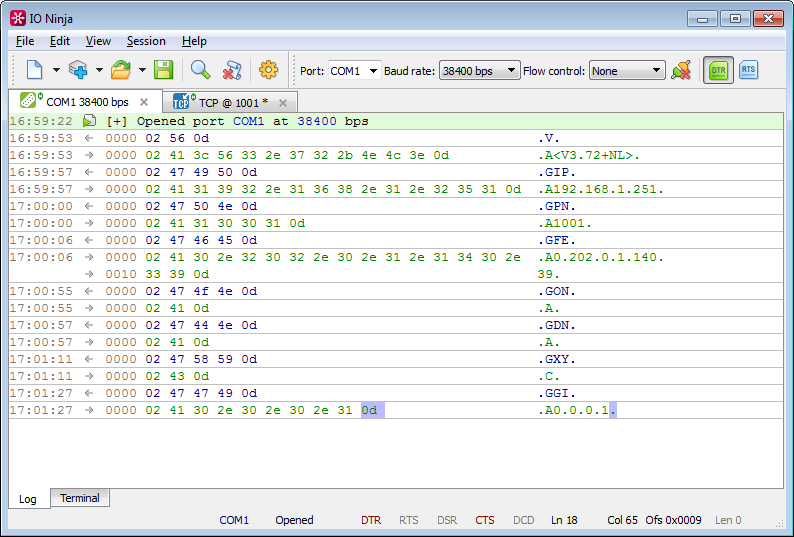
 Users of Unix-like systems are well aware of the possibility of redirecting the output of one program to the input of another. Session Linking in IO Ninja provides similar functionality. The difference lies in the fact that instead of a unidirectional data cascade, as in the case of Unix pipes, connecting two sessions "shorts" the output of one to the other and vice versa (all the data being transferred are recorded in the log). This makes it possible to use IO Ninja as a universal intermediary for redirection and / or listening.
Suppose a device is connected to the computer via a serial interface (serial). Open IO Ninja and start the session Serial. We open and configure the serial port (perhaps, we send several test commands to the device in order to make sure that it is alive and well).
')
Next, start the TCP Listener session, select the interface and TCP port on which we will listen. We connect our two sessions Serial and TCP Listener through the settings dialog and - voila! Now you can connect to our serial device via TCP from any other computer!
Search for devices in the local segment using UDP broadcast
A typical method of auto-detecting devices on the network is UDP broadcasting of a certain ping request and the subsequent collection of response packets - this, in particular, auto-detection works for all embedded modules produced by our company. IO Ninja can be used as a broadcast UDP terminal for one-to-many communication.
Open the UDP Socket, prescribe as the address 255.255.255.255 (or subnet-broadcast type 192.168.1.255), and send an echo request. As a result, we see a list of all devices in the local segment. Further, if necessary, we can continue to communicate with a particular device.
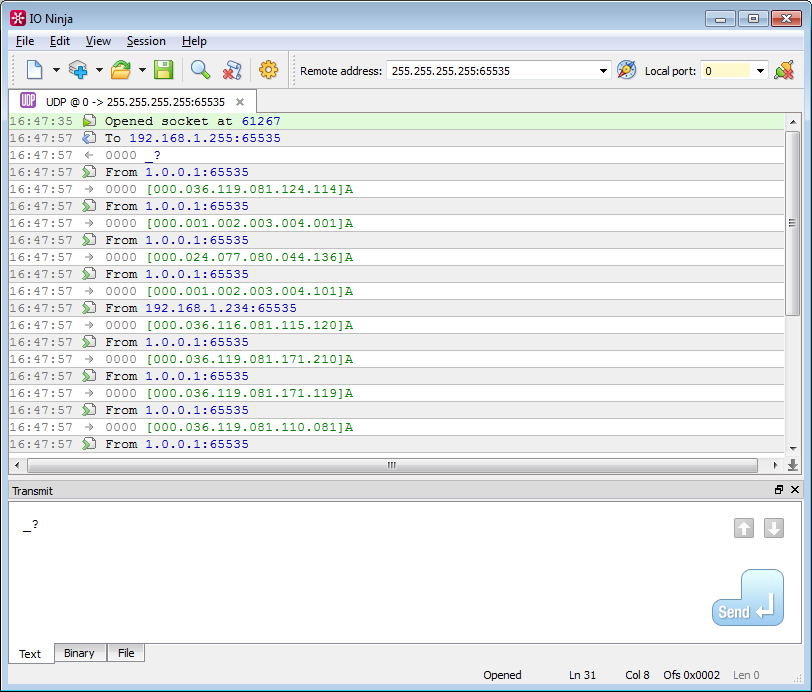
By the way, pay attention to the button with the compass. When working with UDP (and especially on the server side), it is often necessary to remember the address from which the packet came, and to answer precisely there — there is no connection! In principle, nothing prevents to copy the address from the log and insert it into the “Remote address” input field. But why do something with your hands that you can pass on to the car? We press the compass, and we get the required automation - the UDP session will automatically reconfigure the Remote address.
Saving part of the input stream to a file
Sometimes during debugging you want to save a piece of received data to a file. This could be, for example, a block that needs to be sent unchanged in this or some other session, maybe it is a file transmitted by the remote node, maybe something else.
Standard terminals are often stalled on this fairly simple task, and this is due to the following points:
- Data can be binary and contain non-printable characters;
- Data can be spread across multiple packages;
- We need, as a rule, not the entire input stream, but a strictly defined block (which means that the problem is also not completely solved by simply redirecting the stream to the file).
IO Ninja compares favorably with the presence of a log in the form of a “hexadecimal sheet” with the gluing of incoming packets - this allows you to do exactly what we need.
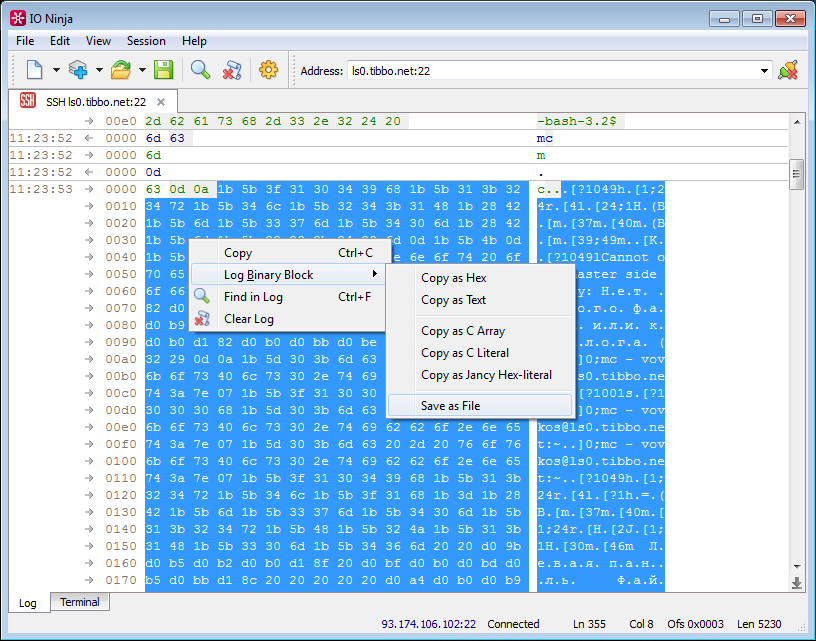
Select the desired block of data (glancing, if necessary, on the status bar - it displays the offset and length of the selected block), save to a file, and then use it. For example, we send it to another session:
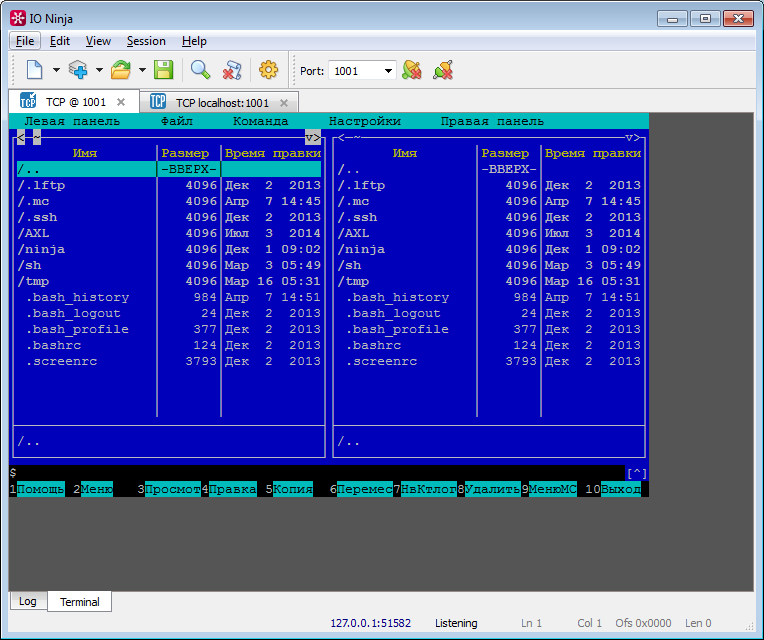
Receive TCP connections using TCP Listener
Above, we have seen how a TCP Listener can be used to redirect so that you can connect to a serial device via TCP. However, the initial purpose of the TCP Listener plug-in is not this, but to act as a server-side TCP terminal (in particular, to debug the client side of a TCP connection).
Create a new TCP Listener session, select the interface and port, and start our server. After receiving the incoming connection from the client, the terminal can work as usual.
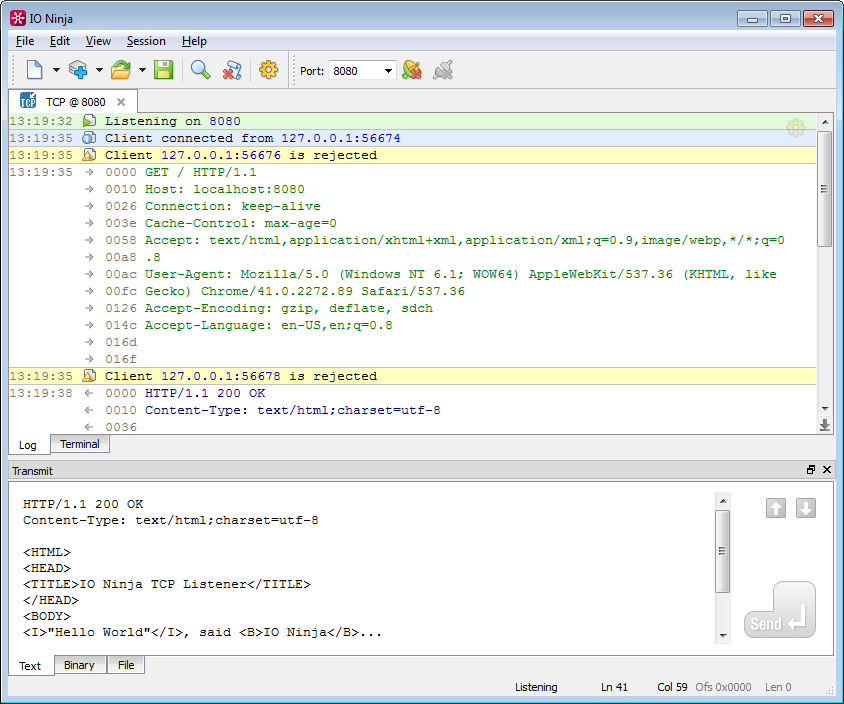
Note that in TCP Listener there is also a choice: to accept or not new incoming connections, if the connection is already in place. This option can be extremely useful in situations where the client sets up multiple secondary connections to the same address (as, for example, many web browsers)
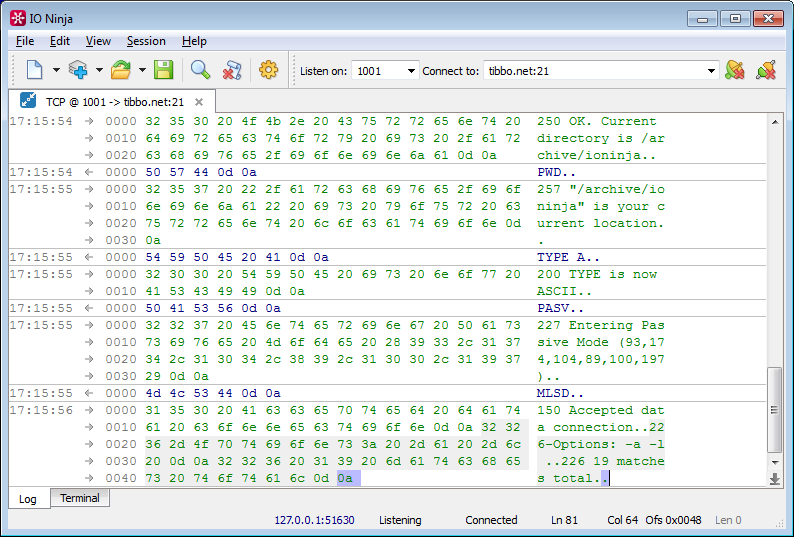
Listening to TCP connections using TCP Proxy
IO Ninja includes the Network Sniffer plugin - a PCap-based network sniffer for listening to network connections. However, in some cases it is much more convenient to use another built-in plugin, namely TCP Proxy.
TCP Proxy is a combination of TCP Connection and TCP Listener that allows you to organize an intermediary for TCP connections. The convenience of this approach lies in the fact that it immediately gives a clean log of data streams in real time (instead of a log in the form of packets, from which the data streams need to be restored later). In addition, this model also works where listening with a sniffer can be difficult (with certain models of network switches, Wi-Fi cards, etc.)
Create a TCP Proxy session, configure the server and client side and start our proxy server. Any connection to this server will generate a secondary connection from the client side of our proxy, with all the data received on the client side will be transferred to the server and vice versa. In this sense, TCP Proxy resembles session binding, but it is specially sharpened for TCP and therefore more convenient.
Debugging Windows Named Pipes
IO Ninja can be used as a tool for debugging a fairly common approach to IPC (Inter-Process Communication) in Windows - named pipes. In particular, some of our Windows drivers communicate with related services and applications.
To emulate the server side of your application (the one where ConnectNamedPipe is called), run the Named Pipe Listener. This plugin allows you to accept incoming named pipe connections that will come from your client application / service.
After the connection is established, you can communicate with the client by analyzing the log of received requests and sending it response packets (created, for example, in the package builder).
To emulate the client side (the one where CreateFile is called), the Generic File plugin is used.
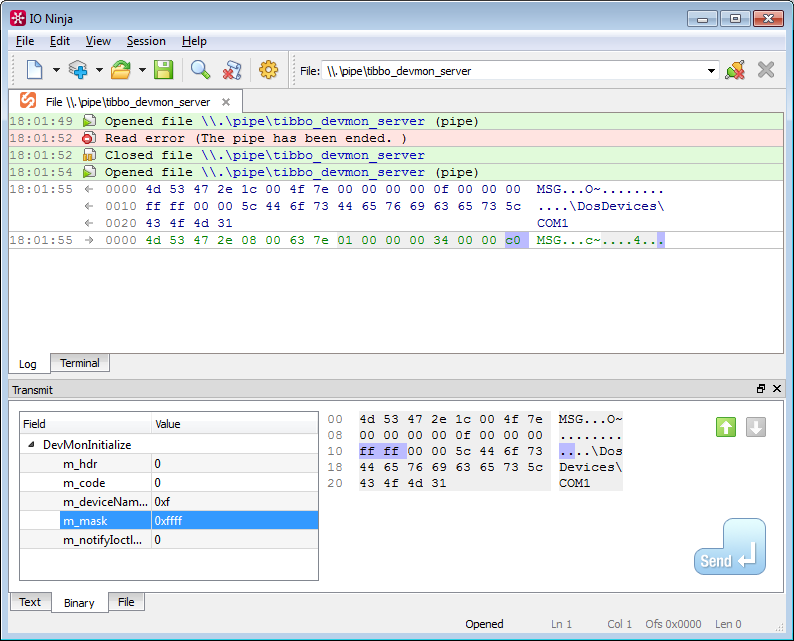
In addition to debugging named pipes (or FIFOs in * nix), this plugin can also be used to read and write non-standard device drivers.
Briefly touch on the issue of listening named pipes. Suppose you have an application or driver that uses pipes for IPC. If you can somehow configure the address of the named pipe on the client side, then you can listen to pipe connections using an intermediary (similar to TCP Proxy).
How exactly?
Let the system being debugged establish a pipe connection to \\. \ Pipe \ debuggee_pipe_server. Select some unallocated pipe name, for example, \\. \ Pipe \ my_pipe_proxy. We configure the client side of the debugged system to this our \\. \ Pipe \ my_pipe_proxy. In IO Ninja, open the Pipe Listener and Generic File pair, link them. In the Pipe Listener we register \\. \ Pipe \ my_pipe_proxy, click Listen. In the Generic File, write \\. \ Pipe \ debuggee_pipe_server, click Open. The mediator is ready.
Over time, in future versions of IO Ninja, a full-fledged listening of named pipes without man-in-the-middle will also be added (as a first approximation, most likely through the user-mode API hooking, and later through the file system filter).
Sending broken frames for testing
The need to send “broken” or otherwise specially crafted Ethernet frames is not so common and may seem to refer rather to the category of exotics. Nevertheless, this functionality is in demand in a number of quite real scenarios. For example, in our practice, this was necessary while debugging the TCP / IP implementation of the stack of the embedded modules produced by our company; Another realistic application area may be the challenges facing network security specialists, firewall developers, etc.
Open the Network Sniffer session, select the interface and capture filter, launch the capture. In the package builder we prepare the necessary frame - for example, you can use the built-in library of TCP / IP packet templates, or simply copy one of the captured frames into a hex editor and correct the required fields.
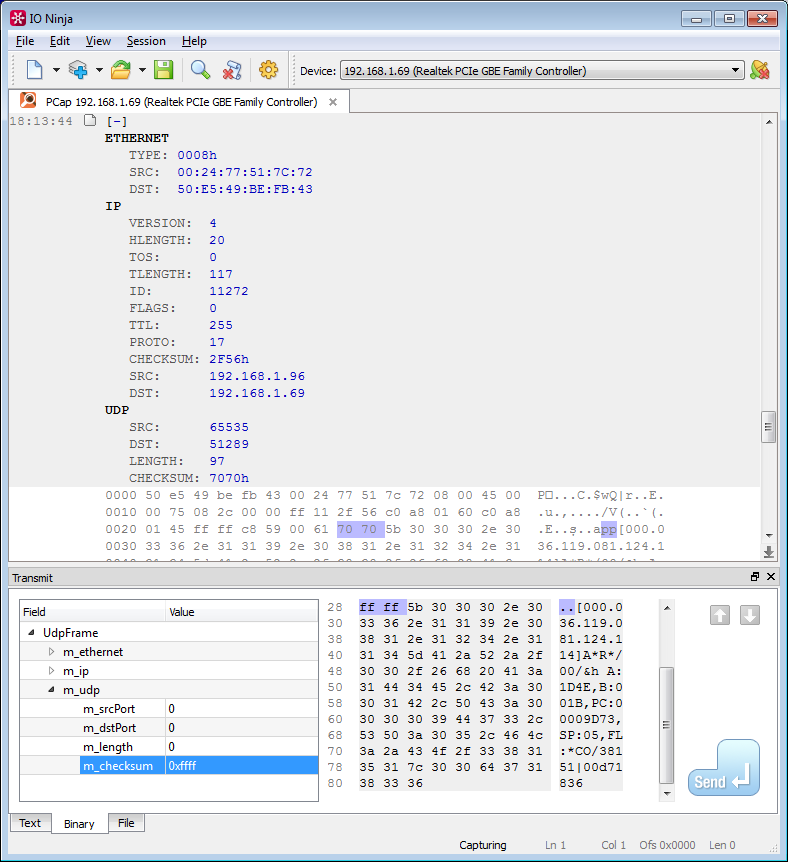
We click Send, and the frame lovingly made by us goes to carry out the fighting task!
Conclusion
This list of scenarios for using IO Ninja is far from complete, but, in principle, sufficient to show a general picture. In addition, he is absolutely honest - all the functions described above were born from the practical needs that arose during the development of our products.
In the next part of the article we will move on to the most interesting part - to the programmability of IO Ninja and the new opportunities opened by it.
The next part of the article
Part 3: We write the "answering machine" http://habrahabr.ru/company/tibbo/blog/256803/
Source: https://habr.com/ru/post/255221/
All Articles