Self-assembly 3d-printer or purchase ready-made equipment for the design. 3d printing. Part 3
In two posts ( Part 1 and Part 2 ), I talked about the intricacies of assembling and configuring the software of the MC5 3d-printer. In this part, you will be told about what a slicer is and how to set it up for “slicing” 3D models for printing, about the requirements for 3D models and why
If a turner to give any detail, with a request to make the same, he will make it. But it will take some time to measure the dimensions of the part, thinking through manufacturing operations, preparing the machine and manufacturing itself. Perhaps even make a sketch of the details.
In order to make the same part on a 3d-printer, we don’t need a
')
- Parametric 3d model details
- Converter 3d-models in machine code G-code
- 3d printer
Using measuring tools and a CAD system, we will get a 3D model of the part that must be saved in one of the special file formats. In this case, I used .STL. In this file, information about the object is stored as a list of triangular faces that describe its surface and their normals:

The figure shows the difference between a standard CAD file and an STL file.
What is a slicer?
Slicer (from the English. Slice- cut) is an auxiliary software that converts the 3d model into machine code (as a rule it is G-code). This code contains the commands for the 3d printer control board (or CNC machine). The temperature of the heating element of the extruder, the feed rate of the plastic thread, the speed of movement, the speed of the cooling fan and most importantly all the coordinates for building a physical copy of the 3d model and its auxiliary elements.
In the software for managing a 3d-printer - Repetier, it is possible to use one of the three slicers: Slic3r, Skeinforge, Cura. Each of them has its own algorithms for converting models. I use the first one.
At this stage you need:
1) Have a clear idea of the part (its function, what mechanical loads it will experience and in what environment to be.
2) Select the appropriate material for printing ABS or PLA plastic.
3) Set the parameters in the slicer.
4) Generate G-code (cut into a 3d model).
5) Perform printing.
The 3d-model can be checked for suitability for printing and corrected by using the free version of the program netfabb
Under the spoiler photo instruction on how to configure the slicer
First you need to add a 3d model to the Repetier-host and place it on the working field:

Then go to the Slicer tab and click on the settings button:

In the Printer settings tab, we set the dimensions of the print area of the printer, the coordinates of the center and the height of the extruder tip lifting along the Z axis just before the start of the printing process (Z offset):

In the parameters Extruder Specify the value of the diameter of the outlet and the feed rate of the plastic thread:

In the tab Filament settings, select the diameter of the plastic thread and the heating temperature:

In the Print setting tab we set the print settings, the main parameter is the layer height:

Next, set the percentage of filling parts (at 100% almost monolithic, at 0% hollow). The geometry of filling the part is also available for selection:

The printer can not print in the air, for the installation of the molten filament support is necessary, in the details with such geometry it is necessary to install the support:

Usually, the manipulation of the settings, which on the screen above is enough. Save the settings under the name of your profile, close the window and click the Slicing button with Slic3r in the Repiter.
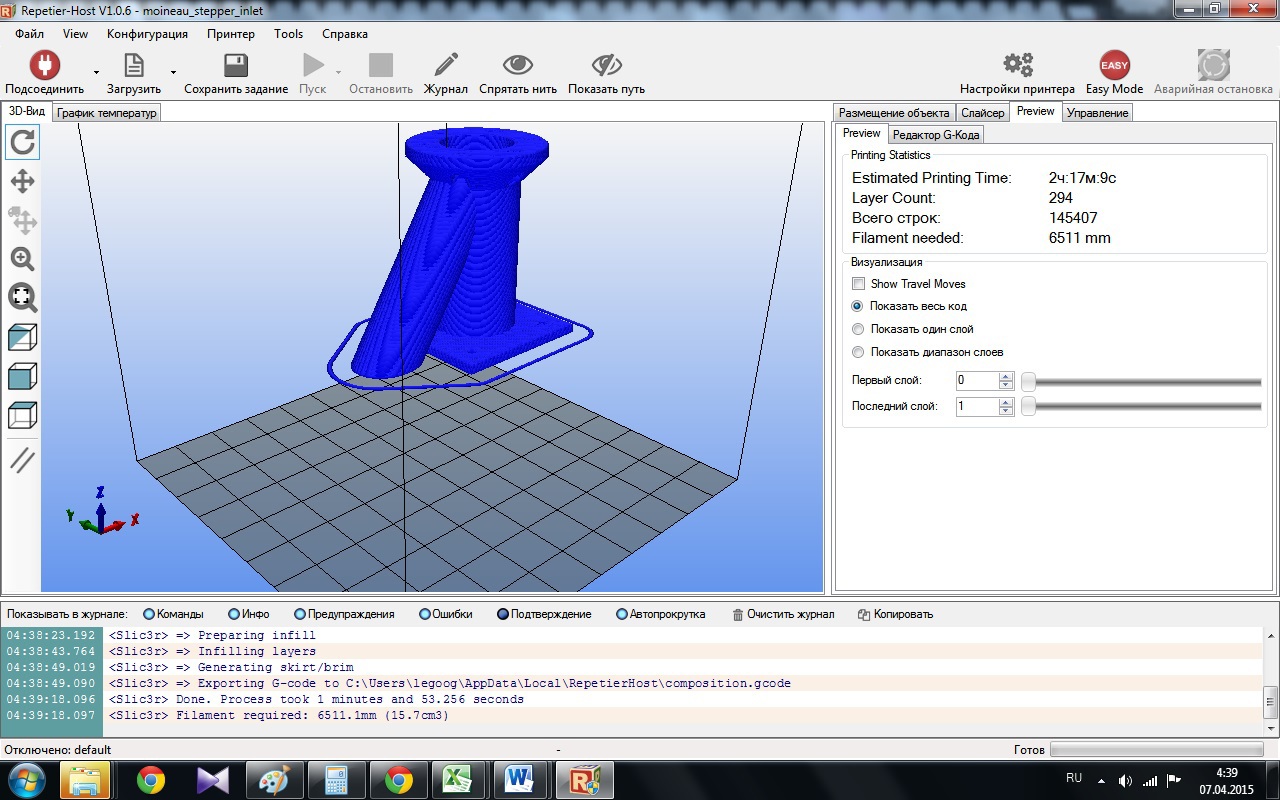
After some time, g-code will be generated:
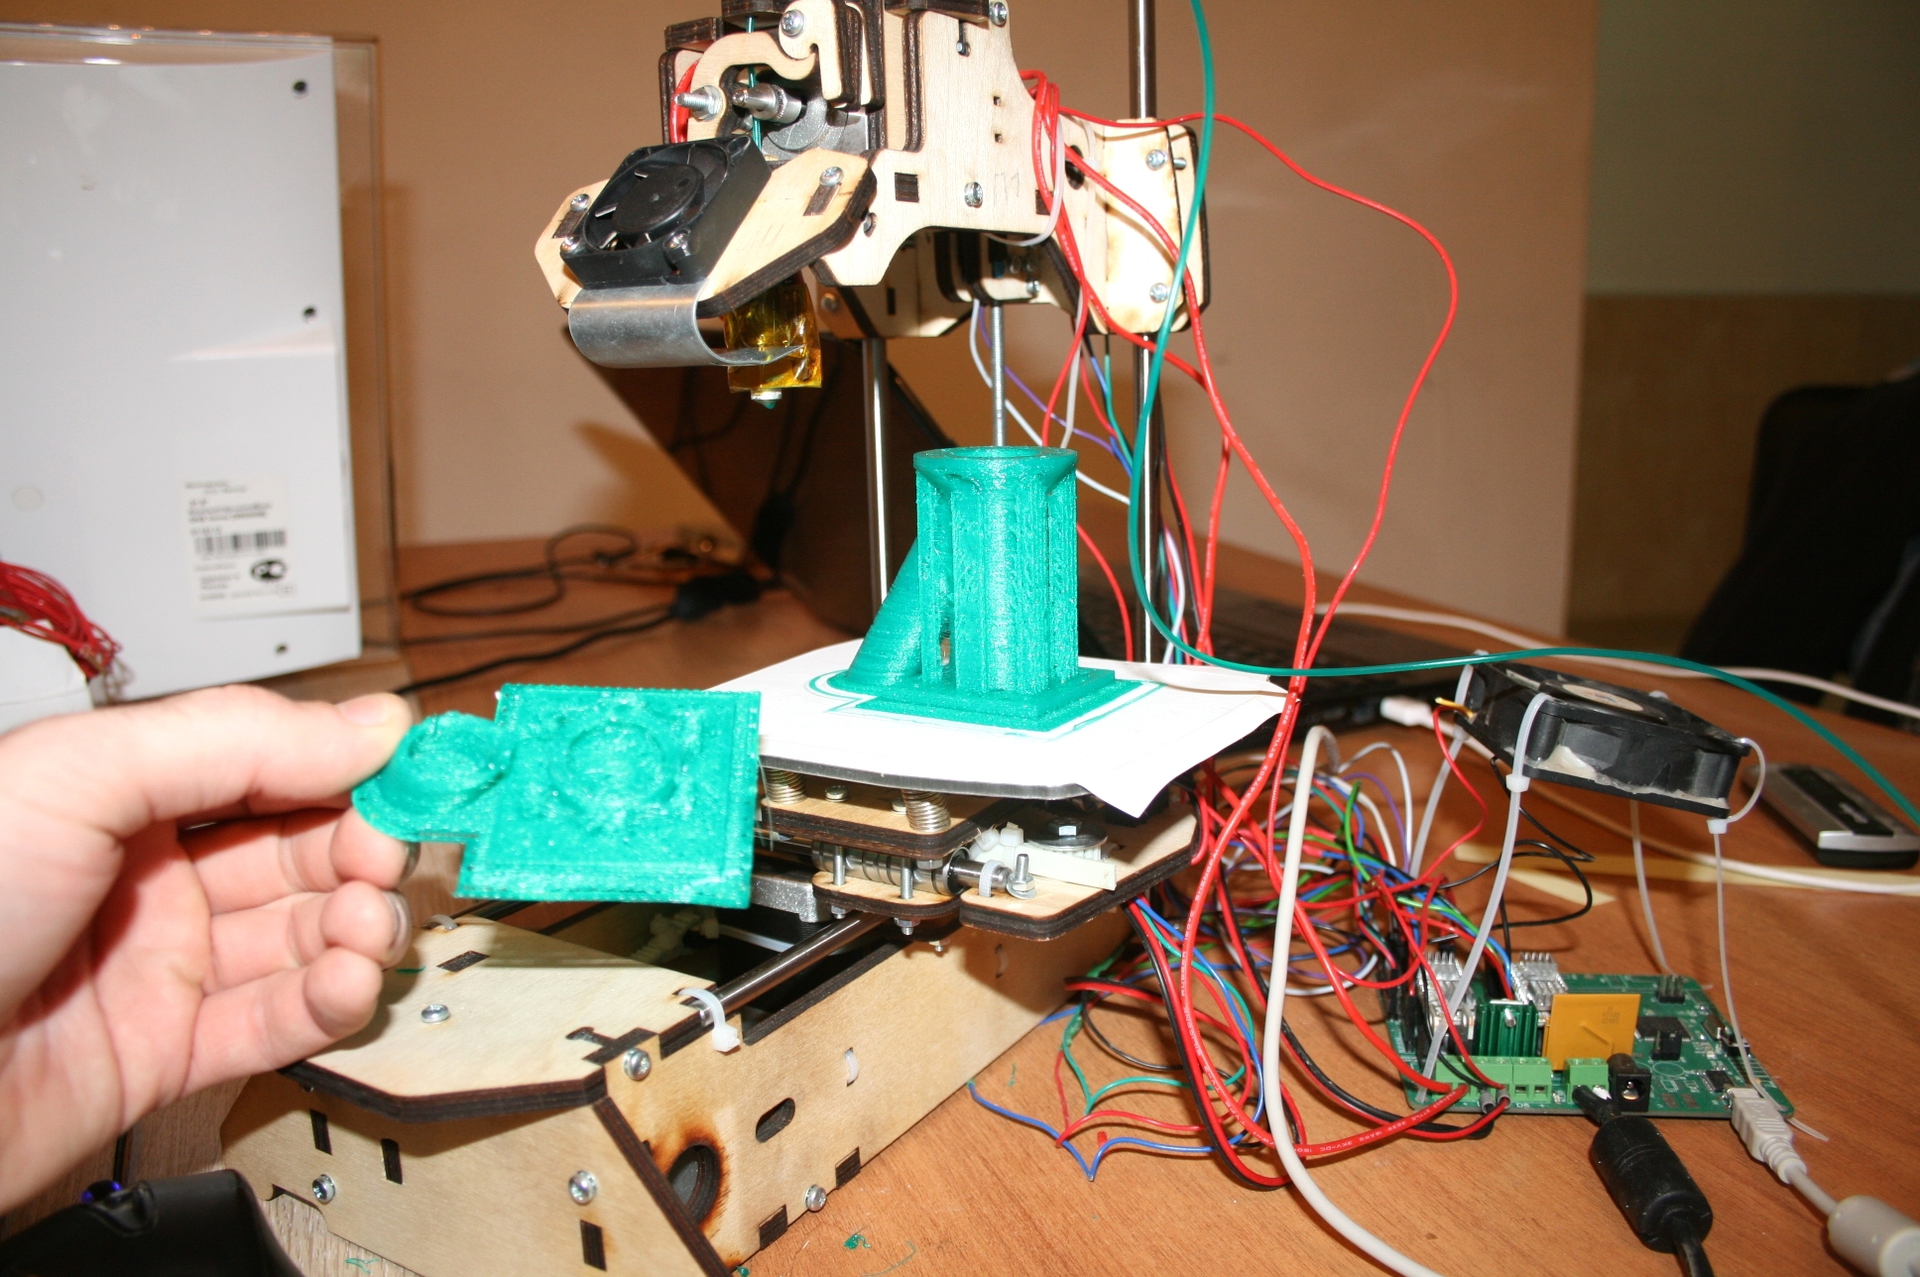
After that, you can start the printing process.
Then go to the Slicer tab and click on the settings button:
In the Printer settings tab, we set the dimensions of the print area of the printer, the coordinates of the center and the height of the extruder tip lifting along the Z axis just before the start of the printing process (Z offset):
In the parameters Extruder Specify the value of the diameter of the outlet and the feed rate of the plastic thread:
In the tab Filament settings, select the diameter of the plastic thread and the heating temperature:
In the Print setting tab we set the print settings, the main parameter is the layer height:
Next, set the percentage of filling parts (at 100% almost monolithic, at 0% hollow). The geometry of filling the part is also available for selection:
The printer can not print in the air, for the installation of the molten filament support is necessary, in the details with such geometry it is necessary to install the support:
Usually, the manipulation of the settings, which on the screen above is enough. Save the settings under the name of your profile, close the window and click the Slicing button with Slic3r in the Repiter.
After some time, g-code will be generated:
After that, you can start the printing process.
If during printing, something goes wrong, you need to check the mechanics and electronics of the 3d printer. If everything is in order with her, then we return to item number 3 and repeat all over again. The
For example, in this photo, I accidentally turned off the power supply, the printing was interrupted, and since I had saved the g-code, then restarting the print job started anew:
Finally, a video of the MC5 3d-printer at very high 3-d printing speeds:
Now it remains long and hard to comprehend Zen 3d-printing. In the network a lot of information in English and in Russian. The most important thing is to follow safety precautions and do not leave your
Source: https://habr.com/ru/post/255009/
All Articles