Creating a universal web application site Habrahabr.ru using the Web App Template

Habrovchane, hello!
In the previous article, we met with the Web Application Template for creating universal web applications. In short, the Web Application Template allows you to "turn" the site into an application for Windows, Windows Phone or Android, adding integration with the operating system and distribution mechanism through the application store.
Today we will look at a practical example: using the Web Application Template to quickly and easily create a web application for Windows and Windows Phone based on habrahabr.ru.
Creating a universal web application for the site Habrahabr.ru
')
To begin, create a new WAT project in Visual Studio. I remind you that it is located along the path: File> New> Project> Templates> JavaScript> Web App Template for Universal Apps

Go to the file config.json and change the start_url to habrahabr.ru .

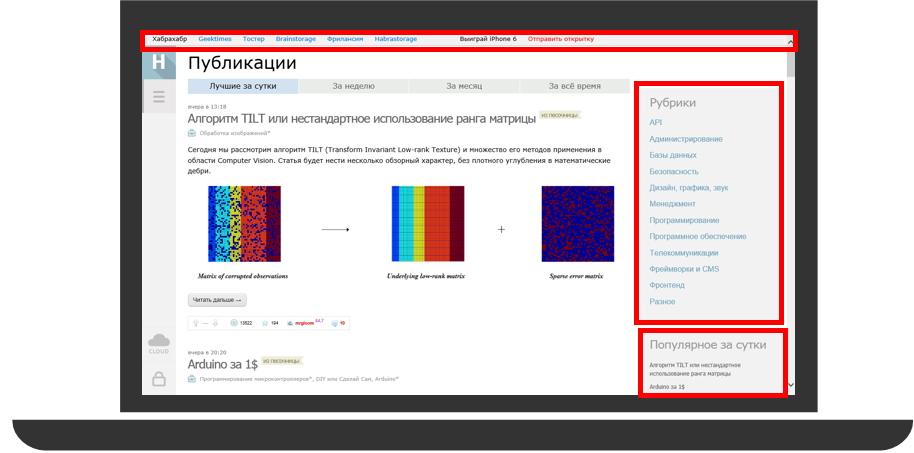
As a starting project, we indicate the Windows project. Run the application and, here's what we see on the screen:

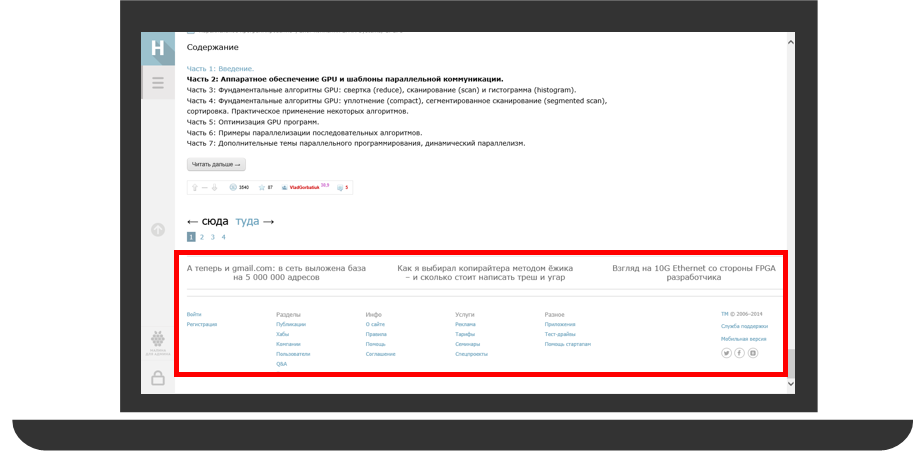
Everything seems to be quite good, but on the screen, in addition to the text of the articles, a lot of superfluous is displayed. In red, I highlighted something that, in my opinion, can be dispensed with:
In order to remove unnecessary elements from the page, I have specified additional css style settings in the i njected-styles.css file . For example, to remove the “Rubric” and “Popular per day” panels, nothing was required except for the following code:
.sidebar_right{ display:none; } Now the app looks better, isn't it ?!
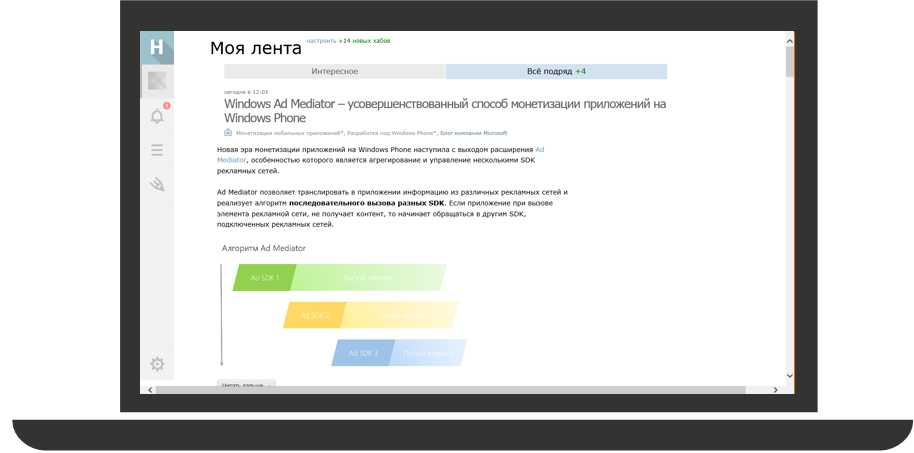
But this modification is not over. I want to simplify navigation through the site using the navigation bar. To add it, insert the following code into config.json :
"wat_navBar": { "enabled": true, "maxRows": 2, "makeSticky": false, "buttons": [ { "label": "Main", "icon": "street", "action": "http://habrahabr.ru/" }, { "label": "Hubs", "icon": "list", "action": "http://habrahabr.ru/hubs/" }, { "label": "Companies", "icon": "people", "action": "http://habrahabr.ru/companies/" }, { "label": "Users", "icon": "contact", "action": "http://habrahabr.ru/users/" } ] }, We created a navigation bar with four buttons, which will be located in one row.
Note that you can set the navbar to display constantly ( “makeSticky”: true ). Now we change the color of the added panel by redefining its style in the file wrapper-styles.css :
.win-navbar{ background-color: rgb(135,158,168); } 
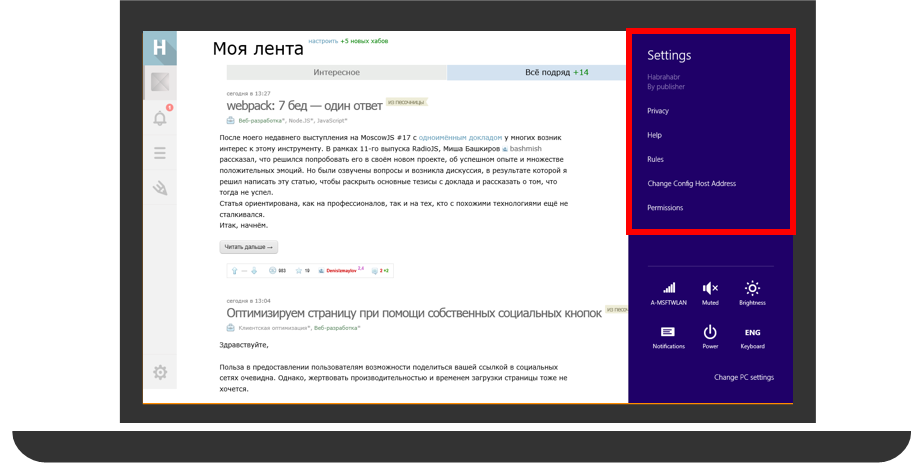
Also, for convenience, we will place references to “user agreement”, “rules” and “help” on the sidebar in the settings section. Add to config.json the following code block:
"wat_settings": { "enabled": true, "privacyUrl": "http://habrahabr.ru/info/agreement/", "items": [ { "title": "Help", "page": "http://habrahabr.ru/info/help/" }, { "title": "Rules", "page": "http://habrahabr.ru/info/help/rules/" } ] } Now the above links appeared on the settings panel:
Offline application mode
It is very important that the user has the opportunity to work with the application in case there is no internet connection. Web Application Template supports offline application mode.
There are several options for handling application transition events to offline mode:
- Display a blank page with an error message due to the absence of the Internet and a warning about the impossibility of further application operation.
- Pre-cache individual pages ( SuperCache mode), display a message about the absence of an Internet connection. Thus, the application will continue its work in limited functionality mode.
To add support for offline mode, insert the wat_offline block into the config.json file .
"wat_offline": { "enabled": true, "message": "There is no internet connection", "superCache": { "enabled": false, "baseDomainURL": "http://habrahabr.ru/", "addIndexedDBSupport": true, "imagesGuardBand": true, "preCacheURLs": [ ], "ignoreURLs": [ ] } } To enable offline mode support, set the enabled property to true .
To customize the page - the stub that the user sees on the screen in case of loss of connection, use the offline.html file located at template> offline.html . If the root address is not defined, then specify in the message a message stub that you want to display on the screen in case of loss of connection.
If you want to keep working with your application and in the absence of a connection, turn on SuperCache mode (inside the SuperCache setting , set the enabled property to true ).
Specify the addresses of those pages that you want to cache in advance in the preCacheURLs configuration, and if you do not want the page cache to be created, write the necessary addresses in ignoreURLs.
The Web Application Template supports working with IndexedDB databases (the addIndexedDBSupport property), as well as embedded (inline) images (the imagesGuardBand property).
With the basic necessary settings for a Windows application, we are finished, now let's move on to creating an application for Windows Phone.
Create an application for Windows Phone
Now it's time for the Windows Phone version of the application. Since Habrahabr.ru has a special mobile version of the site, it will be even easier to create a mobile web application than the Windows version. Copy the config folder from the shared project separately into Windows and into the Windows Phone project. Open the config.json file in the Windows Phone project, delete all unnecessary and change the start_url to the site of the mobile version of the habr: m.habrahabr.ru .
Immediately after launch, the application looks good, but let's modify it.

In the Windows application, we have rendered the main links to the navigation bar and the settings panel.
For convenience, we will add an application panel and place some links on it, for example, the profile, hubs and site rules.
Please note that if you make an application for a third-party resource, you need to give a link to the user agreement (privacy policy).
Before adding an application bar, add the following setting:
"wat_cortana": { "enabled": true, "appBar": true, } Next, add the wat_appBar block and specify the necessary buttons.
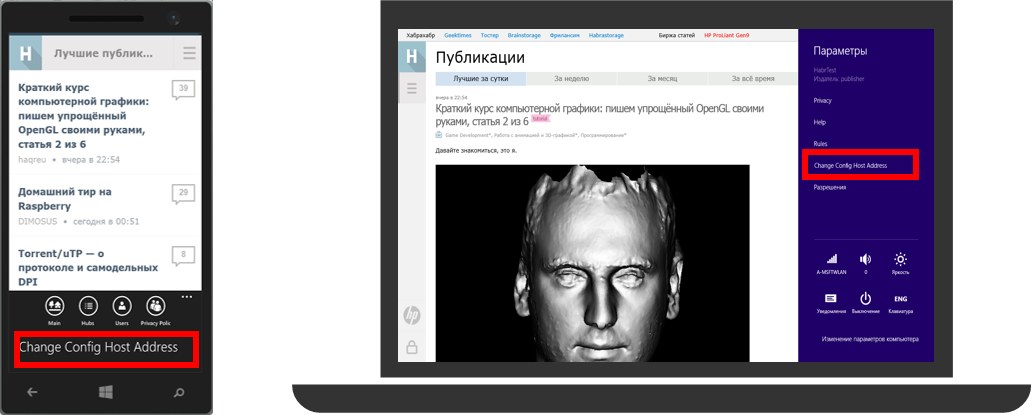
"wat_appBar": { "enabled": true, "makeSticky": false, "buttons": [ { "label": "Main", "icon": "street", "action": "http://m.habrahabr.ru/" }, { "label": "Hubs", "icon": "list", "action": "http://m.habrahabr.ru/hubs/" }, { "label": "Companies", "icon": "people", "action": "http://m.habrahabr.ru/companies/" }, { "label": "Privacy Policy", "icon": "people", "action": http://m.habrahabr.ru/info/agreement/" } ] } Here is what happened:

Pay attention to the link “hange Config Host Address”, which appears when you add an application bar to the Windows Phone version, and is also standard for the settings panel in a Windows application. You can change your application's config file remotely. For information on how to do this, see the MVA course on “Creating Universal Web Applications Using the Web App Template” or in the article Creating Universal Web Applications Using the Web App Template .
Our universal application is almost ready, it remains to change the icons in the application.
Change the icons in the application
With standard icons, the application looks very unaesthetic. Let's see how to change icons (badges, tiles, start screen image).

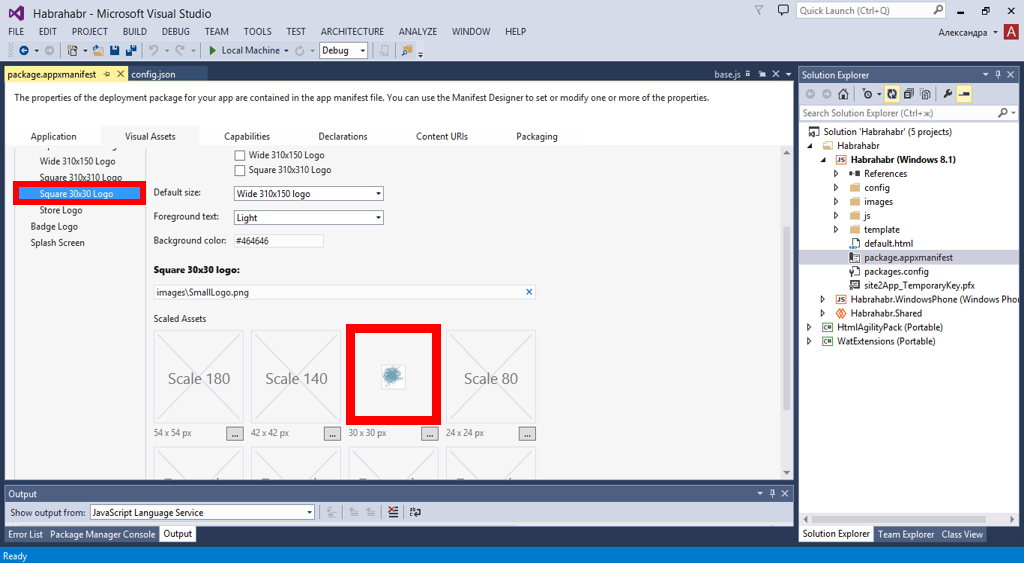
Open the package.appxmanifest file (it is different for each Windows and Windows Phone project, you need to add images separately for each project). Go to the Visual Assets tab and attach the necessary images. For example, if you want to change the icon, which is located on the left in the application window, then change the Square 30x30 Logo image, to change the toolbar image - Square 150x150 Logo , and change the Splash Screen image for the loading screen image.
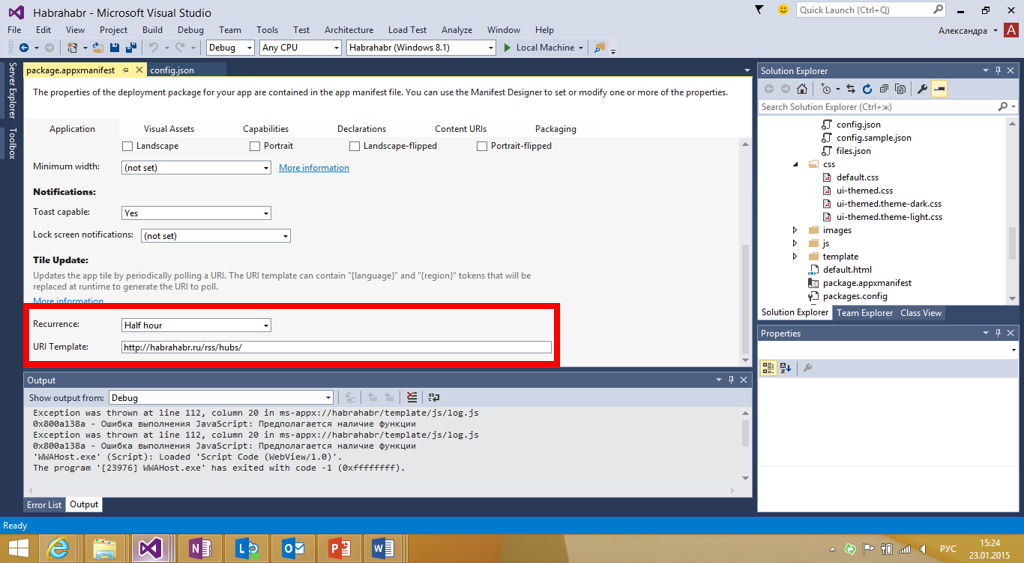
Pay attention to the possibility of adding live tiles. To add them, upload the corresponding images to the application manifest ( Visual Assets tab), then go to the Application tab and in the Tile Update section, specify the tile update frequency and the link to the RSS feed from which the tile update information will be loaded.
Also in the config.json file you need to add the following code:
"wat_livetile": { "enabled": true, "periodicUpdate": 1, "enableQueue": true, "tilePollFeed": "http://habrahabr.ru/rss/hubs/" } Now on the tile application will display information about new posts.
This is where the main work with the application is completed. You can fill the manifest and prepare the application for publication.
In conclusion about the future
In Windows 10, we announced the idea of “Web apps” as part of the platform. Details on how this works can be found in the developer’s guide (see the series " Evolving the Web Platform , starting at 16 minutes).

A WAT manifest made on the basis of the Manifest for Web Apps standard (W3C) is stored on your site, in the settings of the application you specify the access policies to the WinRT API. The finished application can be placed in the app store.
You can start building web apps today using WAT, publishing apps for Windows 8.1, Windows Phone 8.1 or Android, and switch to the Windows 10 Web Apps model as soon as the new OS is released.
Additional links
Creating Universal Web Applications Using the Web App Template
MVA course on creating universal web applications using the Web App Template
Download Web App Template
Web App Template Documentation
Download free or trial Visual Studio
Try Microsoft Azure
Learn Microsoft Virtual Academy courses
Source: https://habr.com/ru/post/254507/
All Articles