Development of a vector editor in JavaScript (part two, with sources)
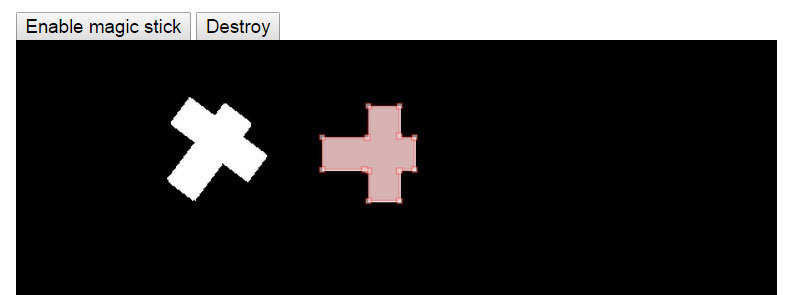
About how I decided to make my own vector editor on JavaScript, I wrote earlier . Unfortunately, it is not possible to lay out a full-fledged editor for several reasons, so I decided to write a small plugin that allows you to create and edit outlines, linking them to any individual image on the page. Of course, the main “trick” of the editor is the possibility of semi-automatic contour creation on the principle of the “magic wand” tool in Photoshop, that is: clicked on the image and got the finished outline, which can then be corrected.
The plugin is written in JavaScript + jQuery, the image is processed in the CANVAS element.
')
Still, I would not like to describe in detail the problems that I had in the process of writing the editor, some of which I already mentioned in the previous article, so immediately to the point:
Initialization of the plug-in occurs normally, by calling the form
$().mapContourEditor(); The list of variables is as follows:
- contour - an array of variables of the form x0, y0, x1, y1, ..., xn, yn, empty by default
- tolerance is the radius (or sensitivity) of the colors for the magic wand tool, the initial value is 20. In general, the contour search occurs along the border of colors and it is this parameter that determines how wide this very border is.
- cback - background color of the finished contour, the default value is rgba (120,0,0,0.3)
- cborder - outline border color, default rgba (255,0,0,0.3)
- msize - marker size (contour points), default square with sides 2 (in pixels)
- mback - internal marker color, default rgba (255,255,255,0.5)
- mborder - rgba marker frame color (255,0,0,0.5)
- magicStick - “magic wand” mode, by default 1 (enabled), after creating a contour automatically switches to 0 - enabled. When magicStick = 0 - you can edit the contour, create, move and delete contour markers.
Few methods
At this stage I decided to make the minimum number of methods and limited myself only to:
- getData - get a variable, for example, in order to find out if magicStick mode is on, you need to call
$().mapContourEditor('getData','magicStick'); - setData - set the necessary variables, for example:
$().mapContourEditor('setData',{magicStick:1}); - destroy - remove the editor from a specific item:
$().mapContourEditor('destroy');
And about events
The event is generally only one:
magicStickChange - called when changing the editor mode:
$().on('magicStickChange',function(){ Magic Stick}); Actually everything, a demo and a brief description of the plugin can be found here: evalexdy.imtqy.com/MapContourEditor , if you have any ideas for the development or refinement of this particular plugin, welcome to the comments!
Source: https://habr.com/ru/post/254291/
All Articles