Self-assembly 3d-printer or purchase ready-made equipment for the design. BY. Part 2
In the first part, it was shown and described how to assemble a doomsday machine 3D printer. Now, it is time to revive the mechanical miracle, with the help of software, brains and wires.
To do this, I used open sourcefree software: Repetier-host (to connect a computer with a 3D printer control card) and Arduino IDE (to work with microcontroller firmware). And the 3D printer itself . The intricacies of setting up this software will be explained in this part:
')
The Mastertronics control board has an Arduino MEGA 2560 microcontroller on board, through which it communicates with a computer and controls everything connected to this board, as shown:

The action algorithm for the operation of a 3D printer is as follows:
1) We have a fully assembled structure ( Part 1 )
2) Connect the mini-USB cable to the Mastertronics control board and to the computer
3) Next, we flash the microcontroller with Marlin_MC5 firmware
(the version that I use in my printer here )
4) Run the software program host Repetier on the computer
5) Set printer parameters in Repetier software
6) Establish a connection with the printer
7) Connect the power to the control board
8) We check the performance of the control board and the electronics connected to it
9) If necessary, make changes to the Marlin firmware.
Let's start with point number 3
To do this, you need to run the Arduino IDE program, in the tools tab, select the Arduino Mega 2560 board, the ATmega 2560 processor, and the com port.

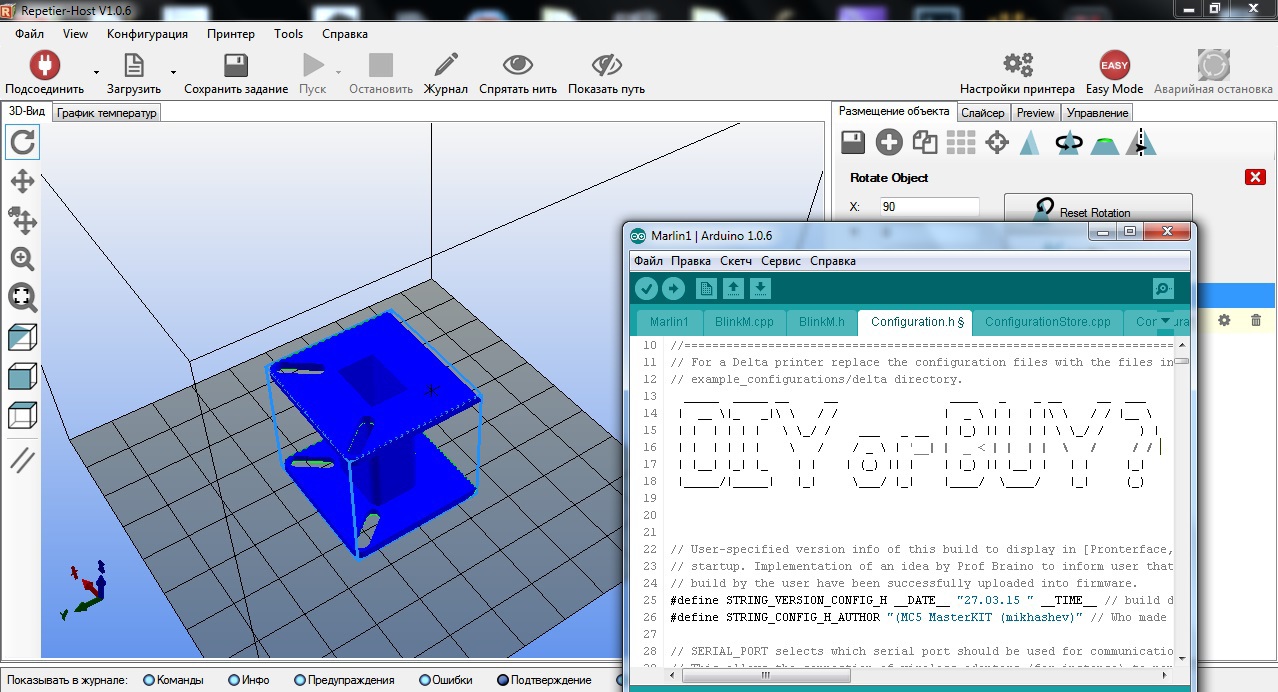
Open the file with the downloaded Marlin.ino firmware, click the icon -> Download, wait until it is compiled and loaded into the microcontroller ...
Now go to item number 4
In the program Repetier, in the menu, select the configuration -> Printer Settings.
Here you need to set the com port, baud rate and cache size
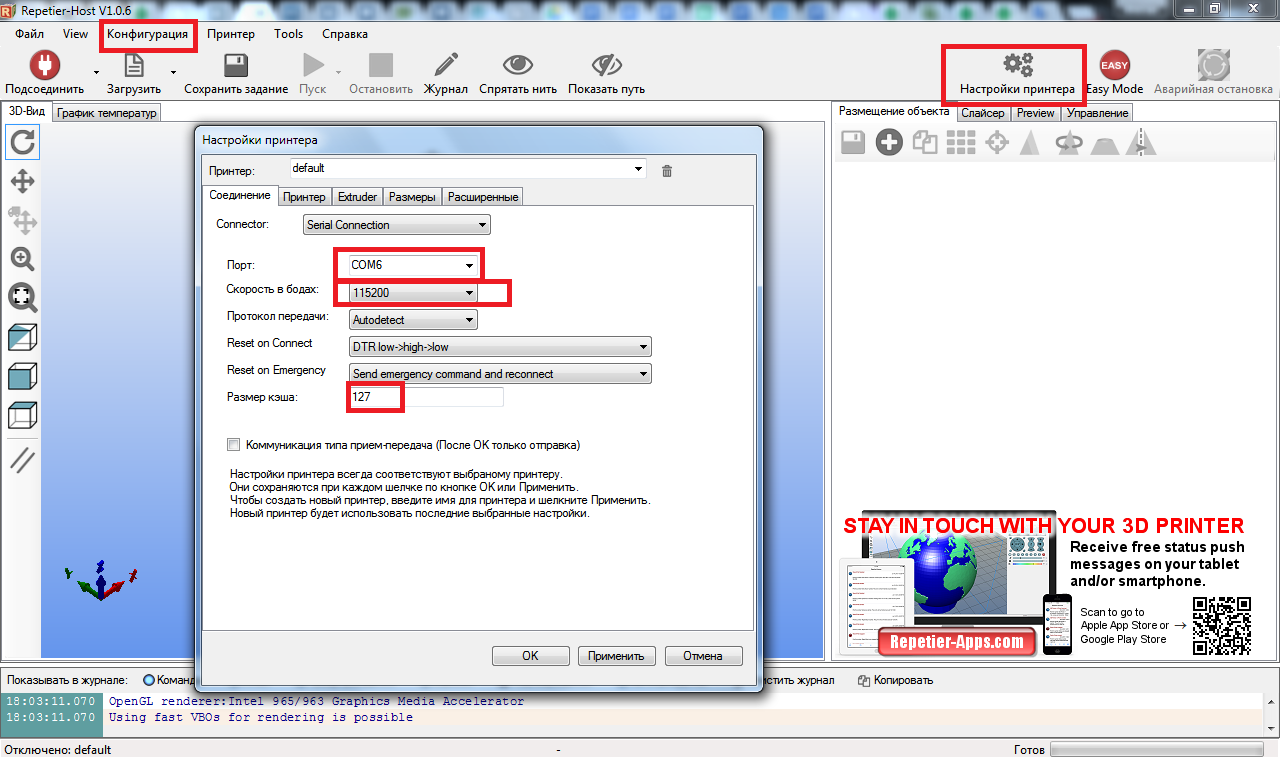
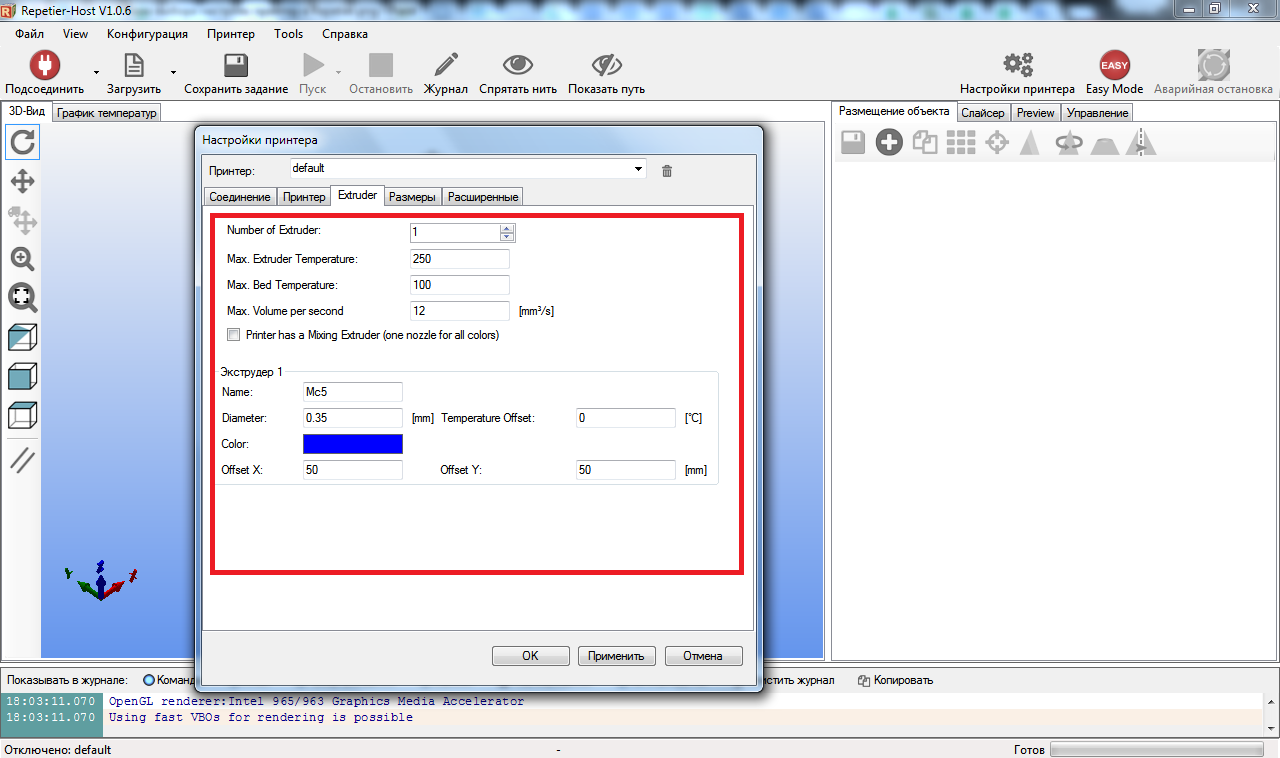
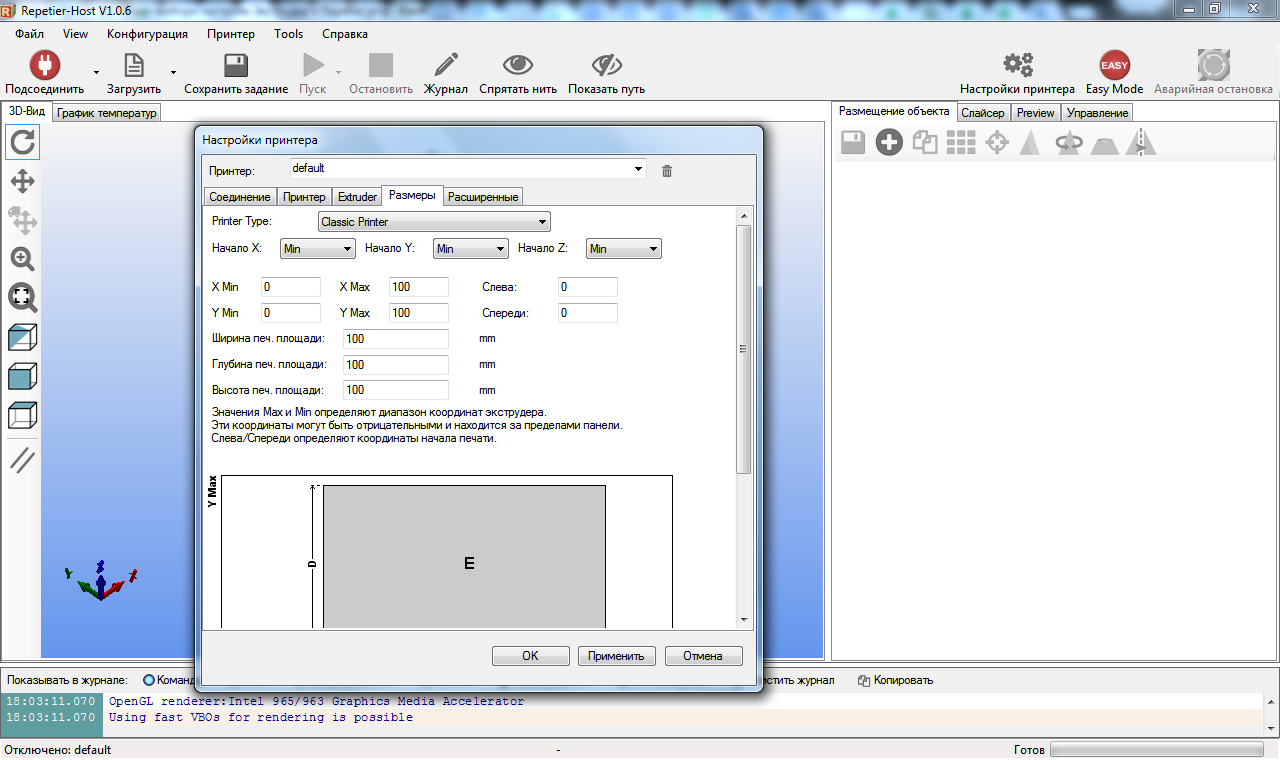
As well as all the parameters of the printer, extruder and print area:
After that, you can safely push the button with the icon forks-> Connect the printer and wiggle with theear steppers. This can be done in two ways: Using the buttons on the control panel, or by sending G-code commands:
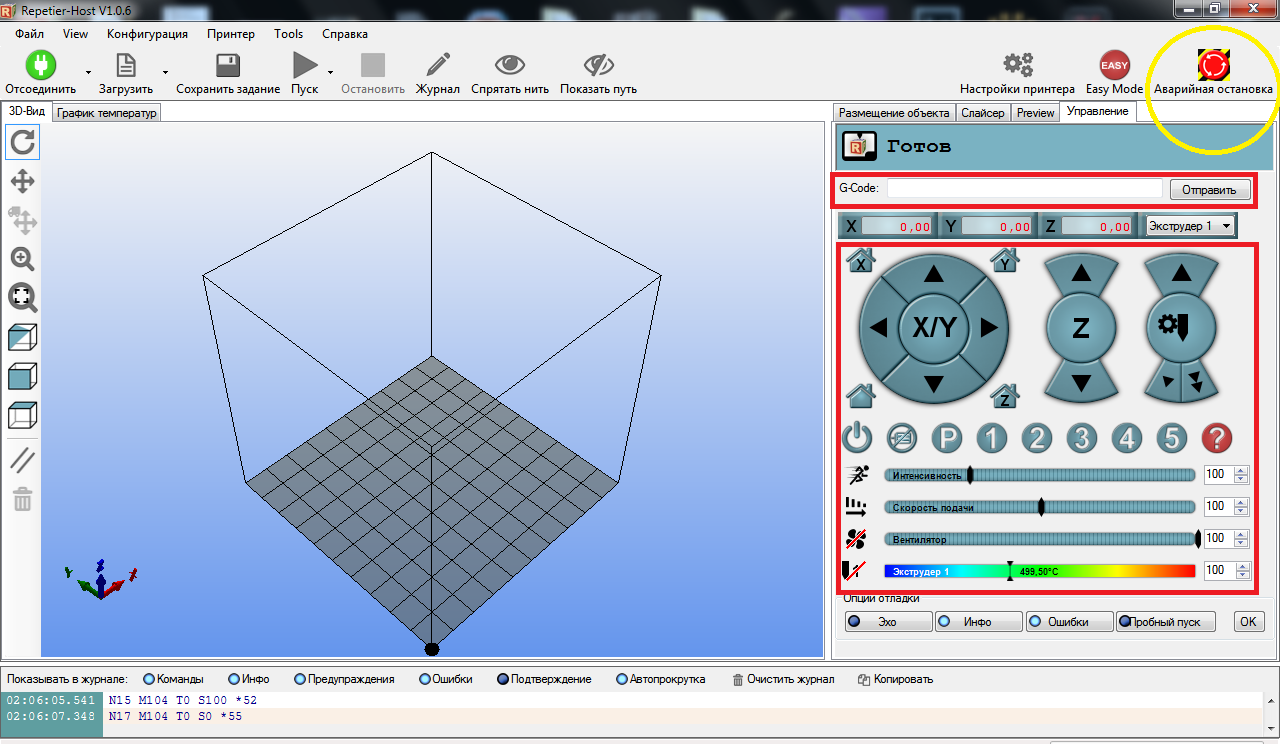
Pay attention to the Emergency Stop button highlighted by the yellow circle.
After successfully connecting to the control board, you can power it on and send the parking command along all three G28 axes or press the button with the image of a house without a letter inside. If the motors and limit switches are connected correctly, the printer will begin to move each axis until the limit switches are activated. Thus, zero coordinates for all three axes (Home position) will be set. This means to be crazy.
If something goes wrong, press the emergency stop button, turn off the power, we think, we check the correctness of the connection to the board of the engines and limit switches, installed jumpers under the drivers. If everything is correctly connected, but does not work properly, then open the Marlin firmware on the Configuration.h tab and check the logic of the limit switches in the code lines:
const bool X_MIN_ENDSTOP_INVERTING = false; // Set the value to (true or false) true or false to invert the endstop logic.
const bool Y_MIN_ENDSTOP_INVERTING = false;
const bool Z_MIN_ENDSTOP_INVERTING = true;
const bool X_MAX_ENDSTOP_INVERTING = true;
const bool Y_MAX_ENDSTOP_INVERTING = true;
const bool Z_MAX_ENDSTOP_INVERTING = true;
I had problems with the direction of movement of the axes when parking, so I had to change the logic of the limit switches in the firmware code.
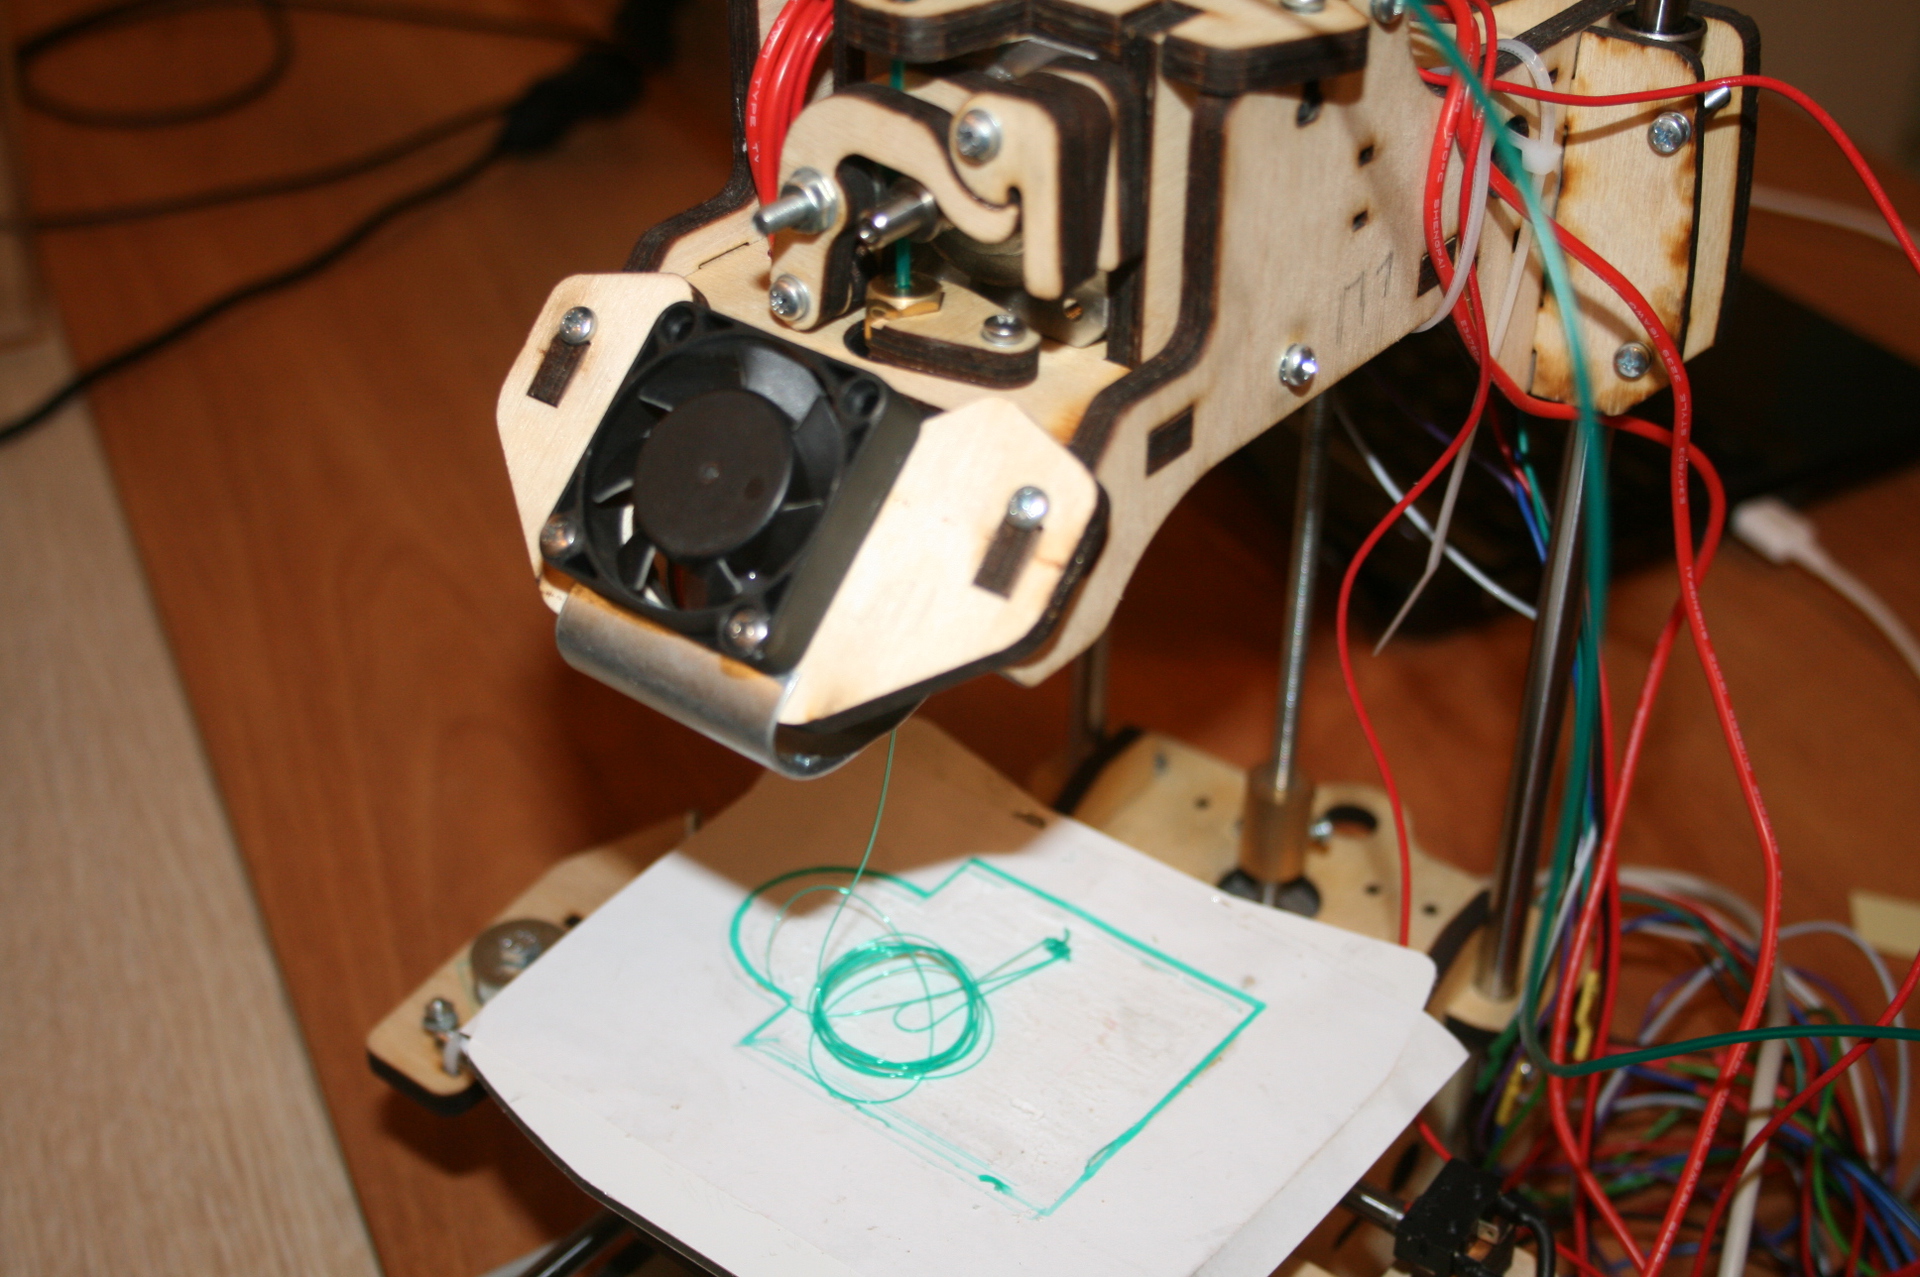
Then you can begin to test the operation of the extruder.
To do this, set the temperature to 100 degrees and monitor the temperature sensor readings. If everything is ok, then we try to heat up to a temperature of 200 degrees, then insert a plastic thread and push several tens of centimeters using the manual control of the extruder in the Repetier program. I had no problems at this stage:
On this, the preparation of the printer software is almost complete. Then you can move on to the third exciting part - the 3D printing itself, which has its own subtleties in customization that you need to master in order not to print such products:
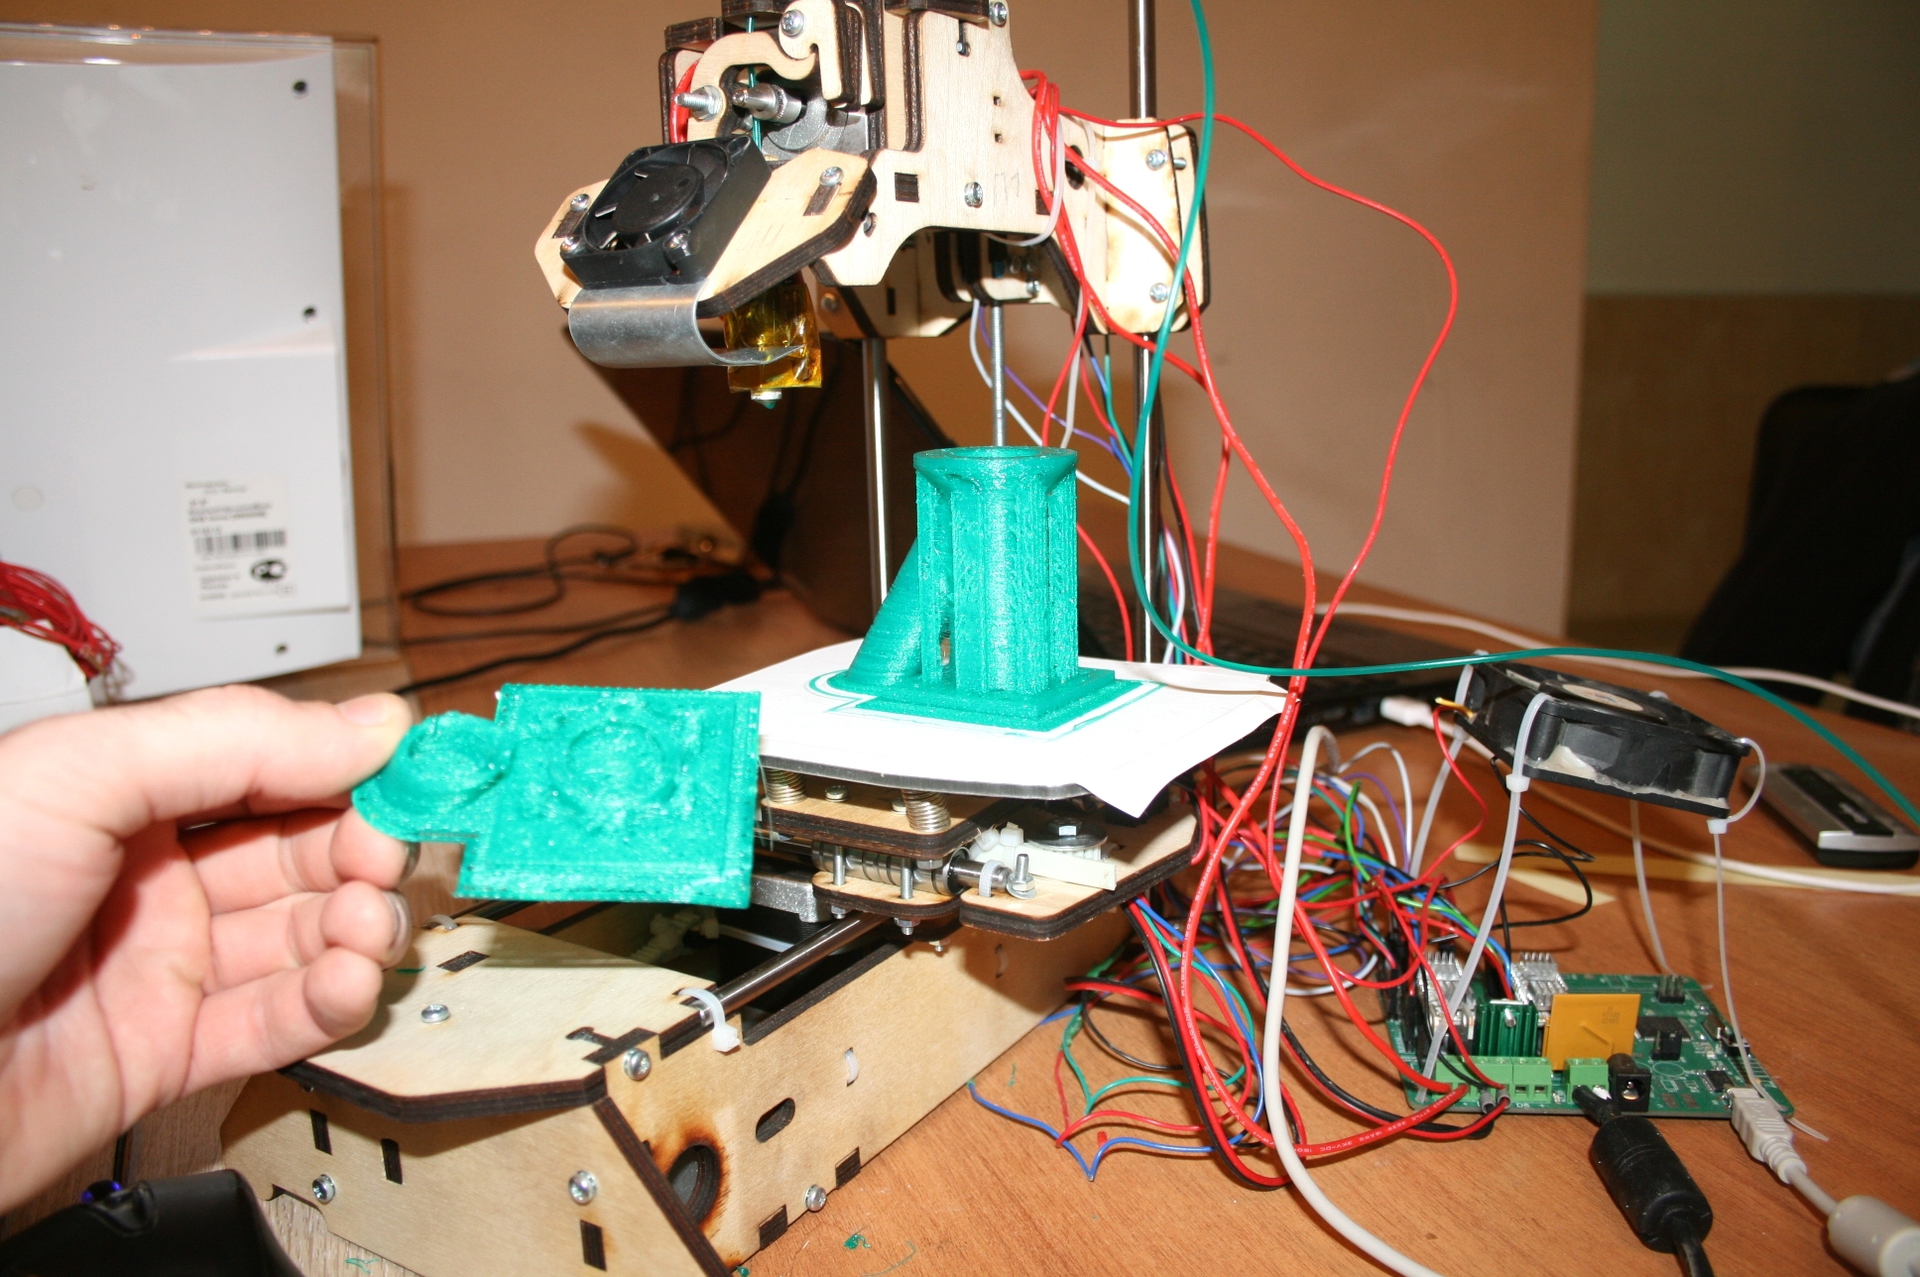
In the third part, I will talk about what a slicer is and how to set it up for “slicing” 3D models for printing, about the requirements for 3D models and whyit’s not so easy to take and calibrate a 3D printer.
To do this, I used open source
')
The Mastertronics control board has an Arduino MEGA 2560 microcontroller on board, through which it communicates with a computer and controls everything connected to this board, as shown:

The action algorithm for the operation of a 3D printer is as follows:
1) We have a fully assembled structure ( Part 1 )
2) Connect the mini-USB cable to the Mastertronics control board and to the computer
3) Next, we flash the microcontroller with Marlin_MC5 firmware
(the version that I use in my printer here )
4) Run the software program host Repetier on the computer
5) Set printer parameters in Repetier software
6) Establish a connection with the printer
7) Connect the power to the control board
8) We check the performance of the control board and the electronics connected to it
9) If necessary, make changes to the Marlin firmware.
Let's start with point number 3
To do this, you need to run the Arduino IDE program, in the tools tab, select the Arduino Mega 2560 board, the ATmega 2560 processor, and the com port.
Open the file with the downloaded Marlin.ino firmware, click the icon -> Download, wait until it is compiled and loaded into the microcontroller ...
Now go to item number 4
In the program Repetier, in the menu, select the configuration -> Printer Settings.
Here you need to set the com port, baud rate and cache size
As well as all the parameters of the printer, extruder and print area:
Printer Settings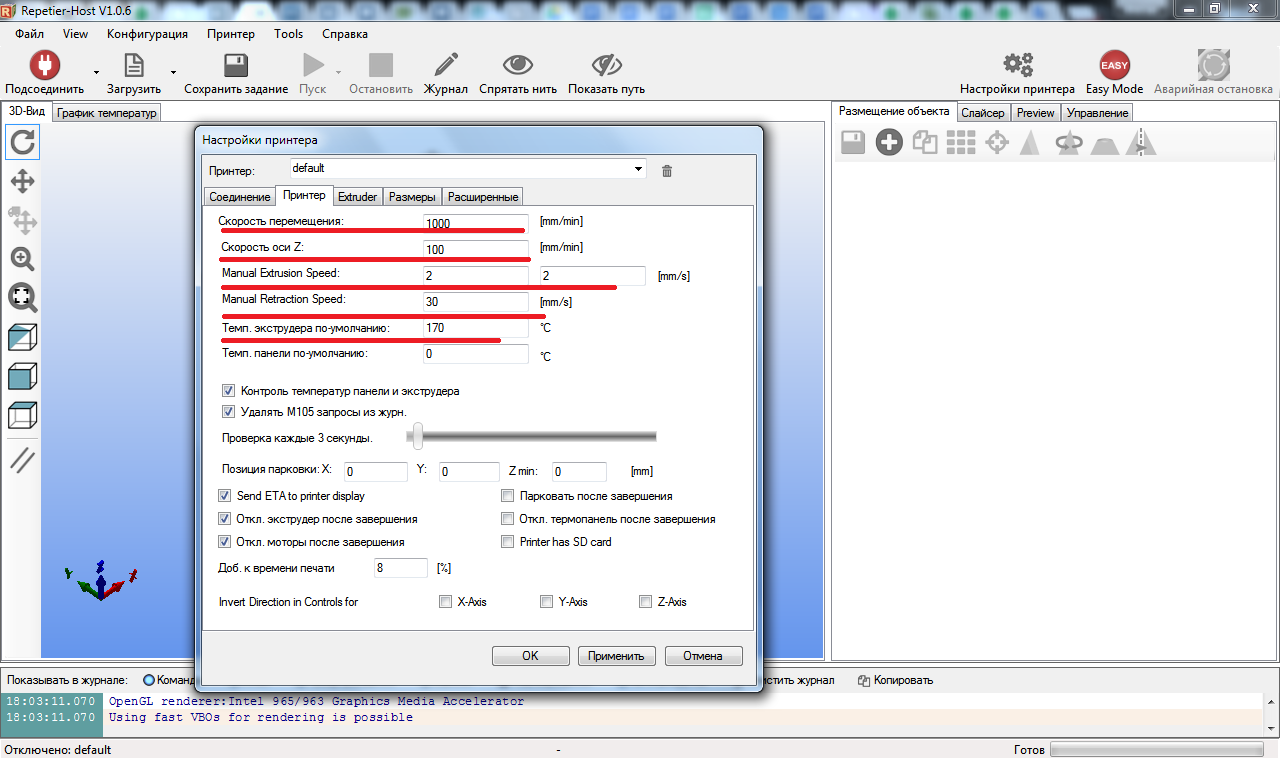
After that, you can safely push the button with the icon forks-> Connect the printer and wiggle with the
Pay attention to the Emergency Stop button highlighted by the yellow circle.
After successfully connecting to the control board, you can power it on and send the parking command along all three G28 axes or press the button with the image of a house without a letter inside. If the motors and limit switches are connected correctly, the printer will begin to move each axis until the limit switches are activated. Thus, zero coordinates for all three axes (Home position) will be set. This means to be crazy.
If something goes wrong, press the emergency stop button, turn off the power, we think, we check the correctness of the connection to the board of the engines and limit switches, installed jumpers under the drivers. If everything is correctly connected, but does not work properly, then open the Marlin firmware on the Configuration.h tab and check the logic of the limit switches in the code lines:
const bool X_MIN_ENDSTOP_INVERTING = false; // Set the value to (true or false) true or false to invert the endstop logic.
const bool Y_MIN_ENDSTOP_INVERTING = false;
const bool Z_MIN_ENDSTOP_INVERTING = true;
const bool X_MAX_ENDSTOP_INVERTING = true;
const bool Y_MAX_ENDSTOP_INVERTING = true;
const bool Z_MAX_ENDSTOP_INVERTING = true;
I had problems with the direction of movement of the axes when parking, so I had to change the logic of the limit switches in the firmware code.
Then you can begin to test the operation of the extruder.
To do this, set the temperature to 100 degrees and monitor the temperature sensor readings. If everything is ok, then we try to heat up to a temperature of 200 degrees, then insert a plastic thread and push several tens of centimeters using the manual control of the extruder in the Repetier program. I had no problems at this stage:
On this, the preparation of the printer software is almost complete. Then you can move on to the third exciting part - the 3D printing itself, which has its own subtleties in customization that you need to master in order not to print such products:
In the third part, I will talk about what a slicer is and how to set it up for “slicing” 3D models for printing, about the requirements for 3D models and why
Source: https://habr.com/ru/post/253901/
All Articles