Architectural visualization in Unreal Engine 4
While working on the project, architects and designers resort to such a presentation method as 3D visualization. Most often this is a static image obtained with the help of visualizers vRay, MentalRay, Corona and others.
This article will focus on the visualization of architectural projects on the Unreal Engine. Consider all the pros and cons, and also share my impressions and experience on the example of the finished project:
UE4 accepts 3D models in .obj and .fbx formats.
')
You can model and export objects in any 3D editor (3ds Max, Blender, Maya, etc.). It is desirable that the model have a good topology and polygonage within reasonable limits (if we talk about interiors, the main objects such as a sofa, a bed, etc. should not exceed 100 thousand triangles, as this greatly affects the performance). It is better, of course, to do the retopology of each model manually, but to achieve an acceptable result, you can get by with automatic tools, programs, or plug-ins.
All models must have a sweep, the smoother it will be, the better the texture will fall on it and, looking ahead, light with shadows that are previously considered in the Unreal Engine.
To build logic in UE4, they use the Blueprint node system. It replaces the need for programming, but does not exclude the possibility of writing in C ++.
The following shows the main shaders used in the scene, built on Blueprint :
Tree:
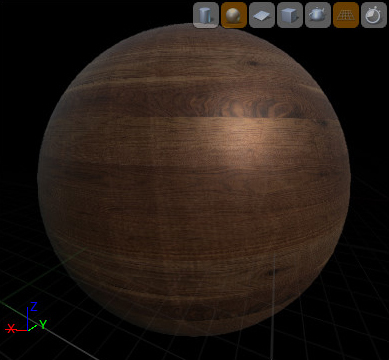
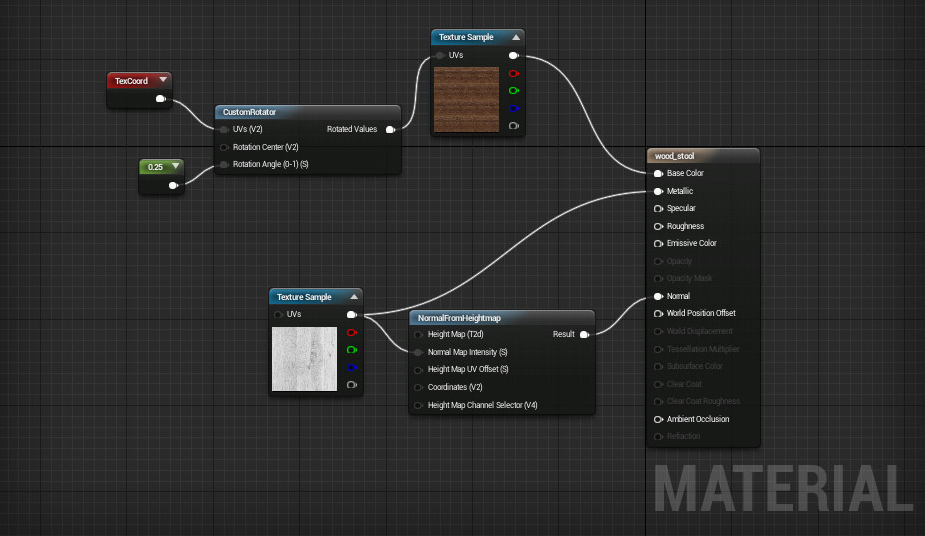
So, as for creating relief surfaces, the engine only requires a normal map, that is, the ability to procedurally create this map from a black and white image using the NormalFromHeightmap node
Metal stained:
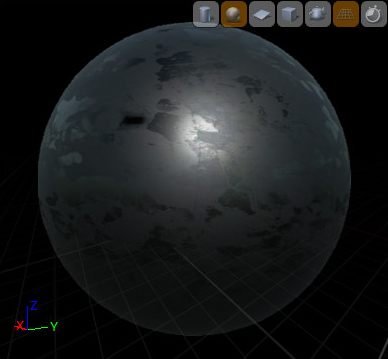
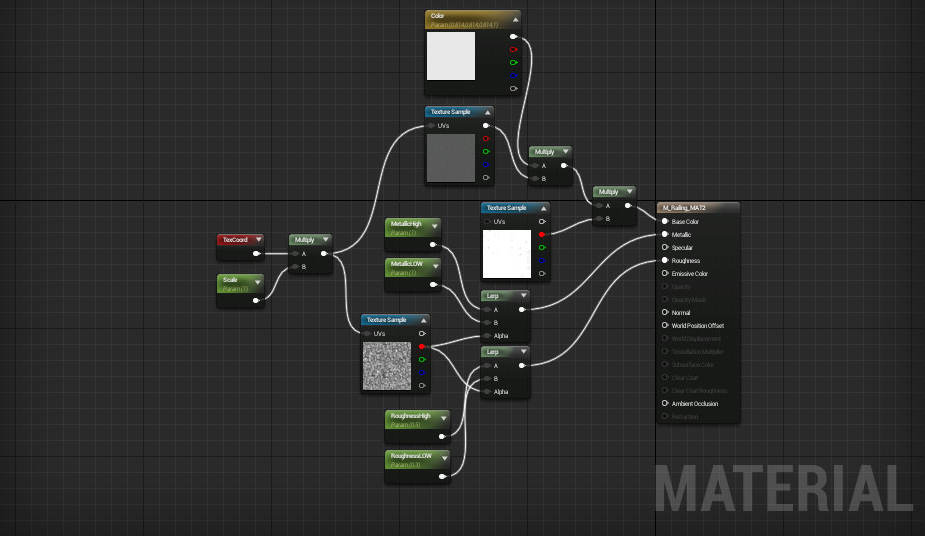
In this example, a black and white map was used, mixed with numerical values and applied to the Metallic and Roughness properties.
Glass:

The transparency of the material is influenced by the Opacity property, which is regulated by the float node (value from 0 to 1)
The following are examples of four basic properties that determine the physical nature of the material. Combining them together in various ways allows you to create almost any possible type of physical surface in the real world.
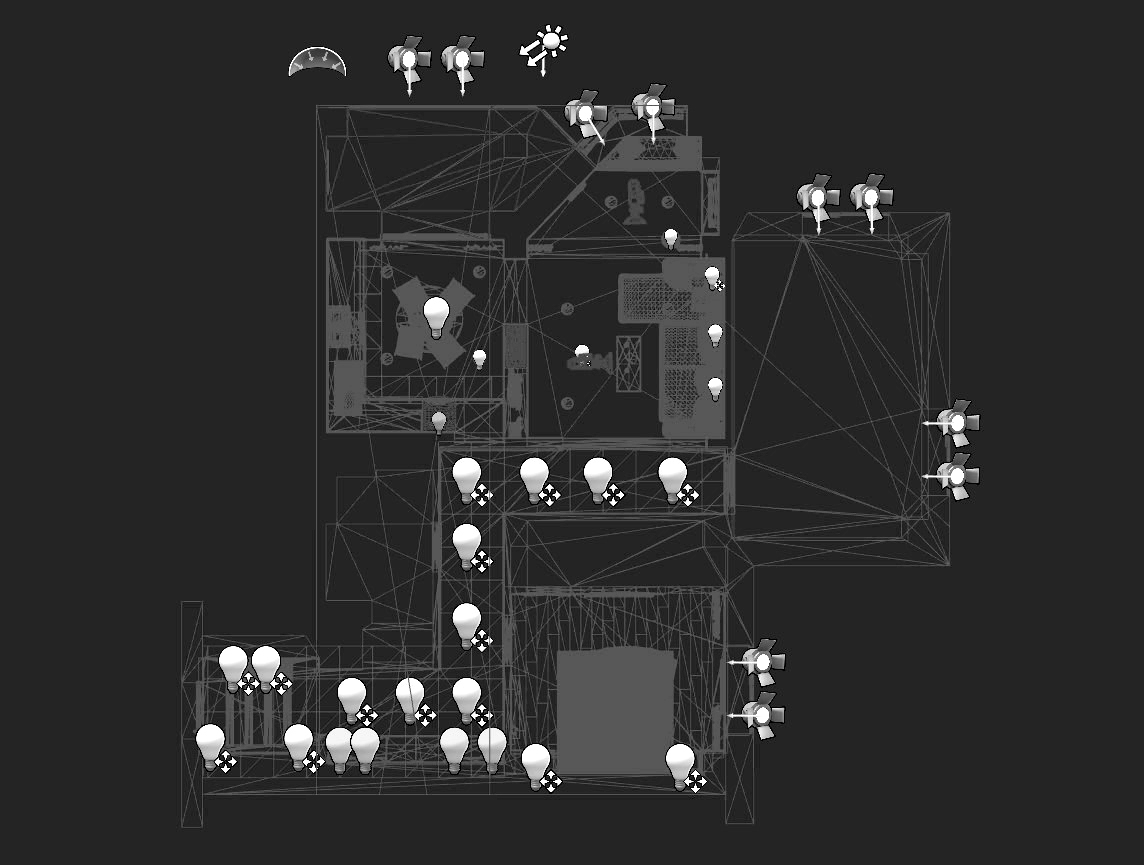
The scene uses three types of lighting:
After all the objects and light sources have been placed, it is necessary to calculate the scene:

This is a kind of analogue rendering, which calculates the interaction of all static light sources with static models. Simply put, casts shadows and bakes.
If, after rendering, the model or light source has been moved or deleted, the shadow will remain and you will have to recount the scene again.
Example:
To improve the architectural project, I recommend adding some interactive elements, such as opening and closing doors, music, various sound and visual effects. Below we look at some of them.
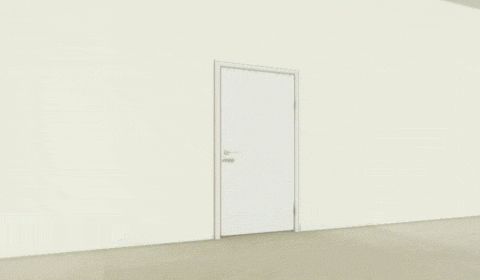
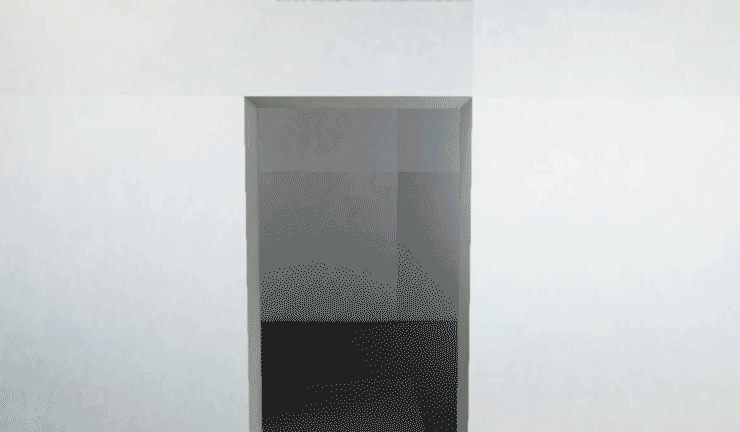
1. Opening and closing the door
Consider a simple option when the door opens automatically, if a player approaches and closes, if the player moves away:
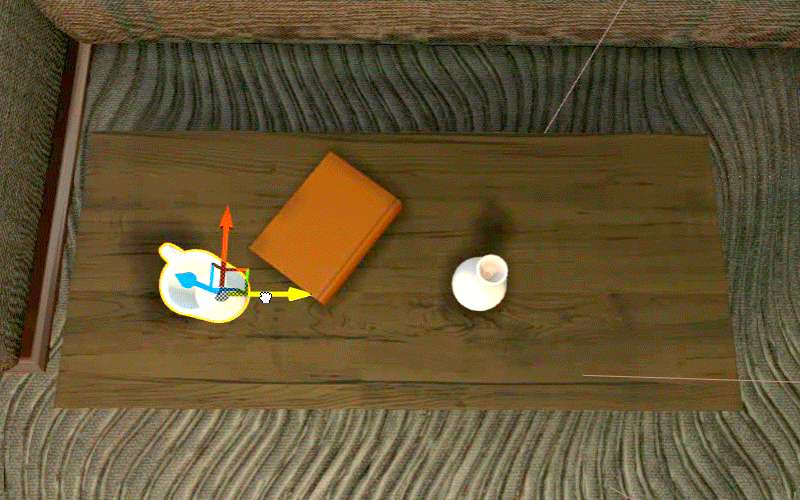
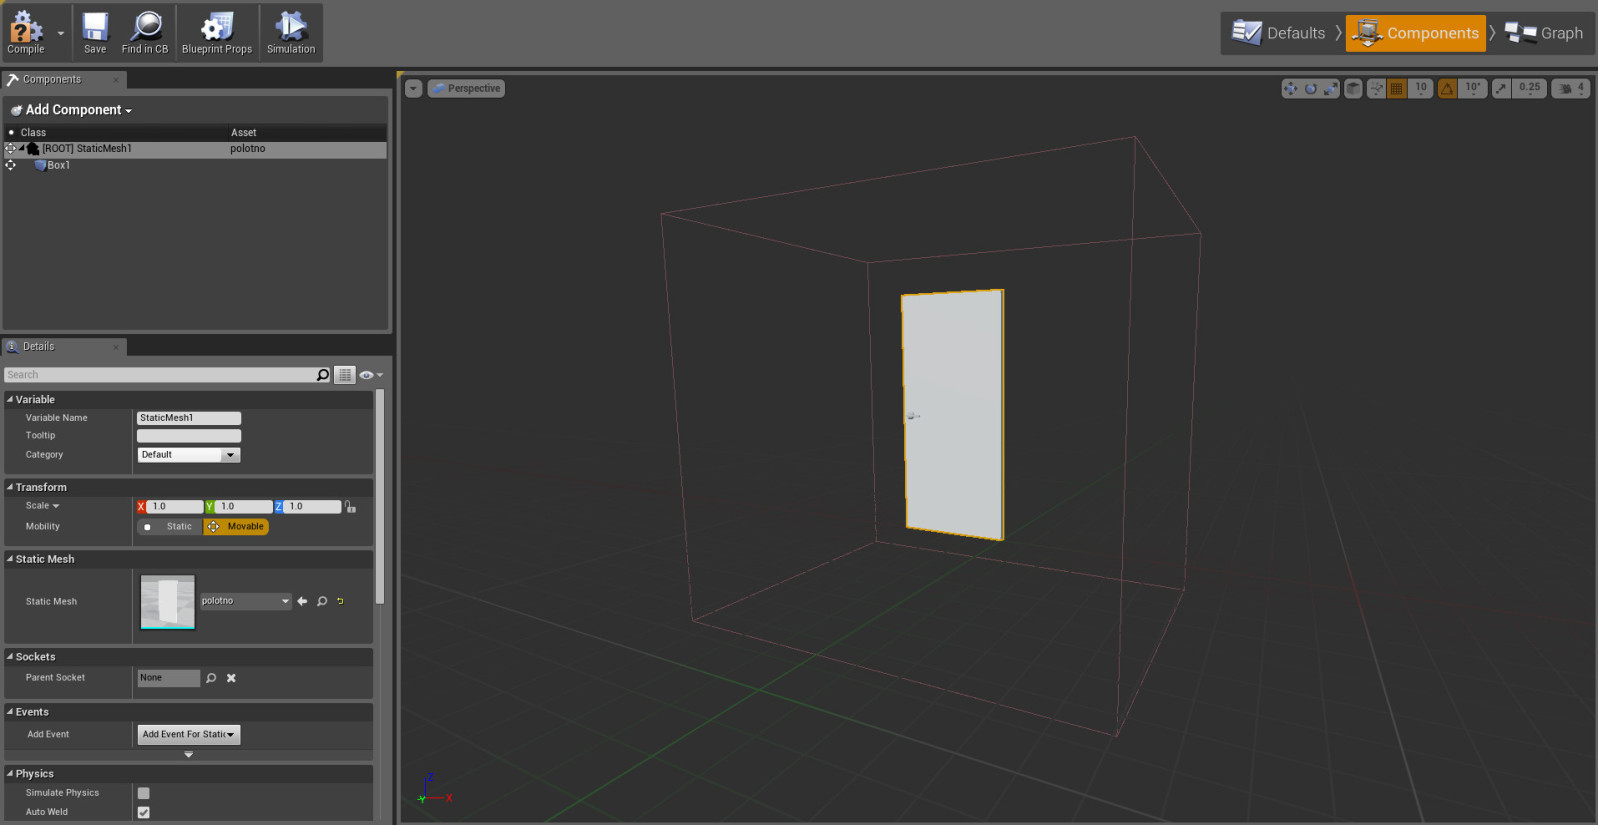
The door itself consists of two elements: a static model of the doorway and an interactive door leaf, the logic of which is described in Blueprint .
The drawing components include a static 3D model of the door leaf and the Box figure, which plays the role of a trigger:
The node structure is as follows:
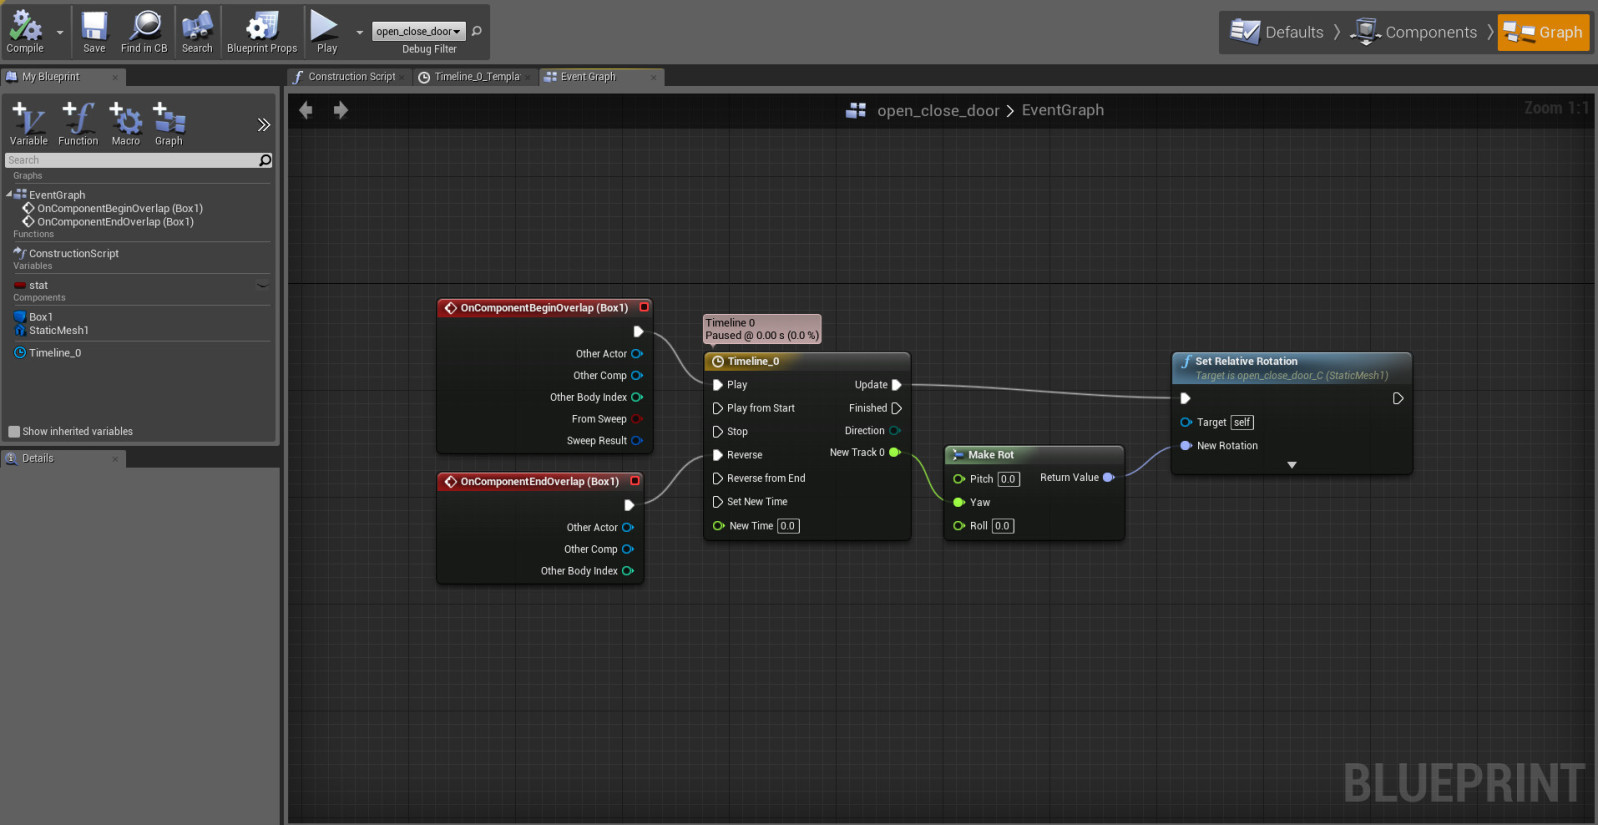
The OnComponentBeginOverlap and OnComponentEndOverlap nodes are responsible for a collision with a trigger.
Timeline_0 is an animation with the Float Track function (New Track 0).
Make Rot creates rotation along any axis, in this case along the Z axis (Yaw).
Function Float Track (New Track 0):
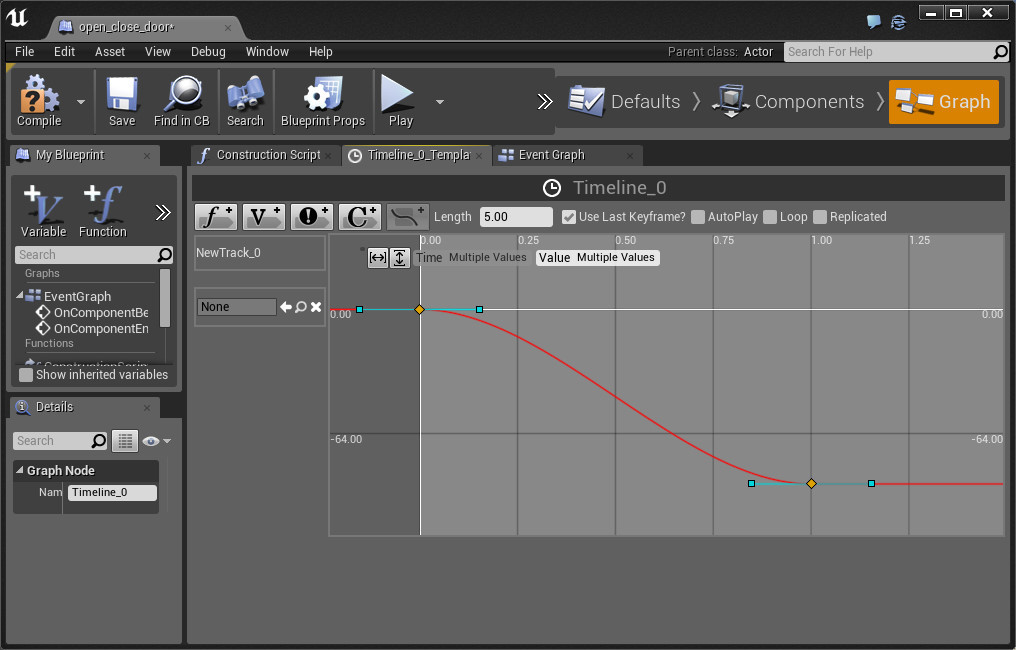
A value from 0 to -90 degrees changes within 1 second
It remains for us to compile Blueprint and add it to the scene, aligning it exactly under the doorway.
2. Sound effects
You can spice up your project by adding to the scene Ambient Sound . For example, to put unobtrusive music in the background or add a sound effect when opening / closing doors.
3. Postprocessing
In a broad sense, post-processing is all that happens after the basic actions of building an image.
You can postprocess either in the chamber or in block Post Process Volume , adding it to the project and adjusting the dimensions. Upon entering this block, the post-processing process will begin.
For example, the Post Process Volume block with increased brightness is recommended to be placed in poorly-lit rooms:
So the Post Process Volume looks in the scene:

Unreal Engine 4 supports many post-processing effects, not all of them can be useful to you, but I will list some of them:
Despite the seeming complexity of the work, Unreal Editor 4 looks friendly. And with increasing productivity of computer hardware, GPU render can change the traditional approach to the work of visualizers, designers and architects.
Of the minuses I want to note a couple of points. At the moment, to achieve a photo-realistic picture is not easy, but if you go into the project with your head and spend more time, you can. The size of the finished build can exceed 1GB, which can impede the exchange among colleagues and customers. At the present time, not every computer is able to produce a stable 25-30 FPS in a filled 100 m² interior.
This article will focus on the visualization of architectural projects on the Unreal Engine. Consider all the pros and cons, and also share my impressions and experience on the example of the finished project:
Modeling
UE4 accepts 3D models in .obj and .fbx formats.
')
You can model and export objects in any 3D editor (3ds Max, Blender, Maya, etc.). It is desirable that the model have a good topology and polygonage within reasonable limits (if we talk about interiors, the main objects such as a sofa, a bed, etc. should not exceed 100 thousand triangles, as this greatly affects the performance). It is better, of course, to do the retopology of each model manually, but to achieve an acceptable result, you can get by with automatic tools, programs, or plug-ins.
All models must have a sweep, the smoother it will be, the better the texture will fall on it and, looking ahead, light with shadows that are previously considered in the Unreal Engine.
Materials
To build logic in UE4, they use the Blueprint node system. It replaces the need for programming, but does not exclude the possibility of writing in C ++.
The following shows the main shaders used in the scene, built on Blueprint :
Tree:
So, as for creating relief surfaces, the engine only requires a normal map, that is, the ability to procedurally create this map from a black and white image using the NormalFromHeightmap node
Metal stained:
In this example, a black and white map was used, mixed with numerical values and applied to the Metallic and Roughness properties.
Glass:
The transparency of the material is influenced by the Opacity property, which is regulated by the float node (value from 0 to 1)
The following are examples of four basic properties that determine the physical nature of the material. Combining them together in various ways allows you to create almost any possible type of physical surface in the real world.
| Base color | Metallic | Specular | Roughness |
 |  |  |  |
Lighting
The scene uses three types of lighting:
 Directional Lights - Provides sunlight for the entire scene, is the basis for rendering Global Illumination (Global Illumination)
 Point Lights - Point light sources that mimic the light from light bulbs. Emit light in all directions, it is possible to use IES texture
 Spot Lights - Placed in close proximity to window openings, simulating ambient light from windows
After all the objects and light sources have been placed, it is necessary to calculate the scene:
This is a kind of analogue rendering, which calculates the interaction of all static light sources with static models. Simply put, casts shadows and bakes.
If, after rendering, the model or light source has been moved or deleted, the shadow will remain and you will have to recount the scene again.
Example:
Interactive
To improve the architectural project, I recommend adding some interactive elements, such as opening and closing doors, music, various sound and visual effects. Below we look at some of them.
1. Opening and closing the door
Consider a simple option when the door opens automatically, if a player approaches and closes, if the player moves away:
The door itself consists of two elements: a static model of the doorway and an interactive door leaf, the logic of which is described in Blueprint .
The drawing components include a static 3D model of the door leaf and the Box figure, which plays the role of a trigger:
The node structure is as follows:
The OnComponentBeginOverlap and OnComponentEndOverlap nodes are responsible for a collision with a trigger.
Timeline_0 is an animation with the Float Track function (New Track 0).
Make Rot creates rotation along any axis, in this case along the Z axis (Yaw).
Function Float Track (New Track 0):
A value from 0 to -90 degrees changes within 1 second
It remains for us to compile Blueprint and add it to the scene, aligning it exactly under the doorway.
2. Sound effects
You can spice up your project by adding to the scene
3. Postprocessing
In a broad sense, post-processing is all that happens after the basic actions of building an image.
You can postprocess either in the chamber or in block
For example, the Post Process Volume block with increased brightness is recommended to be placed in poorly-lit rooms:
So the Post Process Volume looks in the scene:
Unreal Engine 4 supports many post-processing effects, not all of them can be useful to you, but I will list some of them:
- Vignette (Vignette) - darkening or lightening the edges of the frame
- Depth of Field - everything that is closer or further to the focusing distance gradually loses sharpness and is blurred.
- Bloom ( Luminescence ) - the light received from bright sources of lighting
- Lens Flare (Blik) - reproduces the effect of refraction of sunlight in the camera lens
- Film (Noise) - gives an animated noise, imitating film camera
Let's sum up
Despite the seeming complexity of the work, Unreal Editor 4 looks friendly. And with increasing productivity of computer hardware, GPU render can change the traditional approach to the work of visualizers, designers and architects.
Of the minuses I want to note a couple of points. At the moment, to achieve a photo-realistic picture is not easy, but if you go into the project with your head and spend more time, you can. The size of the finished build can exceed 1GB, which can impede the exchange among colleagues and customers. At the present time, not every computer is able to produce a stable 25-30 FPS in a filled 100 m² interior.
Source: https://habr.com/ru/post/253503/
All Articles