Timing for amateur car racing
It all started with the fact that I was fascinated by car racing, seeing how the organizers suffer with time measurements (when there are 4 cars in a circle at the same time that you have to use 4 stopwatches and not get confused, where is the time) I offered my help. It was also interesting to practice unfamiliar technologies. What came of it - read on.
All source code and scheme are available at the end of the article.
Tasks were as follows:
- maximum simplicity, minimum connections and wires;
- quick installation;
- on the circle can be several cars at the same time;
- cars go in strict sequence, cannot overtake and change the order;
- start at the intersection of the line.
Since I had little experience using Arduino, I took it as a basis. I also decided to give up the laptop and, for mobility, replace it with an Android application, we will master an earlier Java language unfamiliar to me.
')
Line crossing sensor . At first, I wanted to realize everything with one block, which would be mounted on one side at the start / finish line and determine the intersection with an ultrasonic distance sensor. At home it even worked, but on the street everything turned out differently. The sensor readings constantly jumped and reacted to the wind and everything except the car. It was decided to dig in the direction of infrared rays.
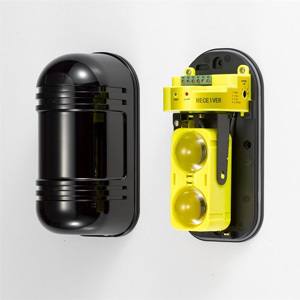
In order to accurately distinguish the light of the infrared diode from car headlights or the sun, you need to select a receiver with frequency modulation, which did not want to do. The choice fell on the ABT-30m ready-made sensors. Everything was already implemented in them, for example, the glass only allowed infrared light in and cut off the light of the headlights and the sun. There were focusing lenses, it was necessary only to connect to the appropriate output of the sensor. As I understand it, such sensors are used to protect the perimeter in home alarms. Looking ahead to say that the choice was successful.
Battery Since the ABT-30m is powered by 12v and the Arduino mini can be powered by a 12v battery, it was decided to take on 12v. I wanted to find the minimum size so that it fits inside the device case, and was not an additional unit outside. It was only possible to find a car battery on the market, which did not fit at all in size and the battery from the UPS, which was also quite large: but in an extreme case, both could be suitable.
As a result, I was lucky and I found a 12v and 4000mAh battery in a Chinese store the size of two matchboxes, which was very good. Later it turned out that these were “batteries from Nokia” connected in series in shrinking:

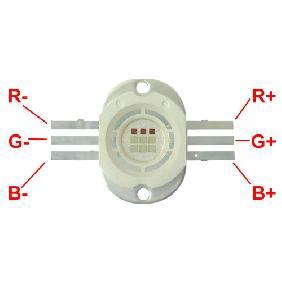
LEDs . Conventional 12v rgb 10w:
Bluetooth Standard modules HC-06:

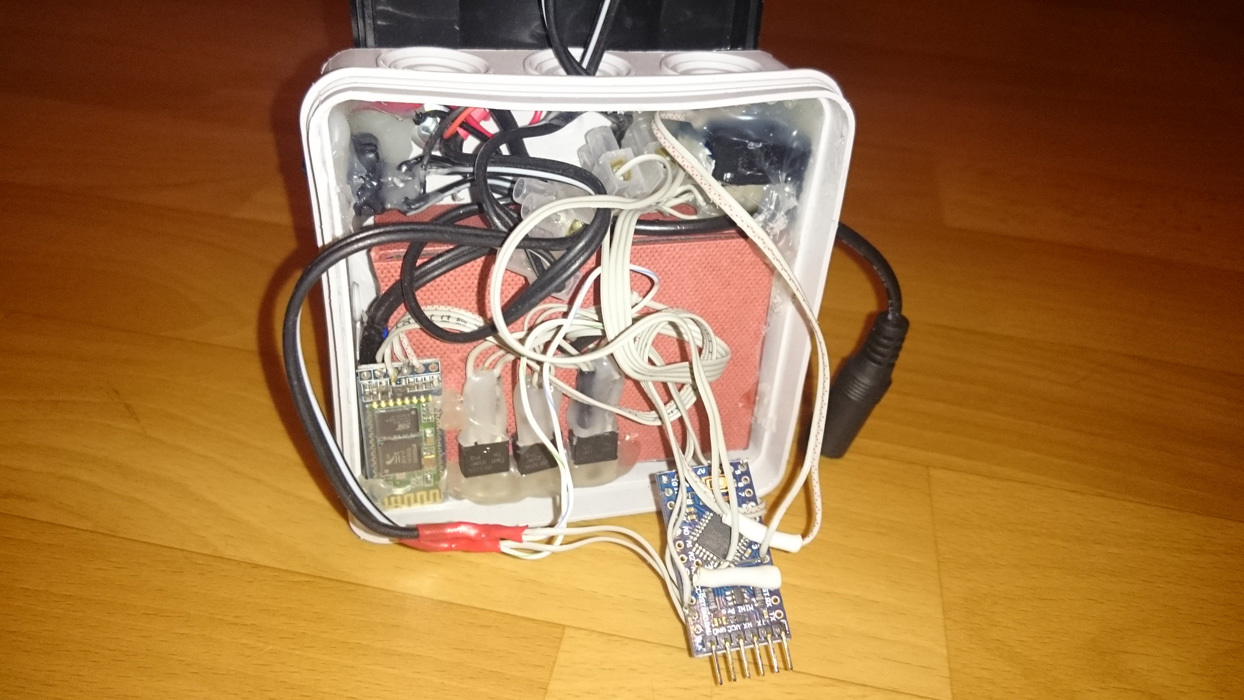
Here is the scheme turned out. Arduino connects to bluetooth on 5 and 6 legs and works through Software Serial. To 9, 10, 11 feet, rgb LEDs are connected through transistors, since the LEDs are powered by 12v, and the arduino outputs 5v. The signal from the intersection sensor is applied to leg 2, it works through interrupts:


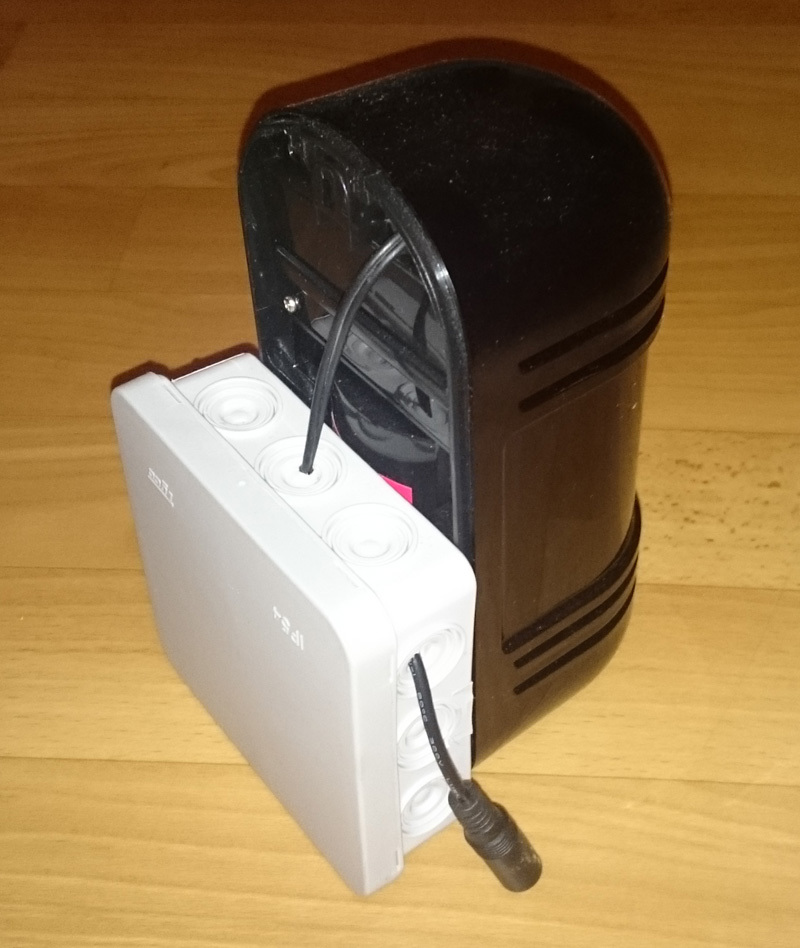
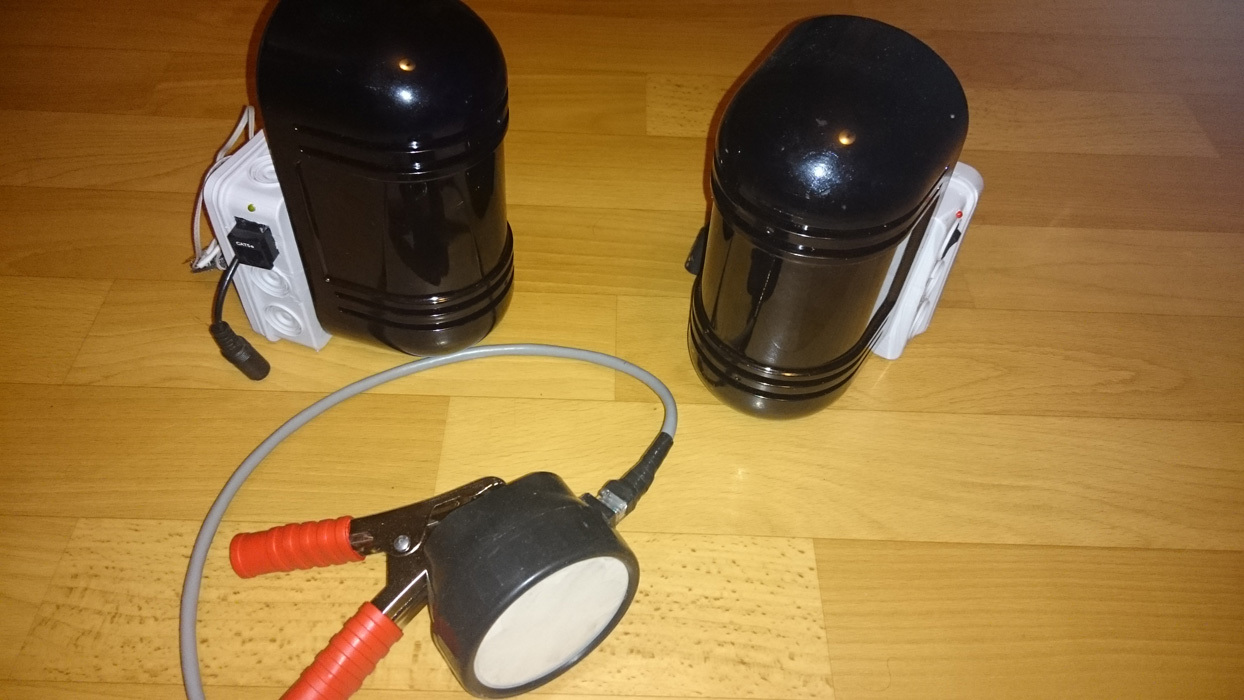
The result was like this. One unit is a receiver (with a bunch of wires inside), the second is a transmitter (only a battery is inside) and a traffic light made of some fixprise flashlight (inside 3 colored LEDs and a lens of some kind of paper). The traffic light is attached with a crocodile, and is connected to the main module with a normal patchcord:

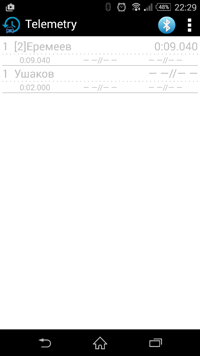
Instead of a computer, I decided to display the results and control the launch from a mobile phone on Android. It was also the first development experience for this platform and the first experience with Java. The result was this application:
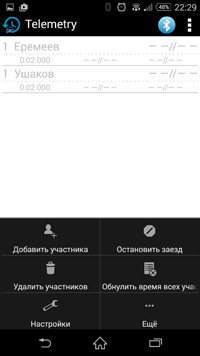
Works as follows. A transmitter and a receiver are placed from different sides of the road, the traffic light is connected and hung up at a convenient place (the installation is very fast). In the application we establish a connection with Arduino, we add participants - in the order in which they will start. Run them in the application.
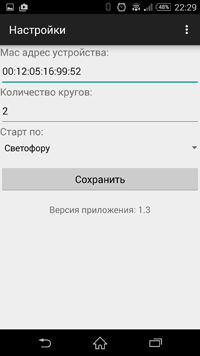
After pressing the “start” button, the traffic light turns green, and at the intersection of the line the time begins to count. Arduino sends to the application the number of milliseconds since its launch, and so on with each intersection of the line. Then the difference between these values is calculated time of arrival. Data transmission delays become unimportant.
Make synchronization to the cloud so that you can look at the big monitor in real time or without leaving your home on the site (it's very interesting to try Meteor.JS). You also need to fix minor bugs and make the device modular so that you can use it for different configurations of the track (start and finish in different places for example). Still need to make an indication of the participant (probably rfid tags ...)
Infrared sensors ABT-30m (1350r)
Arduino mini (135r)
Bluetooth HC-05 (270r)
IRF530 transistors with N-channel (40p * 3pcs)
2 batteries 12V 4000mAh (820p * 2pcs)
10w rgb leds (160p * 3pcs)
Wires, housing, connectors
Total: ~ 4000r - 5000r
All sources are open and available in Bitbucket .
All source code and scheme are available at the end of the article.
Tasks were as follows:
- maximum simplicity, minimum connections and wires;
- quick installation;
- on the circle can be several cars at the same time;
- cars go in strict sequence, cannot overtake and change the order;
- start at the intersection of the line.
Since I had little experience using Arduino, I took it as a basis. I also decided to give up the laptop and, for mobility, replace it with an Android application, we will master an earlier Java language unfamiliar to me.
')
Parts selection
Line crossing sensor . At first, I wanted to realize everything with one block, which would be mounted on one side at the start / finish line and determine the intersection with an ultrasonic distance sensor. At home it even worked, but on the street everything turned out differently. The sensor readings constantly jumped and reacted to the wind and everything except the car. It was decided to dig in the direction of infrared rays.
In order to accurately distinguish the light of the infrared diode from car headlights or the sun, you need to select a receiver with frequency modulation, which did not want to do. The choice fell on the ABT-30m ready-made sensors. Everything was already implemented in them, for example, the glass only allowed infrared light in and cut off the light of the headlights and the sun. There were focusing lenses, it was necessary only to connect to the appropriate output of the sensor. As I understand it, such sensors are used to protect the perimeter in home alarms. Looking ahead to say that the choice was successful.
Battery Since the ABT-30m is powered by 12v and the Arduino mini can be powered by a 12v battery, it was decided to take on 12v. I wanted to find the minimum size so that it fits inside the device case, and was not an additional unit outside. It was only possible to find a car battery on the market, which did not fit at all in size and the battery from the UPS, which was also quite large: but in an extreme case, both could be suitable.
As a result, I was lucky and I found a 12v and 4000mAh battery in a Chinese store the size of two matchboxes, which was very good. Later it turned out that these were “batteries from Nokia” connected in series in shrinking:
LEDs . Conventional 12v rgb 10w:
Bluetooth Standard modules HC-06:
Assembly
Here is the scheme turned out. Arduino connects to bluetooth on 5 and 6 legs and works through Software Serial. To 9, 10, 11 feet, rgb LEDs are connected through transistors, since the LEDs are powered by 12v, and the arduino outputs 5v. The signal from the intersection sensor is applied to leg 2, it works through interrupts:
The result was like this. One unit is a receiver (with a bunch of wires inside), the second is a transmitter (only a battery is inside) and a traffic light made of some fixprise flashlight (inside 3 colored LEDs and a lens of some kind of paper). The traffic light is attached with a crocodile, and is connected to the main module with a normal patchcord:
Mobile app
Instead of a computer, I decided to display the results and control the launch from a mobile phone on Android. It was also the first development experience for this platform and the first experience with Java. The result was this application:
Works as follows. A transmitter and a receiver are placed from different sides of the road, the traffic light is connected and hung up at a convenient place (the installation is very fast). In the application we establish a connection with Arduino, we add participants - in the order in which they will start. Run them in the application.
After pressing the “start” button, the traffic light turns green, and at the intersection of the line the time begins to count. Arduino sends to the application the number of milliseconds since its launch, and so on with each intersection of the line. Then the difference between these values is calculated time of arrival. Data transmission delays become unimportant.
Future plans
Make synchronization to the cloud so that you can look at the big monitor in real time or without leaving your home on the site (it's very interesting to try Meteor.JS). You also need to fix minor bugs and make the device modular so that you can use it for different configurations of the track (start and finish in different places for example). Still need to make an indication of the participant (probably rfid tags ...)
approximate cost
Infrared sensors ABT-30m (1350r)
Arduino mini (135r)
Bluetooth HC-05 (270r)
IRF530 transistors with N-channel (40p * 3pcs)
2 batteries 12V 4000mAh (820p * 2pcs)
10w rgb leds (160p * 3pcs)
Wires, housing, connectors
Total: ~ 4000r - 5000r
All sources are open and available in Bitbucket .
Source: https://habr.com/ru/post/252893/
All Articles