Making another joystick (gamepad) on the Arduino
It was an ordinary Friday, nothing foreshadowed trouble ...
But the "need to do something" worm has already begun its work. After reading the article, I remembered that in my junk years of 15, if not more, the Segov gamepad was lying around. I took it with a firm intention to make a gamepad on the AVR processor (I did not hear about the Arduino then, but I did a couple of small projects on the AVR).
My intention about MSX was further confirmed by my intention, and on Friday I decided to - do it!
')
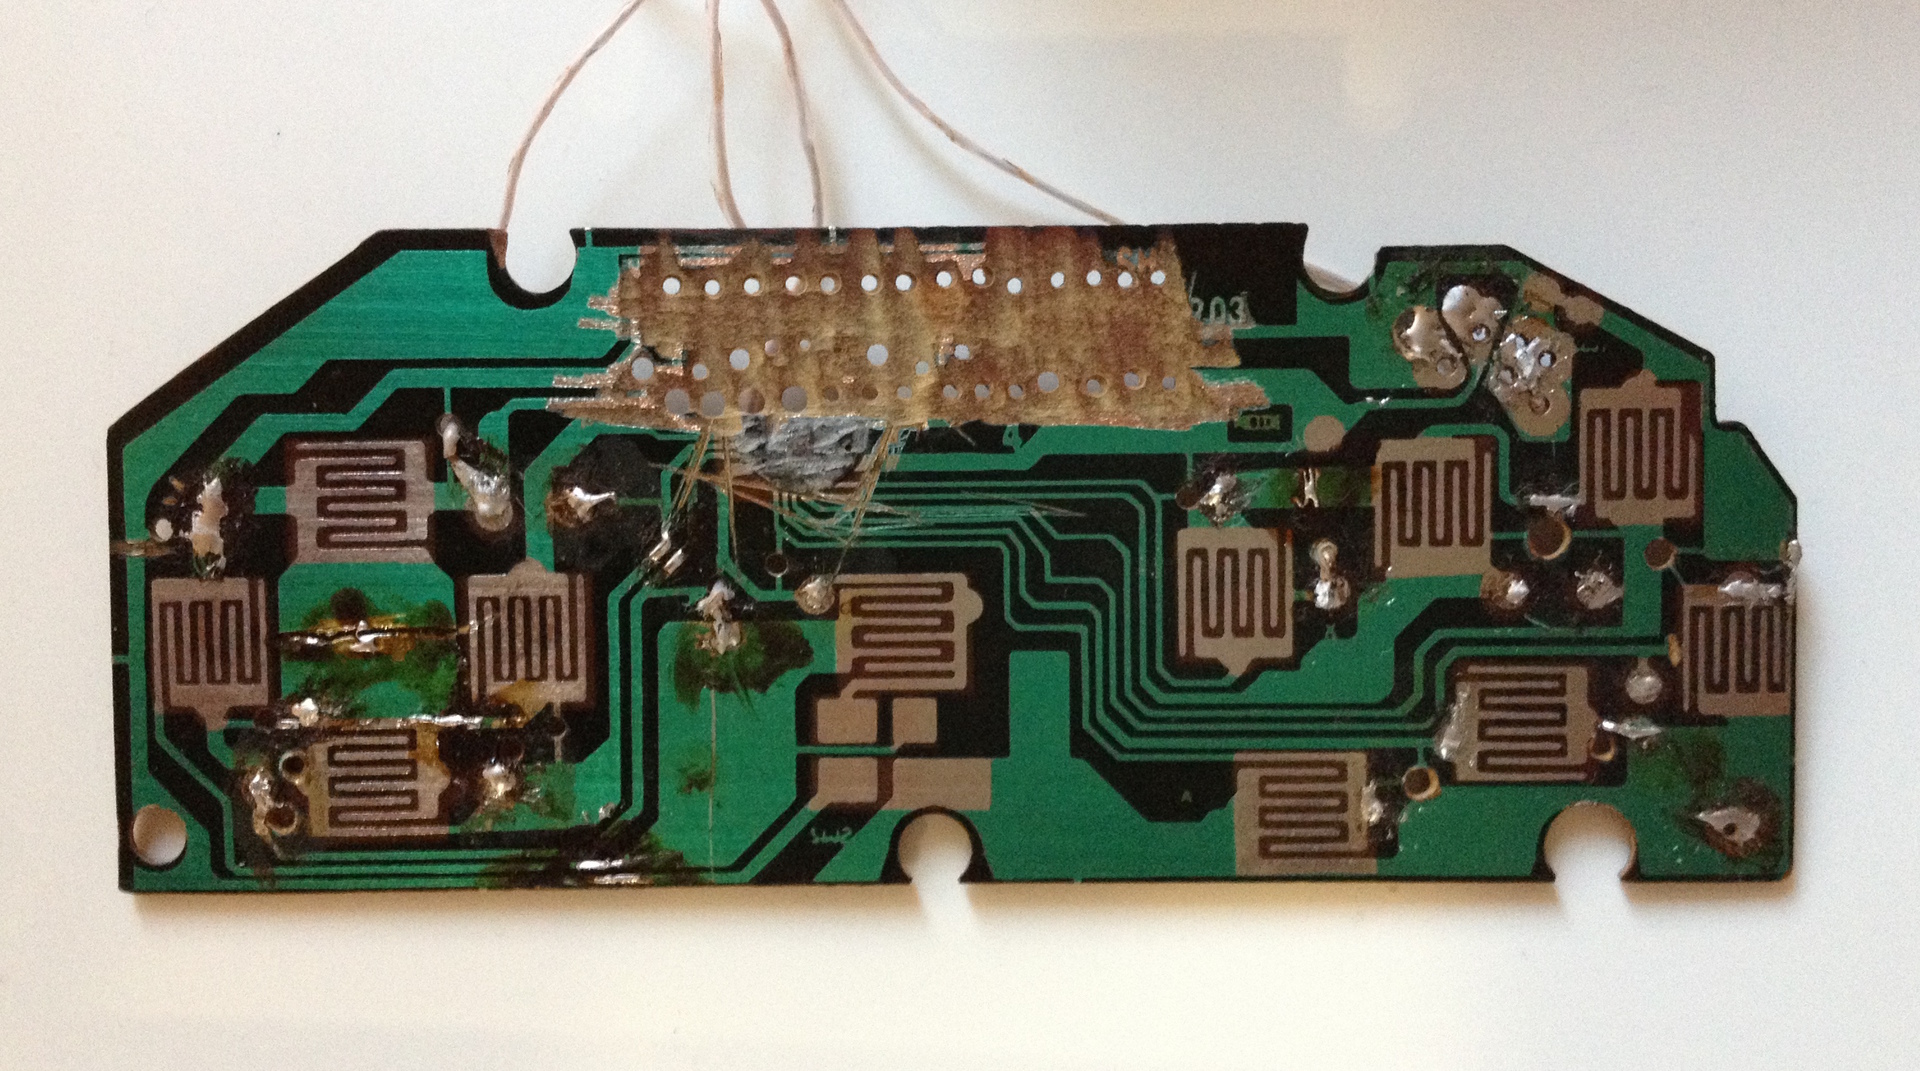
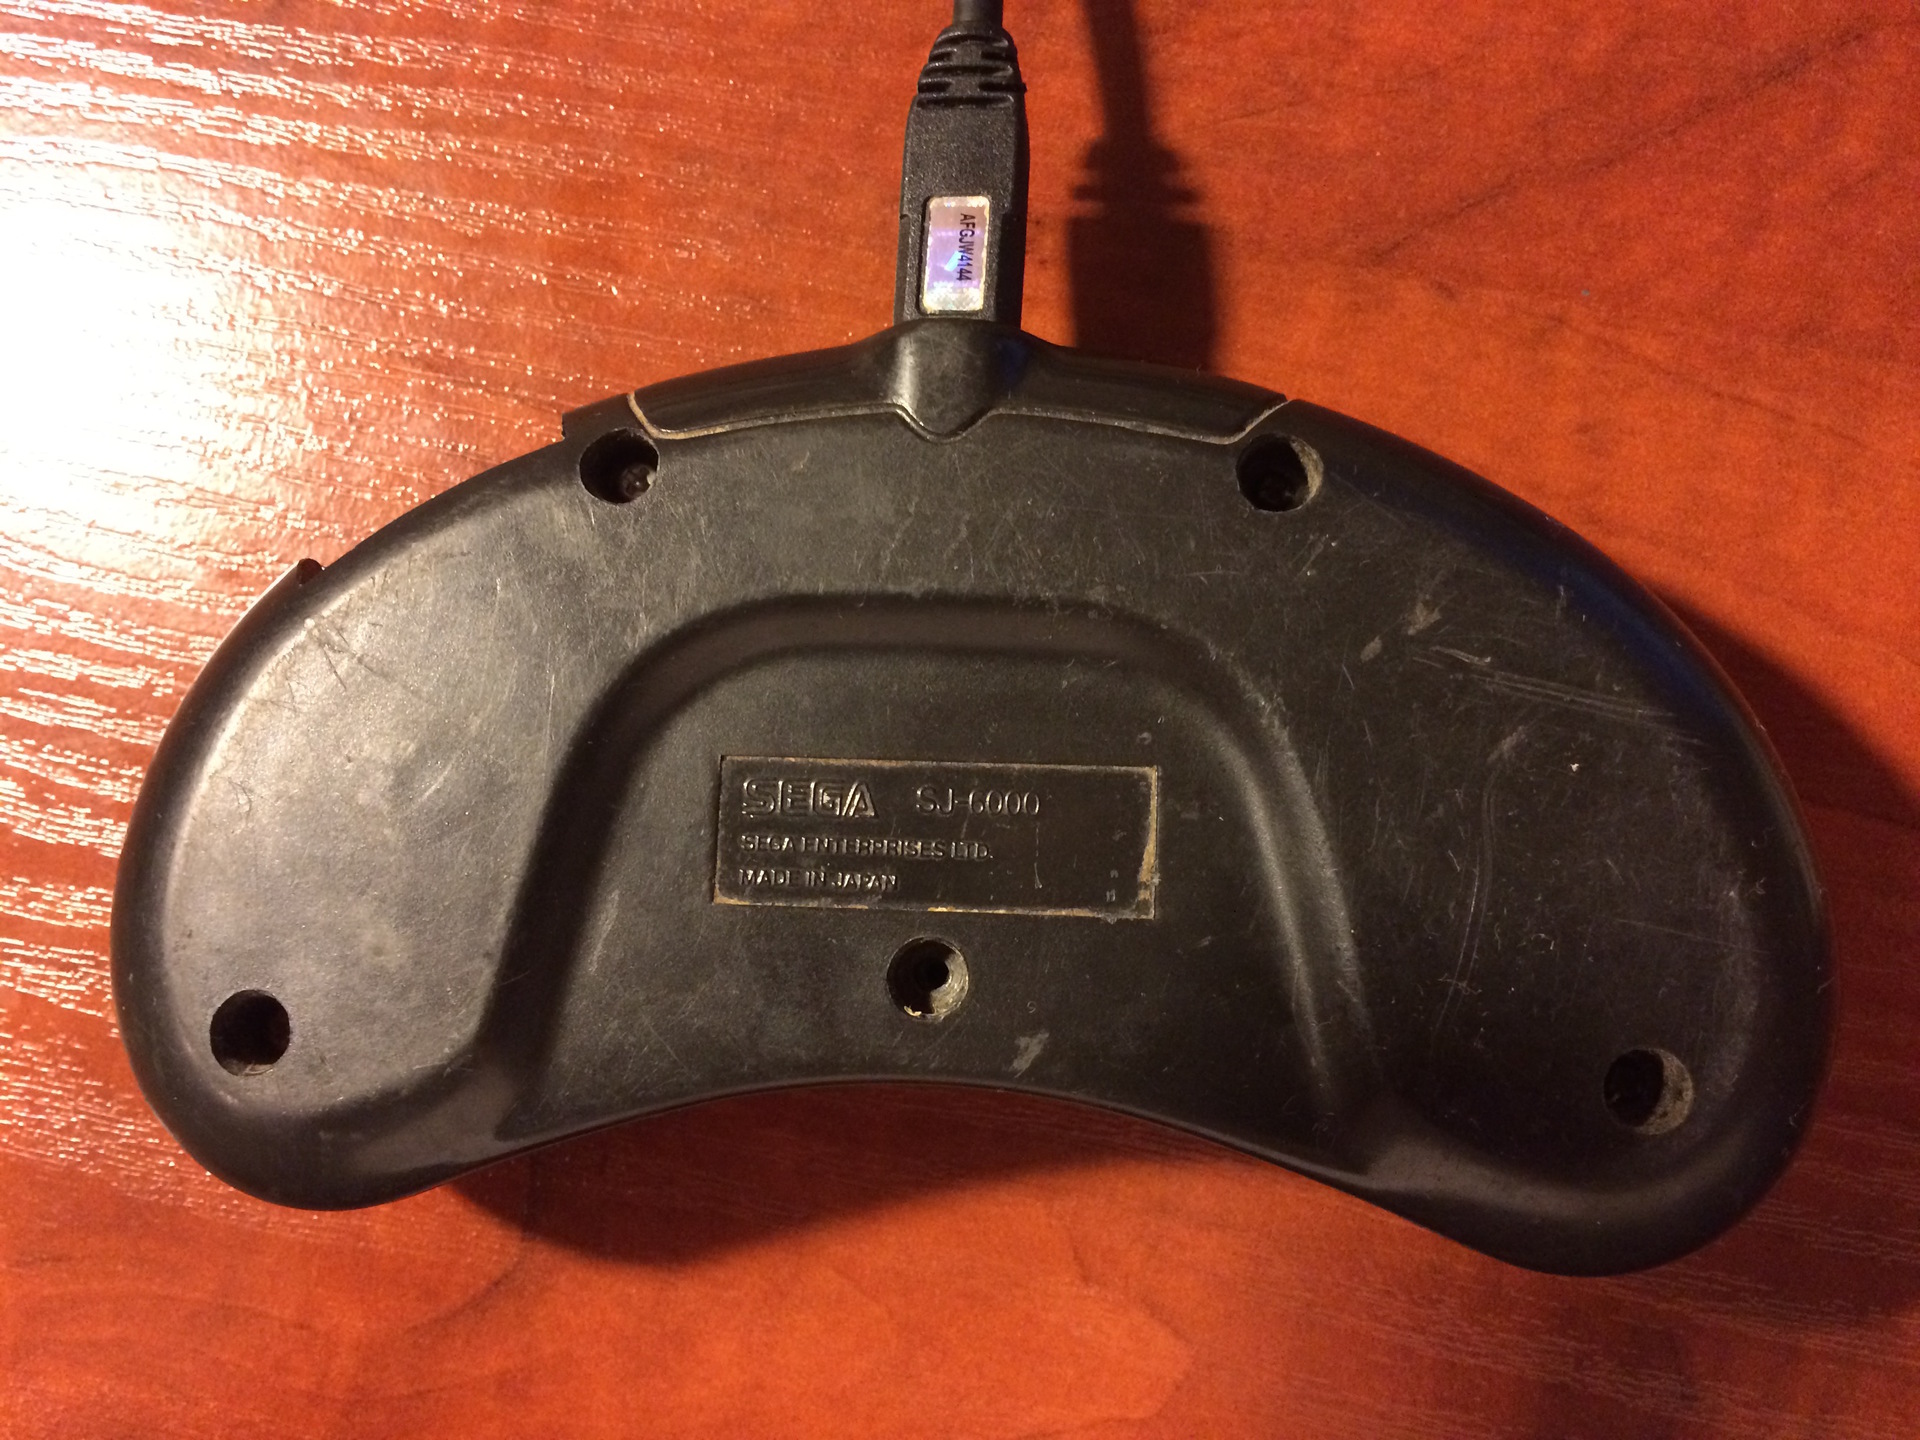
From the bins, a Segovian gamepad in a disassembled state was pulled out onto the white light. To my amazement, it was complete (well, except for the cut tracks and the missing original controller), only 2 bolts were missing.
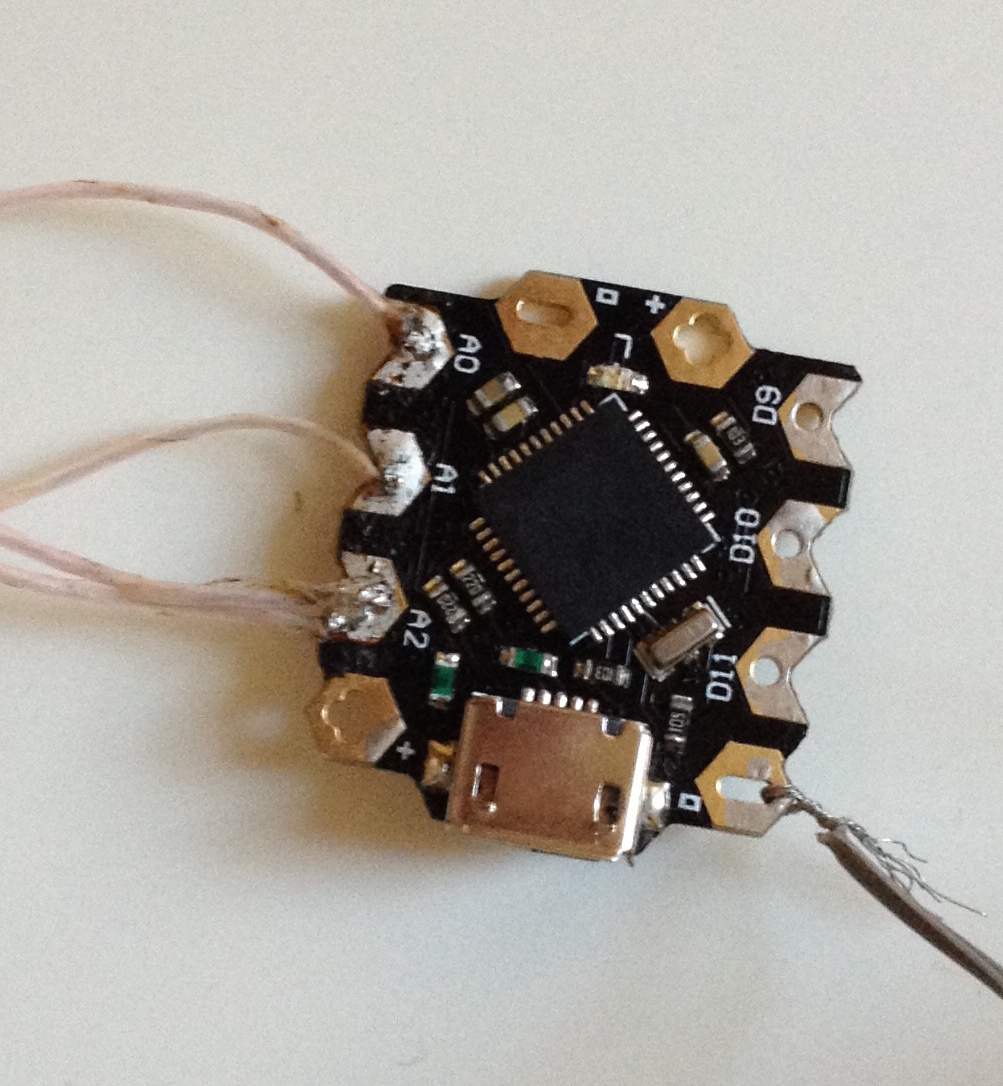
As a controller, I decided to use Beetle , since it was ordered by me once, but not yet tried, and I didn’t really like the “small number of ports”.
And then disappointment awaited me - ports 6, buttons 10. I’m burning there was no limit, but the brain did find a solution, for a start I decided to try to assemble a prototype of 2 buttons, since I decided to use focus with a diode to interrogate 10 buttons using 6 pins. Practically inspired, I sat down to check ... And then the next trouble happened - there are more than 10 buttons on the joystick! In general, it was the moment when it was necessary to look into the documentation, although there were many ideas - for example, to solder (yeah, with my soldering iron, which covers almost all the legs on one side of the chip), or to search for enlightenment on the Internet.
The documentation clearly said that the ports of Beetle are not really 6, but 10, which made the further process boring (as I thought). (Using 8 pins allows you to poll 2 * 6 = 12 buttons, which is what I needed)
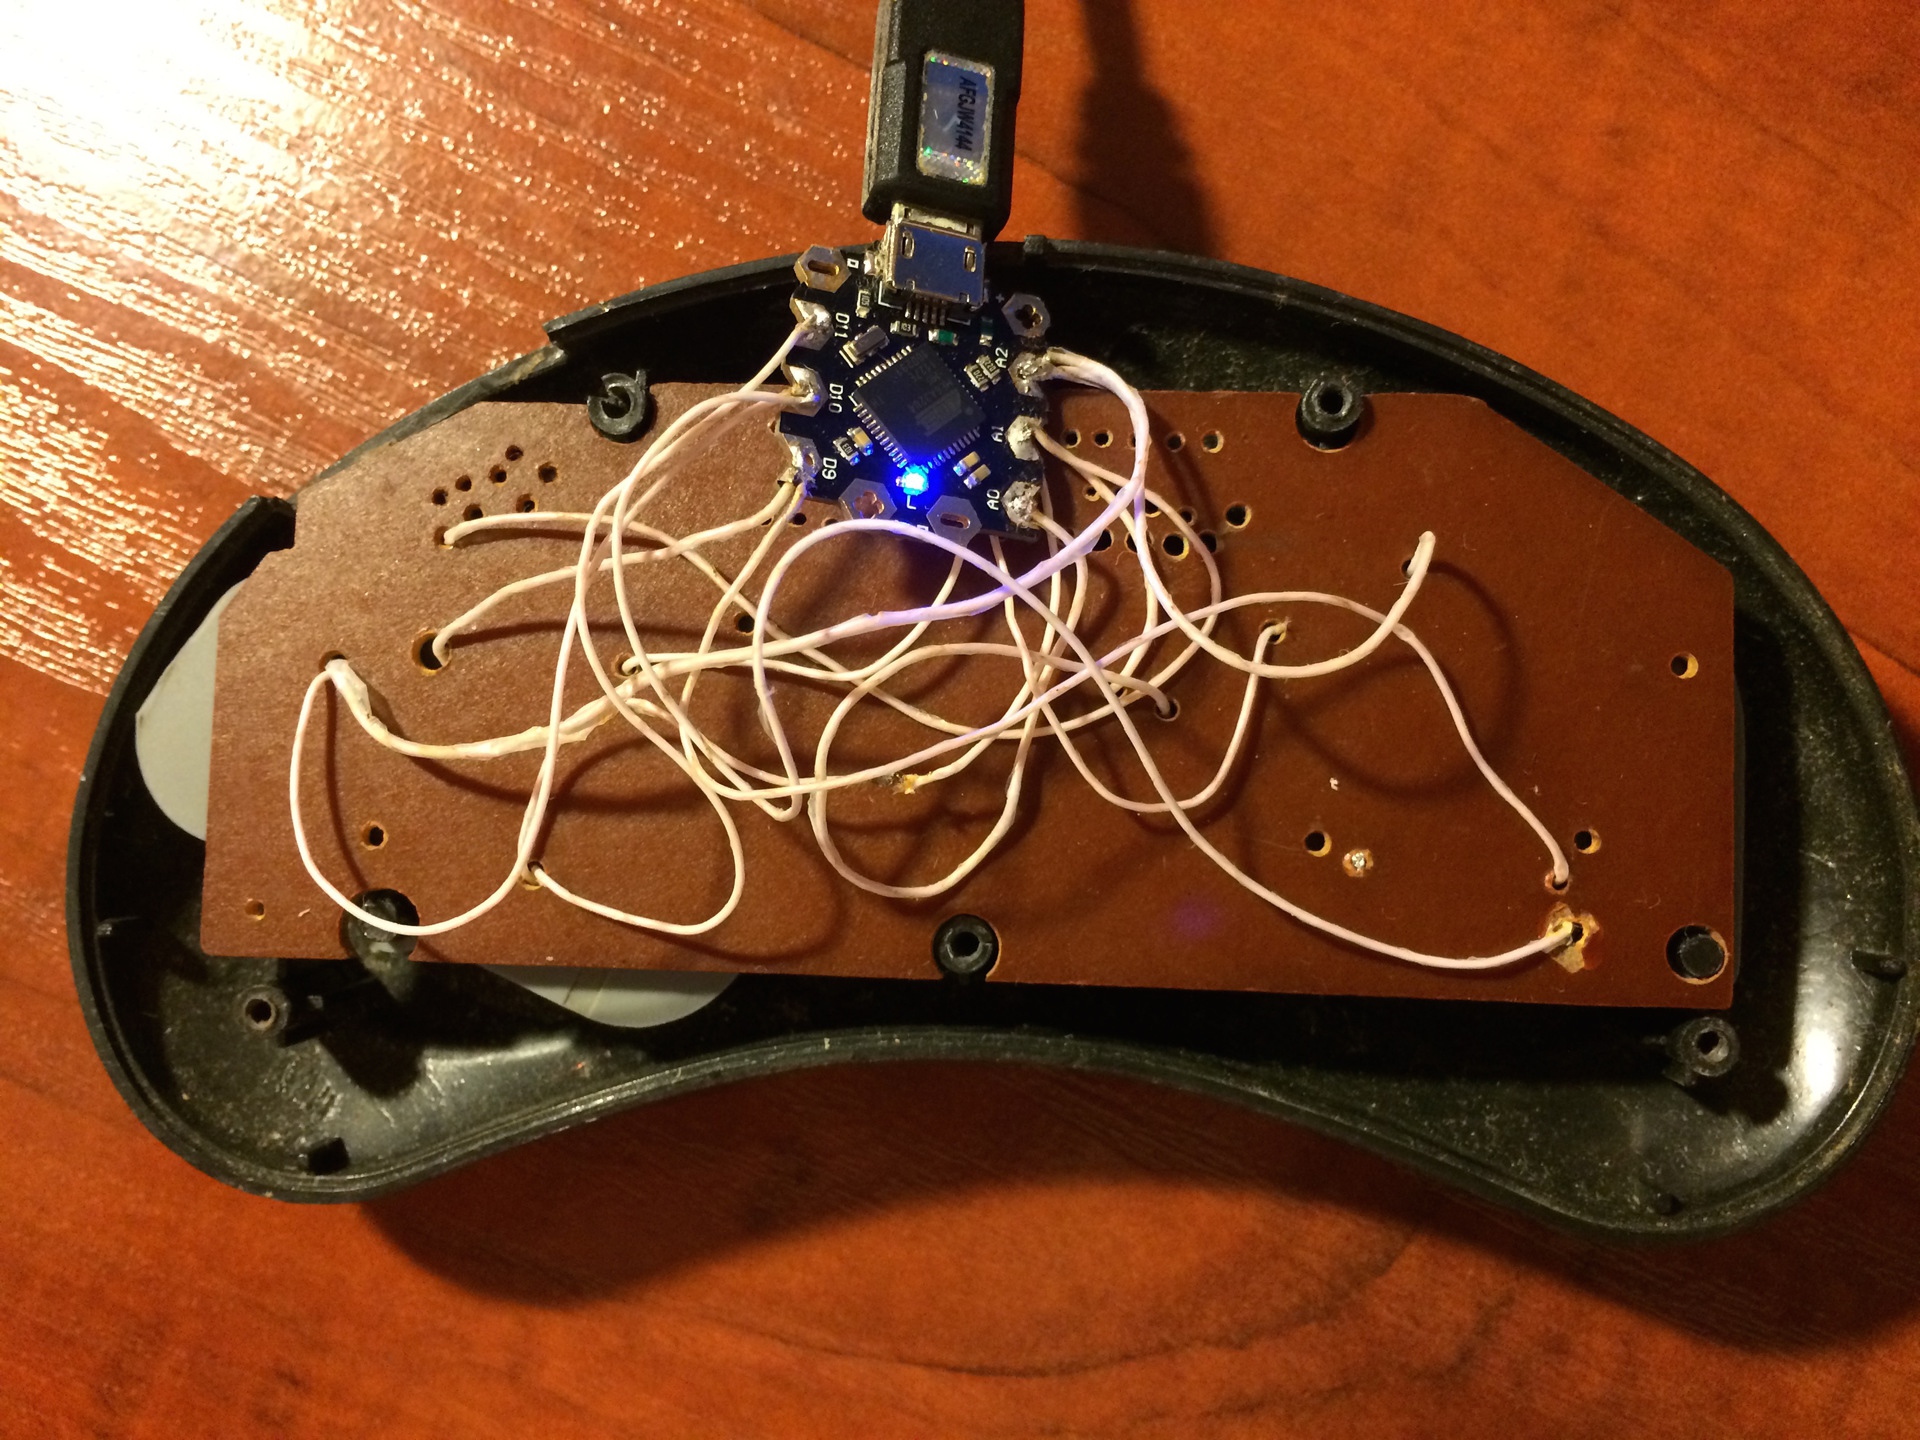
The wiring diagram is a 6 x 2 matrix, because the original board was divorced in a way that was convenient for me. (By the way, in the course of the previous alteration, the tracks were cut to connect the keyboard controller, it was necessary to restore, it turned out ugly)
The scheme of the resulting gamepad:

Quickly throwing an example, I made sure that it does not work ... I do not understand? An example is the simplest. Thinking, I realized that the digital pin lacks the resistance that rubber-conducting buttons give, changed the circuit a little, now it reads the analog signal and compares with half of the maximum. I rewrite contacts, rewrite the program and ... nothing works, at all. The controller is not detected, everything is gone. The code is checked and re-checked, everything should work! And the controller is not seen in any. Motivation falls, we take a break.
After some time, unsuccessfully playing with Beetle, well, everything, I killed the controller with my soldering iron, with regret I took out the Arduino Micro bins, flashing the firmware and again silence! It becomes clear that something is wrong with the code, in the end I find a trivial reason - an infinite loop in loop (), correct it, but I can't stitch it! It turns out the problem when the controller is not seen is solved by pressing the rezet during flashing (or by closing the pins in my case)
The result was a Segovian gamepad, checked, works, I'm happy: I played Metal Gear, Felix The Cat, Super Mario.

Originators here
PS "Trick with LED". Of course, it is not necessary to use an LED, a normal diode is better suited, the essence is simple, instead of two leads, use one connected to different buttons through 2 diodes:

But the "need to do something" worm has already begun its work. After reading the article, I remembered that in my junk years of 15, if not more, the Segov gamepad was lying around. I took it with a firm intention to make a gamepad on the AVR processor (I did not hear about the Arduino then, but I did a couple of small projects on the AVR).
My intention about MSX was further confirmed by my intention, and on Friday I decided to - do it!
')
From the bins, a Segovian gamepad in a disassembled state was pulled out onto the white light. To my amazement, it was complete (well, except for the cut tracks and the missing original controller), only 2 bolts were missing.
As a controller, I decided to use Beetle , since it was ordered by me once, but not yet tried, and I didn’t really like the “small number of ports”.
And then disappointment awaited me - ports 6, buttons 10. I’m burning there was no limit, but the brain did find a solution, for a start I decided to try to assemble a prototype of 2 buttons, since I decided to use focus with a diode to interrogate 10 buttons using 6 pins. Practically inspired, I sat down to check ... And then the next trouble happened - there are more than 10 buttons on the joystick! In general, it was the moment when it was necessary to look into the documentation, although there were many ideas - for example, to solder (yeah, with my soldering iron, which covers almost all the legs on one side of the chip), or to search for enlightenment on the Internet.
The documentation clearly said that the ports of Beetle are not really 6, but 10, which made the further process boring (as I thought). (Using 8 pins allows you to poll 2 * 6 = 12 buttons, which is what I needed)
The wiring diagram is a 6 x 2 matrix, because the original board was divorced in a way that was convenient for me. (By the way, in the course of the previous alteration, the tracks were cut to connect the keyboard controller, it was necessary to restore, it turned out ugly)
The scheme of the resulting gamepad:
Quickly throwing an example, I made sure that it does not work ... I do not understand? An example is the simplest. Thinking, I realized that the digital pin lacks the resistance that rubber-conducting buttons give, changed the circuit a little, now it reads the analog signal and compares with half of the maximum. I rewrite contacts, rewrite the program and ... nothing works, at all. The controller is not detected, everything is gone. The code is checked and re-checked, everything should work! And the controller is not seen in any. Motivation falls, we take a break.
After some time, unsuccessfully playing with Beetle, well, everything, I killed the controller with my soldering iron, with regret I took out the Arduino Micro bins, flashing the firmware and again silence! It becomes clear that something is wrong with the code, in the end I find a trivial reason - an infinite loop in loop (), correct it, but I can't stitch it! It turns out the problem when the controller is not seen is solved by pressing the rezet during flashing (or by closing the pins in my case)
The result was a Segovian gamepad, checked, works, I'm happy: I played Metal Gear, Felix The Cat, Super Mario.
Originators here
PS "Trick with LED". Of course, it is not necessary to use an LED, a normal diode is better suited, the essence is simple, instead of two leads, use one connected to different buttons through 2 diodes:
Source: https://habr.com/ru/post/252495/
All Articles