Wi-Fi thermometer on the ESP8266 + DS18B20 for only $ 4
Recently, Wi-Fi modules based on ESP8266 are gaining more and more popularity. I also decided to join the beautiful, having decided to implement a thermometer that provides data via HTTP. So let's go.
Hardware
ESP8266
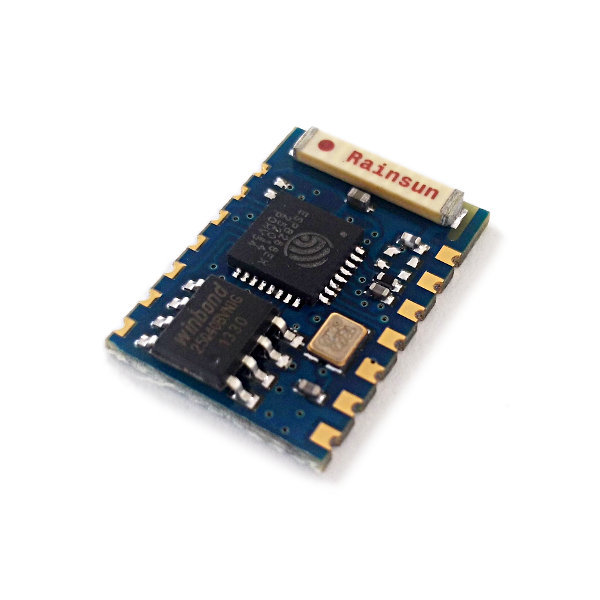
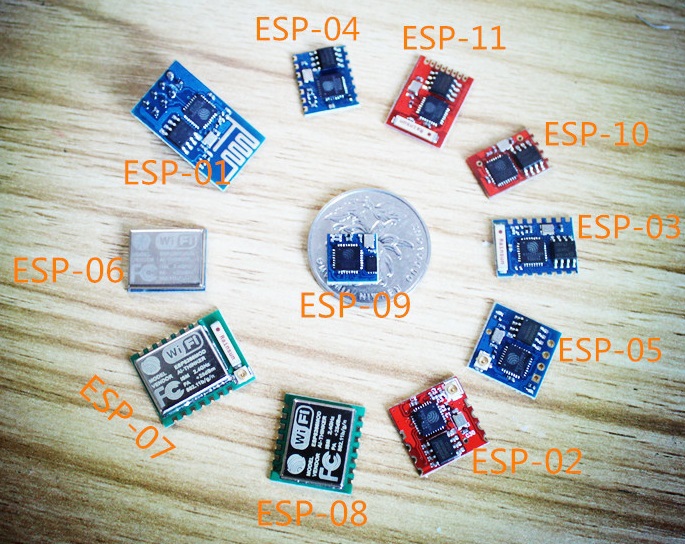
For the project will go any of the modules from ESP-01 to ESP-11, I had ESP-03 (cost ~ $ 3):
')
Especially liked:
ESP-01 is convenient for prototyping (there is a connector for a breadboard), but only 1 GPIO is derived;
ESP-03 - many pins, plus a ceramic antenna;
ESP-07 is the same as ESP-03 + screen and connector for external antenna.
DS18B20
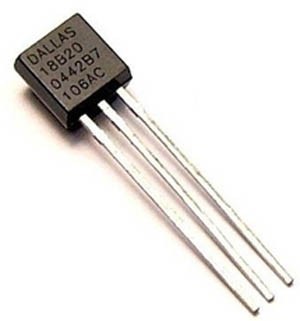
Alternatively, you can buy already with a wire and in a sealed enclosure.
3.3V power supply
A power source of at least 200mA is required.
USB UART
For flashing and debugging. I used a CP2102 based converter
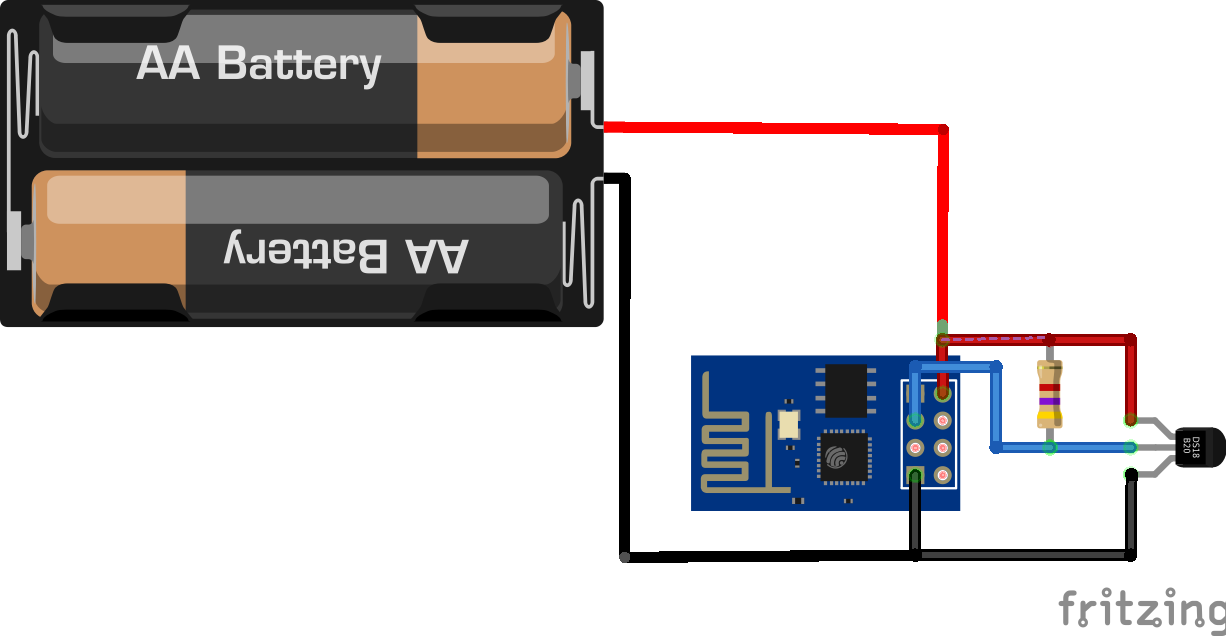
Connection
We connect the power to the ESP8266. On foot CH_PD also served plus.
Attention! Whose modules are not ESP-01, you must submit GPIO15 - GND; GPIO2 -3.3V. ESP-01 has already done this . RX and TX are connected to the USB-UART converter for flashing and debugging code:
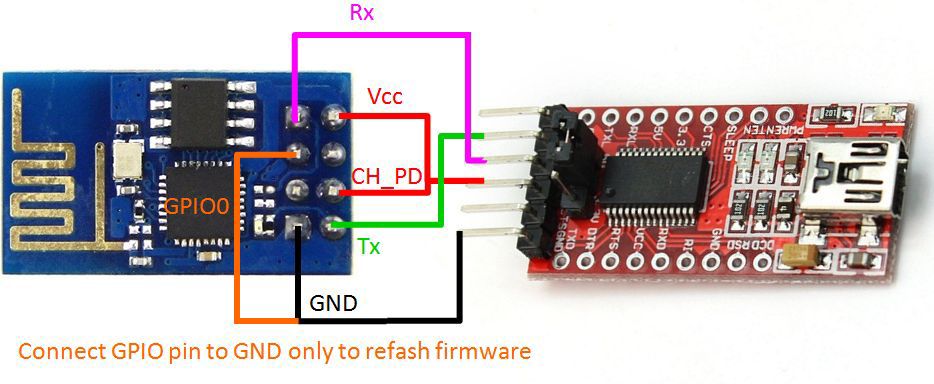
We connect DS18B20 to ESP8266. If you look at the markings: left - ground, medium - signal (GPIO12 to ESP-03), if you have ESP-01, connect to GPIO0, right - power (3.3V). Between the power supply and the signal line, it is desirable to connect a 4.7 kΩ resistor (it works for me with 10 kΩ):
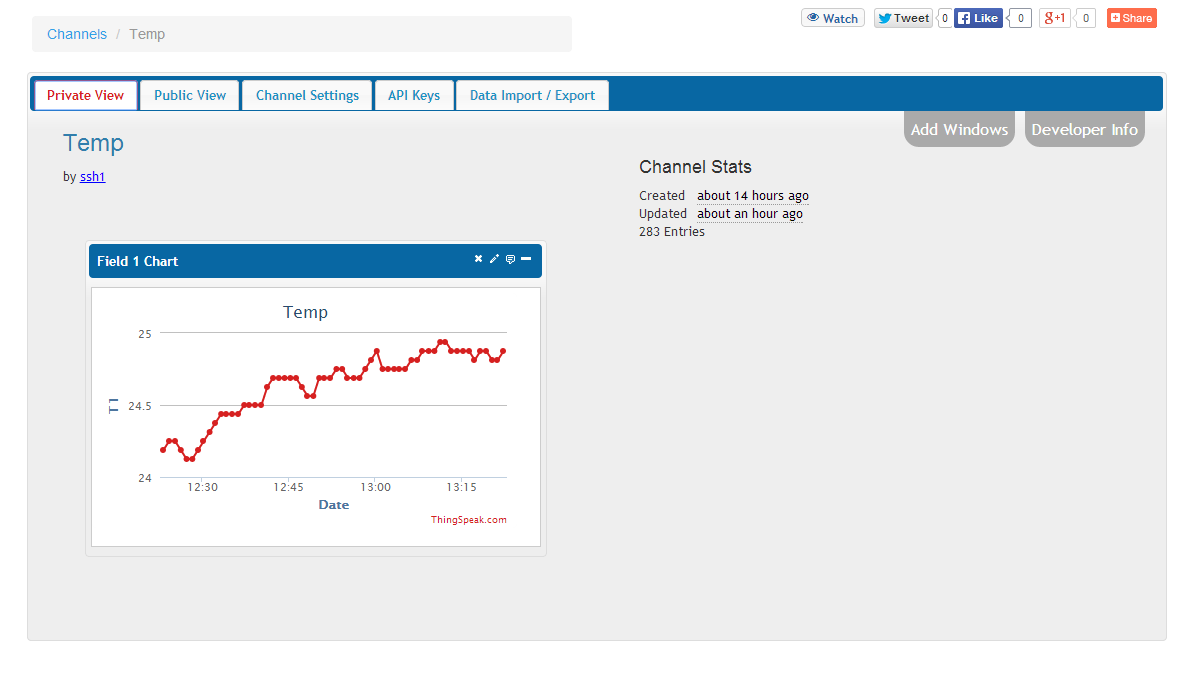
thingspeak.com
We register on thingspeak.com, create a channel, copy a 16-character key from there. It is useful to us for sending temperature data to the cloud.
NodeMCU firmware
NodeMCU is a firmware that allows you to run Lua scripts on ESP8266. Download the latest NodeMCU Flasher and launch it.
We connect GPIO0 to the ground. We select the desired COM port and the speed is 74880 or 115200 (as I understand it, on some versions of ESP8266 the bootloader works on 74880). Click Flash and distort the power to the ESP8266. If the firmware does not start, we check the correctness of the RX, TX connection by running PuTTY at a speed of 74880. At the time of powering the console, a line like " ets Jan 8 2013, rst cause: 1, boot mode: (1.0) " should fall. After correct firmware disconnect GPIO0 from the ground:

Filling Lua Scripts and Running
Download and run LuaLoader . Select the COM port and the speed of 9600, if there is no connection - try to distort the power of the ESP8266 module. We check the connection by clicking on the ChipID button. The chip identifier should be displayed in the console.
= node.chipid() 10371968 Fill the necessary files (button UploadFile):
1. ds18b20.lua - a library for interacting with DS18B20;
2. httpsender.lua is our script that reads temperature data and sends them to thingspeak.com. Do not forget to replace YOURAPIKEY with your key.
gpio = 6 - in the case of connecting the sensor to GPIO12, in the case of GPIO0 - gpio = 3 ( table ):
gpio = 6 require('ds18b20') ds18b20.setup(gpio) function sendData() t=ds18b20.read() print("Temp:"..t.." C\n") -- conection to thingspeak.com print("Sending data to thingspeak.com") conn=net.createConnection(net.TCP, 0) conn:on("receive", function(conn, payload) print(payload) end) -- api.thingspeak.com 184.106.153.149 conn:connect(80,'184.106.153.149') conn:send("GET /update?key=YOURAPIKEY&field1="..t.." HTTP/1.1\r\n") conn:send("Host: api.thingspeak.com\r\n") conn:send("Accept: */*\r\n") conn:send("User-Agent: Mozilla/4.0 (compatible; esp8266 Lua; Windows NT 5.1)\r\n") conn:send("\r\n") conn:on("sent",function(conn) print("Closing connection") conn:close() end) conn:on("disconnection", function(conn) print("Got disconnection...") end) end -- send data every 60000 ms to thing speak tmr.alarm(0, 60000, 1, function() sendData() end ) 3. init.lua - a script initializing WiFi and launching httpsender.lua. Do not forget to register your SSID and password for WiFi:
print("Setting up WIFI...") wifi.setmode(wifi.STATION) --modify according your wireless router settings wifi.sta.config("SSID","SSIDPASSWD") wifi.sta.connect() tmr.alarm(1, 1000, 1, function() if wifi.sta.getip()== nil then print("IP unavaiable, Waiting...") else tmr.stop(1) print("Config done, IP is "..wifi.sta.getip()) dofile("httpsender.lua") end Total:
Plans
This is the first experience with ESP8266. Plans to try the following:
1. Find an alternative to thingspeak. Charts want to move and scale. Maybe someone knows analogues?
2. Humidity sensor (possibly DHT22). It seems to be already in the standard libraries.
3. CO2 sensor based on K-30 sensor.
4. Controlled dawn without additional controller, controlled from ESP8266. Inspired by the publication "Artificial Dawn . "
Materials used
The text is based on the “Low cost WIFI temperature (DS18B20) data logger based on ESP8266 with connectivity to thingspeak.com” . The code for DS18B20 for some reason refused to work, I had to switch to the standard ds18b20.lua library.
Source: https://habr.com/ru/post/252481/
All Articles