Discover FireUI
We recently published a series of articles on application development in FireMonkey. Then we described the key points of building an application, including the creation of a database, data connection using LiveBinding technology, and application deployment on a mobile platform. However, we didn’t consider the details of creating mobile applications in detail. This is largely due to the fact that the process of mobile development in Delphi evolves from version to version. In particular, in the latest XE7 version of Delphi today, a new form designer, FireUI Multi-Device Designer , was introduced. In this article, using a small example, we will look at what FireUI is and how the development methodology has changed with its appearance.

To do this, we will create a simple application for testing. The user displays a picture containing a question and several answer choices. We chose a football theme (why not?).
We can say that this is a variation of the academic task, so in this article we will not focus on the logic of the application. Instead, we will describe in more detail the procedure for creating an application.
')
The most natural choice of DBMS for mobile applications is SQLite . As a database manager, you can use the free version of SQLite Expert or any other product for working with SQLite.
The base will contain a single table in which information about footballs will be stored. The SQL code used to create the table will look like this:
Actually, in this article we use only the Id, PlayerName and Photo fields. The rest is a reserve for the future. We can also fill the table with test data using SQLite Expert.
Upon completion of the preparation of the base, let's proceed directly to writing the program.
In XE7, the approach to creating FireMonkey applications was somewhat changed. Now there is no fundamental difference between the “desktop” and the mobile application. As a result, when creating an application, we select the Multi-Device Application template.
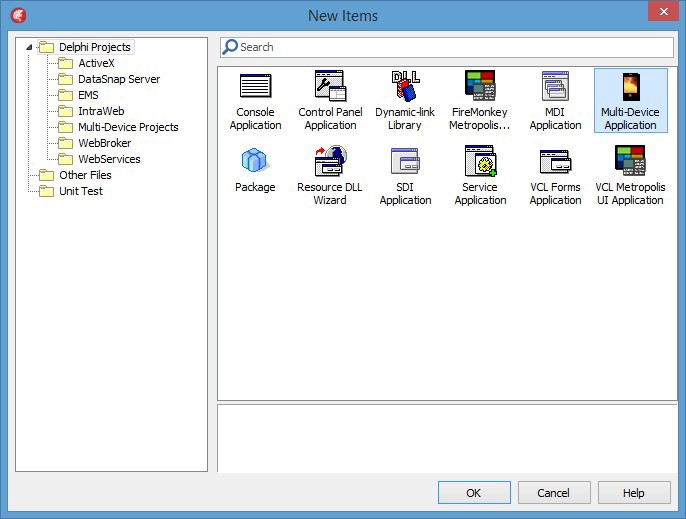
Such a project is able to generate executable files for any of the platforms supported by Delphi: Windows, OS X, IOS and Android. We will be able to select a specific platform during project creation, as well as customize the user interface for a specific type of device.
As in previous versions, we can select the template of the main form of the project using the Select a Multi-Device Application Type dialog.

Tabbed template is suitable for our application.
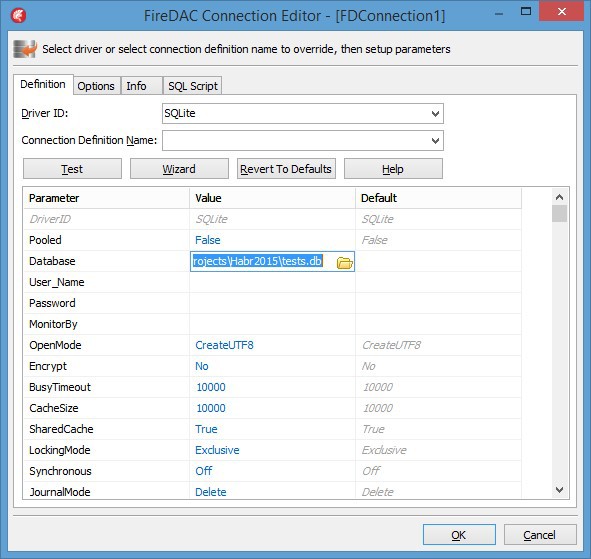
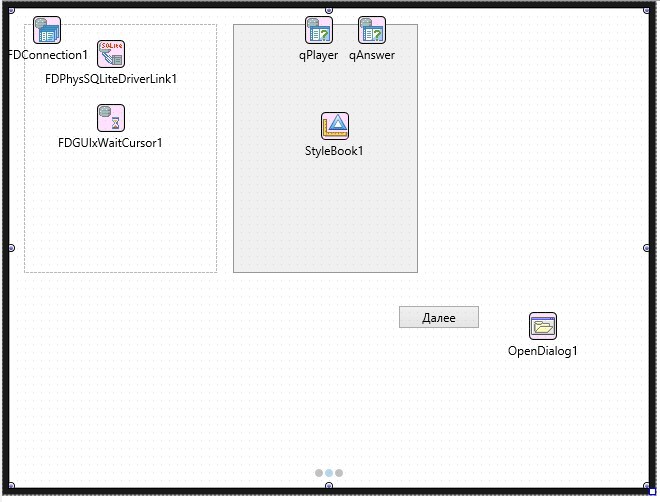
First of all, we will configure the connection to the database using FireDAC . To do this, put three components on the form - TFDConnection, TFDPhysSQLiteDriverLink and TFDGUIxWaitCursor. Double clicking on the TFDConnection component opens the connection editor. Here we should specify the path to the database. The LoginPrompt property is set to False.
To form a list of questions and answers, we will have to create two SQL queries. These queries will be invoked using TFDQuery components.
The first query will display a list of five random players.
Actually, this will be a list of questions.
The second request is similar to the first with the only difference that one of the players will not be included in this list.
This is a list of answers that will be generated for each of the questions. The correct answer is excluded from the list, which will be inserted manually.
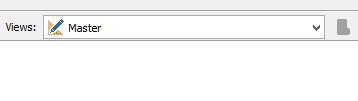
Let's take a closer look at the updated workspace designer in XE7. It has its own toolbar, located just below the main one. This panel contains two buttons and two drop-down lists.

Lists that were available in XE5 / XE6 - were replaced with a list of styles and
list of views. Buttons to change the orientation of the device and to display the device mask.
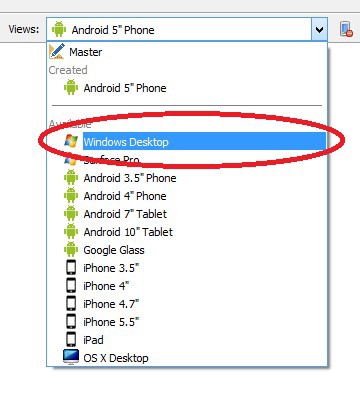
The first of these lists allows you to choose what the interface will look like during the development process.
We will return to the second list a little later. For now, place the necessary controls on the form and create the necessary code.
The basic element of the TTabControl template in our application will contain three tabs that will switch sequentially during the test. Set the TabPosition property to None so that the user will not be able to switch tabs in a random order manually.
On the first tab, place the two buttons. Approximately as shown.

The "Exit" button closes the application.
The button "New game", as it is easy to guess, initiates the testing procedure.
Pressing the button will process as follows:
After pressing the button, the second tab will become active.
The player’s image will be displayed on the left, and a list of answer options on the pAnswers panel on the right.
The variable TrueCount will contain the number of correct answers. Procedure FormAnswers - generates a list of answers.
As it is not difficult to guess from the code, the TRadioButton components are added to the pAnswers panel, the Text property of which as a value will have the player's last name, and the Tag property - Id. In this case, the correct version is taken from the results of the first query (qPlayer), incorrect ones - from the results of the second (qAnswer). The position of the correct answer is random.
When you click the "Next" button, the following code is called:
The GetAnswerID function is implemented as follows.
The third tab simply displays the result.
A new methodology for building a multiplatform application in Delphi XE7 is that first we place all the necessary components on the form using the Master View . Then we create a special view for each platform and device type for which we plan to generate a project. Finally, individually customize each of the views.
Everything that we have done so far has been done in the Master view.
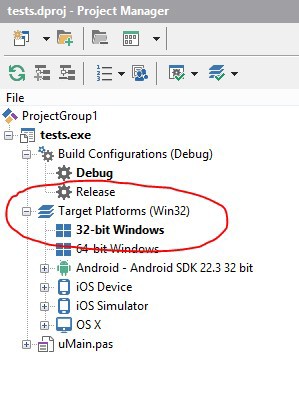
If we now run the application for execution for Windows (we select the target platform as before in the Project Manager), then the main form will look approximately the same as in the designer.
However, now we can select the corresponding view from the list and customize it separately. Let's see how it looks in practice.
Add a view for Windows Desktop, just select it from the list, and connect the style. For this we use the StyleBook component.
A running Windows application will look something like this.

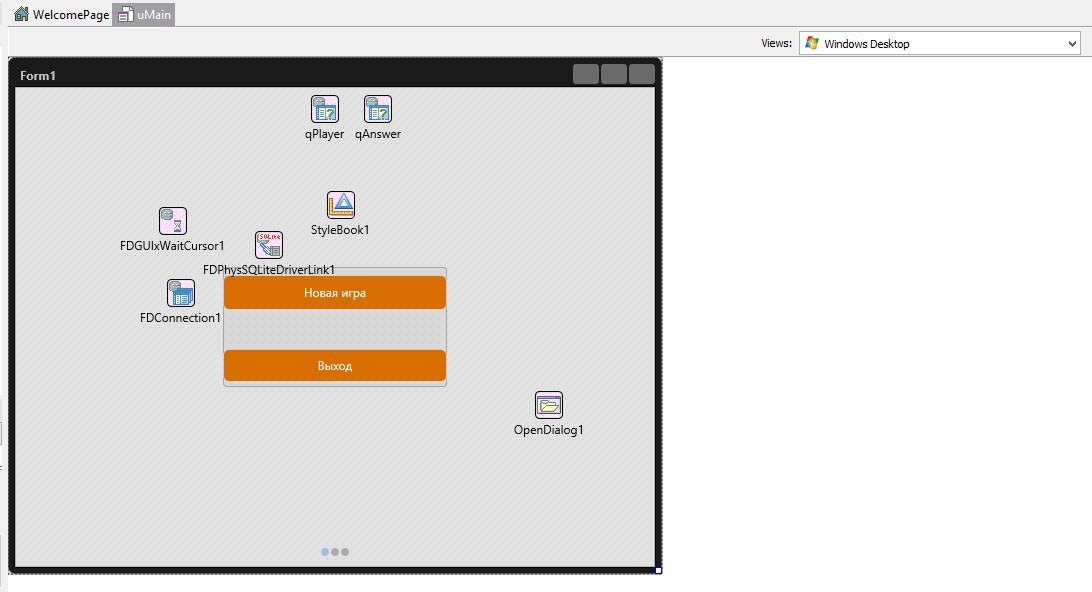
This is how the form in the design will look like with the active presentation of Windows Desktop.
But for the presentation of the Master changes will not occur.

It is important to understand that the changes made in one of the submissions will not affect the others. But if you change the presentation of the Master, then such changes will be "cross-cutting." Naturally, with this approach, there are certain limitations. In simplified form, they boil down to the fact that in all views on the form there must be the same set of components. You cannot remove a component from one view, leaving it in the others. But you can easily change the properties of the components independently in each of the views.
This approach brings some flexibility. Let's see how the FireUI mechanism will work when creating a mobile application for Android.
First of all, we will need to transfer the base to a mobile device. To do this, use the Deployment Manager, familiar to us from previous versions.

As in previous versions of Delphi, we will need to handle the BeforeConnection event of the FDConnection component.
After that we will connect the mobile device and create the corresponding presentation.
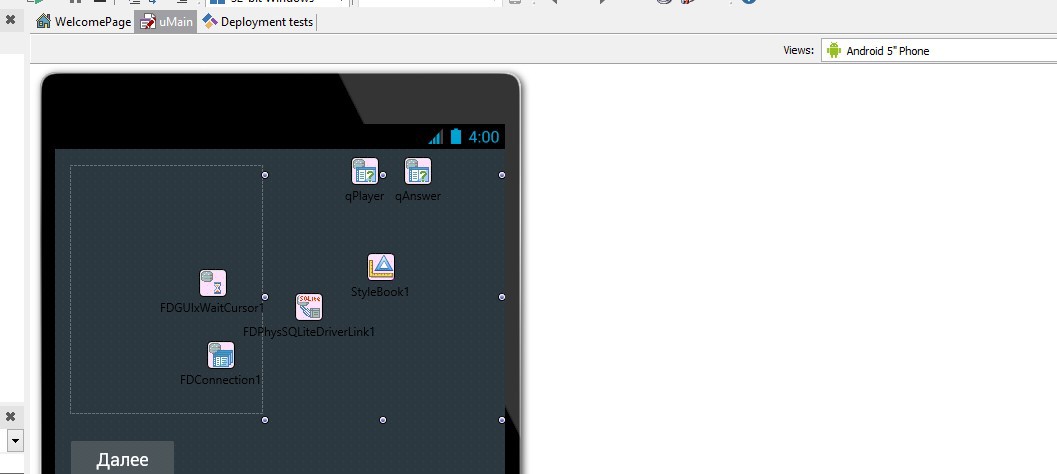
Set up the style and location of controls and run the application on a mobile device. The application takes a completely different form, but, obviously, this is the same application.
In addition, we need to change the handler for the BeforeConnection event of the FDConnection component.
And in order for the application to continue working under Windows, in the Windows Desktop view, we simply will not handle this event.

So, in general terms, we saw what changes occurred in the development methodology of FireMonkey applications with the advent of FireUI. Now we are not talking about a “single code base” and several applications for different platforms, but in fact about a single application that is built for each of the platforms.
In the next article we will try to disassemble the "pitfalls" that can be found in applications that support different platforms. Stay with us.
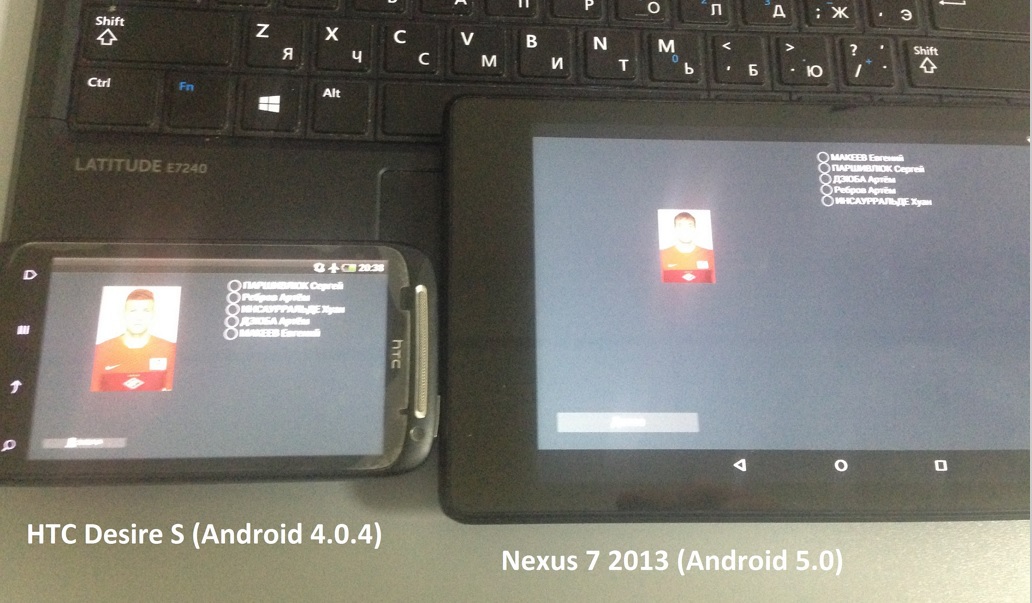
Update 1:
Running application on two devices
To do this, we will create a simple application for testing. The user displays a picture containing a question and several answer choices. We chose a football theme (why not?).
We can say that this is a variation of the academic task, so in this article we will not focus on the logic of the application. Instead, we will describe in more detail the procedure for creating an application.
')
The most natural choice of DBMS for mobile applications is SQLite . As a database manager, you can use the free version of SQLite Expert or any other product for working with SQLite.
The base will contain a single table in which information about footballs will be stored. The SQL code used to create the table will look like this:
CREATE TABLE [Player] ( [Id] INTEGER NOT NULL ON CONFLICT ROLLBACK PRIMARY KEY ON CONFLICT ROLLBACK AUTOINCREMENT, [PlayerName] CHAR(100) NOT NULL, [TeamNumber] INTEGER, [Height] INTEGER, [Weight] INTEGER, [Photo] BLOB, [CountryId] INTEGER); Actually, in this article we use only the Id, PlayerName and Photo fields. The rest is a reserve for the future. We can also fill the table with test data using SQLite Expert.
Upon completion of the preparation of the base, let's proceed directly to writing the program.
In XE7, the approach to creating FireMonkey applications was somewhat changed. Now there is no fundamental difference between the “desktop” and the mobile application. As a result, when creating an application, we select the Multi-Device Application template.
Such a project is able to generate executable files for any of the platforms supported by Delphi: Windows, OS X, IOS and Android. We will be able to select a specific platform during project creation, as well as customize the user interface for a specific type of device.
As in previous versions, we can select the template of the main form of the project using the Select a Multi-Device Application Type dialog.
Tabbed template is suitable for our application.
First of all, we will configure the connection to the database using FireDAC . To do this, put three components on the form - TFDConnection, TFDPhysSQLiteDriverLink and TFDGUIxWaitCursor. Double clicking on the TFDConnection component opens the connection editor. Here we should specify the path to the database. The LoginPrompt property is set to False.
To form a list of questions and answers, we will have to create two SQL queries. These queries will be invoked using TFDQuery components.
The first query will display a list of five random players.
SELECT * FROM Player ORDER BY Random() Limit 5 Actually, this will be a list of questions.
The second request is similar to the first with the only difference that one of the players will not be included in this list.
SELECT * FROM Player WHERE Id<> :Id ORDER BY Random() Limit 4 This is a list of answers that will be generated for each of the questions. The correct answer is excluded from the list, which will be inserted manually.
Let's take a closer look at the updated workspace designer in XE7. It has its own toolbar, located just below the main one. This panel contains two buttons and two drop-down lists.
Lists that were available in XE5 / XE6 - were replaced with a list of styles and
list of views. Buttons to change the orientation of the device and to display the device mask.
The first of these lists allows you to choose what the interface will look like during the development process.
We will return to the second list a little later. For now, place the necessary controls on the form and create the necessary code.
The basic element of the TTabControl template in our application will contain three tabs that will switch sequentially during the test. Set the TabPosition property to None so that the user will not be able to switch tabs in a random order manually.
On the first tab, place the two buttons. Approximately as shown.
The "Exit" button closes the application.
procedure TfMain.btnExitClick(Sender: TObject); begin Close; end; The button "New game", as it is easy to guess, initiates the testing procedure.
Pressing the button will process as follows:
procedure TfMain.btnNewGameClick(Sender: TObject); begin qPlayer.Close; qPlayer.Open; // qPlayer.First; TrueCount := 0; TabControl1.TabIndex := 1; FormAnswers(4); end; After pressing the button, the second tab will become active.
The player’s image will be displayed on the left, and a list of answer options on the pAnswers panel on the right.
procedure TfMain.FormAnswerArray(Count, qId: integer); var aPos, i: integer; rb: TRadioButton; BlobStream: TStream; begin Randomize; aPos := Random(Count - 1); try BlobStream := qPlayer.CreateBlobStream(qPlayer.FieldByName('Photo'), TBlobStreamMode.bmRead); Image1.Bitmap.LoadFromStream(BlobStream); finally BlobStream.Free; end; qAnswer.Close; qAnswer.ParamByName('Id').AsInteger := qId; qAnswer.Open; i := 0; while not qAnswer.Eof do begin if i > Count then Break; try rb := TRadioButton.Create(pAnswers); rb.Position.X := 0; // Image1.Position.X +10; rb.Position.Y := i * 20; rb.Parent := pAnswers; pAnswers.InsertComponent(rb); rb.Size.Width := 250; finally end; if i = aPos then begin rb.Text := qPlayerPlayerName.AsString; rb.Tag := qPlayerId.AsInteger; end else begin rb.Text := qAnswerPlayerName.AsString; rb.Tag := qAnswerId.AsInteger; qAnswer.Next; end; Inc(i); end; end; procedure TfMain.ClearRadioButtons; var i, j: integer; begin for i := pAnswers.ChildrenCount - 1 downto 0 do begin if pAnswers.Children[i].ClassNameIs('TRadioButton') then begin (pAnswers.Children[i] as TRadioButton).Visible := FAlse; pAnswers.Children[i].Free; end; end; pAnswers.Repaint; end; procedure TfMain.FormAnswers(Count: integer); begin ClearRadioButtons; FormAnswerArray(Count, qPlayerId.AsInteger); end; The variable TrueCount will contain the number of correct answers. Procedure FormAnswers - generates a list of answers.
As it is not difficult to guess from the code, the TRadioButton components are added to the pAnswers panel, the Text property of which as a value will have the player's last name, and the Tag property - Id. In this case, the correct version is taken from the results of the first query (qPlayer), incorrect ones - from the results of the second (qAnswer). The position of the correct answer is random.
When you click the "Next" button, the following code is called:
procedure TfMain.btnNextClick(Sender: TObject); var answID: integer; begin answID := GetAnswerID; Inc(cnt); if answID = qPlayerId.AsInteger then begin Inc(TrueCount); ShowMessage(''); end else begin ShowMessage(' '); end; if qPlayer.RecNo <> 5 then begin qPlayer.Next; FormAnswers(4); end else begin TabControl1.TabIndex := 2; end; // if qPlayer.Eof then if qPlayer.RecNo = 5 then begin lResult.Text := ' ' + IntToStr(TrueCount) + ' 5'; btnNext.Text := ''; end; end; The GetAnswerID function is implemented as follows.
function TfMain.GetAnswerID: integer; var i, j, k: integer; begin Result := -1; for i := tiQuest.ChildrenCount - 1 downto 0 do begin if tiQuest.Children[i].ClassNameIs('TTabItemContent') then begin for j := tiQuest.Children[i].ChildrenCount - 1 downto 0 do begin if tiQuest.Children[i].Children[j].ClassNameIs('TPanel') then for k := tiQuest.Children[i].Children[j].ChildrenCount - 1 downto 0 do if tiQuest.Children[i].Children[j].Children[k].ClassNameIs ('TRadioButton') then if (tiQuest.Children[i].Children[j].Children[k] as TRadioButton).IsChecked then begin Result := (tiQuest.Children[i].Children[j].Children[k] as TRadioButton).Tag; Break; end; end; end; end; end; The third tab simply displays the result.
A new methodology for building a multiplatform application in Delphi XE7 is that first we place all the necessary components on the form using the Master View . Then we create a special view for each platform and device type for which we plan to generate a project. Finally, individually customize each of the views.
Everything that we have done so far has been done in the Master view.
If we now run the application for execution for Windows (we select the target platform as before in the Project Manager), then the main form will look approximately the same as in the designer.
However, now we can select the corresponding view from the list and customize it separately. Let's see how it looks in practice.
Add a view for Windows Desktop, just select it from the list, and connect the style. For this we use the StyleBook component.
A running Windows application will look something like this.
This is how the form in the design will look like with the active presentation of Windows Desktop.
But for the presentation of the Master changes will not occur.
It is important to understand that the changes made in one of the submissions will not affect the others. But if you change the presentation of the Master, then such changes will be "cross-cutting." Naturally, with this approach, there are certain limitations. In simplified form, they boil down to the fact that in all views on the form there must be the same set of components. You cannot remove a component from one view, leaving it in the others. But you can easily change the properties of the components independently in each of the views.
This approach brings some flexibility. Let's see how the FireUI mechanism will work when creating a mobile application for Android.
First of all, we will need to transfer the base to a mobile device. To do this, use the Deployment Manager, familiar to us from previous versions.
As in previous versions of Delphi, we will need to handle the BeforeConnection event of the FDConnection component.
procedure TfMain.FDConnection1BeforeConnect(Sender: TObject); begin {$IFDEF ANDROID} FDConnection1.Params.Values['Database'] := IncludeTrailingPathDelimiter (System.IOUtils.TPath.GetDocumentsPath) + 'tests.db'; {$ENDIF} end; After that we will connect the mobile device and create the corresponding presentation.
Set up the style and location of controls and run the application on a mobile device. The application takes a completely different form, but, obviously, this is the same application.
In addition, we need to change the handler for the BeforeConnection event of the FDConnection component.
procedure TfMain.FDConnection1BeforeConnect(Sender: TObject); begin FDConnection1.Params.Values['Database'] := IncludeTrailingPathDelimiter (System.IOUtils.TPath.GetDocumentsPath) + 'tests.db'; end; And in order for the application to continue working under Windows, in the Windows Desktop view, we simply will not handle this event.
So, in general terms, we saw what changes occurred in the development methodology of FireMonkey applications with the advent of FireUI. Now we are not talking about a “single code base” and several applications for different platforms, but in fact about a single application that is built for each of the platforms.
In the next article we will try to disassemble the "pitfalls" that can be found in applications that support different platforms. Stay with us.
Update 1:
Running application on two devices
Source: https://habr.com/ru/post/252345/
All Articles