Taming dinosaurs, or as I wrote my own host controller for a 3D printing lab

In this article I want to talk about my experience in developing free software for managing 3D printers on Qt5, problems and features of communication with RepRap and other joys.
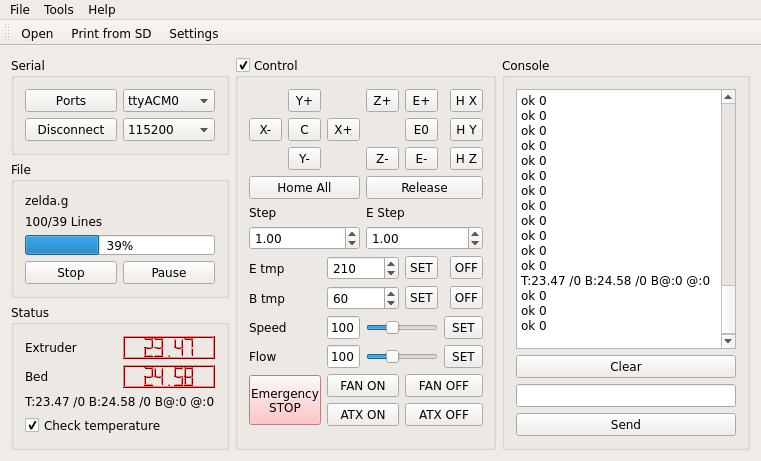
The result of this experience was RepRaptor - a minimalistic free host-controller for 3D printers.
')
I invite everyone interested under the cat.
A bit of background
Over the past year I have become very interested in 3D printing, and not just 3D printing, but its free component - the RepRap project. The administration of the university supported the undertakings, and during this year, by my efforts and like-minded people, the laboratory of 3D printing was opened in MSTU MIREA.
Very soon a problem arose - the software existing in the ecosystem had shortcomings that strongly interfered with the work. Therefore, it was decided to eliminate these problems by creating your own software.
In order not to hurt the authors of the existing software inadvertently, I will not poke a finger, especially the problems in a number of free 3D printing software are common:
- They are all written in interpreted languages, sometimes opening and parsing files on a weak gland sometimes takes up to 10 minutes;
- Those of them that are written in Mono also periodically fall, and doom a bunch of plastic to an untimely demise (The fault here, most likely, is not Mono itself, but minimal attention to the assemblies on it from the authors);
- There are few codes in the interface, but there is a very redundant functionality (I apologize for my minimalism);
Why Qt?

How to fix it all? It's pretty simple to write a host in a language that will work faster and make it as simple as possible. No sooner said than done. Qt was chosen for development, and not by chance. This wonderful framework not only spreads freely, but also allows you to write cross-platform applications without the accompanying multiplatform in C ++ pain, as well as the QSerialPort that I periodically use not so long ago became the official part of the framework.
In addition, I do not know a single IDE, which is as fast and convenient for me as QtCreator.
Since all the windows, and indeed Ui itself, were generally made using .ui files in the Qt WSIWYG editor, I will omit everything connected directly to the interface. We will look "under the hood."
Where to start, or how printers talk
It is necessary to communicate with a whole zoo of various boards (Melzi, RAMPS 1.4, Teensylu, Gen7 1.5.1, etc.), since the community of the RepRap project has long been determined with the protocol and the list of commands. To communicate with any board using the serial port and the G-code protocol.
In our laboratory of 3D printing, we use the Repetier firmware, which, along with the Marlin and Teacup firmware, supports most of the standard codes.
First disappointment - protocol
The specification of serial ports RS-232 is extensive and interesting, but, unfortunately, it is rarely used where it is fully used. When emulating a serial port via USB, very often only the TX and RX lines responsible for data transfer are connected to the microcontroller. Lines, such as DTR (connection reset), are not commonly used, and this is sad.
Instead of hardware control over data transfer, RepRap-compatible printers use a very simple protocol, organized on the PingPong principle:
- The printer reports a simple wait line;
- The host sends a G-Code command ending in a line break;
- The printer confirms receipt of the command with the line Ok <line number> .
It looks like this:
wait
G1 X10 Y10 Z10
ok 0
G1 X20 Y5 Z3
ok 0
Notice the 0 after “ok”? This is the line number. If desired, you can use the checksum and line number when
sending commands to the printer:
N1 G1 X10 Y10 Z10 * cs
ok 1
N2 G1 X20 Y5 Z3 * cs
ok 2
Where cs is the calculated check for the string.
Typically, code generators that convert 3D models to G-Code for printing checksums do not generate, but leave it at the discretion of the host.
The printer has a buffer, the size of which in most cases is 16 commands.
Protocol implementation
Qt has a great feature for making life easier for the developer — signals and slots.
Signal is a new concept for C ++. A signal is declared in a class like a slot:
class Example : public QObject { Q_OBJECT public: Example(); signals: void exampleSignal(int); } The signal can not return anything, so it is always of type void, and instead of the argument, the type of the variable transmitted by the signal is indicated. It is not required to initialize it.
The signal is called from any method of the parent class, and it is very simple:
emit exampleSignal(100); After such a call, all slots attached to this signal will be called as soon as possible in the order of attachment, and the value 100 is transmitted to them.
What is a slot? In short, this is the most common method declared by the slot.
class Example2 : public QObject { Q_OBJECT public: Example(); public slots: void exampleSlot(int); } Connecting the signal to the slot is also very simple:
Example e1; Example2 e2; connect(&e1, SIGNAL(exampleSignal(int)), &e2, SLOT(exampleSlot(int))); There is a limitation - the signal and the slot must have the same transmitted type.
Given the signals and slots, it is very easy to write an asynchronous receiver / transmitter for communication over a serial port.
The easiest part is reading.
To implement serial port communication, use the above-mentioned QSerialPort (an instance of which we call “printer”), which has a readyRead () signal, which is called every time information arrives at the port. All that is required of us is to create a slot in its class, which we will call when this signal appears, connect them, and wait. What are we going to read? As already described above, we are primarily interested in the answers ok and wait . Since our code is executed asynchronously, and the printer has a buffer, we need to save somewhere the number of lines we have taken, so that when we send it, we need to know how much we can send. Store them in the variable "readyRecieve".
Slot:
void MainWindow::readSerial() { if(printer.canReadLine()) // , { QByteArray data = printer.readLine(); // if(data.startsWith("ok")) readyRecieve++; // else if(data.startsWith("wait")) readyRecieve = 1; // , - 1 printMsg(QString(data)); // , } } Excellent, with the reception figured out. And what about shipping? Here we see a protocol defect. We have no hardware command to indicate readiness to receive data, which means that we do not have a corresponding signal from our QSerialPort. So we will send by timer. The timer in Qt works to disgrace is simple and convenient - we create an instance of the QTimer class, connect its timeout () signal with our slot, which will be executed by this timer, and then launch it - timer.start (ms). Subsequently, it was found that, depending on the performance of the PC, the optimal interval is from 1 to 5 ms. By the way, if you specify the timer interval 0, then it will be executed as soon as Qt has a free minute.
It is also worth mentioning that we are sending either a command from the user or a file. Since parsing a file comes down to an ordinary file loading into an array, as well as filtering lines entirely from comments (so as not to send too much to the printer and not cluttering up memory), I decided to omit this part. An array of lines from a file is called gcode.
Implementing send:
void MainWindow::sendNext() { if(injectingCommand && printer.isWritable() && readyRecieve > 0) // { sendLine(userCommand); // (userCommand injectingCommand ) readyRecieve--; // , injectingCommand=false; // , return; // } else if(sending && !paused && readyRecieve > 0 && !sdprinting && printer.isWritable()) //, { if(currentLine >= gcode.size()) // { sending = false; // - currentLine = 0; // ui->sendBtn->setText("Send"); // ui->pauseBtn->setDisabled("true"); // ui->filelines->setText(QString::number(gcode.size()) // + QString("/") + QString::number(currentLine) + QString(" Lines")); return; // } sendLine(gcode.at(currentLine)); // - currentLine++; // readyRecieve--; // ui->filelines->setText(QString::number(gcode.size()) // + QString("/") + QString::number(currentLine) + QString(" Lines")); ui->progressBar->setValue(((float)currentLine/gcode.size()) * 100); // } } Well, have you figured out the serial port? Not yet. We also need to catch errors. To do this, we again resort to signals and slots, this time we will listen to the error signal (SerialPort :: SerialPortError error) from our QSerialPort instance:
void MainWindow::serialError(QSerialPort::SerialPortError error) { if(error == QSerialPort::NoError) return; // - if(printer.isOpen()) printer.close(); // - , if(sending) paused = true; // - - ui->connectBtn->setText("Connect"); // ui->sendBtn->setDisabled(true); // ui->pauseBtn->setDisabled(true); // ui->controlBox->setDisabled(true); // ui->consoleGroup->setDisabled(true); // qDebug() << error; // QString errorMsg; // switch(error) { case QSerialPort::DeviceNotFoundError: errorMsg = "Device not found"; break; case QSerialPort::PermissionError: errorMsg = "Insufficient permissions\nAlready opened?"; break; case QSerialPort::OpenError: errorMsg = "Cant open port\nAlready opened?"; break; case QSerialPort::TimeoutError: errorMsg = "Serial connection timed out"; break; case QSerialPort::WriteError: case QSerialPort::ReadError: errorMsg = "I/O Error"; break; case QSerialPort::ResourceError: errorMsg = "Disconnected"; break; default: errorMsg = "Unknown error\nSomething went wrong"; break; } ErrorWindow errorwindow(this, errorMsg); // errorwindow.exec(); } 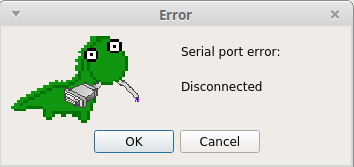
Inaccurate handling of the printer upsets the dinosaur,% username%.
Making our host smarter
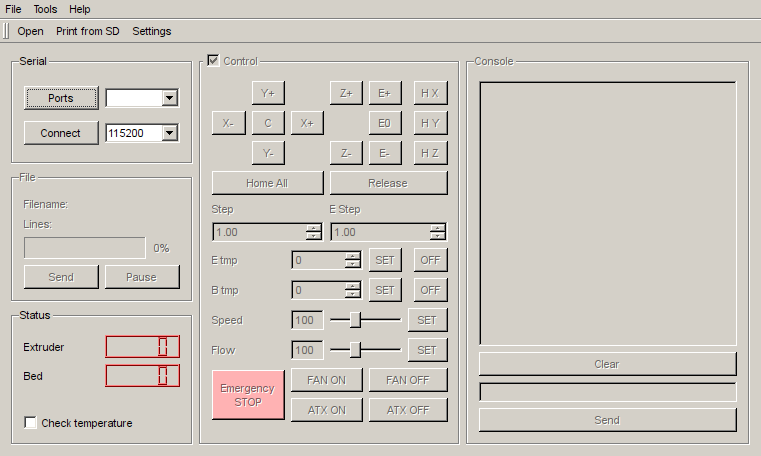
We take out the command buttons
We learned how to send a file to the serial port and properly keep the protocol, but for a full-fledged host this is not enough. In addition to the ability to send a file line by line, you must also give the user the ability to send commands himself. As hammered by hand, and displayed on the buttons in the interface.
What teams should withdraw? Opinions of the authors of different, already existing programs diverge, but I tried to bring out the maximum:
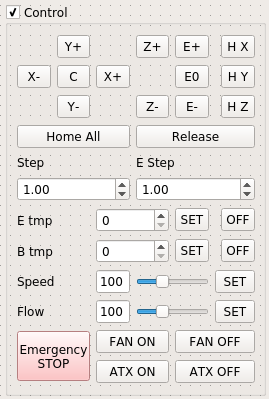
There are no icons yet, but they will definitely appear in future releases. The implementation of most of these buttons is quite simple:
void MainWindow::homeall() { injectCommand("G28"); } The injectCommand method, which we have already learned how to work earlier, is also quite simple in the implementation of the code sender:
void MainWindow::injectCommand(QString command) { injectingCommand = true; // userCommand = command; // } Get additional data
RepRap is a harsh DIY. So severe that anything happens:
It is not always during setup that you can be sure that the printer will behave as it should. One of the very important values is temperature, and it is vital to monitor it. Some people on the printer have displays that display operational information, but not all. In addition, you can physically located far from the printer, or at the wrong angle, and the display will no longer be read. That is why you want to display the temperature, and the more quickly - the better.
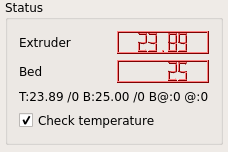
Under the temperature we define a separate group of elements.
How to know her? During heating, the printer stops receiving commands, and instead of ok or wait, it starts sending temperature. The temperature string looks like this:
T: 196.94 / 210 B: 23.19 / 0 B @: 0 @: 4
Readable for humans, but not very convenient for parsing. In the first versions I analyzed this line right in the slot responsible for receiving information, but tests showed that parsing the line right in this slot slows down the program too much. Until recently, I tried to avoid working with streams, since one of the main reasons why RepRaptor was written was speed. Multithreading perfectly speeds up the work of software on multi-core systems, but everything was not so rosy with the hardware. However, there was no choice left - it was necessary to transfer to a separate stream either the parsing or the connection itself. It was decided to compromise - move the analysis to a separate stream, and allow the user to turn off the temperature check.
How is multithreading implemented in Qt? Very comfortably. There are several ways to create a separate thread. The full-fledged way is to create a stream using QThread , but we do not need a full-fledged stream for simple parsing of the string, so we will use another method — we will pass our parse function along with the arguments to the QFuture object, and will follow it. It is done this way - first we need to create an instance of QFutureWatcher, a class that monitors QFuture and informs us about its status. Then you need to write our parse function. Since the function can return only one variable, I decided to create a special type for temperature transfer:
typedef struct { double e, b; } TemperatureReadings; And the parsing function:
TemperatureReadings MainWindow::parseStatus(QByteArray data) { QString extmp = ""; // QString btmp = ""; // for(int i = 2; data.at(i) != '/'; i++) // { extmp+=data.at(i); } for(int i = data.indexOf("B:")+2; data.at(i) != '/'; i++) // { btmp+=data.at(i); } TemperatureReadings t; te = extmp.toDouble(); // tb = btmp.toDouble(); return t; // } Now it only remains to give this function to the stream when conveniently (we insert an additional check into the receive function automaton):
//.... else if(checkingTemperature && data.startsWith("T:")) // , { QFuture<TemperatureReadings> parseThread = QtConcurrent::run(this, &MainWindow::parseStatus, data); // QFuture (QtConcurrent::run QFuture parseStatus) statusWatcher.setFuture(parseThread); // QFuture ui->tempLine->setText(data); // } //... It remains only to create a slot to connect a signal to it, which sends the results of the function execution from QFutureWatcher:
void MainWindow::updateStatus() { TemperatureReadings r = statusWatcher.future().result(); // ui->extruderlcd->display(re); // ui->bedlcd->display(rb); sinceLastTemp.restart(); // } That's all, now every time the printer informs us about the temperature - we parse this line and display it beautifully in the interface.
The problem is that the printer itself sends it only during heating, but we can ask it to send it to us at any other time by sending a command to check the temperature M105. We will send it on a timer, if several conditions are met. Just as before, we create a new timer for the sending function, and a new slot for connecting to its signal. This time we set a larger value to the timer, for example, 1500ms:
void MainWindow::checkStatus() { if(checkingTemperature && // .... (sinceLastTemp.elapsed() > statusTimer.interval()) // , && statusWatcher.isFinished()) injectCommand("M105"); // , M105 } Someone might say that these checks are superfluous, but when you control the printer with the Asus EEEPC 900AX, and you want to simultaneously read the Habr - this is a necessity.
Printing from SD card
A lot of standard boards for 3D printers have a built-in slot for an SD card, or a way to connect such a slot. This method of printing is preferred, since at any time you can disconnect from the printer and leave, but every time you take out the SD card is often too lazy, especially if you print many small details. Of course, you can transfer the file through the serial port, but transferring the file in this way takes hardly less time than printing itself.
In any case, the host must be able to work with the SD card, which means:
- Get file list
- Select file
- Print file
- Pause print
- Report progress
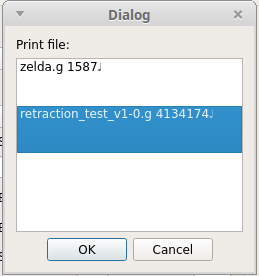
And that means more parsing! But this time, polling the list of files, we can not worry about performance - at this moment it is not important. To display a list of files, we need a dialog. In the dialogue, we will transmit an array of strings with files, and it will return one file to us, and at the same time tell our program that it is in print mode with SD.
Every time when a line comes to the host, from which the list of files on SD begins, we will open a dialog with a list of files. To do this, change our receiver again:
//... if(readingFiles) // { if(!data.contains("End file list")) sdFiles.append(data); // - else { readingFiles = false; // emit sdReady(); // } } //... else if(data.startsWith("Done")) sdprinting = false; // Done - SD else if(data.startsWith("SD printing byte") && sdWatcher.isFinished()) // SD { QFuture<double> parseSDThread = QtConcurrent::run(this, &MainWindow::parseSDStatus, data); // sdWatcher.setFuture(parseSDThread); // } else if(data.contains("Begin file list")) // SD { sdFiles.clear(); readingFiles = true; // , } //... The flag is needed because our read method is called for each line .
For one to open the dialogue will send a signal. To myself. Yes, you can even connect signals with slots of the same object.
The slot we connect to this signal is:
void MainWindow::initSDprinting() { SDWindow sdwindow(sdFiles, this); connect(&sdwindow, SIGNAL(fileSelected(QString)), this, SLOT(selectSDfile(QString))); sdwindow.exec(); } After that, you need to put the interface in print mode. I did this by introducing the additional sdprinting flag. The status of printing from an SD card is checked in a similar manner with temperature.
Soft - to the masses
No matter how much I love GitHub, not everyone likes to collect software themselves. Despite the cross-platform nature of Qt, it is a framework, not a cross-compilation environment. And this means, in addition to binarikov for the Linux-amd64 platform, binarikas for Linux-i386, Windows 32 and OSX 64 are needed. Well, the first two are simple - just add the necessary sets to QtCreator. And what about Windows 32 and OSX 64? With the latter - no way. I tried, but I wash my hands. The only way to build something under OSX is to do it on OSX. Unfortunately, it is not possible to do it legally.
Debian and its packages
I really wanted to build a package for my favorite Linux Mint, on which development is underway. At first, I wanted to build packages for PPA, but eventually I came to the conclusion that I needed to build with static Qt libraries, and therefore I had to assemble the packages for the first time. Why static linking? Everything is very simple - even in Ubuntu 14.04, on which Mint is based, there is only Qt 5.2.1 in the sources. During the tests of the first two releases on different systems, QSerialPort's bugs were fixed, corrected in new versions, and therefore it was decided to ship everything with the latest versions. In addition, the Qt wiki says that statically linked libraries work somewhat faster.
Hands on the package is going to be quite simple - it should contain a directory tree for the Debian file system, which contains all the files that we are going to install. Having written a .desktop file in order to get an item in the menu on the target system, I wrote a small bash script to build the version of the packages I needed:
#!/bin/bashcd # $1 - mkdir repraptor-$1-1-i386 mkdir repraptor-$1-1-amd64 mkdir repraptor-$1-1-i386/DEBIAN/ mkdir repraptor-$1-1-i386/usr/ mkdir repraptor-$1-1-i386/usr/local/ mkdir repraptor-$1-1-i386/usr/local/bin mkdir repraptor-$1-1-i386/usr/local/share mkdir repraptor-$1-1-amd64/DEBIAN/ mkdir repraptor-$1-1-amd64/usr/ mkdir repraptor-$1-1-amd64/usr/local/ mkdir repraptor-$1-1-amd64/usr/local/bin cp ../RepRaptor-linux32/RepRaptor repraptor-$1-1-i386/usr/local/bin/repraptor cp ../RepRaptor-linux64/RepRaptor repraptor-$1-1-amd64/usr/local/bin/repraptor cp share repraptor-$1-1-i386/usr/local/ -r cp share repraptor-$1-1-amd64/usr/local/ -r echo "Package: repraptor Version: $1-1 Section: base Priority: optional Architecture: i386 Maintainer: [Hello Habr!] Description: RepRaptor A Qt RepRap gcode sender/host controller" > repraptor-$1-1-i386/DEBIAN/control echo "Package: repraptor Version: $1-1 Section: base Priority: optional Architecture: amd64 Maintainer: [Hello Habr!] Description: RepRaptor A Qt RepRap gcode sender/host controller" > repraptor-$1-1-amd64/DEBIAN/control dpkg-deb --build repraptor-$1-1-i386 dpkg-deb --build repraptor-$1-1-amd64 All he does is create a directory tree, copy the icons and the .desktop file, and then generate a package description for the package manager, inserting the correct version.
Windows and MXE
It's one thing to collect packages for your OS, another thing for someone else. It requires tulchein - a set of tools for assembly. Benefit under Windows there is an excellent MinGW, and for Linux there is an equally excellent MXE - the environment manager for cross-compiling using free libraries.
Installation is ridiculously simple - we clone MXE and tell it which libraries we need:
git clone https://github.com/mxe/mxe.git cd mxe make qtbase qtserialport After that, you can safely go to drink coffee - the assembly of all this good takes a decent time.
After the build is finished - you can write a project build script for Windows automatically:
#!/bin/bash # MXE PATH export PATH=/home/neothefox/src/mxe/usr/bin:$PATH # rm -rf RepRaptor-win32 # git clone https://github.com/NeoTheFox/RepRaptor RepRaptor-win32 cd RepRaptor-win32 # Makefile QtCreator /home/neothefox/src/mxe/usr/bin/i686-w64-mingw32.static-qmake-qt5 RepRaptor.pro make # ZIP cp LICENCE release/ cd release zip RepRaptor-$1-win32.zip RepRaptor.exe LICENCE # mv RepRaptor-$1-win32.zip ../../RepRaptor-$1-win32.zip Simple and angry. Health is easily checked in Wine:
findings
When I started this, I was hoping to write a simple sending of G-code files, which would not do anything else, but would plan it in the evening. But, as is often the case - the project has gone beyond the original plan, and now is something more. There is still a lot to do - at least the same graphic EEPROM editor, which is so lacking, as well as support for checksums.
However, RepRaptor already allows me to safely use my ASUS EEEPC as a stable host for a printer, which no other host I have tried could achieve. Well, Qt's knowledge I have definitely improved, and still there is still room for optimizations.
This article is also timed to the release of the first stable version, which I myself now use every day - 0.2.
Thank you all for your attention! I hope my experience was useful to you.
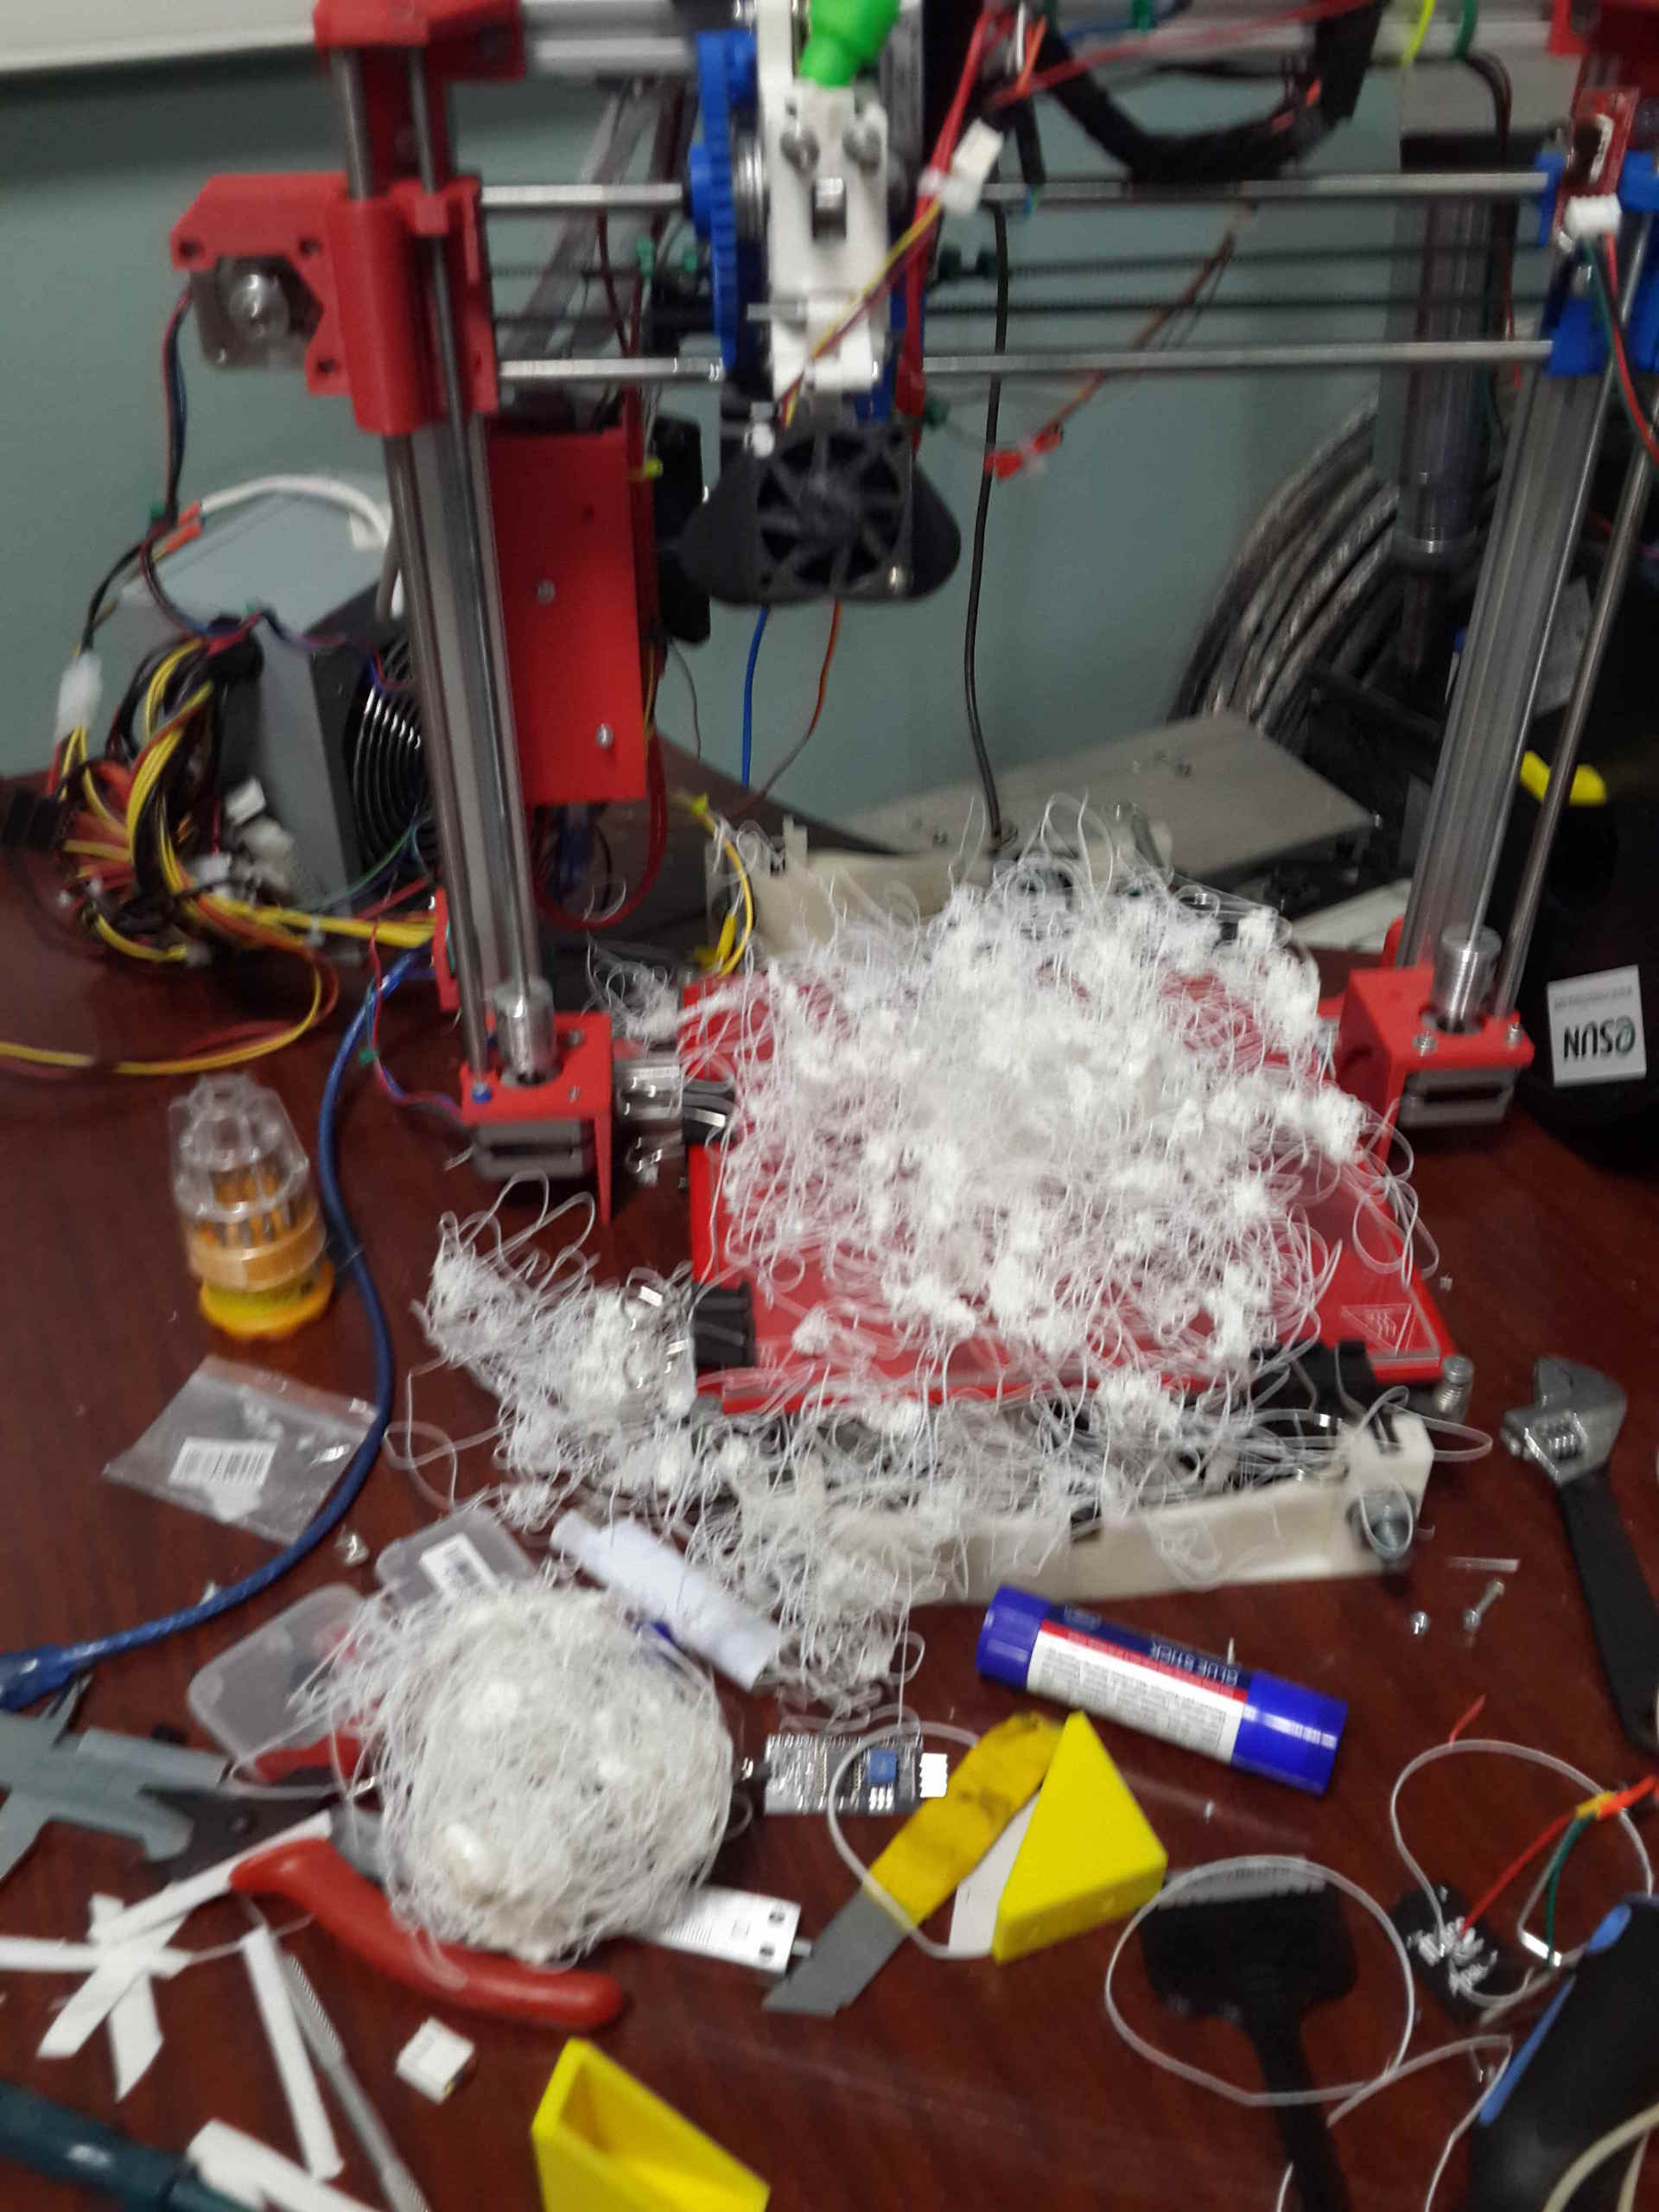
Finally, here is an army of objects printed during the tests:

Links
First stable version
Reprap wiki
Github
Source: https://habr.com/ru/post/252189/
All Articles