A simple Bluetooth machine on the Arduino
The wide distribution and cheapness of the Arduino platform and various roboplatforms allowed fans to create radio-controlled cars for every taste. A wide distribution of smartphones allowed to use them as controllers of these machines. The main problem for many fans of Arduino is the lack of experience in programming for Android. Today I will tell you how easy it is to solve this problem using the App Inventor 2 visual development environment for Android applications.
The construction of any typewriter must begin with "iron", so I will briefly describe what I used for my typewriter:
arduino nano
bluetooth module HC-05
Z-Mini Motor Sensor Shield L293D
2WD Motor Chassis
The configuration of the "iron" does not play a big role in this project, so the chassis, shield and Arduino itself can be replaced with any analogues.
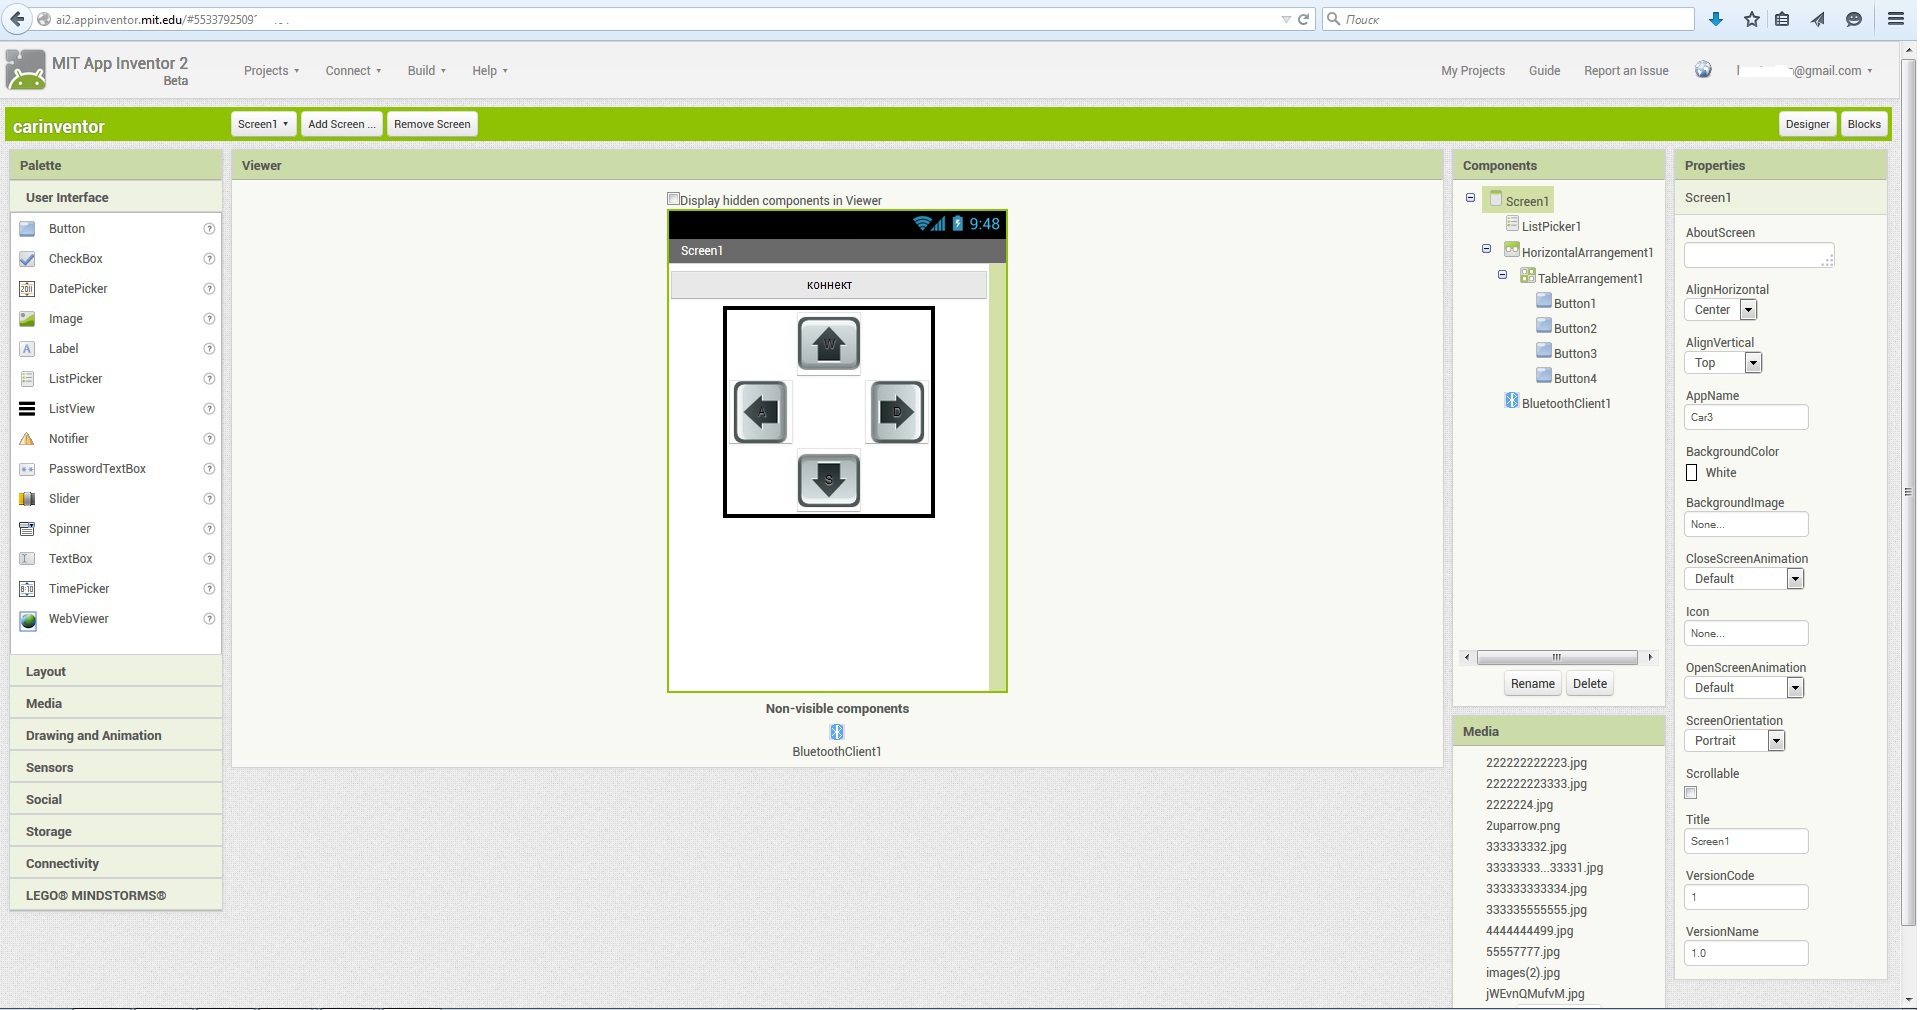
We now turn to creating an application for Android. App Inventor is a visual development environment for android applications, it works from a browser. We go to the site, allow access to your account on Google, click the "create" button and create a new project. In the new project using the “Drag and Drop” method we create 4 buttons to select the direction of movement and one to connect to our bluetooth module. Like that:
')
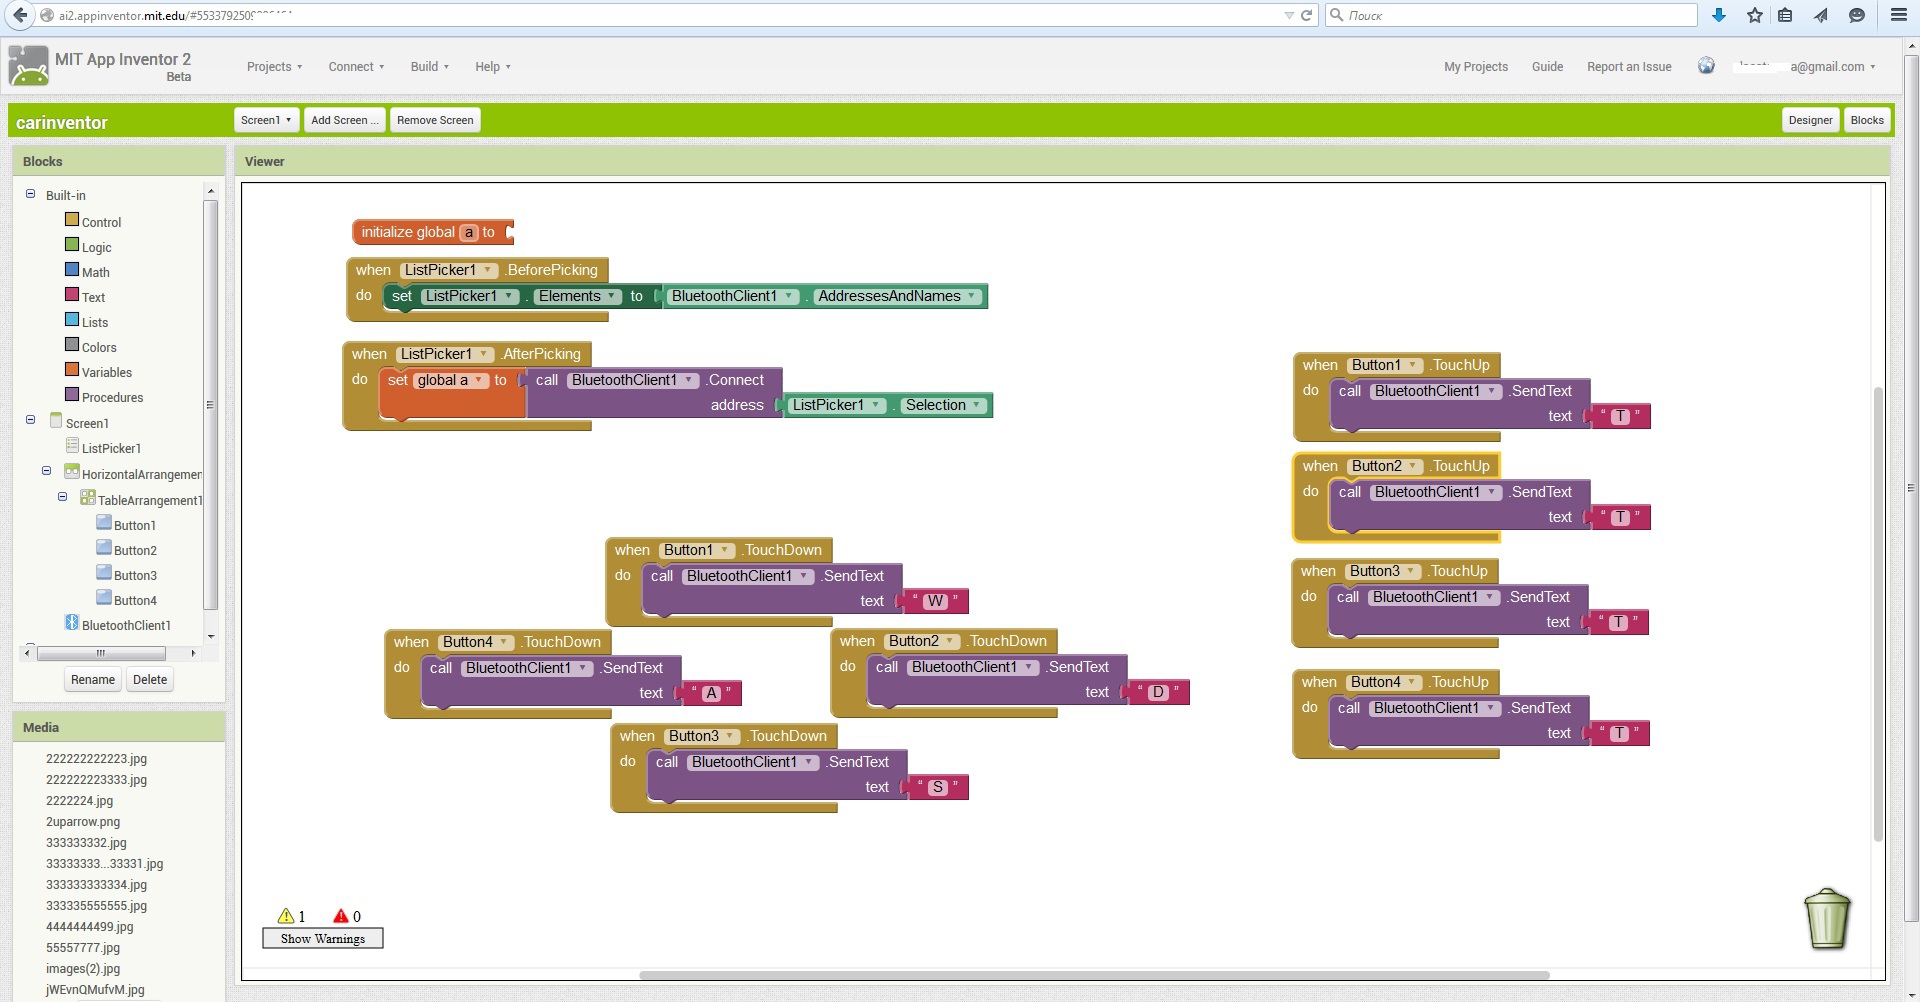
Next, click on the "Blocks" button in the upper right corner and using the same method of dragging and dropping elements, we create the logic of our android application to work like this:
It now remains to compile the application by clicking on the "Build" button.
With the writing of the sketch, I think the lovers of arduino will have no problems, I can only say that you can choose from ready-made sketches, where the machine is controlled from a computer via a sireal port. I used this
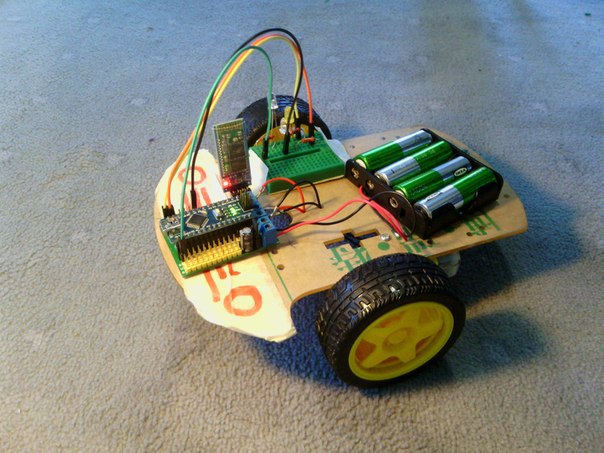
So, this is how I got the machine:
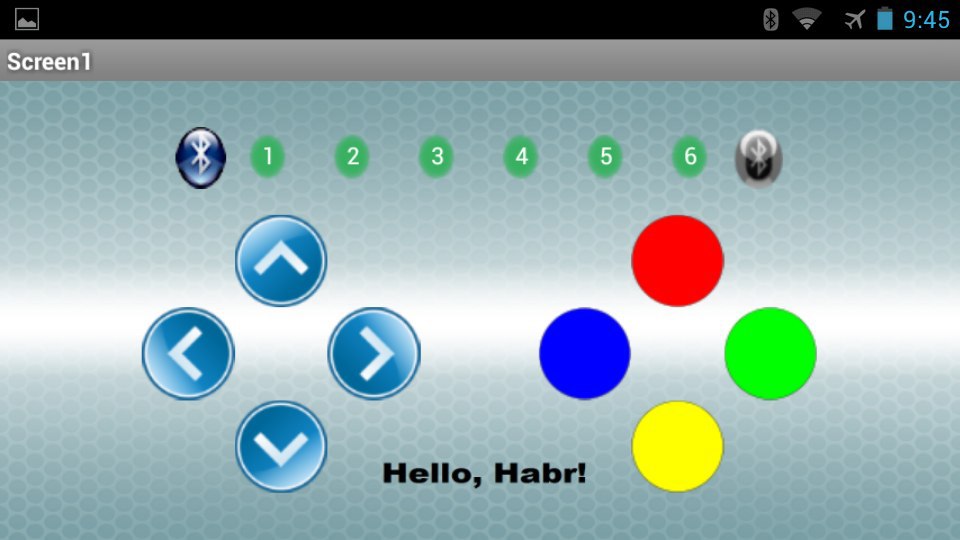
Those who like design in applications can change a little. I will not describe in detail how to do this, it’s not difficult to figure it out myself. Let me just say that for this you basically need to use .png files, instead of .jpeg, which do not support a transparent background. For example, any unprepared person can make such a design in half an hour or an hour:
PS For those who have not encountered application development in App Inventor 2, I made a more detailed guide on the development of this application (you need to go to YouTube to view).
PPS A collection of more than 100 teaching materials on arduino for beginners and pros here .
Online course on arduino to giktaimes here.
UPD 1.02.2017: Laid the app on the play market.
Similar projects with other shields here.
The construction of any typewriter must begin with "iron", so I will briefly describe what I used for my typewriter:
arduino nano
bluetooth module HC-05
Z-Mini Motor Sensor Shield L293D
2WD Motor Chassis
The configuration of the "iron" does not play a big role in this project, so the chassis, shield and Arduino itself can be replaced with any analogues.
We now turn to creating an application for Android. App Inventor is a visual development environment for android applications, it works from a browser. We go to the site, allow access to your account on Google, click the "create" button and create a new project. In the new project using the “Drag and Drop” method we create 4 buttons to select the direction of movement and one to connect to our bluetooth module. Like that:
')
Next, click on the "Blocks" button in the upper right corner and using the same method of dragging and dropping elements, we create the logic of our android application to work like this:
It now remains to compile the application by clicking on the "Build" button.
With the writing of the sketch, I think the lovers of arduino will have no problems, I can only say that you can choose from ready-made sketches, where the machine is controlled from a computer via a sireal port. I used this
sketch
int val;
int IN1 = 4;
int IN2 = 7;
int EN1 = 6;
int EN2 = 5;
void setup ()
{
Serial.begin (9600);
pinMode (IN1, OUTPUT);
pinMode (IN2, OUTPUT);
pinMode (EN1, OUTPUT);
pinMode (EN2, OUTPUT);
}
void loop ()
{
if (Serial.available ())
{
val = Serial.read ();
// Set forward motion
if (val == 'W') // When you press the "W" key
{
// Conclusions are configured according to Motor Shield
// Motors spin forward
digitalWrite (EN1, HIGH);
digitalWrite (EN2, HIGH);
digitalWrite (IN1, HIGH);
digitalWrite (IN2, HIGH);
}
// Set Backward Motion
if (val == 'S')
{
digitalWrite (EN1, HIGH);
digitalWrite (EN2, HIGH);
digitalWrite (IN1, LOW);
digitalWrite (IN2, LOW);
}
// Set the movement to the right
if (val == 'D')
{
digitalWrite (EN1, HIGH);
digitalWrite (EN2, HIGH);
digitalWrite (IN1, HIGH);
digitalWrite (IN2, LOW);
}
// Set the movement to the left
if (val == 'A')
{
digitalWrite (EN1, HIGH);
digitalWrite (EN2, HIGH);
digitalWrite (IN1, LOW);
digitalWrite (IN2, HIGH);
}
// Stop mode
// When releasing the keys in the program, a “T” is sent to the port
if (val == 'T') // Pressing the "T" Key
{
// ENABLE conclusions are attracted to the minus, the motors do not work
digitalWrite (EN1, LOW);
digitalWrite (EN2, LOW);
}
}
}
So, this is how I got the machine:
Those who like design in applications can change a little. I will not describe in detail how to do this, it’s not difficult to figure it out myself. Let me just say that for this you basically need to use .png files, instead of .jpeg, which do not support a transparent background. For example, any unprepared person can make such a design in half an hour or an hour:
PS For those who have not encountered application development in App Inventor 2, I made a more detailed guide on the development of this application (you need to go to YouTube to view).
PPS A collection of more than 100 teaching materials on arduino for beginners and pros here .
Online course on arduino to giktaimes here.
UPD 1.02.2017: Laid the app on the play market.
Similar projects with other shields here.
Source: https://habr.com/ru/post/252137/
All Articles