Comparison of Android applications for data encryption
The purpose of this article is to compare three Android data encryption applications — LUKS Manager, Cryptonite, and CyberSafe Mobile. Immediately it should be noted that the comparison will be fair, and not to highlight the advantages of a particular program. Each program has its advantages and disadvantages, in this article they will be disclosed in full.
')
First of all, I would like to note why these applications are involved in the review. With the CyberSafe Mobile program, I think everything is clear, because you are reading the Cybersoft company's blog , so it’s logical to see our program in the review. But the rest of the programs were chosen by the so-called Cauchy method , aka scientific method, that is, randomly. Of course, the choice of programs took into account their popularity and ratings. So, the Cryptonite program currently has more than 50 thousand downloads and its rating is 4.3, while the LUKS Manager program has the same rating, but five times less downloads - more than 10 thousand.
For Android, many data encryption programs have been developed, so we can’t physically consider all of them. Perhaps in the future a similar review of other programs and their comparison with CyberSafe Mobile will be written. In the meantime, we confine ourselves to the previously mentioned programs.
LUKS Manager is one of the first real Android encryption programs. Before her, the “encryption” programs actually didn’t do any encryption, but they did all sorts of nonsense, like assigning a hidden attribute to a file.
The program LUKS Manager left a dual impression. I'll start in order - with the installation of the program itself. The program requires that you have root access, and SuperSU and BusyBox are installed. Root access is a feature of all serious Android encryption programs, because without maximum privileges there is little that can be done. But the requirement of SuperSU and BusyBox prompted me to the idea that the program, in fact, does not do anything, and instead of using the Android system calls, it uses BusyBox utilities. In other words, the program is only a shell for system commands. Well, okay, novice users are unlikely to deal with all these commands, so the shell is just what you need - the main thing is that it works.
I already had root access to my device, SuperSU was installed, but BusyBox had to be installed from the Play Market. However, after installing BusyBox, the program still happily told me that it did not see it (Fig. 1).
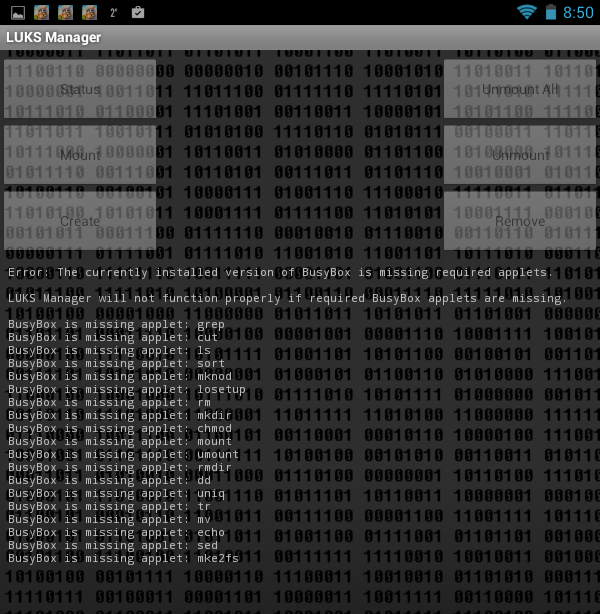
Fig. 1. The LUKS Manager program does not see the installed BusyBox
I will not describe what I did, so that the program "saw" it, I can only say that the restart of the tablet helped. Somehow it smacks of Windows even, and not UNIX, which, anyway, is Android. By the way, bullying occurred on the Acer B1 tablet with Android 4.1.2. None of the tablet as a result of the experiments was not damaged :)
After the reboot, the program still started (Fig. 2). The program interface is very simple. I would even say Spartan. I cut the screenshots so as not to reduce their size and so that you can see them better.
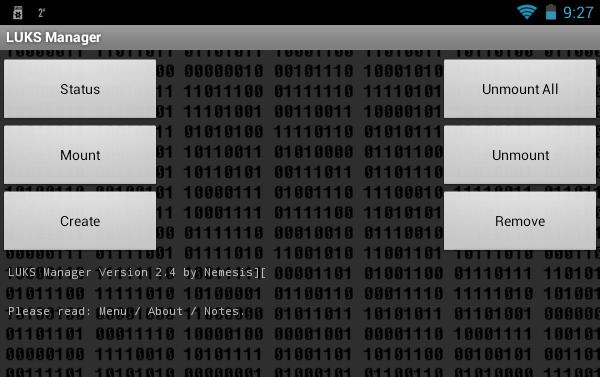
Fig. 2. LUKS Manager program
The functionality of the program is also spartan. You can view which container is mounted ( Status button), create a container ( Create button), mount ( Mount button) and unmount it ( Unmount button), unmount all containers ( Unmount All ), remove container ( Remove ). The fact that the program can create encrypted containers and mount them is good. But nowadays I want to see the possibility of cloud encryption, the ability to mount network folders so that you can work with a remote container. I also wanted to see the built-in file manager in case the user of such a program is not installed. After all, so for the work of LUKS Manager, I had to root the device, install SuperSu and BusyBox. It turns out that the file manager is also needed. The basic functionality (display of files and folders) in the program is, was it really difficult to add copy / move / delete functions of files and folders? To access the "Explorer" embedded in the program, press the button to call the program menu and select the Explore command. However, we'll talk more about this.
Let's look at the program in work. Click the Create button to create a container. The program will offer to select the directory in which the container will be stored (Fig. 3, Fig. 4).
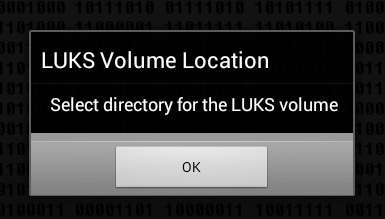
Fig. 3. Click OK
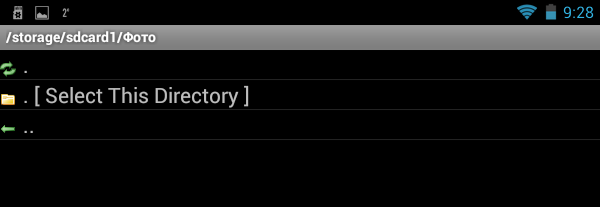
Fig. 4. Select a directory and click Select This Directory.
Next you need to enter the name of the container (Fig. 5), the password for access (Fig. 6) to it and the size of the container (Fig. 7). The program does not display the entered password and does not offer to enter a password confirmation, therefore there is a possibility of an error when entering the password - then it will not be possible to mount the created container and this should be taken into account when working with the program.
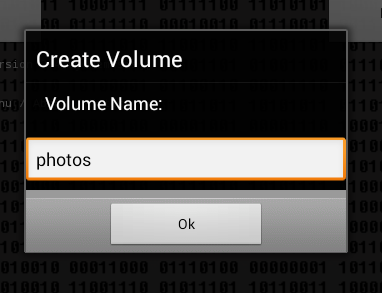
Fig. 5. Container Name
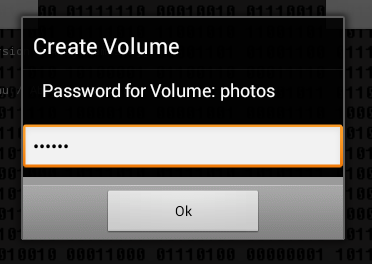
Fig. 6. Password to access the container
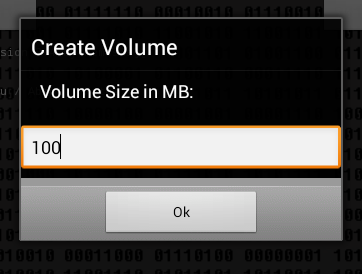
Fig. 7. Container size
The next question is how to format the container: as FAT (will be compatible with FreeeOTFE) or as ext2 (Fig. 8). LUKS Manager creates containers compatible with the FreeOTFE Windows program. As for me, it would be better if the program supported TrueCrypt. However, it should be noted that FreeOTFE finally has support for 64-bit versions of Windows, which makes it possible to more fully use the LUKS Manager + FreeOTFE combination on modern computers. It would be nice if LUKS Manager had the ability to remotely mount a container that resides on a Windows computer. Then you could create a container on the PC using FreeOTFE and remotely mount it on your Android device. The advantage of this solution is that you don’t need to clutter up the memory of the device, and the data itself would not be physically stored on the Android device, which is much more likely to lose than a regular PC.
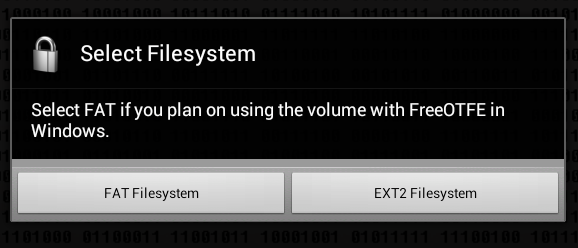
Fig. 8. How to format a container?
Next, the program will inform you that the container has been created and mounted to the / mnt / sdcard / <container name> folder, in our case it is / mnt / sdcard / photos (Fig. 9). In the program settings you can change the name of this folder.
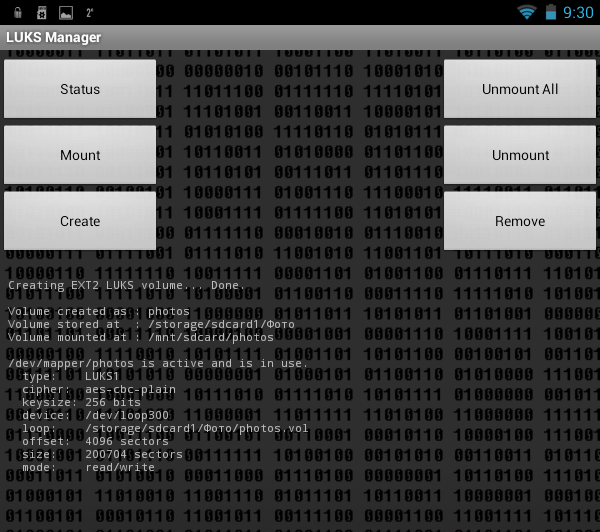
Fig. 9. Container mounted
It remains to run some third-party file manager and copy the files into the created container (Fig. 10).
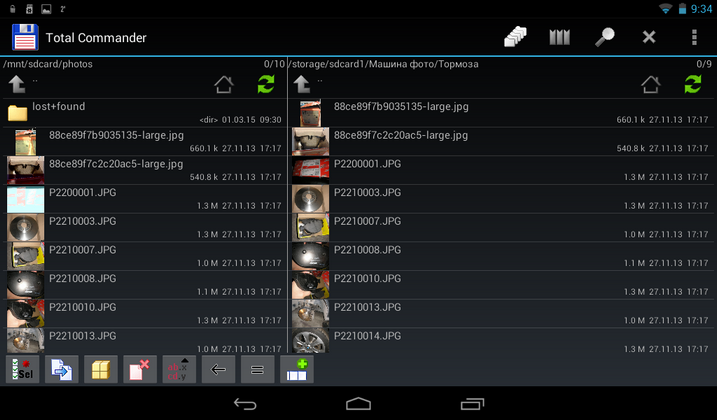
Fig. 10. Files copied
We try to unmount the container (the Unmount button), while the program shows a window that allows you to choose which particular container to unmount (Fig. 11).
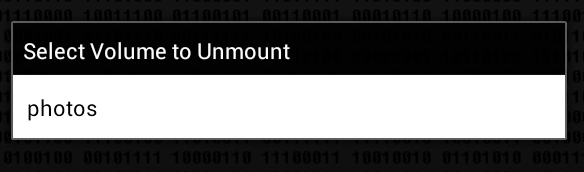
Fig. 11. Unmounting a container
After that, run the file manager and go to / mnt / sdcard /. The photos folder is there and for some reason it has not been deleted, but access to it is denied (Fig. 12). Usually such temporary folders should be deleted after unmounting. But these are trifles, in principle.
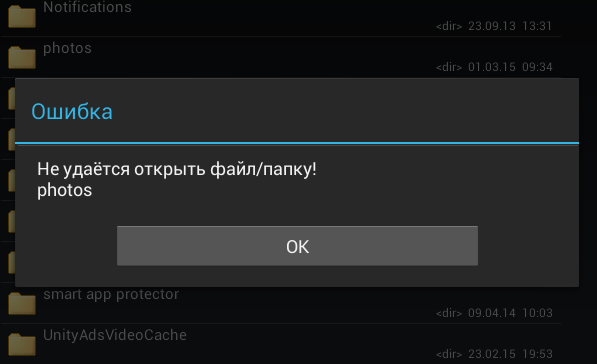
Fig. 12. Access to / mnt / sdcard / photos is prohibited
Now let's see what the program has in the settings. Press the menu button and select the Preferences command (Figure 13). This is what we see as useful (Fig. 14):

Fig. 13. Program menu
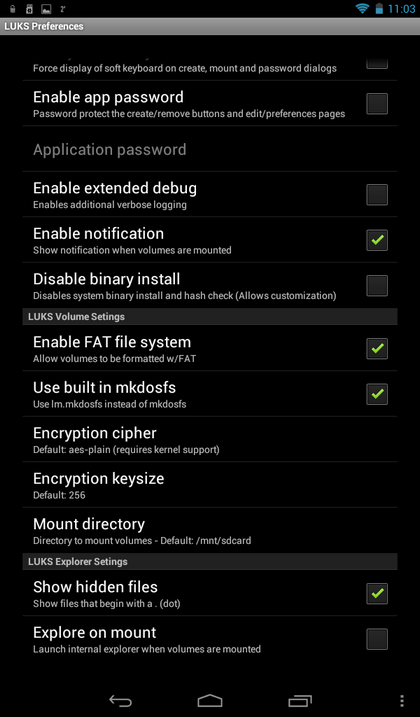
Fig. 14. Program settings
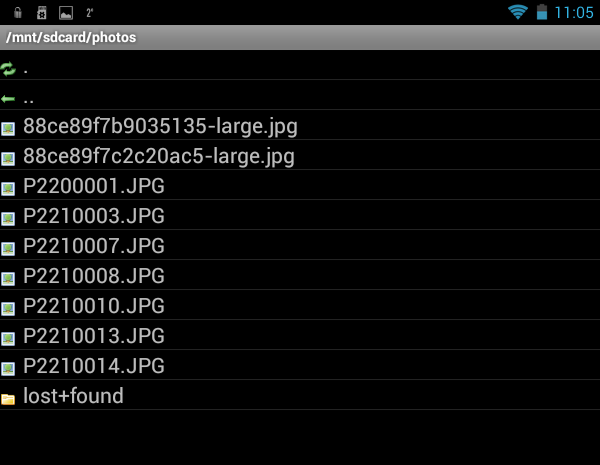
Fig. 15. Built-in file manager

Fig. 16. File Information Window
Now let's summarize. The advantages of the program LUKS Manager include:
But the program has many shortcomings:
The Cryptonite program is quite young and is at the testing stage, so it can hardly be used to encrypt any particularly important data. In fairness, it should be noted that the developers honestly warn about this when they first start the program (Fig. 17).
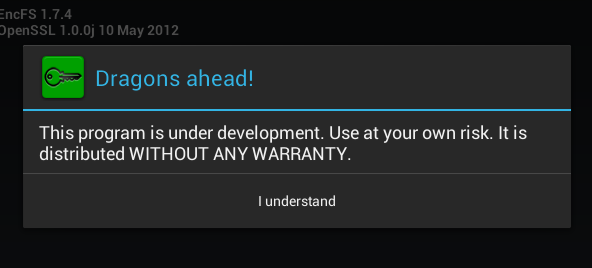
Fig. 17. First launch of Cryptonite
As for system requirements, the program needs root access and a kernel with FUSE support (Filesystem in Userspace, File system in user space). The requirement to support FUSE can be safely attributed to the shortcomings of the program, since not all devices support FUSE. It is not necessary to reinstall any additional programs (except for the file manager).
The functionality of the program is already somewhat better than that of LUKS Manager. It can create not only local containers, but also encrypt your files on DropBox. DropBox support automatically means cloud encryption support, so this program is already head and shoulders above LUKS Manager.
In fig. 18 presents the program Cryptonite after closing the annoying message that you are using an experimental version of the program. The Dropbox tab allows you to encrypt files on your Dropbox, the Local tab is used to create a local container, and on the Expert tab, the average user has nothing to do.
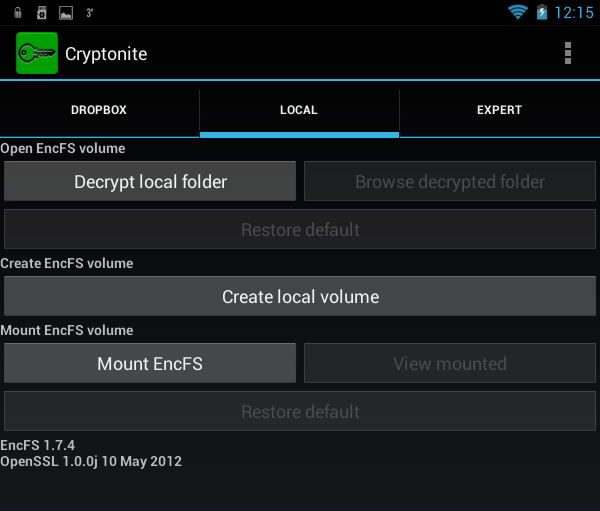
Fig. 18. Program Cryptonite
To create a local container, you need to click the Create local volume button, after which you will again see a warning that this function is experimental (Fig. 19). Next, as usual, you need to select the encryption method (Fig. 20), the location of the container, enter the password and its confirmation (Fig. 21). I liked that the program offers to enter a password confirmation, which prevents its incorrect input when creating a container.
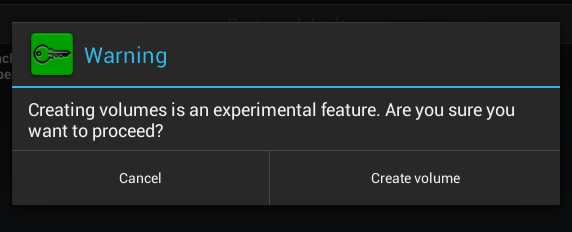
Fig. 19. Again an annoying warning
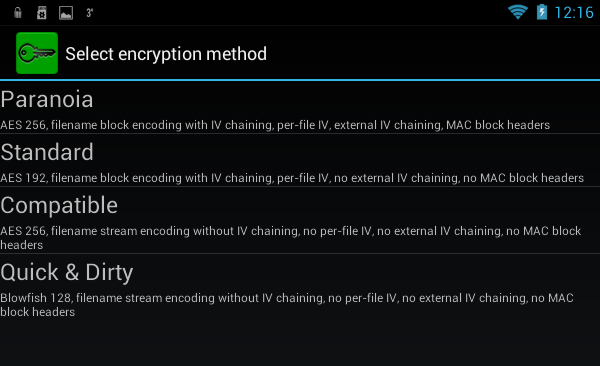
Fig. 20. Select encryption method
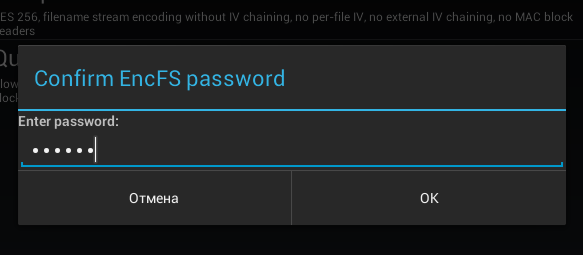
Fig. 21. Enter password confirmation
You can mount the created container using the Mount EncFS command on the Local tab. The program will offer to choose a container. The container after entering the password to it will be mounted to the directory /mnt/sdcard/csh.cryptonite/mnt (Fig. 22). The directory for mounting is specified in the program settings (Fig. 23).
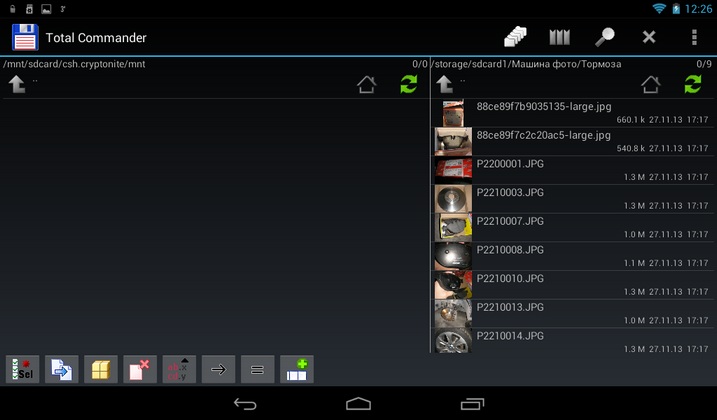
Fig. 22. Container mounted

Fig. 23. Program settings
In the settings there is nothing particularly interesting, except the folder for mount ( Mount point ), as well as the regime of Chuck Norris, which allows you to disable annoying and meaningless warnings. You can also enable the use of the built-in file manager when mounting the container ( Use built-in file browser ), but given the traditionally poor functionality of this part of the program (Fig. 24), I do not recommend enabling this option. This "file manager" can not even open the file. It only allows you to view the contents of the container and nothing else.
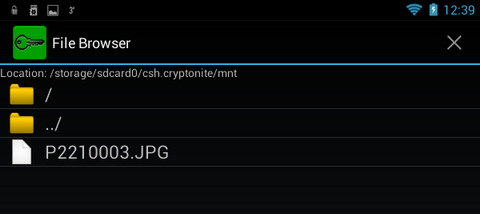
Fig. 24. Built-in container viewer
Advantages of the program:
Disadvantages:
CyberSafe Mobile program, we have repeatedly considered in our blog, so its detailed description will not. I strongly recommend reading the article “Sharing cryptodisks on PC and Android” , which describes one of the cases of using the program.
Therefore, instead of reviewing the program, in order not to repeat, it will be compared with the programs previously described in this article.
First of all, it should be noted that no root rights are needed to work with the program. Yes, in this case, the functionality of the program will be limited, and you will not be able to mount the created safe (this is called an encrypted container in CyberSafe Mobile), but your smartphone will not “fly off” the warranty if you get root access. However, given that the program has a full-fledged file manager, this is not a problem. You can work with files in the safe without mounting it and installing a third-party file manager. For security reasons, the program does not allow you to take some screenshots, so the built-in file manager window, which displays the contents of the safe, could only be photographed with a regular camera (Fig. 25). As you can see, the program has a full-fledged file manager. It’s not ES Explorer, but, unlike the previously described programs, Cybersafe Mobile’s built-in file manager can manage files — copy, move, delete, create new files and folders. I apologize for the quality of the picture, but in order to avoid flare, the tablet was photographed without a flash, so the picture is a bit dark.
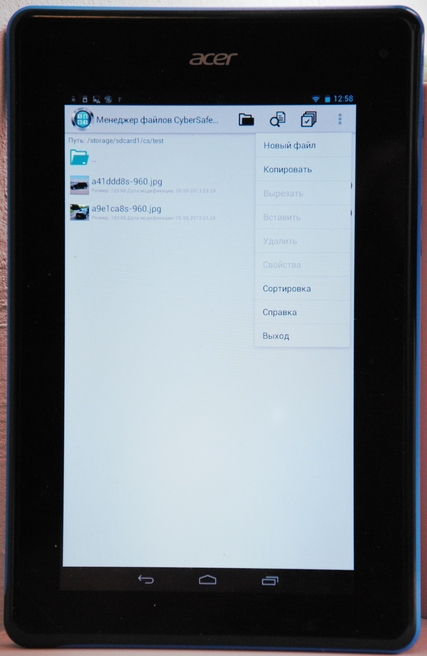
Fig. 25. Built-in CyberSafe file manager
In the program's mount settings, you can select (fig. 26):
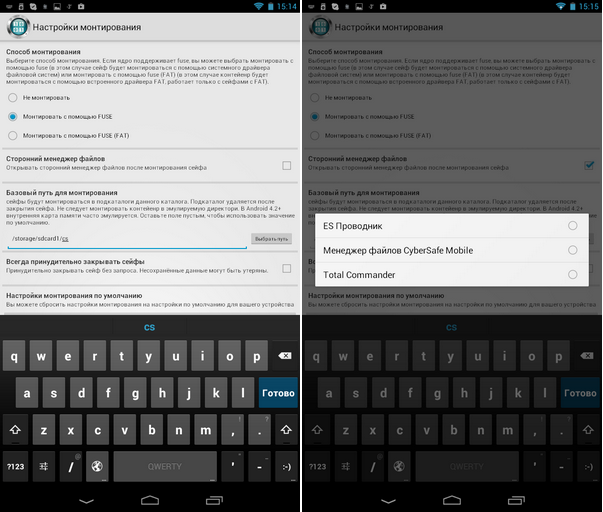
Fig. 26. Mount options
Also worth noting is the Russian-language interface of CyberSafe Mobile, which makes it easier for non-English users to work with the program (Fig. 27).
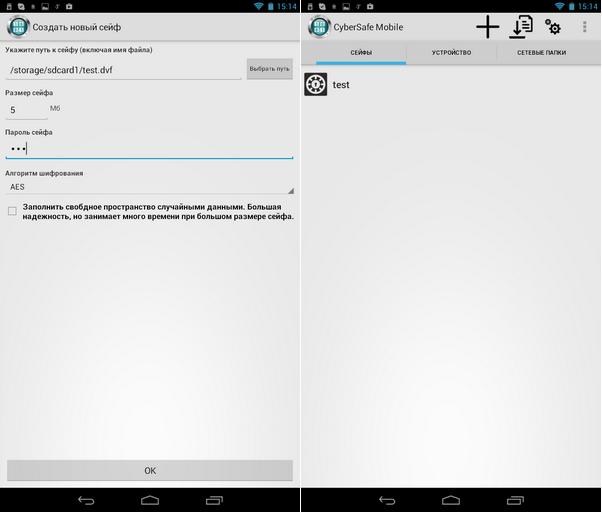
Fig. 27. Program interface. Creating a safe
Only thanks to all this (the ability to work without root and FUSE, a full-fledged file manager and a Russian-language interface) the program is a cut above LUKS Manager and Cryptonite. But that is not all. The program has a number of features that lead to knockout competitors.
Firstly, this is the support of the GOST algorithm - unlike other programs that use only AES or Blowfish (Fig. 28).
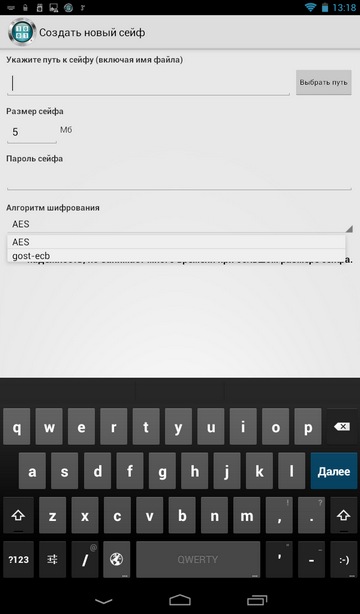
Fig. 28. The choice of encryption algorithm when creating a safe
Secondly, the program supports the mounting of network folders, which allows the use of a remote safe located on a remote PC (Fig. 29). The principle is simple: the container itself is stored on a PC, it is shared across the network. It turns out that the container is opened on the smartphone, on the PC it is always stored in encrypted form, the data on the network are also transferred encrypted, which eliminates their interception. All data encryption and decryption is performed on a mobile device. Even if you lose your device, no one will even have access to encrypted data, since it is stored on a remote computer.
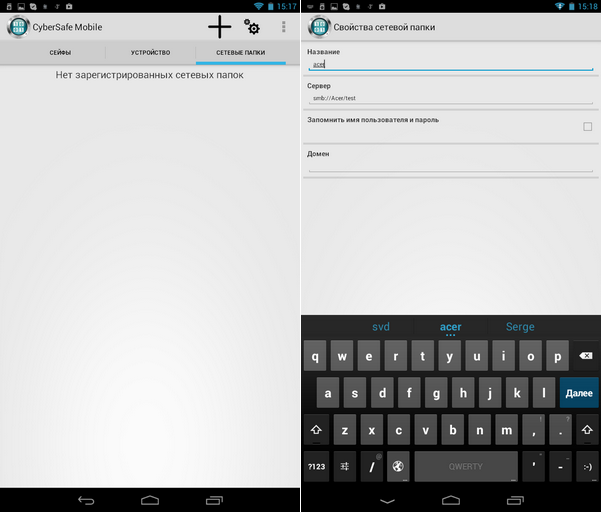
Fig. 29. Work with network folders
You can create a safe using the CyberSafe Mobile program or using the desktop version of the program CyberSafe Top Secret . It should be noted that in order to fully work with the safe, CyberSafe Top Secret is not needed - you can create a safe on your mobile device and copy it to a PC. In other words, you do not need to buy the CyberSafe Top Secret program for remote use of the safe on your smartphone. But if you need to organize safe sharing on PC and Android , then, of course, you will need the CyberSafe Top Secret program.
When you install the free URSafe Media Redirector program, it is possible to automatically redirect the photos you create (and other files, such as documents) to the safe that is physically located on the remote computer. You can read more about this in the article “Protecting personal photos on Android phones” . And in the article “Storing data in a cryptocontainer on a remote server and working with them from Android devices” shows how to store containers on a remote server, and not on a PC connected to your local wireless network.
Everything has flaws. However, CyberSafe Mobile has almost none. The disadvantages include the need to support FUSE, but this disadvantage is leveled by the fact that the created safes can be opened without mounting, but only in the built-in file manager. It should also be noted that the program is paid, but its price is low for a program of this class (do not forget what the program has functionality and do not forget that it supports, in addition to the AES algorithm, also GOST). Well, I don’t really like the impossibility of creating some screenshots of the program, but it’s better from a security point of view :)
Now let's summarize. Advantages of CyberSafe Mobile:
Disadvantages:
, — , . , , CyberSafe Mobile. , .
')
What caused the choice of applications?
First of all, I would like to note why these applications are involved in the review. With the CyberSafe Mobile program, I think everything is clear, because you are reading the Cybersoft company's blog , so it’s logical to see our program in the review. But the rest of the programs were chosen by the so-called Cauchy method , aka scientific method, that is, randomly. Of course, the choice of programs took into account their popularity and ratings. So, the Cryptonite program currently has more than 50 thousand downloads and its rating is 4.3, while the LUKS Manager program has the same rating, but five times less downloads - more than 10 thousand.
For Android, many data encryption programs have been developed, so we can’t physically consider all of them. Perhaps in the future a similar review of other programs and their comparison with CyberSafe Mobile will be written. In the meantime, we confine ourselves to the previously mentioned programs.
LUKS Manager
LUKS Manager is one of the first real Android encryption programs. Before her, the “encryption” programs actually didn’t do any encryption, but they did all sorts of nonsense, like assigning a hidden attribute to a file.
The program LUKS Manager left a dual impression. I'll start in order - with the installation of the program itself. The program requires that you have root access, and SuperSU and BusyBox are installed. Root access is a feature of all serious Android encryption programs, because without maximum privileges there is little that can be done. But the requirement of SuperSU and BusyBox prompted me to the idea that the program, in fact, does not do anything, and instead of using the Android system calls, it uses BusyBox utilities. In other words, the program is only a shell for system commands. Well, okay, novice users are unlikely to deal with all these commands, so the shell is just what you need - the main thing is that it works.
I already had root access to my device, SuperSU was installed, but BusyBox had to be installed from the Play Market. However, after installing BusyBox, the program still happily told me that it did not see it (Fig. 1).
Fig. 1. The LUKS Manager program does not see the installed BusyBox
I will not describe what I did, so that the program "saw" it, I can only say that the restart of the tablet helped. Somehow it smacks of Windows even, and not UNIX, which, anyway, is Android. By the way, bullying occurred on the Acer B1 tablet with Android 4.1.2. None of the tablet as a result of the experiments was not damaged :)
After the reboot, the program still started (Fig. 2). The program interface is very simple. I would even say Spartan. I cut the screenshots so as not to reduce their size and so that you can see them better.
Fig. 2. LUKS Manager program
The functionality of the program is also spartan. You can view which container is mounted ( Status button), create a container ( Create button), mount ( Mount button) and unmount it ( Unmount button), unmount all containers ( Unmount All ), remove container ( Remove ). The fact that the program can create encrypted containers and mount them is good. But nowadays I want to see the possibility of cloud encryption, the ability to mount network folders so that you can work with a remote container. I also wanted to see the built-in file manager in case the user of such a program is not installed. After all, so for the work of LUKS Manager, I had to root the device, install SuperSu and BusyBox. It turns out that the file manager is also needed. The basic functionality (display of files and folders) in the program is, was it really difficult to add copy / move / delete functions of files and folders? To access the "Explorer" embedded in the program, press the button to call the program menu and select the Explore command. However, we'll talk more about this.
Let's look at the program in work. Click the Create button to create a container. The program will offer to select the directory in which the container will be stored (Fig. 3, Fig. 4).
Fig. 3. Click OK
Fig. 4. Select a directory and click Select This Directory.
Next you need to enter the name of the container (Fig. 5), the password for access (Fig. 6) to it and the size of the container (Fig. 7). The program does not display the entered password and does not offer to enter a password confirmation, therefore there is a possibility of an error when entering the password - then it will not be possible to mount the created container and this should be taken into account when working with the program.
Fig. 5. Container Name
Fig. 6. Password to access the container
Fig. 7. Container size
The next question is how to format the container: as FAT (will be compatible with FreeeOTFE) or as ext2 (Fig. 8). LUKS Manager creates containers compatible with the FreeOTFE Windows program. As for me, it would be better if the program supported TrueCrypt. However, it should be noted that FreeOTFE finally has support for 64-bit versions of Windows, which makes it possible to more fully use the LUKS Manager + FreeOTFE combination on modern computers. It would be nice if LUKS Manager had the ability to remotely mount a container that resides on a Windows computer. Then you could create a container on the PC using FreeOTFE and remotely mount it on your Android device. The advantage of this solution is that you don’t need to clutter up the memory of the device, and the data itself would not be physically stored on the Android device, which is much more likely to lose than a regular PC.
Fig. 8. How to format a container?
Next, the program will inform you that the container has been created and mounted to the / mnt / sdcard / <container name> folder, in our case it is / mnt / sdcard / photos (Fig. 9). In the program settings you can change the name of this folder.
Fig. 9. Container mounted
It remains to run some third-party file manager and copy the files into the created container (Fig. 10).
Fig. 10. Files copied
We try to unmount the container (the Unmount button), while the program shows a window that allows you to choose which particular container to unmount (Fig. 11).
Fig. 11. Unmounting a container
After that, run the file manager and go to / mnt / sdcard /. The photos folder is there and for some reason it has not been deleted, but access to it is denied (Fig. 12). Usually such temporary folders should be deleted after unmounting. But these are trifles, in principle.
Fig. 12. Access to / mnt / sdcard / photos is prohibited
Now let's see what the program has in the settings. Press the menu button and select the Preferences command (Figure 13). This is what we see as useful (Fig. 14):
- Encryption keysize - encryption key size, default is 256 bits.
- Mount directory - the folder to which the containers will be mounted.
- Explore on mount - if this option is enabled, after the container is mounted, its contents will be displayed in the built-in "explorer" (Fig. 15). However, the built-in file manager allows only viewing the contents of the container; it does not allow managing files. The maximum that is useful in it is a window with information about the file that appears when you click on the file in the container and hold your finger for a while (Fig. 16).
Fig. 13. Program menu
Fig. 14. Program settings
Fig. 15. Built-in file manager
Fig. 16. File Information Window
Now let's summarize. The advantages of the program LUKS Manager include:
- The program is free, but requires a paid BusyBox (however, there is its limited free version)
- Encryption is carried out on the fly
- Work with the mounted container is carried out as with a regular folder. It's pretty simple.
But the program has many shortcomings:
- In addition to the program, you must install additional applications SuperSU and BusyBox (which, by the way, is not free, although LUKS Manager itself is free).
- Limited functionality of the program: there is no possibility to mount remote containers, there is no possibility of cloud encryption, there is no support for mounting network folders.
- Inconvenient built-in file manager, allowing only to view files and folders.
- There is no possibility to choose an external file manager.
- Folders to which the container is mounted are not automatically deleted after unmounting the container.
- No support for Russian language.
Cryptonite
The Cryptonite program is quite young and is at the testing stage, so it can hardly be used to encrypt any particularly important data. In fairness, it should be noted that the developers honestly warn about this when they first start the program (Fig. 17).
Fig. 17. First launch of Cryptonite
As for system requirements, the program needs root access and a kernel with FUSE support (Filesystem in Userspace, File system in user space). The requirement to support FUSE can be safely attributed to the shortcomings of the program, since not all devices support FUSE. It is not necessary to reinstall any additional programs (except for the file manager).
The functionality of the program is already somewhat better than that of LUKS Manager. It can create not only local containers, but also encrypt your files on DropBox. DropBox support automatically means cloud encryption support, so this program is already head and shoulders above LUKS Manager.
In fig. 18 presents the program Cryptonite after closing the annoying message that you are using an experimental version of the program. The Dropbox tab allows you to encrypt files on your Dropbox, the Local tab is used to create a local container, and on the Expert tab, the average user has nothing to do.
Fig. 18. Program Cryptonite
To create a local container, you need to click the Create local volume button, after which you will again see a warning that this function is experimental (Fig. 19). Next, as usual, you need to select the encryption method (Fig. 20), the location of the container, enter the password and its confirmation (Fig. 21). I liked that the program offers to enter a password confirmation, which prevents its incorrect input when creating a container.
Fig. 19. Again an annoying warning
Fig. 20. Select encryption method
Fig. 21. Enter password confirmation
You can mount the created container using the Mount EncFS command on the Local tab. The program will offer to choose a container. The container after entering the password to it will be mounted to the directory /mnt/sdcard/csh.cryptonite/mnt (Fig. 22). The directory for mounting is specified in the program settings (Fig. 23).
Fig. 22. Container mounted
Fig. 23. Program settings
In the settings there is nothing particularly interesting, except the folder for mount ( Mount point ), as well as the regime of Chuck Norris, which allows you to disable annoying and meaningless warnings. You can also enable the use of the built-in file manager when mounting the container ( Use built-in file browser ), but given the traditionally poor functionality of this part of the program (Fig. 24), I do not recommend enabling this option. This "file manager" can not even open the file. It only allows you to view the contents of the container and nothing else.
Fig. 24. Built-in container viewer
Advantages of the program:
- Cloud Encryption Support (Dropbox).
- Encryption on the fly.
- Support containers TrueCrypt, which is useful if the container will need to work on a stationary PC.
Disadvantages:
- Requires support for FUSE, which is not every device.
- A very meager file manager that only allows you to view the contents of the container and nothing else.
- No support for network folders (although this flaw is slightly diminished by Dropbox support)
- The program is still experimental (although it appeared quite long ago, and since then more than 50,000 people have downloaded it). It’s up to you to use it or not, but I wouldn’t use it to protect important data. It is better to look for another program.
- No support for Russian language.
CyberSafe Mobile
CyberSafe Mobile program, we have repeatedly considered in our blog, so its detailed description will not. I strongly recommend reading the article “Sharing cryptodisks on PC and Android” , which describes one of the cases of using the program.
Therefore, instead of reviewing the program, in order not to repeat, it will be compared with the programs previously described in this article.
First of all, it should be noted that no root rights are needed to work with the program. Yes, in this case, the functionality of the program will be limited, and you will not be able to mount the created safe (this is called an encrypted container in CyberSafe Mobile), but your smartphone will not “fly off” the warranty if you get root access. However, given that the program has a full-fledged file manager, this is not a problem. You can work with files in the safe without mounting it and installing a third-party file manager. For security reasons, the program does not allow you to take some screenshots, so the built-in file manager window, which displays the contents of the safe, could only be photographed with a regular camera (Fig. 25). As you can see, the program has a full-fledged file manager. It’s not ES Explorer, but, unlike the previously described programs, Cybersafe Mobile’s built-in file manager can manage files — copy, move, delete, create new files and folders. I apologize for the quality of the picture, but in order to avoid flare, the tablet was photographed without a flash, so the picture is a bit dark.
Fig. 25. Built-in CyberSafe file manager
In the program's mount settings, you can select (fig. 26):
- Mount method - as already noted, if your device does not have root access or does not support FUSE, then you can not mount the safe, but work with it through the built-in file manager.
- The base mount path is the directory to which safes will be mounted.
- Third-party file manager - the program allows you to use both the built-in and external file manager, and it detects the managers already installed on your device and allows you to select one of them.
Fig. 26. Mount options
Also worth noting is the Russian-language interface of CyberSafe Mobile, which makes it easier for non-English users to work with the program (Fig. 27).
Fig. 27. Program interface. Creating a safe
Only thanks to all this (the ability to work without root and FUSE, a full-fledged file manager and a Russian-language interface) the program is a cut above LUKS Manager and Cryptonite. But that is not all. The program has a number of features that lead to knockout competitors.
Firstly, this is the support of the GOST algorithm - unlike other programs that use only AES or Blowfish (Fig. 28).
Fig. 28. The choice of encryption algorithm when creating a safe
Secondly, the program supports the mounting of network folders, which allows the use of a remote safe located on a remote PC (Fig. 29). The principle is simple: the container itself is stored on a PC, it is shared across the network. It turns out that the container is opened on the smartphone, on the PC it is always stored in encrypted form, the data on the network are also transferred encrypted, which eliminates their interception. All data encryption and decryption is performed on a mobile device. Even if you lose your device, no one will even have access to encrypted data, since it is stored on a remote computer.
Fig. 29. Work with network folders
You can create a safe using the CyberSafe Mobile program or using the desktop version of the program CyberSafe Top Secret . It should be noted that in order to fully work with the safe, CyberSafe Top Secret is not needed - you can create a safe on your mobile device and copy it to a PC. In other words, you do not need to buy the CyberSafe Top Secret program for remote use of the safe on your smartphone. But if you need to organize safe sharing on PC and Android , then, of course, you will need the CyberSafe Top Secret program.
When you install the free URSafe Media Redirector program, it is possible to automatically redirect the photos you create (and other files, such as documents) to the safe that is physically located on the remote computer. You can read more about this in the article “Protecting personal photos on Android phones” . And in the article “Storing data in a cryptocontainer on a remote server and working with them from Android devices” shows how to store containers on a remote server, and not on a PC connected to your local wireless network.
Everything has flaws. However, CyberSafe Mobile has almost none. The disadvantages include the need to support FUSE, but this disadvantage is leveled by the fact that the created safes can be opened without mounting, but only in the built-in file manager. It should also be noted that the program is paid, but its price is low for a program of this class (do not forget what the program has functionality and do not forget that it supports, in addition to the AES algorithm, also GOST). Well, I don’t really like the impossibility of creating some screenshots of the program, but it’s better from a security point of view :)
Now let's summarize. Advantages of CyberSafe Mobile:
- Ability to work without root-access and support FUSE (just safes will not be mounted).
- « »
- ,
- (VPN-)
- ( CyberSafe Top Secret).
- () ( LUKS Manager)
Disadvantages:
- , Lite-, . , FUSE root-, «» , Lite- — , . CyberSafe Mobile , Lite- , LUKS Manager, .
- FUSE (, — ).
, — , . , , CyberSafe Mobile. , .
Source: https://habr.com/ru/post/251889/
All Articles