Create a rotating logo using ImageMagick and FFMPEG
The article may be of interest to those who want to slightly revive the design of their video channel, as well as those who have just started working with the tools specified in the title. Confident users, I hope, will complement my material.
I wondered how to revive the logo, which I impose on the videos of some sporting events. There was an idea to make a 20 logo turning around its vertical axis every seconds. As a result, I wanted to get something like this:

To complete the task, you need a system with imagemagick and ffmpeg installed. The bash will be used to form commands for imagemagick. What would be the use of the bc utility? The math in bash is pretty simple and it’s difficult to compute trigonometric functions.
')
Using python, for example, you can make the same thing even easier; in it, sine and cosine are calculated.
To create a video, create N frames for which the logo will take a full turn, then turn them into a video file.
In fact, rotation is the sequential compression and expansion of an image in one of the dimensions. If we want to get the effect of uniform rotation around the vertical axis, the image width will be changed multiple of the sine or cosine functions.
The initial state for us is a logo visible in full size, so to change the width of the image we will multiply its width by the cosine (its value at zero is just one).
Rotation of the image for these purposes can be divided into 4 stages:
- the image is narrowed;
- expands, but turned to the viewer the reverse side;
- narrows downside to the viewer;
- expands to its original size.
Let's form a basic set of frames, build for rotation by 0-90 degrees, and frames for the remaining 270 will get a little converting them. The cycle, accordingly, will not be from 0 to 360 degrees, but from 0 to 90.
We will prescribe the path to our logo, so that we can then access it with a short $ logo:
For convenience, we introduce variables equal to the width and height of the logo, so it will be easier to correct the script for another image:
Let's get a variable equal to the number of frames for which the logo will make a quarter turn. It will be needed once - to calculate the step with which the rotation angle should be calculated.
In the loop you will need:
- calculate what will be the width of the image when it is rotated at a given angle "n";
- create a blank canvas of size, say 850x600;
- add a compressed image to its center.
Let's sort the code in parts.
Calculate the width of the image at a given angle:
It will be more convenient to disassemble this piece from right to left:
"| bc -l" indicates that this will be computed by the bc utility.
Since cosine in the “bc” utility accepts values in radians as input, and pi numbers in bash are not — use the following expression:
c ($ n * 4 * a (1) / 180) - where
“C” is the cosine,
$ n - the angle in degrees is determined in a cycle;
a (1) is the arctangent of a unit equal to pi / 4. Therefore, 4 * a (1) is a way to write pi. 180 divide to go from radians to degrees.
Thus, "$ width * (c ($ n * 4 * a (1) / 180))" is the width multiplied by the cosine of the angle "n".
"+1" after this expression to ensure that the image width does not take the value 0. Attempting to make an image of zero width will not understand ImageMagick.
$ (printf%. $ 2f $ (echo "$ width * (c ($ n * 4 * a (1) / 180)) + 1" | bc -l)) - calculate the width for a given angle and output rounded to the whole.
convert -size 850x600 xc: transparent -background none - create a transparent canvas with the size of 640x360 without background.
The following part of the command is taken in escaped "\" brackets so that it runs in isolation. This is important, otherwise the resizing will touch the canvas.
-alpha set - enable transparency channel.
-channel A -evaluate add -60% - add "-60%" to the value of channel A of all image pixels.
$ logo - the path to the image.
-geometry $ oWidth \ x $ height \! - resize the image.
"-geometry AxB" will resize the image but maintain the aspect ratio. Those. if we try to reduce the width, the image height will also decrease to maintain the “width x height” ratio, and empty areas will appear above and below.
"-geometry AxB \!" They are not trying to keep the “width x height” ratio, but will change them independently of each other.
-gravity center - place in the middle.
-composite - combine images.
./tmp/$n.png - save the file to the “tmp” folder, calling the current value of the variable “n”.
View from an angle of 54 degrees:

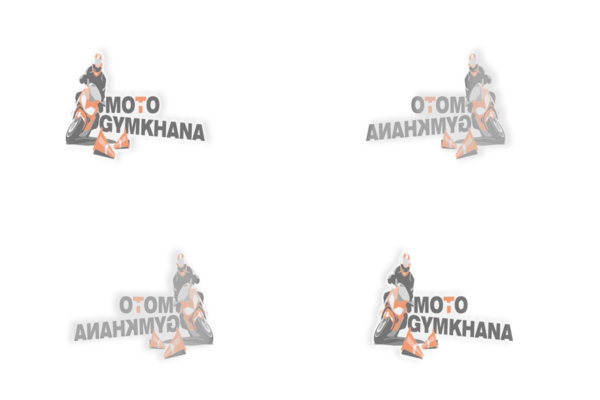
From this reference image set, create 4 frames of future animation.
Let the logo rotate clockwise when viewed from above. To add volume to the image, add a “shadow” shifted to the right or left depending on where the image rotates on the frame. And we will reflect the image from left to right on the frames, where the logo is turned to the viewer with the back side. The “shadow” on the same frames will be added not under the original image, but on top of it to create the effect of the reverse side of the logo.
Consider in detail the expression for the first quarter of the turn. The rest will be clear by analogy. I only focus on the differences from the first:
convert tmp / $ n.png — take the source image as a base.
\ (+ clone -background '#cccf' -shadow 100x8 + $ shadowShift-3 \) - clone and create an image shadow.
The color specified by the background option will set the color of the shadow.
How much the shadow is opaque (in percent) and is blurred is set by the parameter “100x5”.
The shadow shift relative to the original image is given as + x + y. In our case, the vertical shift is constant (3 pixels up), and the horizontal shift is set by the variable shadowShift.
The value of this variable is calculated in the same way as the original frame is compressed vertically. Just take the sine of the angle, not the cosine, because the zero angle shift should be zero.
shadowShift = $ (printf%. $ 2f $ (echo "15 * (s ($ n * 4 * a (1) / 180)) + 1" | bc -l))
For the first and second quarters, the shadow should be shifted to the right, so the shadowShift value is taken with a plus sign, for the third and fourth - with a minus sign.
-background none -compose Dst_Over -layers merge -gravity center -depth 8 tmp / logo $ (expr $ ((1000 + n))). png
Here the important option is -compose. It sets which of the images will be located on top.
For the first quarter of the turn, the logo itself is on top, therefore Dst_Over. For the second and third quarters, Src_Over will be spelled out (shadow above).
-layers merge -gravity center - combine layers, place in the middle.
tmp / logo $ (expr $ ((1000 + n))). png - save as logo + “1000 + value n” in the tmp folder.
The name is so that the frame names are immediately sorted alphabetically, and it was convenient to give them to ffmpeg for processing.
For frames of the second quarter of the turn there will be “1800-n”, for the third “2000 + n”, for the fourth “2800-n”.
For the second and third quarters, the -flop option will appear - flip the image from left to right. Because of this, by the way, you need to change the sign of the displacement of the shadow to the opposite.
Code for all four quarters of the turn:
As a result, 4 were obtained from the original frame with minor differences:
Now it's up to you to collect videos from these images:
-pattern_type glob - allows you to set the frame name mask in the usual console view
-i 'tmp / logo * .png' - take as the initial data of the image from the tmp folder whose name begins with "logo"
-pix_fmt argb - set image format with transparency. “A” in ARGB is just the alpha channel
-vcodec qtrle - set the codec for video that supports transparency. From the known to me this “qtrle” and “png”
-r 30 - set the final video frequency to 30 frames per second.
rotating_logo.mov - save as “rotatingLogo.mov”
Now we can execute the command
The resulting video is only a couple of seconds long, t.ch. Let's combine a lot of these pieces together.
For this we use the same ffmpeg.
So that the logo does not rotate permanently, but occasionally we will create a piece of video with a fixed logo. For an article, let it be a duration of 3 seconds so that you do not have to wait long for a rotation while viewing:
This command has the option "-loop 1" - indicating ffmpeg to repeat the input image sequence (in this case, the only one), and the option "-t 3" indicating that the duration of the final video is 3 seconds.
To glue the video with a fixed and rotating logo, create a file with a list of files that you want to glue. In this case, 20 copies of our files:
Let's give this file an input to the concat filter with instructions to copy codecs, but not to transcode (-c copy).

It remains to impose the resulting logo on the video.
The logo is quite large, t.ch. at imposing we will scale it, reducing by three times.
ffmpeg -i video.mov -i logoWithRotation.mov - take two videos as input.
-filter_complex - use filter_complex to which we specify the following:
[1: 0] scale = iw / 3: ih / 3 [logo] - take stream 0 from the second video (1 sample is from zero) and reduce the width (iw - input width) and height (ih - input height) value . Pass on with the name "logo".
[0: 0] [logo] overlay = shortest = 1: x = 20: y = 0 — take stream 0 from the first video and stream “logo” and superimpose them on each other.
“Shortest = 1” - says stop when the end of any stream is reached.
x = 20: y = 500 - indicates where to place the left upper corner of the video overlay.
-vcodec libx264 -crf 18 - use H264 codec. The value after crf indicates how much to compress. 0 - no compression at all.
overlay.mov - save under this name.
View result:
Drawings and animation for the article created using the same tools. In order of appearance in the article:
The final script for creating a rotating logo:
Overlay on the video.mov file with a decrease in the logo three times:
I wondered how to revive the logo, which I impose on the videos of some sporting events. There was an idea to make a 20 logo turning around its vertical axis every seconds. As a result, I wanted to get something like this:

To complete the task, you need a system with imagemagick and ffmpeg installed. The bash will be used to form commands for imagemagick. What would be the use of the bc utility? The math in bash is pretty simple and it’s difficult to compute trigonometric functions.
')
Using python, for example, you can make the same thing even easier; in it, sine and cosine are calculated.
To create a video, create N frames for which the logo will take a full turn, then turn them into a video file.
In fact, rotation is the sequential compression and expansion of an image in one of the dimensions. If we want to get the effect of uniform rotation around the vertical axis, the image width will be changed multiple of the sine or cosine functions.
The initial state for us is a logo visible in full size, so to change the width of the image we will multiply its width by the cosine (its value at zero is just one).
Rotation of the image for these purposes can be divided into 4 stages:
- the image is narrowed;
- expands, but turned to the viewer the reverse side;
- narrows downside to the viewer;
- expands to its original size.
Let's form a basic set of frames, build for rotation by 0-90 degrees, and frames for the remaining 270 will get a little converting them. The cycle, accordingly, will not be from 0 to 360 degrees, but from 0 to 90.
We will prescribe the path to our logo, so that we can then access it with a short $ logo:
logo=../../logo/Moto_Gymkhana_transparent.png For convenience, we introduce variables equal to the width and height of the logo, so it will be easier to correct the script for another image:
width=842 height=595 Let's get a variable equal to the number of frames for which the logo will make a quarter turn. It will be needed once - to calculate the step with which the rotation angle should be calculated.
Frames=15 In the loop you will need:
- calculate what will be the width of the image when it is rotated at a given angle "n";
- create a blank canvas of size, say 850x600;
- add a compressed image to its center.
for (( n=0; n<=90; n+=$(expr $(( 90/$Frames ))))) do oWidth=$(printf %.$2f $(echo "$width*(c($n*4*a(1)/180))+1" | bc -l)) convert -size 850x600 xc:transparent -background none \ \( -alpha set -channel A -evaluate add -60% $logo -geometry $oWidth\ x$height\! \)\ -gravity center -composite ./tmp/$n.png done Let's sort the code in parts.
Calculate the width of the image at a given angle:
oWidth=$(printf %.$2f $(echo "$width*(c($n*4*a(1)/180))+1" | bc -l)) It will be more convenient to disassemble this piece from right to left:
"| bc -l" indicates that this will be computed by the bc utility.
Since cosine in the “bc” utility accepts values in radians as input, and pi numbers in bash are not — use the following expression:
c ($ n * 4 * a (1) / 180) - where
“C” is the cosine,
$ n - the angle in degrees is determined in a cycle;
a (1) is the arctangent of a unit equal to pi / 4. Therefore, 4 * a (1) is a way to write pi. 180 divide to go from radians to degrees.
Thus, "$ width * (c ($ n * 4 * a (1) / 180))" is the width multiplied by the cosine of the angle "n".
"+1" after this expression to ensure that the image width does not take the value 0. Attempting to make an image of zero width will not understand ImageMagick.
$ (printf%. $ 2f $ (echo "$ width * (c ($ n * 4 * a (1) / 180)) + 1" | bc -l)) - calculate the width for a given angle and output rounded to the whole.
convert -size 850x600 xc:transparent -background none \ \( -alpha set -channel A -evaluate add -60% $logo -geometry $oWidth\ x$height\! \)\ -gravity center -composite ./tmp/$n.png convert -size 850x600 xc: transparent -background none - create a transparent canvas with the size of 640x360 without background.
The following part of the command is taken in escaped "\" brackets so that it runs in isolation. This is important, otherwise the resizing will touch the canvas.
-alpha set - enable transparency channel.
-channel A -evaluate add -60% - add "-60%" to the value of channel A of all image pixels.
$ logo - the path to the image.
-geometry $ oWidth \ x $ height \! - resize the image.
"-geometry AxB" will resize the image but maintain the aspect ratio. Those. if we try to reduce the width, the image height will also decrease to maintain the “width x height” ratio, and empty areas will appear above and below.
"-geometry AxB \!" They are not trying to keep the “width x height” ratio, but will change them independently of each other.
-gravity center - place in the middle.
-composite - combine images.
./tmp/$n.png - save the file to the “tmp” folder, calling the current value of the variable “n”.
View from an angle of 54 degrees:

From this reference image set, create 4 frames of future animation.
Let the logo rotate clockwise when viewed from above. To add volume to the image, add a “shadow” shifted to the right or left depending on where the image rotates on the frame. And we will reflect the image from left to right on the frames, where the logo is turned to the viewer with the back side. The “shadow” on the same frames will be added not under the original image, but on top of it to create the effect of the reverse side of the logo.
Consider in detail the expression for the first quarter of the turn. The rest will be clear by analogy. I only focus on the differences from the first:
convert tmp/$n.png \ \( +clone -background '#cccf' -shadow 100x8+$shadowShift-3 \)\ -background none -compose Src_Over -layers merge \ -gravity center tmp/logo$(expr $(( 1000+n ))).png convert tmp / $ n.png — take the source image as a base.
\ (+ clone -background '#cccf' -shadow 100x8 + $ shadowShift-3 \) - clone and create an image shadow.
The color specified by the background option will set the color of the shadow.
How much the shadow is opaque (in percent) and is blurred is set by the parameter “100x5”.
The shadow shift relative to the original image is given as + x + y. In our case, the vertical shift is constant (3 pixels up), and the horizontal shift is set by the variable shadowShift.
The value of this variable is calculated in the same way as the original frame is compressed vertically. Just take the sine of the angle, not the cosine, because the zero angle shift should be zero.
shadowShift = $ (printf%. $ 2f $ (echo "15 * (s ($ n * 4 * a (1) / 180)) + 1" | bc -l))
For the first and second quarters, the shadow should be shifted to the right, so the shadowShift value is taken with a plus sign, for the third and fourth - with a minus sign.
-background none -compose Dst_Over -layers merge -gravity center -depth 8 tmp / logo $ (expr $ ((1000 + n))). png
Here the important option is -compose. It sets which of the images will be located on top.
For the first quarter of the turn, the logo itself is on top, therefore Dst_Over. For the second and third quarters, Src_Over will be spelled out (shadow above).
-layers merge -gravity center - combine layers, place in the middle.
tmp / logo $ (expr $ ((1000 + n))). png - save as logo + “1000 + value n” in the tmp folder.
The name is so that the frame names are immediately sorted alphabetically, and it was convenient to give them to ffmpeg for processing.
For frames of the second quarter of the turn there will be “1800-n”, for the third “2000 + n”, for the fourth “2800-n”.
For the second and third quarters, the -flop option will appear - flip the image from left to right. Because of this, by the way, you need to change the sign of the displacement of the shadow to the opposite.
Code for all four quarters of the turn:
convert tmp/$n.png \( +clone -background '#cccf' -shadow 100x8+$shadowShift-3 \) \ -background none -compose Dst_Over -layers merge -gravity center -depth 8 tmp/logo$(expr $(( 1000+n ))).png convert tmp/$n.png \( +clone -background '#cccf' -shadow 100x8-$shadowShift-3 \) \ -background none -compose Src_Over -layers merge -gravity center -flop tmp/logo$(expr $(( 1800-n ))).png convert tmp/$n.png \( +clone -background '#cccf' -shadow 100x8+$shadowShift-3 \) \ -background none -compose Src_Over -layers merge -gravity center -flop tmp/logo$(expr $(( 2000+n ))).png convert tmp/$n.png \( +clone -background '#cccf' -shadow 100x8-$shadowShift-3 \) \ -background none -compose Dst_Over -layers merge -gravity center tmp/logo$(expr $(( 2800-n ))).png As a result, 4 were obtained from the original frame with minor differences:

Now it's up to you to collect videos from these images:
ffmpeg -pattern_type glob -i 'tmp/logo*.png' -pix_fmt argb -vcodec qtrle -r 30 rotatingLogo.mov -pattern_type glob - allows you to set the frame name mask in the usual console view
-i 'tmp / logo * .png' - take as the initial data of the image from the tmp folder whose name begins with "logo"
-pix_fmt argb - set image format with transparency. “A” in ARGB is just the alpha channel
-vcodec qtrle - set the codec for video that supports transparency. From the known to me this “qtrle” and “png”
-r 30 - set the final video frequency to 30 frames per second.
rotating_logo.mov - save as “rotatingLogo.mov”
Now we can execute the command
ffplay rotatingLogo.mov and look at the result:The resulting video is only a couple of seconds long, t.ch. Let's combine a lot of these pieces together.
For this we use the same ffmpeg.
So that the logo does not rotate permanently, but occasionally we will create a piece of video with a fixed logo. For an article, let it be a duration of 3 seconds so that you do not have to wait long for a rotation while viewing:
ffmpeg -loop 1 -pattern_type glob -i 'tmp/logo1000.png' -pix_fmt argb -vcodec qtrle -r 30 -t 3 stillLogo.mov This command has the option "-loop 1" - indicating ffmpeg to repeat the input image sequence (in this case, the only one), and the option "-t 3" indicating that the duration of the final video is 3 seconds.
To glue the video with a fixed and rotating logo, create a file with a list of files that you want to glue. In this case, 20 copies of our files:
for (( i=0; i<20; i+=1 )) do echo file 'stillLogo.mov' >> list.txt echo file 'rotatingLogo.mov' >> list.txt done Let's give this file an input to the concat filter with instructions to copy codecs, but not to transcode (-c copy).
ffmpeg -f concat -i list.txt -c copy logoWithRotation.mov 
It remains to impose the resulting logo on the video.
The logo is quite large, t.ch. at imposing we will scale it, reducing by three times.
ffmpeg -i video.mov -i logoWithRotation.mov \ -filter_complex "[1:0]scale=iw/2:ih/2[logo];[0:0][logo]overlay=shortest=1:x=20:y=500" \ -vcodec libx264 -crf 18 overlay.mov ffmpeg -i video.mov -i logoWithRotation.mov - take two videos as input.
-filter_complex - use filter_complex to which we specify the following:
[1: 0] scale = iw / 3: ih / 3 [logo] - take stream 0 from the second video (1 sample is from zero) and reduce the width (iw - input width) and height (ih - input height) value . Pass on with the name "logo".
[0: 0] [logo] overlay = shortest = 1: x = 20: y = 0 — take stream 0 from the first video and stream “logo” and superimpose them on each other.
“Shortest = 1” - says stop when the end of any stream is reached.
x = 20: y = 500 - indicates where to place the left upper corner of the video overlay.
-vcodec libx264 -crf 18 - use H264 codec. The value after crf indicates how much to compress. 0 - no compression at all.
overlay.mov - save under this name.
View result:
ffplay overlay.mov Drawings and animation for the article created using the same tools. In order of appearance in the article:
ffmpeg -i rotatingLogo.mov -filter_complex "[0:0]scale=iw/3:ih/3" rotatingLogo.gif montage tmp/54.png -geometry 300x200 result.png montage -mode concatenate -tile 2x2 tmp/logo1054.png tmp/logo1746.png tmp/logo2054.png tmp/logo2746.png -geometry 300x200 result.png ffmpeg -i logoWithRotation.mov -t 5.5 -filter_complex "[0:0]scale=iw/3:ih/3" logoWithRotation.gif The final script for creating a rotating logo:
logo=../../logo/Moto_Gymkhana_transparent.png Frames=15 width=842 height=595 mkdir tmp for (( n=0; n<=90; n+=$(expr $(( 90/$Frames ))))) do oWidth=$(printf %.$2f $(echo "$width*(c($n*4*a(1)/180))+1" | bc -l)) shadowShift=$(printf %.$2f $(echo "15*(s($n*4*a(1)/180))+1" | bc -l)) convert -size 850x600 xc:transparent -background none \( -alpha set -channel A -evaluate add -50% $logo -geometry $oWidth\ x$height\! \) -gravity center -composite -depth 8 ./tmp/$n.png convert tmp/$n.png \( +clone -background '#cccf' -shadow 100x8+$shadowShift-3 \) -background none -compose Dst_Over -layers merge -gravity center -depth 8 tmp/logo$(expr $(( 1000+n ))).png convert tmp/$n.png \( +clone -background '#cccf' -shadow 100x8-$shadowShift-3 \) -background none -compose Src_Over -layers merge -gravity center -flop tmp/logo$(expr $(( 1800-n ))).png convert tmp/$n.png \( +clone -background '#cccf' -shadow 100x8+$shadowShift-3 \) -background none -compose Src_Over -layers merge -gravity center -flop tmp/logo$(expr $(( 2000+n ))).png convert tmp/$n.png \( +clone -background '#cccf' -shadow 100x8-$shadowShift-3 \) -background none -compose Dst_Over -layers merge -gravity center tmp/logo$(expr $(( 2800-n ))).png done ffmpeg -pattern_type glob -i 'tmp/logo*.png' -pix_fmt argb -vcodec qtrle -r 30 rotatingLogo.mov ffmpeg -loop 1 -pattern_type glob -i 'tmp/logo1000.png' -pix_fmt argb -vcodec qtrle -r 30 -t 3 stillLogo.mov rm list.txt for (( i=0; i<20; i+=1 )) do echo file 'stillLogo.mov' >> list.txt echo file 'rotatingLogo.mov' >> list.txt done ffmpeg -f concat -i list.txt -c copy logoWithRotation.mov Overlay on the video.mov file with a decrease in the logo three times:
ffmpeg -i video.mov -i logoWithRotation.mov -filter_complex "[1:0]scale=iw/3:ih/3[logo];[0:0][logo]overlay=shortest=1:x=20:y=500" -vcodec libx264 -crf 18 overlay.mov Source: https://habr.com/ru/post/251029/
All Articles