Return the original menu pages in Phoenix SCT UEFI
Hello, dear readers of Habr.
With you again, I and we continue to delve into various implementations of UEFI in the name of good. I have one old Chinese GSM-modem, which on my Dell Vostro 3360 is determined once, and on older laptops - normal. After several experiments with connecting it via an adapter to the main PC, it turned out that for some reason he did not like the connection via PCIe Gen2, and I would like to switch the port to Gen1, but in UEFI Setup there was no necessary setting. Sad, but not fatal, because very often device manufacturers do not delete the original menus of the UEFI manufacturer, but simply hide them, or show their place in their place, so after a small reverse engineering, the original menu can be returned to its place, which I did. This time, one IDA Demo is no longer necessary, since DXE drivers in most modern UEFI are built for the x86-64 architecture, so radare2 will be used instead.
I do not pretend to the discoverer's laurels for such modifications for a hundred years at lunch, but I will try to show how to make such a modification myself.
If you are still interested - welcome under cat.
Menu modifications are a rather old, well-known and sought-after type of modifications among those for whom for some reason the menu is not initially accessible. Most often, these reasons are contrived, “because it is possible,” but it also happens that important settings such as the ability to almost completely disable ME, enable USB debugging (EHCI Debug Port), configure PCIe modes of operation, etc., are hidden. Iron producers may find it easier to hide such menu items “not for everyone” than to describe them in the documentation and spend money on their support, but such hidden items can be more often restored, and we can do it. But for starters - the necessary information about the device Setup menu.
The Setup menu in UEFI is arranged in a rather interesting way and is described in the UEFI Human Interface Infrastructure specification ( Chapters 29-31 ), but you will not be told about everything in a short article, so if you are interested in details, write in the comments.
However, the basics are worth explaining. This menu itself consists of the forms described in the VFR and Unicode strings (although this is not quite honest Unicode, but only UCS-2) stored separately. Forms are associated with strings by ID, which facilitates its localization.
The most common menu item, combo box, on a VFR is described like this:
And the lines to it are like this:
Explanation requires, probably, only varid = SETUP_DATA.PrimaryPcie. The fact is that from within the menu 95% is just an interface to variables in NVRAM . Variables can be in different blocks (so-called varstore), but settings that are accessible from Setup are most often stored in a large SETUP_DATA block, which in turn is stored entirely in a variable called Setup. The remaining 5% are interactive menu items like current time values, component temperatures, fan speeds, etc., they are processed by callback functions tied to the corresponding menu item, but this is another story.
The menu elements are assembled into forms, then the forms are compiled into an internal representation ( IFR ), assembled into formsets and fed to the input of the FormBrowser engine, which shows the user all received forms in the form of a UI. Implementations of FormBrowser differ in some details, and most of all, Intel moved away from the reference implementation from AMI, for a simple reason - at first the reference implementation was wildly slowed down, since the menu was stored in a dozen different places and it had to be collected with each UI call, so AMI adapted its TSE implementation from AMIBIOS8 for UEFI, which (with varying success) is still supported.
In my case, UEFI is based on the Phoenix SecureCore Tiano 2.3 platform, in which FormBrowser is arranged almost standardly: the formsets for each tab (Main, Advanced, Security, Boot, Exit) are stored in separate DXE drivers, and FormBrowser communicates with them through protocols that they register. It remains to find the driver (in which the original Advanced menu is located) and explain to FormBrowser that it is necessary to show it, and not what it shows instead of the normal Advanced now. Go!
We will edit the image using UEFITool , extract forms using Universal IFR Extractor , disassemble and examine formset drivers and FormBrowser itself using radare2 , and we will trust the modified program to the Chinese programmer for five bucks .
')
We remove the firmware dump, open it in UEFITool and look for what we need at the very beginning - setting the speed of the PCIe port named "Gen1":
4 entries, three of which are in the driver named PlatfromHiiAdvancedDxe, a ready candidate for getting forms out of it and disassembling, extract it through the Extract body ...
Run Universal IFR Extractor, specify the path to the extracted file, click Extract and get a text file that describes the Advanced menu structure as we need it:
We look for “Gen1” in this file and find the following setting:
Now there is no doubt - this is the right file, but the settings from it in UEFI Setup are not visible.
But another Advanced is visible, which is located in the DellSetupAdvancedDxe file (found by searching the Advanced line in UEFITool), and we pull out from its executable section for further study:

Well, it remains to investigate the difference between the files and understand what and where you need to change so that the first one is displayed instead of the second one.
We copy both files to VMs with Linux, assemble radare2 and open two terminals, in one of which we run r2 PlatfromHiiAdvancedDxe.bin , and in the other - r2 DellSetupAdvancedDxe.bin , and after launch we go to visual mode with disassembler using the Vp command:
We observe a striking unanimity, broken only by different addresses of transitions. Everything suggests that the code is generated from the same template, so it will not differ much. Knowing the architecture of FormBrowser, we can assume that the files differ in that they publish the access protocol to them under different GUIDs. The protocol can be published via a call to gBS-> InstallProtocolInterface , which in the listing will look something like this:
After a brief search, a very similar template is found in both files:

Already from the comment of radare2 opposite lea rdx it is clear that the GUIDs of the logged protocols differ:

Now you can try to replace the GUID in the PlatfromHiiAdvancedDxe file with the GUID from DellSetupAdvancedDxe and delete the latter, but it is better to search for who exactly is using the protocol with the GUID from DellSetupAdvancedDxe and replace it already in it. We drive in the search:
We find two entries, one of which we already know, and the other is in the SystemFormBrowserCoreDxe driver at offset 2C0h from the beginning. It remains to replace and try to do.
UPD : Comrade gorodianskyi reports that on other versions of SCT in FormBrowser there may be a bunch of GUIDs, and even if you replace them all, the necessary tabs still do not appear, but the existing ones disappear. In his case, it turned out to replace the useless Info page from SystemSetupInfoDxe with the desired Advanced page (which for some reason is called Intel) from PlatformSetupAdvancedDxe by replacing the GUID in it with the one used in SystemSetupInfoDxe and removing this driver that has become unnecessary.
Replace the found GUID, save the changes, rebuild the image and flash it on the programmer, then go to UEFI Setup, open Advanced and voila, the original settings are in full view. Some, of course, it is better not to touch, some others do not work, but the main thing is that you can finally set the speed limit for PCIe Port 1, for which I started these dances with a tambourine.
In fact, it was possible to confine ourselves to examining a text file with IFR and replacing one byte in NVRAM with the necessary one, but since it turned out to return the original menu, so be it.
Other vendors may have things differently, so do not take this post as a universal guide.
Thank you for your attention and successful modifications to you.
With you again, I and we continue to delve into various implementations of UEFI in the name of good. I have one old Chinese GSM-modem, which on my Dell Vostro 3360 is determined once, and on older laptops - normal. After several experiments with connecting it via an adapter to the main PC, it turned out that for some reason he did not like the connection via PCIe Gen2, and I would like to switch the port to Gen1, but in UEFI Setup there was no necessary setting. Sad, but not fatal, because very often device manufacturers do not delete the original menus of the UEFI manufacturer, but simply hide them, or show their place in their place, so after a small reverse engineering, the original menu can be returned to its place, which I did. This time, one IDA Demo is no longer necessary, since DXE drivers in most modern UEFI are built for the x86-64 architecture, so radare2 will be used instead.
I do not pretend to the discoverer's laurels for such modifications for a hundred years at lunch, but I will try to show how to make such a modification myself.
If you are still interested - welcome under cat.
Motivation
Menu modifications are a rather old, well-known and sought-after type of modifications among those for whom for some reason the menu is not initially accessible. Most often, these reasons are contrived, “because it is possible,” but it also happens that important settings such as the ability to almost completely disable ME, enable USB debugging (EHCI Debug Port), configure PCIe modes of operation, etc., are hidden. Iron producers may find it easier to hide such menu items “not for everyone” than to describe them in the documentation and spend money on their support, but such hidden items can be more often restored, and we can do it. But for starters - the necessary information about the device Setup menu.
Briefly about the device UEFI Setup
The Setup menu in UEFI is arranged in a rather interesting way and is described in the UEFI Human Interface Infrastructure specification ( Chapters 29-31 ), but you will not be told about everything in a short article, so if you are interested in details, write in the comments.
However, the basics are worth explaining. This menu itself consists of the forms described in the VFR and Unicode strings (although this is not quite honest Unicode, but only UCS-2) stored separately. Forms are associated with strings by ID, which facilitates its localization.
The most common menu item, combo box, on a VFR is described like this:
oneof varid = SETUP_DATA.PrimaryPcie, prompt = STRING_TOKEN(STR_PRIMARY_PCIE), help = STRING_TOKEN(STR_PRIMARY_PCIE_HELP), option text = STRING_TOKEN(STR_COMMON_AUTO), value = 0, flags = DEFAULT | MANUFACTURING | RESET_REQUIRED; option text = STRING_TOKEN(STR_COMMON_PCIE1), value = 1, flags = RESET_REQUIRED; option text = STRING_TOKEN(STR_COMMON_PCIE2), value = 2, flags = RESET_REQUIRED; option text = STRING_TOKEN(STR_COMMON_PCIE3), value = 3, flags = RESET_REQUIRED; option text = STRING_TOKEN(STR_COMMON_PCIE4), value = 4, flags = RESET_REQUIRED; option text = STRING_TOKEN(STR_COMMON_PCIE5), value = 5, flags = RESET_REQUIRED; option text = STRING_TOKEN(STR_COMMON_PCIE6), value = 6, flags = RESET_REQUIRED; option text = STRING_TOKEN(STR_COMMON_PCIE7), value = 7, flags = RESET_REQUIRED; endoneof; And the lines to it are like this:
#string STR_PRIMARY_PCIE #language eng "Primary PCIe" Explanation requires, probably, only varid = SETUP_DATA.PrimaryPcie. The fact is that from within the menu 95% is just an interface to variables in NVRAM . Variables can be in different blocks (so-called varstore), but settings that are accessible from Setup are most often stored in a large SETUP_DATA block, which in turn is stored entirely in a variable called Setup. The remaining 5% are interactive menu items like current time values, component temperatures, fan speeds, etc., they are processed by callback functions tied to the corresponding menu item, but this is another story.
The menu elements are assembled into forms, then the forms are compiled into an internal representation ( IFR ), assembled into formsets and fed to the input of the FormBrowser engine, which shows the user all received forms in the form of a UI. Implementations of FormBrowser differ in some details, and most of all, Intel moved away from the reference implementation from AMI, for a simple reason - at first the reference implementation was wildly slowed down, since the menu was stored in a dozen different places and it had to be collected with each UI call, so AMI adapted its TSE implementation from AMIBIOS8 for UEFI, which (with varying success) is still supported.
In my case, UEFI is based on the Phoenix SecureCore Tiano 2.3 platform, in which FormBrowser is arranged almost standardly: the formsets for each tab (Main, Advanced, Security, Boot, Exit) are stored in separate DXE drivers, and FormBrowser communicates with them through protocols that they register. It remains to find the driver (in which the original Advanced menu is located) and explain to FormBrowser that it is necessary to show it, and not what it shows instead of the normal Advanced now. Go!
Required Tools
We will edit the image using UEFITool , extract forms using Universal IFR Extractor , disassemble and examine formset drivers and FormBrowser itself using radare2 , and we will trust the modified program to the Chinese programmer for five bucks .
')
Search
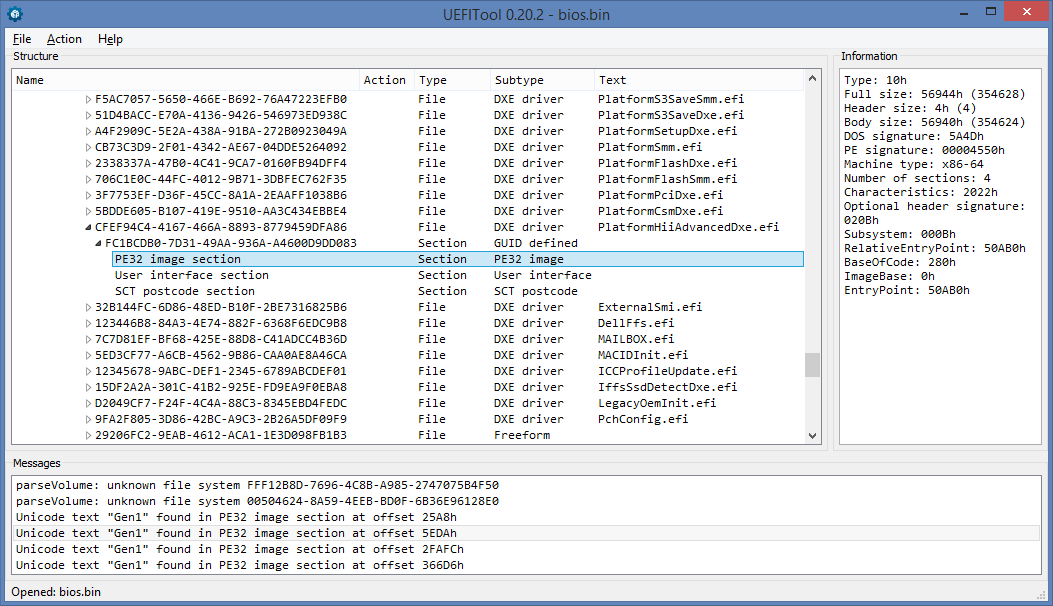
We remove the firmware dump, open it in UEFITool and look for what we need at the very beginning - setting the speed of the PCIe port named "Gen1":
4 entries, three of which are in the driver named PlatfromHiiAdvancedDxe, a ready candidate for getting forms out of it and disassembling, extract it through the Extract body ...
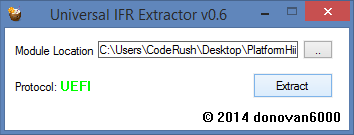
Run Universal IFR Extractor, specify the path to the extracted file, click Extract and get a text file that describes the Advanced menu structure as we need it:
We look for “Gen1” in this file and find the following setting:
0x0B018 Form Set: Advanced ... 0x44020 Setting: PCIe Speed, Variable: 0x25 0x44046 Default: 8 Bit, Value: 0x0 0x44053 Default: 8 Bit, Value: 0x0 0x44060 Option: Auto, Value: 0x0 0x4406E Option: Gen1, Value: 0x1 0x4407C Option: Gen2, Value: 0x2 Now there is no doubt - this is the right file, but the settings from it in UEFI Setup are not visible.
But another Advanced is visible, which is located in the DellSetupAdvancedDxe file (found by searching the Advanced line in UEFITool), and we pull out from its executable section for further study:
Well, it remains to investigate the difference between the files and understand what and where you need to change so that the first one is displayed instead of the second one.
Study
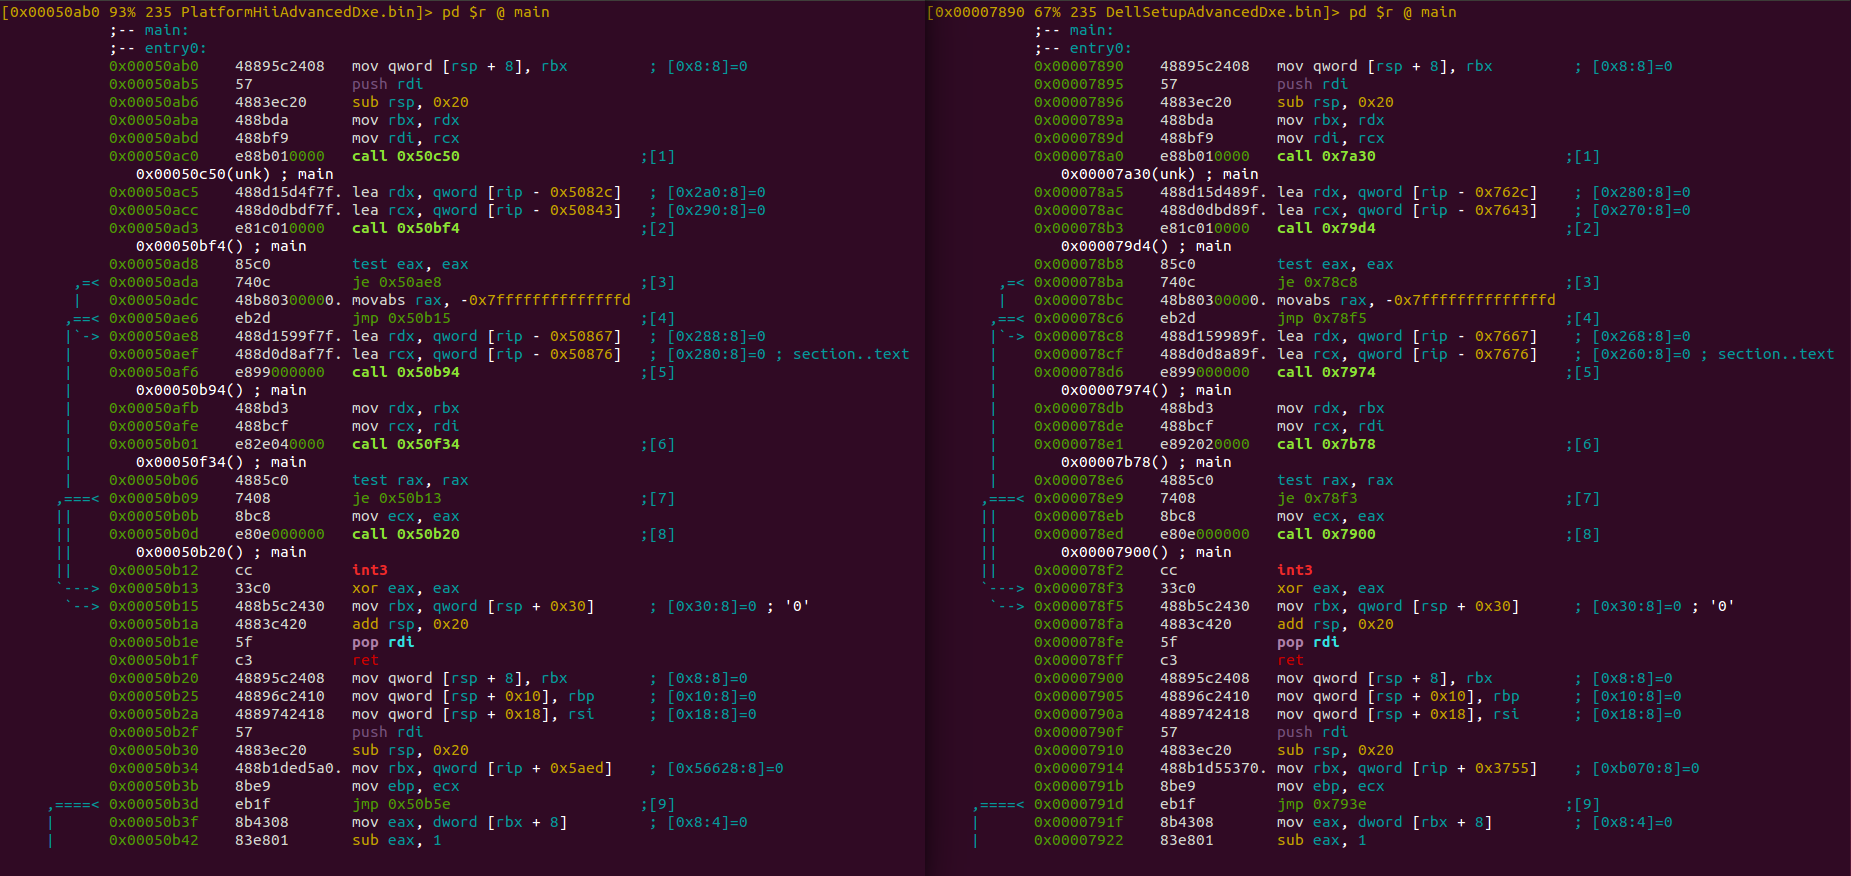
We copy both files to VMs with Linux, assemble radare2 and open two terminals, in one of which we run r2 PlatfromHiiAdvancedDxe.bin , and in the other - r2 DellSetupAdvancedDxe.bin , and after launch we go to visual mode with disassembler using the Vp command:
We observe a striking unanimity, broken only by different addresses of transitions. Everything suggests that the code is generated from the same template, so it will not differ much. Knowing the architecture of FormBrowser, we can assume that the files differ in that they publish the access protocol to them under different GUIDs. The protocol can be published via a call to gBS-> InstallProtocolInterface , which in the listing will look something like this:
mov reg, offset gBS ; BootServices lea rcx, Handle ; - NULL lea rdx, ProtocolGuid ; - GUID xor r8d, r8d ; - , 0 lea r9, Interface ; - NULL call [reg + 80h] ; gBS->InstallProtocolInterface After a brief search, a very similar template is found in both files:
Already from the comment of radare2 opposite lea rdx it is clear that the GUIDs of the logged protocols differ:
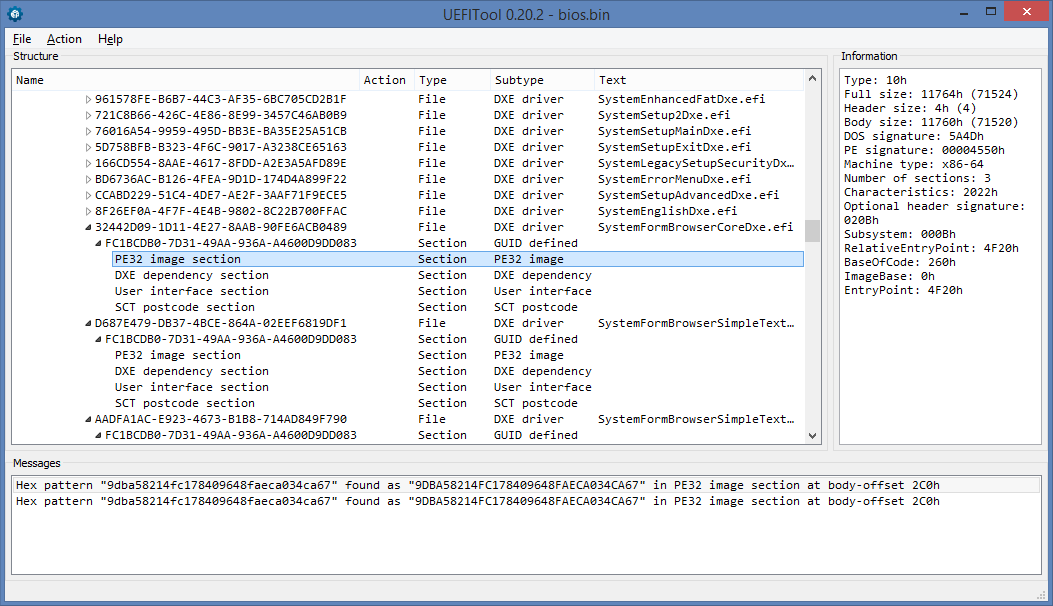
Now you can try to replace the GUID in the PlatfromHiiAdvancedDxe file with the GUID from DellSetupAdvancedDxe and delete the latter, but it is better to search for who exactly is using the protocol with the GUID from DellSetupAdvancedDxe and replace it already in it. We drive in the search:
We find two entries, one of which we already know, and the other is in the SystemFormBrowserCoreDxe driver at offset 2C0h from the beginning. It remains to replace and try to do.
UPD : Comrade gorodianskyi reports that on other versions of SCT in FormBrowser there may be a bunch of GUIDs, and even if you replace them all, the necessary tabs still do not appear, but the existing ones disappear. In his case, it turned out to replace the useless Info page from SystemSetupInfoDxe with the desired Advanced page (which for some reason is called Intel) from PlatformSetupAdvancedDxe by replacing the GUID in it with the one used in SystemSetupInfoDxe and removing this driver that has become unnecessary.
It was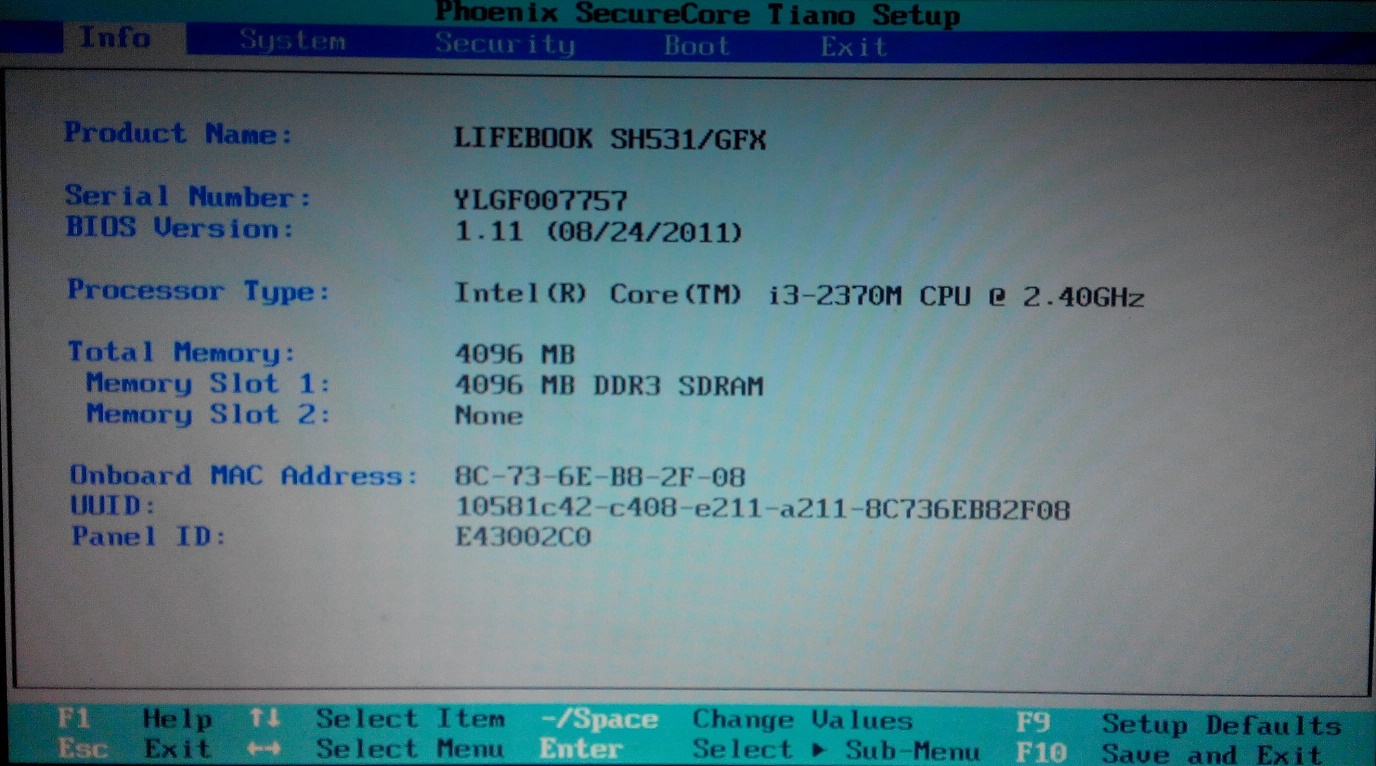
It became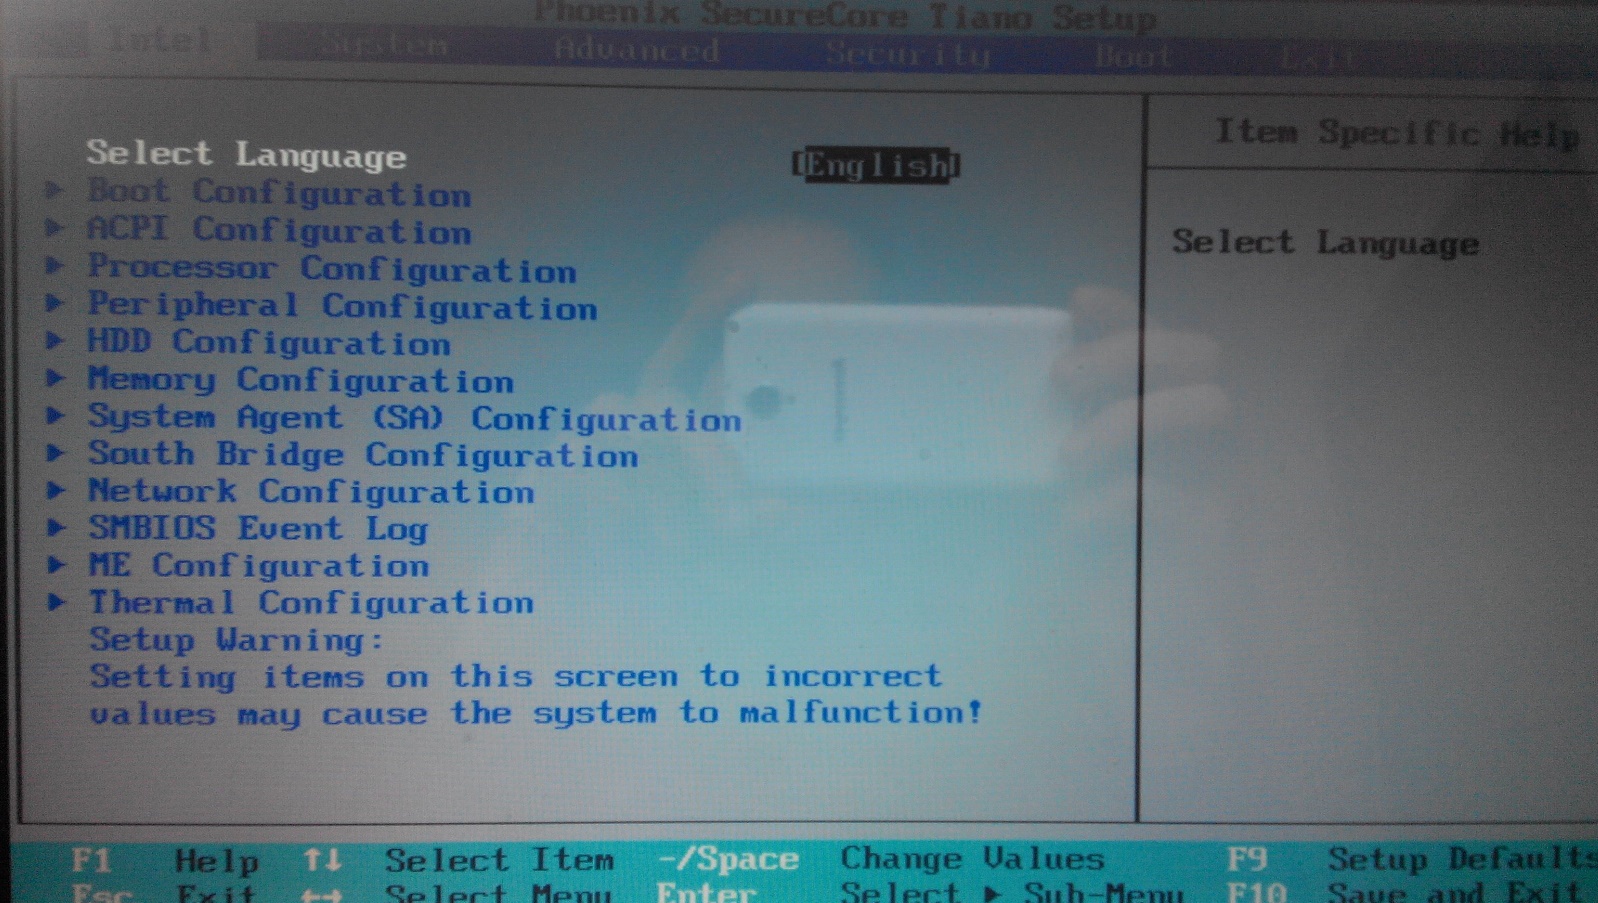
Testing and conclusion
Replace the found GUID, save the changes, rebuild the image and flash it on the programmer, then go to UEFI Setup, open Advanced and voila, the original settings are in full view. Some, of course, it is better not to touch, some others do not work, but the main thing is that you can finally set the speed limit for PCIe Port 1, for which I started these dances with a tambourine.
In fact, it was possible to confine ourselves to examining a text file with IFR and replacing one byte in NVRAM with the necessary one, but since it turned out to return the original menu, so be it.
Other vendors may have things differently, so do not take this post as a universal guide.
Thank you for your attention and successful modifications to you.
Source: https://habr.com/ru/post/250611/
All Articles