Deploying Windows Server 2012 R2 to Dell servers in BARE-METAL mode. Part 2
 In the previous part of the article, we prepared a sample server for cloning: we installed all the necessary drivers, updates (system components) and software. Made the necessary settings - enabled MPIO for ISCSI and SAS disks, combined the interfaces into groups, created logical interfaces in different VLANs, changed the size of the processed Jumbo Frames packets (the MTU value was set equal to 9014 <).
Now let's move on to configuring WDS (Windows Deployment Services).
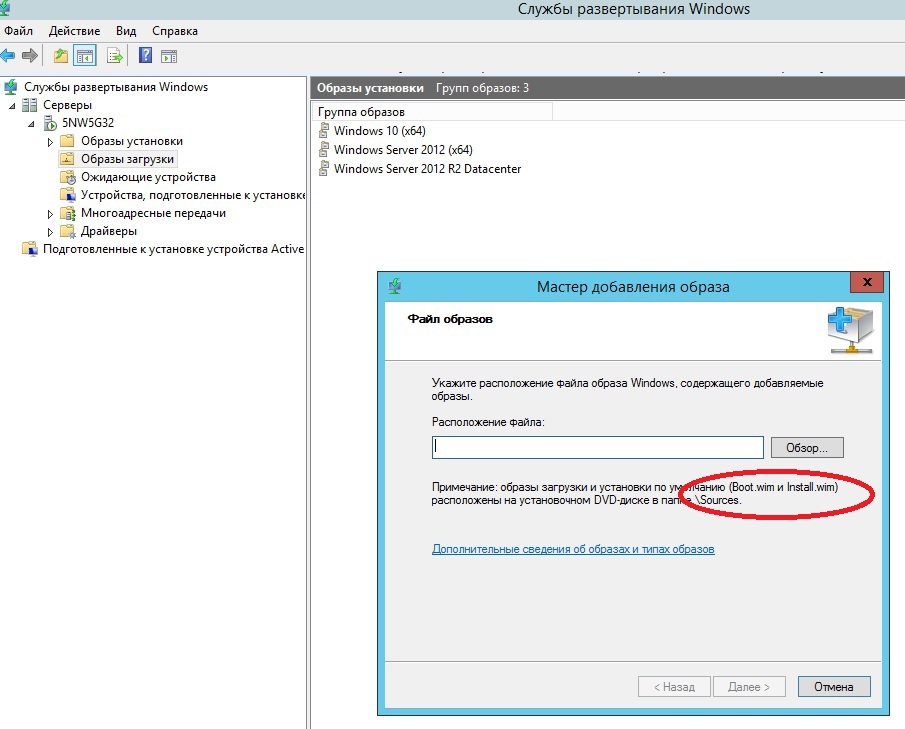
Installing this component of the Windows Server OS will not cause any problems, the procedure is standard. After installation, open "Control Panel - Administrative Tools - Windows Deployment Services". Mount the ISO image or connect a virtual DVD drive and insert the Windows Server 2012 R2 OS image into it, find the boot.wim files (to add the boot image) and install.wim (to add the OS installation image) on it:
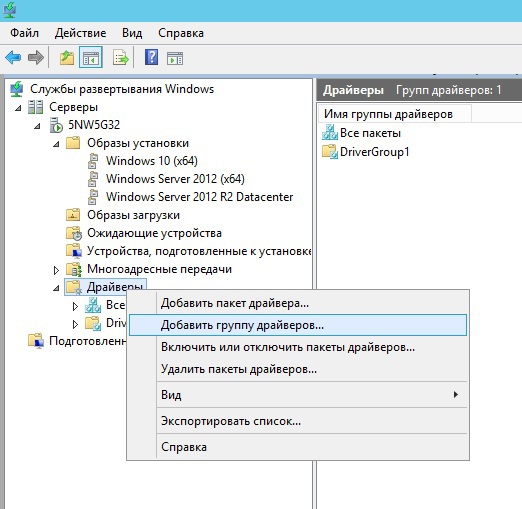
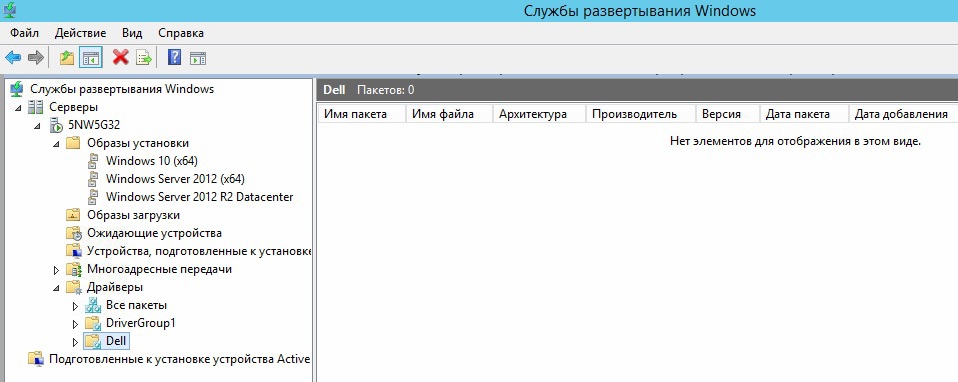
We will not go into details, the article is not about that - we just want to note the necessary settings: for ease of management, create groups for boot / install images, as well as add the necessary drivers for network adapters - this will save you from a lot of problems!
Grouping helps to apply filters when adding drivers (filter by vendors or models, types of equipment, etc.)

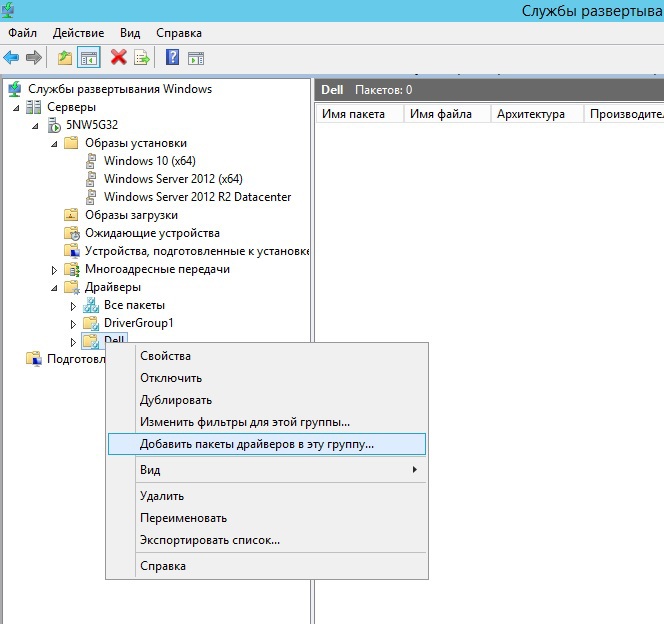
Empirically, the difficulty was found with loading WinPE to remove the image, without adding network adapter drivers and a RAID controller. For some reasons, the manufacturer does not lay out the drivers in unpacked form, only the installation package. It is good that the necessary drivers can be found on the computer. where the installation has already been done. They are located at the following address: C: \ Program Files \ Intel

The next step is to create a capture image:
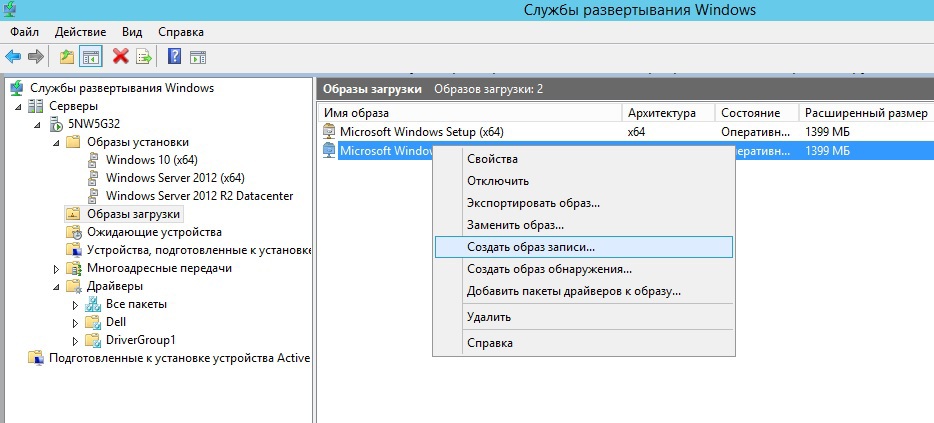
Enter the name of the recording image and its description (so that we don’t get confused, we add the word Capture to the name). Choose a place where it will be saved. After creation, make sure that the image is added to the server (section “Download images”), select it and call the context menu, where we are interested in “Add driver packages to the image”. Accordingly, we add the previously created driver group to the image ...
')
Go to the sample server. Create a file
AutoUnattend.xml
as follows:
<?xml version="1.0" encoding="utf-8"?> <unattend xmlns="urn:schemas-microsoft-com:unattend"> <settings pass="generalize"> <component name="Microsoft-Windows-PnpSysprep" processorArchitecture="amd64" publicKeyToken="31bf3856ad364e35" language="neutral" versionScope="nonSxS" xmlns:wcm="http://schemas.microsoft.com/WMIConfig/2002/State" xmlns:xsi="http://www.w3.org/2001/XMLSchema-instance"> <PersistAllDeviceInstalls>true</PersistAllDeviceInstalls> </component> </settings> </unattend> Save the following path C: \ Temp. Next, on the command line, run the sysprep utility:
%SystemRoot%\system32\sysprep\sysprep.exe /generalize /unattend:C:\Temp\AutoUnattend.xml 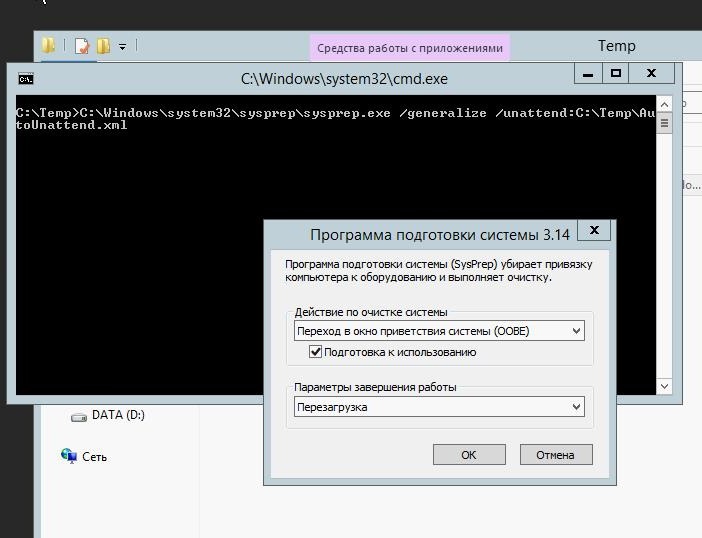
After running sysprep and rebooting, we go into the BIOS and select the network boot ( PXE ). If you have DHCP properly configured, it will transfer the necessary parameters (IP address of the PXE server, etc.) to the network adapter to boot WinPE and we will see the boot string to capture the image:
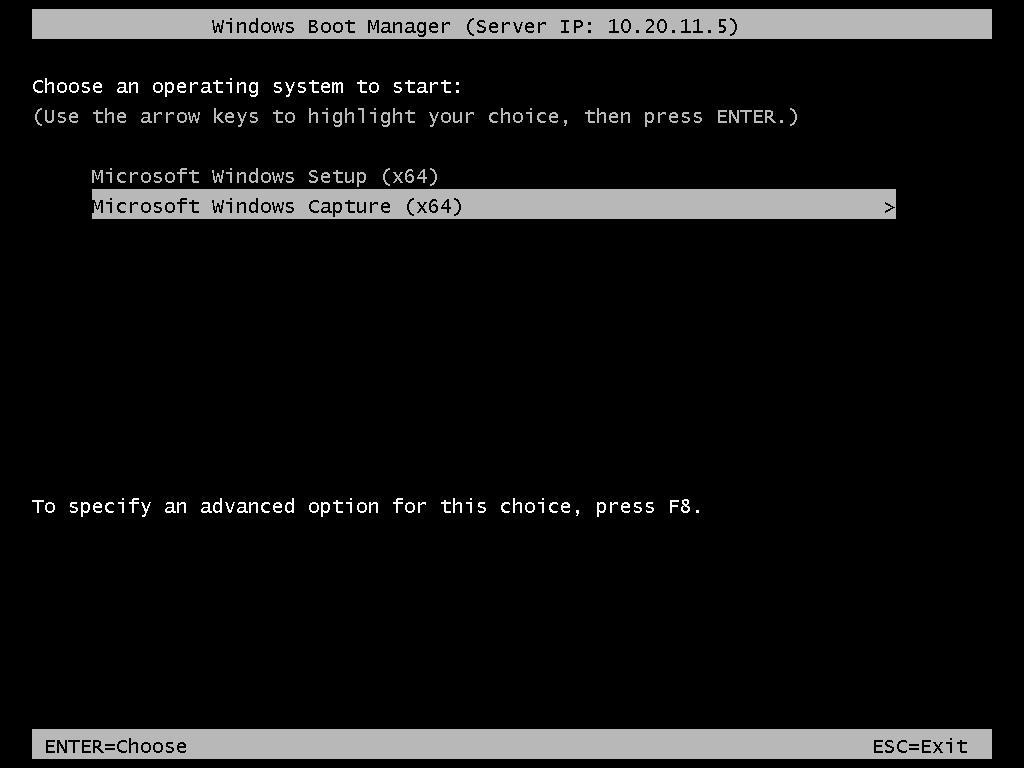
press Enter and load WinPE with all the necessary tools to capture:

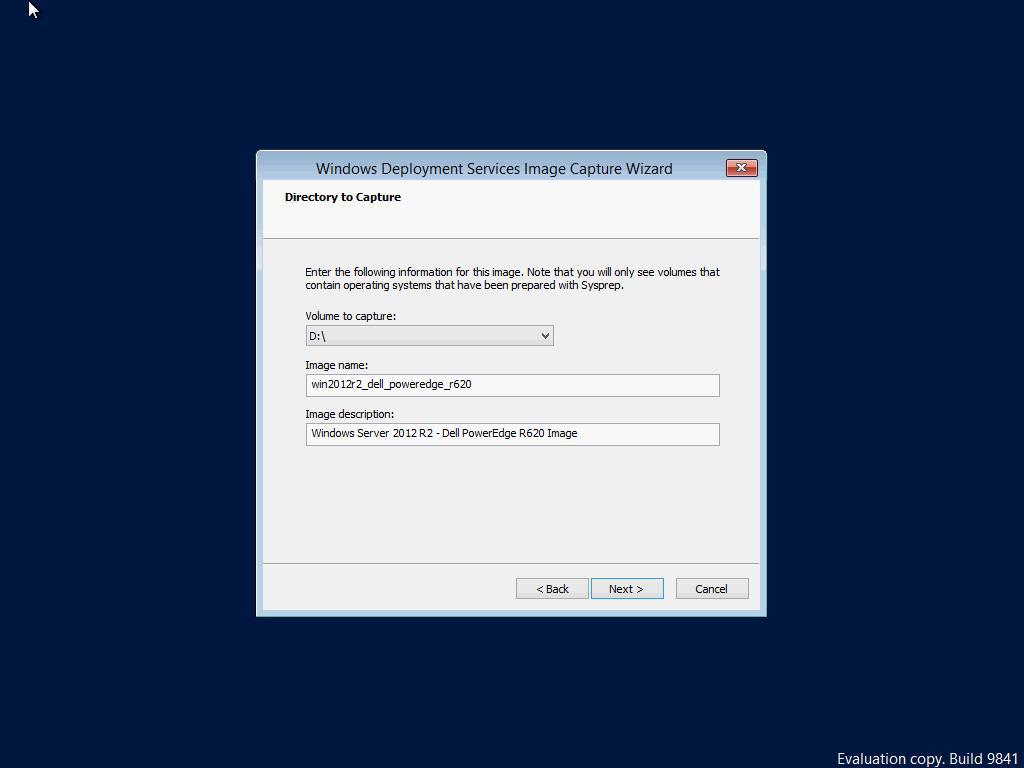
select the partition of the disk from which the image will be created (in the screenshot it is designated as D: \ - because it is the second partition on the disk). if there is nothing to choose, it means that something went wrong with the preparation of the system with the sysprep utility or with the addition of the necessary drivers, repeat these steps.
The created image can be uploaded to the WDS server (but, as our sad experience shows, this download is not justified for a long time and it is better to download it manually later):
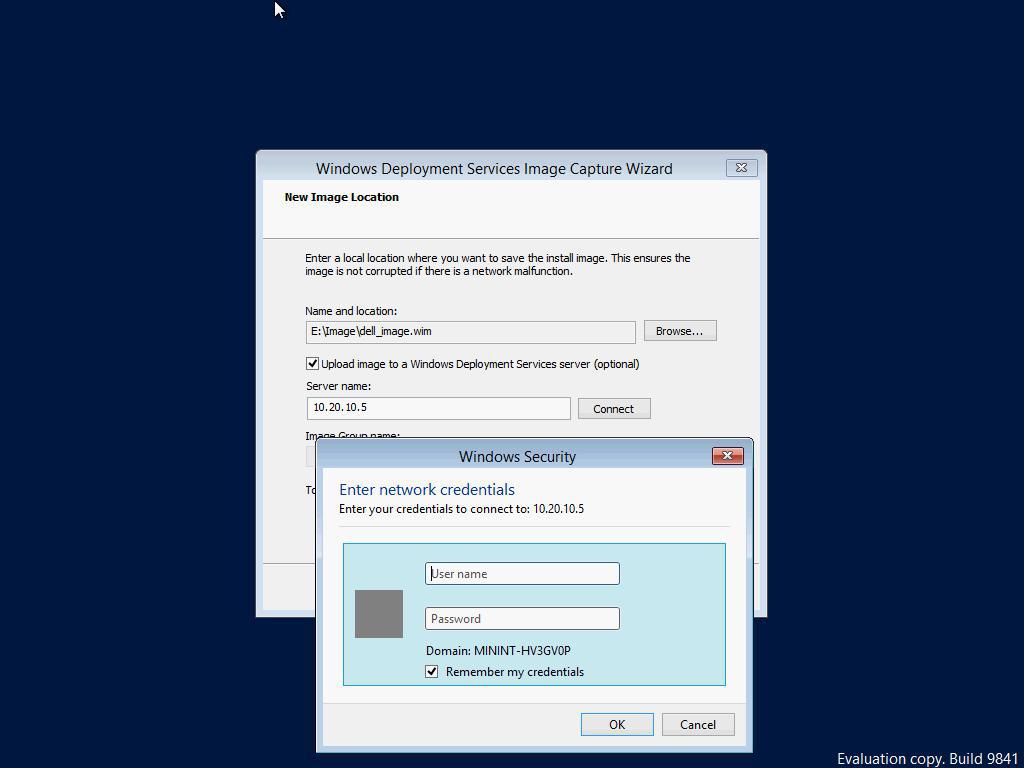
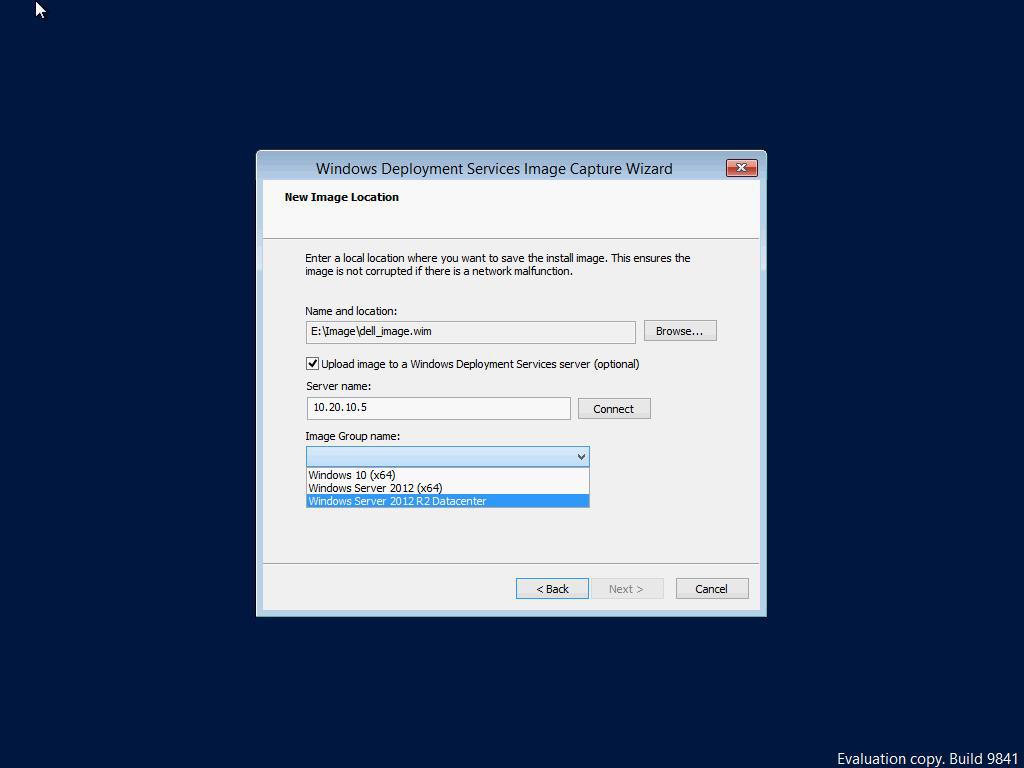
use the credentials of a domain or local administrator to connect. upon successful connection, you will see a group of images to be installed on the WDS server
With this image creation, everything can be deployed to the remaining servers ... Time savings increase with the number of servers on which you want to install the system. In addition, in the future this image can be used for downloading via iSCSI . We will tell about it in the future.
Source: https://habr.com/ru/post/250325/
All Articles