Writing a cross-platform library in Python
 Hi, Habr! Today we will talk a little about cross-platform development, namely, in the Python language.
Python language itself is considered cross-platform, but as long as it does not come to the interaction of the python-script and external platform-specific components. For example, the mechanism for connecting a network folder in Windows and Linux is completely different. And if you write a cross-platform script or even a library, then you cannot do without organizing a cross-platform code at the highest level of abstraction.
We will draw ideas from the cross-platform library itself among all Python libraries - os.py. It imports low-level modules depending on the composition of the standard library. For different platforms, the set of standard Python interpreter modules is different. You can verify this by looking at the code for the os module.
_names = sys.builtin_module_names # Note: more names are added to __all__ later. __all__ = ["altsep", "curdir", "pardir", "sep", "extsep", "pathsep", "linesep", "defpath", "name", "path", "devnull", "SEEK_SET", "SEEK_CUR", "SEEK_END"] def _get_exports_list(module): try: return list(module.__all__) except AttributeError: return [n for n in dir(module) if n[0] != '_'] if 'posix' in _names: name = 'posix' linesep = '\n' from posix import * try: from posix import _exit except ImportError: pass import posixpath as path import posix __all__.extend(_get_exports_list(posix)) del posix As you can see, the names tuple contains the names of all available modules. The module variable __all__ answers which objects will be available at import using the from os import * instruction. If the “posix” module is available, then we execute the posix-specific code, and also write links to its available objects in os .__ all__ . Then we delete the posix object so that it is not accessible by calling os.posix , since we no longer need it.
')
Thus, all objects of the posix module are available for calling using os.posix_object_module . Similarly for Windows, only instead of posix - nt.
It should be noted that in the Windows version of the interpreter only the nt module is available. Posix, solaris and other platform modules are not included in the delivery. Similarly for other platforms. The fact that the interpreter is compiled for a specific platform does not fit into the idea of cross-platform. Therefore, the distribution kit of our library contains modules for all platforms.
Let's start writing your own cross-platform library. For example, let's write a library that will connect a network folder regardless of the platform. Let's look at the commands that help to connect the network folder in different operating systems:
In Linux:
mount //server/share /mount_point -o user=user,pass=password In Mac OSX:
mount_smbfs //user:password@server/share /mount_point In windows:
net use z: \\server\share /user:user password Not so different teams. As you can see, each command has in its syntax server, share, user and password. All we need is to define the platform and execute the function with the server, share, user, password, mount_point input parameters (for win, this will be the drive letter).
Library structure
The file structure for our library will be as follows:
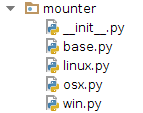
__init__.py
This file performs 2 functions:
- Specifies that the mounter folder is a package.
- Imports into the scope of the mounter package, objects depending on the platform
if sys.platform == "win32": from mounter.win import * if sys.platform == "darwin": from mounter.osx import * if sys.platform == "linux2": from mounter.linux import * base.py
Contains common to all platforms objects and prototypes of classes, on the basis of which platform-specific classes will be built.
import os from subprocess import Popen, PIPE class MounterBase(): mount_cmd = None umount_cmd = None mount_point = None network_folder = None def _prepare(self): if not os.path.exists(self.mount_point): print 'creating %s folder for mounting' % self.mount_point os.makedirs(self.mount_point) def mount(self): self._prepare() Popen(self.mount_cmd, stdout=PIPE, stderr=PIPE, shell=True) def umount(self): Popen(self.umount_cmd, stdout=PIPE, stderr=PIPE, shell=True) (UPD: According to the hellman user note, it’s worth noting that using shell = True is not safe . In order not to complicate the example, we will sacrifice some security for the sake of clarity).
Here, the MounterBase class is a prototype of future platform- dependent classes from the files win.py , osx.py , linux.py and so far does not know anything useful, since the commands for mounting and unmounting are not defined. Now consider one of the platform-dependent modules.
linux.py
import mounter class Mounter(mounter.MounterBase): def __init__(self, network_folder, mount_point, user, password): mount_cmd = "mount {network_folder} {mount_point} -o user={user},pass={password}" self.mount_cmd = mount_cmd.format(network_folder=network_folder, mount_point=mount_point, user=user, password=password) self.umount_cmd = "umount {mount_point}".format(mount_point=mount_point) In this class, we describe specific parameters for the Linux platform, namely, the mount and unmount commands. Let's do the same for Mac and Windows.
osx.py
class Mounter(mounter.MounterBase): def __init__(self, network_folder, mount_point, user, password): mount_cmd = "mount_smbfs //{user}:{password}@{network_folder} {mount_point}" self.mount_cmd = mount_cmd.format(network_folder=network_folder, mount_point=mount_point, user=user, password=password) self.umount_cmd = "umount {mount_point}".format(mount_point=mount_point) win.py
class Mounter(mounter.MounterBase): def __init__(self, network_folder, mount_point, user, password): network_folder =network_folder.replace("/", "\\") mount_cmd = "net use {mount_point} \\{network_folder} /user:{user} {password}" self.mount_cmd = mount_cmd.format(network_folder=network_folder, mount_point=mount_point, user=user, password=password) self.umount_cmd = "net use {mount_point} /delete /y".format(mount_point=mount_point) As a result, to connect the network folder, we just need to call the mount () method of an instance of the mounter.Mounter () class:
import mounter ... mount_point = "/mnt/mount_moint" share = mounter.Mounter("server/share", mount_point, "guest", "secret_password") share.mount() copy_requared_files(source=mount_point, dest="/tmp") share.umount() Now you do not need to remember the command syntax for all platforms. Of course, we implemented the most primitive mechanism for connecting a network folder. This mechanism does not take into account that the network folder can be without a password, as well as other features. I will leave the implementation of these features to you.
We use a similar architecture in automated testing of Acronis True Image for Windows and Acronis True Image for Mac products. For example, to perform a backup procedure, it is enough to call the TrueImage.backup () function, and depending on the platform on which the script was run, the corresponding platform-specific code will be executed.
Previous posts in our blog:
- True Image Multiplatform Development
- 50 shades of blue, or a tale about how we did the design. True Image 2015
- Acronis Snap Deploy 5: Bulk Deployment is fast and easy.
- “Not a single break!” Or why should a customer fight with technical support
- Stages of the birth of new functionality in the software product
- Golden rule of backup
Source: https://habr.com/ru/post/249963/
All Articles