Acronis True Image (for Windows) usage example for Mac computers
Introduction
Many PC users know what Acronis True Image (ATI) is and how it simplifies life.
It is enough to install and configure the OS once, be it Windows or Linux, or any combination of them, and then use ATI to create an image file of the necessary partitions on the disk. By restoring this image file (on the same or another PC), you immediately get the desired configuration of the disk partitions and operating systems with all the settings and software.
This is especially convenient when you have hundreds of empty identical PCs in front of you, and you had to install them yesterday.
')
ATI has other useful features, but it’s about the use of copying disk partitions to an image file and back.
Task: prepare an ATI image file with the Mac OS and deploy it on Mac computers.
To solve the problem, you will need: an ATI boot disk (for Windows), a Mac computer (hereinafter referred to as Mac) with a CD / DVD drive.
Theory (possible problems)
Question number 1: How to get to the Mac boot menu?
Answer # 1: Hold down the “Alt” key when turning on the Mac.
Question number 2: How to load ATI on a Mac.
Answer # 2: Early versions of the Mac OS bootloader did not allow booting from the Windows Live or ATI boot disk. In this case, Mac OS had to install the latest version of Boot Camp. After that, the download from Windows Live or ATI became available.
Currently, there is such a possibility by default, if you still have such a problem, you must first update EFI via Mac OS, and if the problem persists, install the latest version of Boot Camp.
You can add that Linux can often be loaded (depending on the version) only by installing the rEFIt program in Mac OS.
Question number 3: Mac OS uses the HFS and HFS + file system, and ATI does not support such file systems.
Answer # 3: When creating an image file in ATI, we select sector-by-sector copying of the partition. In this mode, you can copy any file system. The disadvantage of this method is that the resulting image file will have a much larger volume (in part this problem will be solved further).
Practice (technology description)
Phase of image file creation:
Step 1. First you need to prepare (install and configure) Mac OS and the necessary software. Adjusting the OS you need to bring it to a state in which you want to see it when installing on this or another Mac.
Step 2. After preparing the system, you need to go to the disk utility and reduce the volume of the partition with the system to a minimum (Figure 1). This is necessary to reduce the size of the image file. The fact is that with sector-by-sector copying, information will be recorded on “all sectors” of the disk partition, including those that are “responsible” for the free space. This step allows you to reduce the size of the image file from 100-200GB to 15-20GB (depending on the size of the hard disk and the installed software). It also increases the speed of creating and deploying an image file from 4 hours to 10 minutes.

Fig.1. Reducing the size of the disk partition
Step 3. After the size of the disk partition is reduced, restart the Mac and hold the “Alt” key (in order to get to the boot menu). Paste the ATI boot disk into Mac and boot from it.
Step 4. Create an image file.

Fig.2. We go to ATI. An example is given on ATI 2013.
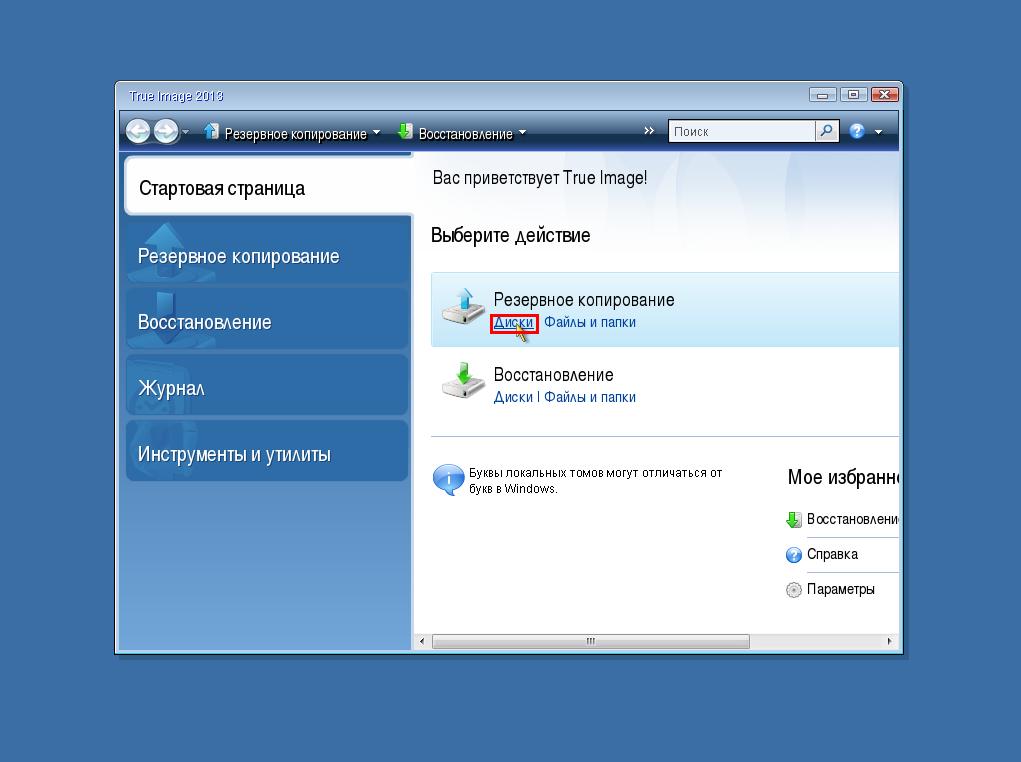
Fig.3. Select the backup drive. (Reserve separate files and folders will not work, since ATI can not detect them in the file system HFS or HFS +)

Fig.4. Choose a physical disk to copy all partitions (If you are an experienced user, then you may need only some logical partitions, but the article is not about that). Select sector-by-sector copying (since ATI does not recognize the HFS or HFS + partition) and click “next”. The picture is not entirely correct, as an example of NTFS is given, but the procedure is just such

Fig.5. Go to the media selection window, on which we save the file-image of the disk partitions. Press the “Browse” button

Fig.6. We select the medium on which we will save the file-image of the disk partitions. Be sure to specify the name for the image file, then the “ok” button will become active. Click “ok”
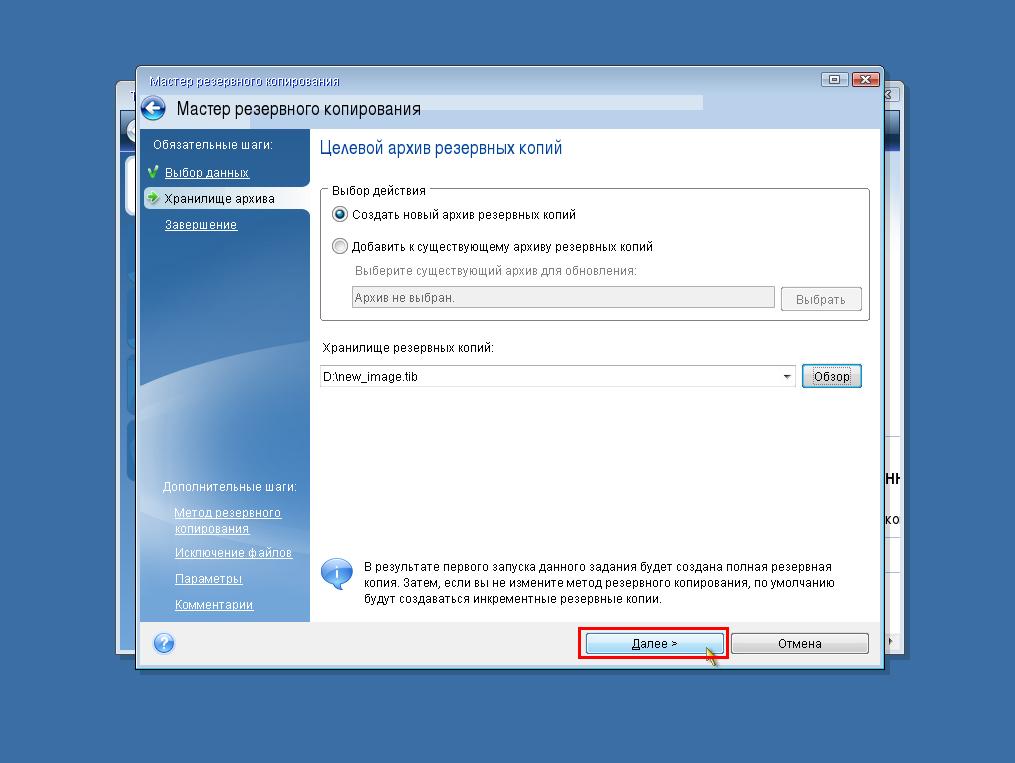
Fig.7. Confirm the path and name where we save the image file by clicking the “next” button

Fig.8. We start the process of creating the image file by clicking “Proceed”

Fig.9. Confirm successful completion of the image file by pressing the “ok” button
Step 5. Reboot the Mac (If the reboot button is not provided in the ATI version, then simply turn off the power of the Mac).
Step 6. After the file-image is created, you need to return the previous size of the disk partition. Go to the disk utility and return the desired size of the disk partition (Fig.10).

Fig.10 Returning the desired size of the disk partition
File Image Deployment Phase:
Step 1. Turn on the Mac while holding the “Alt” key (in order to get into the boot menu). Paste the ATI boot disk into Mac and boot from it.
Step 2. Deploy the image file.
Fig.11. Go to ATI

Fig.12. We select recovery of disks

Fig.13. Go to the media selection window, on which the desired image file is saved by clicking the “Browse” button

Fig.14. We select the media and the image file itself, and confirm the selection by pressing the “ok” button. This version of ATI, when creating an image file, appends the technical parameters of the image file to the end of its name, this record does not play a special role, and if you don’t like it, you can change the file name to any other

Fig.15. With more complex ATI manipulations, there may be several images in one image file, but in our case it is the only one, so just click “next”

Fig.16. Confirm that we restore partitions by clicking the “next” button

Fig.17. Select the recovery of the entire physical disk (all logical partitions) from the image and confirm the selection by clicking the “Next” button. (And again, if you are an experienced user, then you may need only some logical sections, but the article is not about that.)

Fig.18. Select the physical disk, on which we will restore partitions from the image and confirm the selection by clicking the “Next” button. Again, the picture is not entirely correct, as an example of NTFS is given, but the procedure is just such

Fig.19. In order to deploy partitions from an image to a physical disk, this disk must first be cleared of the partitions currently existing on it. We agree to format the hard disk by pressing the “ok” button

Fig.20. We start the process of expanding sections from the image file by clicking the “Proceed” button

Fig.21. Confirm successful recovery of partitions from an image file by clicking the “ok” button
Step 3. Reboot the Mac.
Step 4. After the image file is deployed, you need to return the previous size of the disk partition. Go to the disk utility and return the desired size of the disk partition (Fig.10).
The problem of resizing the partition
Question number 4: Sometimes there is a situation when the disk utility can not change the size of the disk partition.
Answer # 4: Often this happens when an image file was created on a Mac with one hard disk capacity, and is deployed on a Mac with a different hard disk size. You can fix this in several similar ways, below are 2 ways to solve this problem:
Method one:
Step 1. Boot from the Mac OS installation disk.
Step 2. Enter the disk utility.
Step 3. Select a logical disk and click “fix disk” (Fig.22).

Fig.22 Correction of the logical disk (in the picture the button is not active, since the Mac is loaded from the same logical disk)
Step 4. Select a physical disk and set the required size of the disk partition (Fig.10).
Step 5. Restart Mac.
Method two:
For this method, you must have: a second Mac with Mac OS installed, a FireWire port on both Macs (Figure 23), a FireWire wire (Figure 23).
Step 1. Download Mac (computer # 1), on which the image file is deployed, holding down the “T” key (load Mac in FireWire mode).
Step 2. Connect both Macs with FireWire wire.
Step 3. Enter the disk utility on the computer №2.
Step 4. Select the logical disk of the No.1 computer connected via FireWire and click “fix disk”.
Step 5. Select the physical disk of the No.1 computer connected via FireWire and set the required partition size.
Step 6. Disassemble the design and restart the computer number 1 in normal mode.


Fig.23 On the left is the FireWire wire used in Macs. On the right is the FireWire port on the Mac.
Instead of conclusion
This method is not applicable to those Macs on which 2 physical disks are combined into one logical disk.
Source: https://habr.com/ru/post/249511/
All Articles