Guide to the Car Tutorial (Unity3d) part 3 of 3
Part 1
Part 2
Before we begin, I want to suggest scripts rewritten in C #. because half of the JS scripts I decided to rewrite them under C # (C # is more native to me). Download
There is also an active “debriefing” of the project for beginners “Project: Survival shooter” , video tutorials are presented in the next Playlist , additional video tutorials for Survival shooter . I personally thank this channel for their not easy work.
')
ps at the end of this manual there is a video review in which examples show a comparison of two implemented methods of driving a car.
So, we will start studying our leadership.
We have already seen how to build a working machine from a 3D model, scripts and embedded components. We also learned about public variables and how they can be used to fine tune a car.
Now we will talk about studying the work of the script Car .
• Double-click the Car.js script to open it in the code editor.
At first glance, this script can be a bit intimidating, with more than 500 lines of code and comments and a lot of variables and functions. Do not despair. Our script is designed in such a way that we would have relatively small functions with meaningful names that indicate what is being performed in each function. As well as in the code there are comments that explain a certain part of the code.
So we suggest that you take a look at it, starting from the “entry points” of studying the script and following further along the guide. In this case, these entry points will be the Start () , Update () and FixedUpdate () functions.
Each of these “core” functions causes other functions. Therefore, when we start with the Start () function, we will see that the function first called the SetupWheelColliders () function. Find this function in code and examine what it does, and then go back to the Start () function and go to the next SetupCenterOfMass () function. By studying this code you will understand how the car works. In the future, we will consider all these functions. We will not explain every line of code, but we will examine all the functions in order.
Working in Unity is easy in many ways, thanks to such things: built-in components, editor, D & D capabilities. Setting up a car is half the job — Unity takes care of importing models , collision components (collision) , rendering (rendering) and physics (physics) can be added to an object by clicking on the “add the components” button .
Inside our script, we will work mainly on manipulating these components. Of course, you will stumble upon a multitude of calculations and formulas that we use to determine what happens to a car. This is the inevitable part that makes games realistic: you have to set some logic, for example by writing scripts when you want to do more than just basic functions. These formulas and calculations are used in our components.
If you see that the code is not at all familiar and you do not know where to start, you can try our approach, which is to focus on the following points, as well as considering how and what works:
• rigidbody
• Wheel Colliders
• Calculations and formulas that we make, as well as their order.
Think of it like this:
• When adding a Rigidbody to our car model, we have a way to control its physical abilities. We can do this by calculating the forces that move it forward, which slow it down.
• When adding wheel colliders (Wheel Colliders), we gain control over where the car collides with the road.
This is where we do the initialization necessary for the car. The Start () function is executed only once, at the beginning of the script, before the Update functions. Therefore, Start () is often used to set the initial values of the required components in the code.
We have four wheels attached to our car, and we put them in the FrontWheels and RearWheels arrays in the inspector. In this function, we create real colliders (colliders) , making it possible for the wheels to interact with the surface and the car. We start with the SetupWheelFrictionCurve () function .
In SetupWheelFrictionCurve (), we simply create a new WheelFrictionCurve and assign it values that we consider appropriate for our car. WheelFrictionCurve uses WheelColliders to describe the friction properties of tire tires. If you want to learn the process of creating a car in Unity in more detail, built using WheelColliders , then read the documentation.
After setting the curve (curve) , we returned to the SetupWheelColliders () script, now we are ready to create colliders (colliders) and wheel objects (Wheel) . This is done by calling the SetupWheel () function for each of our wheels. If you look at this function, you will see that it has two parameters: Transform and boolean , and returns a Wheel object. We need this in order to change the location of the wheels, as well as to indicate the wheel belongs to the front of the car or not. The function then creates and returns the Wheel object, which we nest in the wheels array containing all our wheels for the rest of the script:
In this cycle, we create a new game object, and call the SetupWheel () function, pass the coordinates of the object as the first argument, specify TRUE or FALSE as the second parameter, if TRUE , then the created wheel will be the front one, if FALSE, then the rear one. Then we add the WheelCollider component to this game object. We set the WheelCollider properties from the suspension variables (suspension) that we discussed when setting up the car (suspension range, suspension spring and shock absorber) (suspension range, spring and damper).
Required properties: we’ve already created a collider (collider) , WheelFrictionCurve is created in WheelFrictionCurve () , wheel graphics ( DiscBrake object we dragged into the inspector when we created the car) and tire graphics (which is a child of DiscBrake ).
We will set the wheel radius automatically, depending on the tire size:
Finally, we check the wheel we just created, whether it is the front wheel or the rear wheel, looking at the TRUE or FALSE value. Later in the code, we have to check that the car touches the ground, at least with one front and one rear wheel.
In addition, we make a small reception for the front wheel, creating an additional game object that we establish between the car body and the wheel. This is the Steer Column (front pillar) , which we will use later to rotate the wheel when turning. Finally, we create a wheel, which we return to the Wheel array and when we have processed all the wheels, we return to the Start () function.
This is the next function we will look at. This is a very small function that will set the center of mass in the Rigidbody to CenterOfMass , which we created earlier. If the center of mass has not been established, Rigidbody will use the center of mass by default, which Unity will automatically calculate. Then we convert the maximum speed entered in the inspector using a small useful function:
The function simply multiplies the TopSpeed variable by the number 0.44704, which translates it into meters per second. This is an installation, so we can enter the desired speed in the inspector in miles / hour. When calculating physics, we work with m / s. We also have a small function that does the inverse calculation, which is very useful if you want to display the vehicle speed in miles / hour.
The transfer is automatically calculated in this function by assigning the maximum speed to each gear and calculating how much power is needed to accelerate the car to a given speed in each gear. The power is calculated using the friction and resistance values supplied in some variables, which means basic calculations along the Z axis, the friction calculation takes place in the Update () function. The coefficient is multiplied by the value of this power so that the car accelerates to high speed.
This function finds the Skidmark game object on the scene and stores a link to it using ParticleEmitter to create smoke. The code for skidmarks is not covered in this manual, but this should not stop you from opening the script and exploring it on your own. At the end of Start (), we assign the X values of our dragMultiplier array to a variable:
It is saved because we change the dragMultiplier X variable when we use the handbrake , and then we need to return to the original value again when we do not use the handbrake .
To set the initial values, use the Start () function. For regular changes to these values, use the Update () function.
Update () is called every frame of the game, if MonoBehaviour is on.
Update () is the most frequently used function for implementing gameplay.
The first thing we do in each frame is a different keyboard operation by calling the GetInput () function. The first two lines are read from vertical (vertical) and horizontal (horizontal) axes and stored in the throttle and steer variables :
Vertical (vertical) and horizontal (horizontal) axes can be set in the Unity Input Manager (Edit -> Project Settings -> Input) . By default, the vertical (vertical) axis is set to the “W”, “up arrow” keys for forward movement and “S” keys, “down arrow” keys for backward movement and the value we use here is stored in the variable throttle . The horizontal (horizontal) axis is set as the “A” and “Left arrow” keys to turn left, as well as the “D” and “Right arrow” keys to turn right.
After learning to getInput to drive a car, we call the CheckHandbrake () function. This is a specific function that checks whether the Space key is pressed or not, and applies certain logic accordingly:
When we first pressed Space (space) , we set the handbrake variable to true , it starts the handbrake mechanism and changes the value of dragMultiplier.x (it creates a vibration on the road, like a real handbrake).
When Space (space) is not pressed, the code will be executed another, until the key is pressed. This again means that the handbrake code will not work only when the user first releases the Space (space) , because we set the handbrake variable to false inside the block. The StopHandbraking () function will be activated:
StopHandbraking () takes an input variable that determines the number of seconds that will have to be spent returning dragMultiplier.x back to its original state. This value must be at least 5 for the handbrake timer that we just started. The function then counts down the specified number of seconds, after which it sets the default value of the dragMultiplier.x variable, this creates the vehicle’s normal movement again.
Returning to the Update () function, we now consider the Check_If_Car_Is_Flipped () function to check if the machine has turned over. Inside this function, we will check the inverted machine. This is absolutely true for a car that will be turned over or turned for example on extreme turns, if we have an accident or do some tricks, but we want to exclude the possibility of a car turning over. Therefore, we check if the car has turned over at a certain angle, at which the car is not on the move anymore, and if so, we add from the moment of the last frame to the resetTimer variable. If this value ultimately boils down to exceeding the value we set for resetTime (5 seconds by default), we call the FlipCar () function. If the car is at an angle with which you can drive, we set the timer back to zero.
In FlipCar () we get the car back on the wheels and set its speed to 0, so we can start moving again from this point.
This is the longest and most complex function that is called from Update () . Fortunately, there is this large section that deals only with the placement of tire marks . In terms of wheels, an important role is played by updating their position and angle of rotation in this function.
Each wheel we begin with checking whether it touches the ground or not. If it touches the ground, then we set the wheelGraphic (wheel graphics) to the position in which it should be, it depends on the height and radius of the wheel. This will move the center of the wheel to the correct position relative to the chassis of the car.
After installing the wheel, we get the RigidBody speed at the point of contact with the ground, in order to transfer it to the local space and store its coordinates in our object.
If the wheel currently does not touch the ground, then we establish the position of the wheel on the basis of its coordinates, the range of the suspension, and the suspension of the “parent wheels” itself.
The last function called in the Update () function is UpdateGear () , which calculates the current “transfer” of the car, based on the set values in SetupGears () and the current speed. In the last section of the tutorial, we should look at the rest of the main loop, namely the physical calculations that occur inside the FixedUpdate () function.
When dealing with physics, it is important that the calculations and actions are strictly controlled so that the result is good. FixedUpdate () is created for this purpose. This ensures the execution of the code with a fixed time interval. The frequency of calling the FixedUpdate () function: “It can be called several times in a frame if the frame rate is low; or may be called after several frames if the frame rate is high. All physics calculations and updates are called immediately before FixedUpdate () . ” We have a number of functions performed inside FixedUpdate () , and they all relate to computing and applying force to a car.
This means that with increasing speed - resistance increases even more. Squaring the velocity when calculating the resistance is based on the present formula of resistance used in physics.
After relativeDrag (Relative resistance) and scalable dragMultiplier (resistance factors) we have already considered, it was taken into account that the car in profile is very different from the front, side and top views.
If we apply additional forces to the side brake to the side and frontal resistance values, based on how fast the car travels. Notice how we use the scalar product between the speed and the direction of the front of the car to calculate the additional resistance. This equation leads to additional resistance at the front of the car when the car is driving forward without turning (braking is faster) and slower braking on skids and turns. For the X value of resistance, the same: for a car while sliding sideways. After that, we gradually increase the resistance value X to slow the car instead of letting it slide along the road at all times.
If we do not use the handbrake , we will only update the value of X :
This is done for a comfortable ride on the car - we increase the lateral resistance, it gradually slows down the car during a drift until the moment the car completes the drift.
At the end of the function, we apply forces to RigidBody :
The resistance force is opposite to the speed of the car, we apply it to the RigidBody , as a result of which the car slows down.
This function monitors the friction that is created between the wheels of the car and the surface of our road. This is very simple because we use the WheelFrictionCurve function that we set up at the very beginning. Friction of the wheel gives the force at the “exit” of the function, based on the tire slip measurements that we passed to the function. This force is divided into two directions: frontal friction (responsible for acceleration and braking) and lateral friction (responsible for properly maintaining the vehicle on the ground). Earlier, we assigned the value of friction wheels, now we need to take care of updating the friction between the wheel and the surface:
We perform one action - we change the friction value of the car based on the current speed of the vehicle and the direction of movement of the car (normal driving - Forward Friction , and based on the skidding of the car - “driving sideways” sideways friction ).
Calculation of engine power, which we later use to apply force to RigidBody is relatively simple, but has several “quirks”.
• If we do not throttle , we simply reduce the engine power, thereby slowing down the car.
• If we throttle in the same direction in which the car is now moving (we check this with the HaveSameSign () function) and calculate the value we add to the engine power. What we see may seem a bit strange: we calculate the rate of force, which is the product of the current engine power divided by the maximum engine power (yielding a result between 0 and 1), and then multiplied by 2 times. The result will be between 0 (when we stand still or eat very slowly) and 2 (when we eat at maximum power). Then we call the helper function EvaluateNormPower () . This function looks at the transmitted value and returns a number between 1 and 0 if the power norm is from 0 to 1. If the power norm is from 1 to 2, the function returns a value between 0 and 1. Are you surprised? The number used in the formula that adds strength to the engine:
The end result is that we add more power when we press the "gas" button and the car starts slowly from the beginning, gradually accelerating. In the end, when the car reaches maximum speed, no additional force is used to add to
engine power.
• If you use throttling in the opposite direction, this is equivalent to braking. In this case, we will subtract the engine power for some time.
Finally, the engine power is calculated, between the current gear and the previous gear, to avoid the possibility of drastically changing the values in the calculation formula.
This is a small function that we will consider now, because we need to know which car wheels are on the ground. She makes this check very simple:
• We set the canDrive and canSteer variables to False by default.
• Then we check each wheel in the Wheels array to check which wheel touches the ground and which one does not:
If the wheel is on the ground, we check what type of wheel it is. If this is the front wheel, then canDrive is set to True . If it's a rear wheel, then steerWheel is set to True . This function has done its job, if at least one wheel (rear wheel) touches the ground, then we can drive our car. If at least one wheel (front wheel) touches the ground, we can turn.
It remains to consider the last two functions that actually relate to our calculations for the RigidBody car. We will look at this in more detail here so that you understand the logic of the work and the formulas for the calculation that ultimately create the movement of the car.
This function will work if the CalculateState () function sets the canDrive variable to True (this means that at least one drive wheel is on the road). If we can control, we start by comparing the throttle variable (which is a keystroke from the keyboard) and the relativeVelocity.z variable in which the vehicle speed value. If these values have the same sign — defined in the HaveSameSign () function — this means that we are throttling in the same direction in which the car is traveling and in this case we add throttle force to RigidBody :
If the throttle value is negative (the user presses the brake button), the sign will be -1 and we calculate the negative throttleForce (Throttle Force), which we add to the car, we also know that the throttle force has a negative speed. Therefore, we will throttle back faster. The opposite effect when the user presses the "gas" button. Then we add a “positive” throttleForce to the car, which is already going forward.
If relativeVelocity.z and throttle have different signs, then this should mean that we will add throttle force in the opposite direction from the direction in which the car is now driving. In other words, the car slows down or slows down. We do this by setting the variable Brakeforce based on the mass of the car and the force of the first gear of the engine:
Again we use throttle , because we know throttle in this case has the opposite sign of speed, as a result, we calculate the force opposite to the force that drives the car.
When we finish defining whether the car needs acceleration or deceleration, we apply the calculated forces in the direction of the Rigidbody movement:
If you do not create a drag racing game where you are trying to set a world speed record on a straight line, steering control is as important as throttling, so let's explore this function. We do not use any throttle force as long as the drive wheels (drive wheels) do not touch the ground, and the same for this function, where we can not drive the car as long as the steer wheels do not touch the ground.
At the beginning of the function, we calculate the value of a variable named turnRadius , based on the input data. The equation makes an increase in the turnRadius value when you turn to either side. We calculate the minMaxTurn value by calling the EvaluateSpeedToTurn () function.
This function returns the turn value depending on how fast the car travels; this is described in more detail in the second chapter of our manual. If the car is driving fast, this value will be closer to minimumTurn , which makes it more difficult for the car to turn during fast driving. Returning to the ApplySteering () function, there turnSpeed refers directly to the calculation of turnRadius in the car. The larger the radius, the smaller the angle of rotation, because the rotation circle is larger.
We turn the car according to the formula:
The function RotateAround () turns around the transformed axis at a given point and takes an angle, which is the sum of turns.
• The pivot point is exactly in the middle of the car when we do not turn the car at all. , , . , Steer , , , . TurnRadius , . TurnRadius transform.right , , :
• Y (up) , , X- we will turn the car to the line shown in the image.
• The rotation angle is calculated on the basis of turnSpeed multiplied by Steer to turn left / right .
Now consider the inside:
(handbraking) .
, , angularVelocity.y RigidBody . , , . , .
, , angularVelocity.y . -1, 1.
, :
, , , , — .
Update () LateUpdate () . , , .
(Project view) ~ AlternatePhysicsModel . Prefabs Unity . (wheel colliders) Unity , (wheel collider) Physics.Raycast . Pacejka « /Magic Formula» — , .
Most likely, you do not need to know about the inner workings of the physical model. You can just experiment with the settings of the already created Prefabs . If you open the scripts, you will see that all parameters are explained in the comments. Try to change the settings slightly and drive a car.
Prefabs (skidmarks) Prefabs . , (Skidmarks Prefab) (, Prefabs skidmarks ). .
, «» ( ).
, TractionHelper which is designed to make cars more manageable with joysticks.
AerodynamicResistance.cs : This script must be added to each car in order to calculate the aerodynamic friction of the car.
AntiRollBar.cs : Add, if necessary, to mimic the anti-roll bar for better handling.
CarController.cs : script to handle driving. This script is required for each car. You can edit this script if you want to change driving or implement AI. Also sets some characteristics of the car body, such as the center of gravity and inertia.
Drivetrain.cs : car engine and transmission. This script contains the gearbox and engine. One of the scripts needed in the car.
Skidmarks.cs : Global Brake Mark Manager . Add a Skidmark Prefab to the scene that uses this class to visualize and control brake marks on all vehicles.
SoundController.cs : A simple class to play car sounds and other sounds. This script must be added to the car.
TractionHelper.cs : If necessary, add this script to the car to make it more sustainable.This script is designed to help customize the flexible control of the car.
Wheel.cs : This script simulates tire models and wheel suspension, and acts as a replacement in Unity for the built-in component Wheel Collider.
Wing.cs : Add one script or more than one if you want to simulate the downforce of aerodynamics for your car.
2 , , :
1) , 70 .
2) , .
3) «» .
4) Rigidbody Drag Angular Drag ( ) )).
. (~ AlternatePhysicsModel).
: Lambordgine — 2, 1.
: , « » 1. , — 2.
Part 2
Before we begin, I want to suggest scripts rewritten in C #. because half of the JS scripts I decided to rewrite them under C # (C # is more native to me). Download
There is also an active “debriefing” of the project for beginners “Project: Survival shooter” , video tutorials are presented in the next Playlist , additional video tutorials for Survival shooter . I personally thank this channel for their not easy work.
')
ps at the end of this manual there is a video review in which examples show a comparison of two implemented methods of driving a car.
So, we will start studying our leadership.
Part 3: Under the hood
We have already seen how to build a working machine from a 3D model, scripts and embedded components. We also learned about public variables and how they can be used to fine tune a car.
Now we will talk about studying the work of the script Car .
• Double-click the Car.js script to open it in the code editor.
At first glance, this script can be a bit intimidating, with more than 500 lines of code and comments and a lot of variables and functions. Do not despair. Our script is designed in such a way that we would have relatively small functions with meaningful names that indicate what is being performed in each function. As well as in the code there are comments that explain a certain part of the code.
So we suggest that you take a look at it, starting from the “entry points” of studying the script and following further along the guide. In this case, these entry points will be the Start () , Update () and FixedUpdate () functions.
Each of these “core” functions causes other functions. Therefore, when we start with the Start () function, we will see that the function first called the SetupWheelColliders () function. Find this function in code and examine what it does, and then go back to the Start () function and go to the next SetupCenterOfMass () function. By studying this code you will understand how the car works. In the future, we will consider all these functions. We will not explain every line of code, but we will examine all the functions in order.
What things need to know?
Working in Unity is easy in many ways, thanks to such things: built-in components, editor, D & D capabilities. Setting up a car is half the job — Unity takes care of importing models , collision components (collision) , rendering (rendering) and physics (physics) can be added to an object by clicking on the “add the components” button .
Inside our script, we will work mainly on manipulating these components. Of course, you will stumble upon a multitude of calculations and formulas that we use to determine what happens to a car. This is the inevitable part that makes games realistic: you have to set some logic, for example by writing scripts when you want to do more than just basic functions. These formulas and calculations are used in our components.
If you see that the code is not at all familiar and you do not know where to start, you can try our approach, which is to focus on the following points, as well as considering how and what works:
• rigidbody
• Wheel Colliders
• Calculations and formulas that we make, as well as their order.
Think of it like this:
• When adding a Rigidbody to our car model, we have a way to control its physical abilities. We can do this by calculating the forces that move it forward, which slow it down.
• When adding wheel colliders (Wheel Colliders), we gain control over where the car collides with the road.
Start () - Installation
This is where we do the initialization necessary for the car. The Start () function is executed only once, at the beginning of the script, before the Update functions. Therefore, Start () is often used to set the initial values of the required components in the code.
SetupWheelColliders ()
We have four wheels attached to our car, and we put them in the FrontWheels and RearWheels arrays in the inspector. In this function, we create real colliders (colliders) , making it possible for the wheels to interact with the surface and the car. We start with the SetupWheelFrictionCurve () function .
SetupWheelFrictionCurve ()
In SetupWheelFrictionCurve (), we simply create a new WheelFrictionCurve and assign it values that we consider appropriate for our car. WheelFrictionCurve uses WheelColliders to describe the friction properties of tire tires. If you want to learn the process of creating a car in Unity in more detail, built using WheelColliders , then read the documentation.
SetupWheel ()
After setting the curve (curve) , we returned to the SetupWheelColliders () script, now we are ready to create colliders (colliders) and wheel objects (Wheel) . This is done by calling the SetupWheel () function for each of our wheels. If you look at this function, you will see that it has two parameters: Transform and boolean , and returns a Wheel object. We need this in order to change the location of the wheels, as well as to indicate the wheel belongs to the front of the car or not. The function then creates and returns the Wheel object, which we nest in the wheels array containing all our wheels for the rest of the script:
for (var t : Transform in frontWheels) { wheels[wheelCount] = SetupWheel(t, true); wheelCount++; } In this cycle, we create a new game object, and call the SetupWheel () function, pass the coordinates of the object as the first argument, specify TRUE or FALSE as the second parameter, if TRUE , then the created wheel will be the front one, if FALSE, then the rear one. Then we add the WheelCollider component to this game object. We set the WheelCollider properties from the suspension variables (suspension) that we discussed when setting up the car (suspension range, suspension spring and shock absorber) (suspension range, spring and damper).
Required properties: we’ve already created a collider (collider) , WheelFrictionCurve is created in WheelFrictionCurve () , wheel graphics ( DiscBrake object we dragged into the inspector when we created the car) and tire graphics (which is a child of DiscBrake ).
We will set the wheel radius automatically, depending on the tire size:
wheel.collider.radius = wheel.tireGraphic.renderer.bounds.size.y / 2; Finally, we check the wheel we just created, whether it is the front wheel or the rear wheel, looking at the TRUE or FALSE value. Later in the code, we have to check that the car touches the ground, at least with one front and one rear wheel.
In addition, we make a small reception for the front wheel, creating an additional game object that we establish between the car body and the wheel. This is the Steer Column (front pillar) , which we will use later to rotate the wheel when turning. Finally, we create a wheel, which we return to the Wheel array and when we have processed all the wheels, we return to the Start () function.
SetupCenterOfMass ()
This is the next function we will look at. This is a very small function that will set the center of mass in the Rigidbody to CenterOfMass , which we created earlier. If the center of mass has not been established, Rigidbody will use the center of mass by default, which Unity will automatically calculate. Then we convert the maximum speed entered in the inspector using a small useful function:
topSpeed = Convert_Miles_Per_Hour_To_Meters_Per_Second(topSpeed); The function simply multiplies the TopSpeed variable by the number 0.44704, which translates it into meters per second. This is an installation, so we can enter the desired speed in the inspector in miles / hour. When calculating physics, we work with m / s. We also have a small function that does the inverse calculation, which is very useful if you want to display the vehicle speed in miles / hour.
SetupGears ()
The transfer is automatically calculated in this function by assigning the maximum speed to each gear and calculating how much power is needed to accelerate the car to a given speed in each gear. The power is calculated using the friction and resistance values supplied in some variables, which means basic calculations along the Z axis, the friction calculation takes place in the Update () function. The coefficient is multiplied by the value of this power so that the car accelerates to high speed.
SetupSkidmarks ()
This function finds the Skidmark game object on the scene and stores a link to it using ParticleEmitter to create smoke. The code for skidmarks is not covered in this manual, but this should not stop you from opening the script and exploring it on your own. At the end of Start (), we assign the X values of our dragMultiplier array to a variable:
initialDragMultiplierX = dragMultiplier.x; It is saved because we change the dragMultiplier X variable when we use the handbrake , and then we need to return to the original value again when we do not use the handbrake .
To set the initial values, use the Start () function. For regular changes to these values, use the Update () function.
Update ()
Update () is called every frame of the game, if MonoBehaviour is on.
Update () is the most frequently used function for implementing gameplay.
GetInput ()
The first thing we do in each frame is a different keyboard operation by calling the GetInput () function. The first two lines are read from vertical (vertical) and horizontal (horizontal) axes and stored in the throttle and steer variables :
throttle = Input.GetAxis(“Vertical”); steer = Input.GetAxis(“Horizontal”); Vertical (vertical) and horizontal (horizontal) axes can be set in the Unity Input Manager (Edit -> Project Settings -> Input) . By default, the vertical (vertical) axis is set to the “W”, “up arrow” keys for forward movement and “S” keys, “down arrow” keys for backward movement and the value we use here is stored in the variable throttle . The horizontal (horizontal) axis is set as the “A” and “Left arrow” keys to turn left, as well as the “D” and “Right arrow” keys to turn right.
CheckHandbrake ()
After learning to getInput to drive a car, we call the CheckHandbrake () function. This is a specific function that checks whether the Space key is pressed or not, and applies certain logic accordingly:
When we first pressed Space (space) , we set the handbrake variable to true , it starts the handbrake mechanism and changes the value of dragMultiplier.x (it creates a vibration on the road, like a real handbrake).
When Space (space) is not pressed, the code will be executed another, until the key is pressed. This again means that the handbrake code will not work only when the user first releases the Space (space) , because we set the handbrake variable to false inside the block. The StopHandbraking () function will be activated:
StartCoroutine(StopHandbraking(Mathf.Min(5, Time.time - handbrakeTime))); StopHandbraking ()
StopHandbraking () takes an input variable that determines the number of seconds that will have to be spent returning dragMultiplier.x back to its original state. This value must be at least 5 for the handbrake timer that we just started. The function then counts down the specified number of seconds, after which it sets the default value of the dragMultiplier.x variable, this creates the vehicle’s normal movement again.
Check_If_Car_Is_Flipped ()
Returning to the Update () function, we now consider the Check_If_Car_Is_Flipped () function to check if the machine has turned over. Inside this function, we will check the inverted machine. This is absolutely true for a car that will be turned over or turned for example on extreme turns, if we have an accident or do some tricks, but we want to exclude the possibility of a car turning over. Therefore, we check if the car has turned over at a certain angle, at which the car is not on the move anymore, and if so, we add from the moment of the last frame to the resetTimer variable. If this value ultimately boils down to exceeding the value we set for resetTime (5 seconds by default), we call the FlipCar () function. If the car is at an angle with which you can drive, we set the timer back to zero.
FlipCar ()
In FlipCar () we get the car back on the wheels and set its speed to 0, so we can start moving again from this point.
UpdateWheelGraphics ()
This is the longest and most complex function that is called from Update () . Fortunately, there is this large section that deals only with the placement of tire marks . In terms of wheels, an important role is played by updating their position and angle of rotation in this function.
Each wheel we begin with checking whether it touches the ground or not. If it touches the ground, then we set the wheelGraphic (wheel graphics) to the position in which it should be, it depends on the height and radius of the wheel. This will move the center of the wheel to the correct position relative to the chassis of the car.
w.wheelGraphic.localPosition = wheel.transform.up * (wheelRadius + wheel.transform.InverseTransformPoint(wh.point).y); After installing the wheel, we get the RigidBody speed at the point of contact with the ground, in order to transfer it to the local space and store its coordinates in our object.
w.wheelVelo = rigidbody.GetPointVelocity(wh.point); w.groundSpeed = w.wheelGraphic.InverseTransformDirection(w.wheelVelo); If the wheel currently does not touch the ground, then we establish the position of the wheel on the basis of its coordinates, the range of the suspension, and the suspension of the “parent wheels” itself.
UpdateGear ()
The last function called in the Update () function is UpdateGear () , which calculates the current “transfer” of the car, based on the set values in SetupGears () and the current speed. In the last section of the tutorial, we should look at the rest of the main loop, namely the physical calculations that occur inside the FixedUpdate () function.
FixedUpdate () - All of our physics
When dealing with physics, it is important that the calculations and actions are strictly controlled so that the result is good. FixedUpdate () is created for this purpose. This ensures the execution of the code with a fixed time interval. The frequency of calling the FixedUpdate () function: “It can be called several times in a frame if the frame rate is low; or may be called after several frames if the frame rate is high. All physics calculations and updates are called immediately before FixedUpdate () . ” We have a number of functions performed inside FixedUpdate () , and they all relate to computing and applying force to a car.
UpdateDrag ()
This means that with increasing speed - resistance increases even more. Squaring the velocity when calculating the resistance is based on the present formula of resistance used in physics.
After relativeDrag (Relative resistance) and scalable dragMultiplier (resistance factors) we have already considered, it was taken into account that the car in profile is very different from the front, side and top views.
If we apply additional forces to the side brake to the side and frontal resistance values, based on how fast the car travels. Notice how we use the scalar product between the speed and the direction of the front of the car to calculate the additional resistance. This equation leads to additional resistance at the front of the car when the car is driving forward without turning (braking is faster) and slower braking on skids and turns. For the X value of resistance, the same: for a car while sliding sideways. After that, we gradually increase the resistance value X to slow the car instead of letting it slide along the road at all times.
If we do not use the handbrake , we will only update the value of X :
drag.x *= topSpeed / relativeVelocity.magnitude; This is done for a comfortable ride on the car - we increase the lateral resistance, it gradually slows down the car during a drift until the moment the car completes the drift.
At the end of the function, we apply forces to RigidBody :
rigidbody.AddForce(transform.TransformDirection(drag) * rigidbody.mass * Time.deltaTime); The resistance force is opposite to the speed of the car, we apply it to the RigidBody , as a result of which the car slows down.
UpdateFriction ()
This function monitors the friction that is created between the wheels of the car and the surface of our road. This is very simple because we use the WheelFrictionCurve function that we set up at the very beginning. Friction of the wheel gives the force at the “exit” of the function, based on the tire slip measurements that we passed to the function. This force is divided into two directions: frontal friction (responsible for acceleration and braking) and lateral friction (responsible for properly maintaining the vehicle on the ground). Earlier, we assigned the value of friction wheels, now we need to take care of updating the friction between the wheel and the surface:
w.collider.sidewaysFriction = wfc; w.collider.forwardFriction = wfc; We perform one action - we change the friction value of the car based on the current speed of the vehicle and the direction of movement of the car (normal driving - Forward Friction , and based on the skidding of the car - “driving sideways” sideways friction ).
CalculateEnginePower ()
Calculation of engine power, which we later use to apply force to RigidBody is relatively simple, but has several “quirks”.
• If we do not throttle , we simply reduce the engine power, thereby slowing down the car.
• If we throttle in the same direction in which the car is now moving (we check this with the HaveSameSign () function) and calculate the value we add to the engine power. What we see may seem a bit strange: we calculate the rate of force, which is the product of the current engine power divided by the maximum engine power (yielding a result between 0 and 1), and then multiplied by 2 times. The result will be between 0 (when we stand still or eat very slowly) and 2 (when we eat at maximum power). Then we call the helper function EvaluateNormPower () . This function looks at the transmitted value and returns a number between 1 and 0 if the power norm is from 0 to 1. If the power norm is from 1 to 2, the function returns a value between 0 and 1. Are you surprised? The number used in the formula that adds strength to the engine:
currentEnginePower += Time.deltaTime * 200 * EvaluateNormPower(normPower); The end result is that we add more power when we press the "gas" button and the car starts slowly from the beginning, gradually accelerating. In the end, when the car reaches maximum speed, no additional force is used to add to
engine power.
• If you use throttling in the opposite direction, this is equivalent to braking. In this case, we will subtract the engine power for some time.
Finally, the engine power is calculated, between the current gear and the previous gear, to avoid the possibility of drastically changing the values in the calculation formula.
CalculateState ()
This is a small function that we will consider now, because we need to know which car wheels are on the ground. She makes this check very simple:
• We set the canDrive and canSteer variables to False by default.
• Then we check each wheel in the Wheels array to check which wheel touches the ground and which one does not:
if(w.collider.isGrounded) If the wheel is on the ground, we check what type of wheel it is. If this is the front wheel, then canDrive is set to True . If it's a rear wheel, then steerWheel is set to True . This function has done its job, if at least one wheel (rear wheel) touches the ground, then we can drive our car. If at least one wheel (front wheel) touches the ground, we can turn.
It remains to consider the last two functions that actually relate to our calculations for the RigidBody car. We will look at this in more detail here so that you understand the logic of the work and the formulas for the calculation that ultimately create the movement of the car.
ApplyThrottle ()
This function will work if the CalculateState () function sets the canDrive variable to True (this means that at least one drive wheel is on the road). If we can control, we start by comparing the throttle variable (which is a keystroke from the keyboard) and the relativeVelocity.z variable in which the vehicle speed value. If these values have the same sign — defined in the HaveSameSign () function — this means that we are throttling in the same direction in which the car is traveling and in this case we add throttle force to RigidBody :
throttleForce = Mathf.Sign(throttle) * currentEnginePower * rigidbody.mass; If the throttle value is negative (the user presses the brake button), the sign will be -1 and we calculate the negative throttleForce (Throttle Force), which we add to the car, we also know that the throttle force has a negative speed. Therefore, we will throttle back faster. The opposite effect when the user presses the "gas" button. Then we add a “positive” throttleForce to the car, which is already going forward.
If relativeVelocity.z and throttle have different signs, then this should mean that we will add throttle force in the opposite direction from the direction in which the car is now driving. In other words, the car slows down or slows down. We do this by setting the variable Brakeforce based on the mass of the car and the force of the first gear of the engine:
brakeForce = Mathf.Sign(throttle) * engineForceValues[0] * rigidbody.mass; Again we use throttle , because we know throttle in this case has the opposite sign of speed, as a result, we calculate the force opposite to the force that drives the car.
When we finish defining whether the car needs acceleration or deceleration, we apply the calculated forces in the direction of the Rigidbody movement:
rigidbody.AddForce(transform.forward * Time.deltaTime * (throttleForce + brakeForce)); ApplySteering ()
If you do not create a drag racing game where you are trying to set a world speed record on a straight line, steering control is as important as throttling, so let's explore this function. We do not use any throttle force as long as the drive wheels (drive wheels) do not touch the ground, and the same for this function, where we can not drive the car as long as the steer wheels do not touch the ground.
At the beginning of the function, we calculate the value of a variable named turnRadius , based on the input data. The equation makes an increase in the turnRadius value when you turn to either side. We calculate the minMaxTurn value by calling the EvaluateSpeedToTurn () function.
EvaluateSpeedToTurn ()
This function returns the turn value depending on how fast the car travels; this is described in more detail in the second chapter of our manual. If the car is driving fast, this value will be closer to minimumTurn , which makes it more difficult for the car to turn during fast driving. Returning to the ApplySteering () function, there turnSpeed refers directly to the calculation of turnRadius in the car. The larger the radius, the smaller the angle of rotation, because the rotation circle is larger.
We turn the car according to the formula:
transform.RotateAround( transform.position + transform.right * turnRadius * steer, transform.up, turnSpeed * Mathf.Rad2Deg * Time.deltaTime * steer ); The function RotateAround () turns around the transformed axis at a given point and takes an angle, which is the sum of turns.
• The pivot point is exactly in the middle of the car when we do not turn the car at all. , , . , Steer , , , . TurnRadius , . TurnRadius transform.right , , :
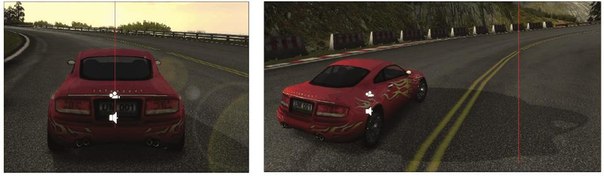
• Y (up) , , X- we will turn the car to the line shown in the image.
• The rotation angle is calculated on the basis of turnSpeed multiplied by Steer to turn left / right .
Now consider the inside:
if(initialDragMultiplierX > dragMultiplier.x) (handbraking) .
, , angularVelocity.y RigidBody . , , . , .
, , angularVelocity.y . -1, 1.
, :
frontWheels[0].localPosition + frontWheels[1].localPosition) * 0.5 , , , , — .
Update () LateUpdate () . , , .
(Project view) ~ AlternatePhysicsModel . Prefabs Unity . (wheel colliders) Unity , (wheel collider) Physics.Raycast . Pacejka « /Magic Formula» — , .
Most likely, you do not need to know about the inner workings of the physical model. You can just experiment with the settings of the already created Prefabs . If you open the scripts, you will see that all parameters are explained in the comments. Try to change the settings slightly and drive a car.
Included Prefabs
Prefabs (skidmarks) Prefabs . , (Skidmarks Prefab) (, Prefabs skidmarks ). .
, «» ( ).
, TractionHelper which is designed to make cars more manageable with joysticks.
Included Scripts
AerodynamicResistance.cs : This script must be added to each car in order to calculate the aerodynamic friction of the car.
AntiRollBar.cs : Add, if necessary, to mimic the anti-roll bar for better handling.
CarController.cs : script to handle driving. This script is required for each car. You can edit this script if you want to change driving or implement AI. Also sets some characteristics of the car body, such as the center of gravity and inertia.
Drivetrain.cs : car engine and transmission. This script contains the gearbox and engine. One of the scripts needed in the car.
Skidmarks.cs : Global Brake Mark Manager . Add a Skidmark Prefab to the scene that uses this class to visualize and control brake marks on all vehicles.
SoundController.cs : A simple class to play car sounds and other sounds. This script must be added to the car.
TractionHelper.cs : If necessary, add this script to the car to make it more sustainable.This script is designed to help customize the flexible control of the car.
Wheel.cs : This script simulates tire models and wheel suspension, and acts as a replacement in Unity for the built-in component Wheel Collider.
Wing.cs : Add one script or more than one if you want to simulate the downforce of aerodynamics for your car.
Analysis and conclusion from the translator
2 , , :
1) , 70 .
2) , .
3) «» .
4) Rigidbody Drag Angular Drag ( ) )).
. (~ AlternatePhysicsModel).
: Lambordgine — 2, 1.
: , « » 1. , — 2.
Source: https://habr.com/ru/post/248995/
All Articles