Home automation with openHAB: lighting and remote control of heaters. Part 1
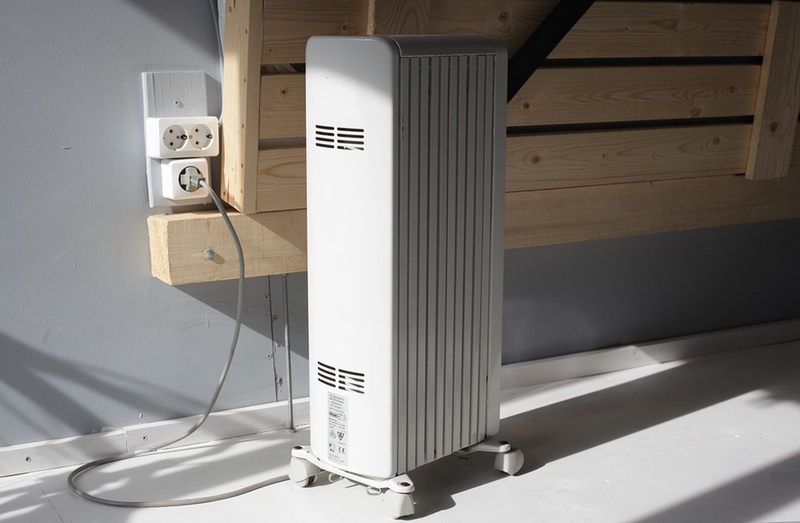
My last article was about the choice of lighting lamps for a residential workshop. This time I will talk about the implementation of home automation in the same room. The workshop is heated by two electric heaters. I wanted to turn them on remotely in order not to come to a cold room. And I also wanted to maintain the set temperature, before this, when the temperature on the street changed, I had to turn the “thermostats” of the heaters each time. Well, lighting control, door opening sensor, etc.
Table of contents
Part 1
Introduction
general description
Load management
Light control
Light switches
How switches work with OpenHAB
Arduino Nano + Ehernet Shield
Raspberry pi
my.openHAB
Part 2
Heater control
Thermal sensors
Data storage
Charts
Remote control
Impressions of OpenHAB
Persistence
Interfaces
Monitoring
')
Introduction
I used quite standard hardware, in some places not optimal, comments and recommendations are especially interesting about it.
The choice of software was partially made in order to try unfamiliar tools, for example, in this way for storing data InfluxDB
After a cursory search for open-source solutions for home automation, OpenHAB was chosen, a rather mature tool with a modular architecture, and it is also actively developing. About him there is already an article on Habré, I recommend it to look to those who want to use OpenHAB.
You can also take a look at the demo interface .
I will describe the hardware part of my solution and at the same time cite excerpts from the OpenHAB configuration.
To make it easier to understand my configuration, I will briefly describe the concepts used when setting up OpenHAB:
- Items are something like a globally accessible object, usually representing an external device or a data source. There may be different types, for example, Switch for switch, Dimmer for dimmer. There is also a String and Number, these are Items which contain a string and a number.
- Sitemaps - describe the interface. In fact, this is an enumeration of Items with the addition of display settings.
- Rules - scripts that run on a schedule or an event. Events occur when the Items state changes, for example, when the Light_1 switch is set to ON.
- Persistence - files that describe the rules for maintaining the state of Items in different databases.
- Bindings - plug-ins, you can probably call plug-ins. Used to add to OpenHAB the ability to interact with different hard and software. For example, binding for KNX or for MySQL, etc.
Here are the Bindings I use:
| Title | Application |
|---|---|
| xmpp | I receive messages from OpenHAB |
| Receive notifications by mail | |
| networkhealth | Monitoring the availability of hosts on the network |
| myopenhab | OpenHAB Remote Access |
| onewire | Receiving temperature sensors from owserever |
| http | Interaction with HTTP API |
| freetts | Speech synthesis |
| jpa | Saving data to PostgreSQL |
| db4o | Saving data to db4o |
| influxdb | Saving data to influxdb |

About xmpp in more detail: this binding allows you to receive messages in Google chat (or another Jabber account) and use chat as a console to send OpenHAB commands. Commands beginning with '>' will be executed and the result will be returned in the response message. I found this useful for debugging when writing Rules. Further in the text, examples of OpenHAB commands begin with the symbol '>'.
OpenHAB configuration, switch scripts, etc. available in the homeAutomationExample repository
general description

System components:
- Server (OpenHAB, InfluxDB, ...)
- Arduino MEGA + Ehernet Shield Relay Control Module
- Switch five buttons Arduino Nano + Ehernet Shield
- Switch five buttons Raspberry Pi
On the picture is the OpenHAB web interface.

It was immediately clear that in addition to the web interface, you need to make several physical switches, since Using the web interface is not always convenient.
At first, I thought of making wireless switches, but I did not find affordable and reliable options, maybe now there is something to choose from, but then I decided to use Ethernet.
When possible, I did so that the system components communicate with each other using the HTTP protocol.
It is chosen because of simplicity, transparency and familiarity. As an alternative, I considered MQTT , but I would need software for the server, since OpenHAB can only be a client.
The load is controlled by a relay, now there are seven of them. From each relay there is a separate cable core, that is, for three controllable outlets, a 4-core cable is used (three for the phase and one for the zero).
Relay usage:
- 3 sockets, heaters are connected to two of them (220v)
- 2 daylight lines (220v)
- 1 evening light, incandescent lamp (12v)
- 1 diode tape (12v)
All DC consumers are connected to one computer power supply.
About security and access control: in OpenHAB, you can add users and deny anonymous access , but I did not. Now any host on my local network has access to the OpenHAB web interface and other devices available over HTTP.
Load management

I wanted to make an HTTP API to enable the load. Used for this combination Arduino MEGA + Ehernet Shield + relay. Megu bought a long time ago, it cost as much as $ 50, was not useful, and lay idle.
Based on the load management recommendations with Arduino, the pins to which the relays are connected are initialized like this:
digitalWrite(pin, HIGH); pinMode(pin, OUTPUT); So you can avoid short-term switching on the relay when you turn on the Arduino.
All but one relay uses a normally open contact (NO, Normally Open) so that by default the entire load is turned off, for example after a temporary power cut. An exception is made for the diode tape - it is connected to a normally-closed contact for emergency lighting.
In general, Arduino + Ehernet Shield work without problems, there were interruptions only when I turned on their monitoring from OpenHAB. There is an assumption that OpenHAB opened keepalive connection and because of this other connections were not established.
And then there is an unpleasant moment in the work of Ethernet Shield:
PROBLEM:
Ehernet Shield does not work after powering on the Arduino, but only after the reset. As I understand it, this is the problem of the first version of the shild on the w5100 chip. Here is a possible solution .
API sources for Arduino in the minimalArduinoWebApi repository.
Here is an example of a request for the state of pin 40, to which a relay controlling one of the lamps is connected:
Request Status:
GET http://192.168.2.15/pins/40 The response text will be ON or OFF.
Shutdown:
PUT http://192.168.2.15/pins/40/OFF Turning on:
PUT http://192.168.2.15/pins/40/ON So, there is an HTTP API for turning on lights and sockets, now you need to somehow use it from OpenHAB. Each pin to which the relay is connected is added to the OpenHAB configuration as a switch via http binding .
For example, here’s a description of pin 40 from main.items file:
Here, a Switch is defined with the name Light_1, which is a member of the Lights and DayLights groups:
Switch Light_1 "First Day Light" (Lights, DayLights) { http=" >[ON:PUT:http://192.168.2.15/pins/40/ON] >[OFF:PUT:http://192.168.2.15/pins/40/OFF] <[http://192.168.2.15/pins/40:60000:REGEX(.*<status>(.+)</status>.*)] " } (Groups in OpenHAB are useful, for example, to turn off all the lights or take the average from temperature sensors.)
(Line breaks have been added for readability; they will not work in this form.)
The string> [ON: ... specifies the request that OpenHAB will execute when the Light_1 command is received ON.
That is, if you send to the console:
> Light_1.sendCommand(ON) then OpenHAB will send a PUT 192.168.2.15/pins/40/ON request.
In addition to the console, you can control Light_1 through the OpenHAB REST API itself.
<[http://192.168.2.15/pins/40:60000:REGEX (. * (. +). *)] means that the query is executed once every two minutes and a regular expression is applied to the response text, the result of which determines the state of Light_1 . In short, this is a polling of the state.
In order for the Light_1 switch to appear in the OpenHAB web interface, you need to add it to your Sitemap, for example:
Switch item=Light_1 Light control
Light switches
I made two switches , each with four buttons and one standard switch. (So that in the previous sentence there is no recursion, the switch is written in italics and means the whole module with buttons, in contrast to the switch - a conventional switch.)
At first, only buttons were made, but it turned out that it was inconvenient to grope them in the dark and I added an ordinary switch. Three buttons and a conventional switch control the light, and one button is used to inform about the temperature inside and outside (using a speech generator).
How switches work with OpenHAB
When you press a button or switch, an HTTP request is sent to OpenHAB.
This is how Light_1 can be enabled via OpenHAB REST API from Python:
import requests requests.post("http://OPENHAB_URL/rest/items/Light_1", data="ON") But to use this method, the switches must know the state of Light_1 in OpenHAB. To, if the light is off, send the command ON and vice versa. For this would have to use polling.
It turned out that OpenHAB also supports such requests:
GET /CMD?Light_1=TOGGLE .. GET Item ;( This option allows you to not store the state, so I use it.
And yet, for flexibility, management does not take place directly through Light_1, Light_2, etc., but through Virtual_Switch_1, Virtual_Switch_2, etc. For example, when you press the first button on any of the switches, the request is sent to Virtual_Switch_1, and what happens at the same time is determined in virtual_switches.rules . Thus, if you need to change the actions of the buttons, you will not have to reflash the Arduino and change the script code to Raspeberry, but only change the rules in OpenHAB.
Until I finally chose which actions to assign with buttons and a switch. Now three buttons and a switch control the light, and one is used to alert the temperature inside and outside (through a speech generator).
Often when turning off the light, it is convenient that it turns off not at the moment when the button is pressed, but later. Therefore, for the switch, I wrote a rule so that it works like this:
- if all the lights are turned off, the lights turn on by default (these are Items from the SmartSwitchDefaultLights group)
- if some light is on, then all daylight is turned off, the light turns on by default and a timer is set for 5 minutes to turn off the light
Here is the code for this rule:
rule "Virtual_Switch_5" when Item Virtual_Switch_5 changed then /* , */ if(virtual_switch_off_timer != null && !virtual_switch_off_timer.hasTerminated) { virtual_switch_off_timer.cancel() virtual_switch_off_timer = null playSound('Beep_Negative.mp3') SmartSwitchDefaultLights.members .filter( item| item.state == OFF ) .forEach( item| item.sendCommand(ON) ) } else { // , if ( Lights.members.filter( item| item.state == ON ).isNullOrEmpty ) { SmartSwitchDefaultLights.members.forEach( item| item.sendCommand(ON) ) } else { /* ** , */ if ( NightLights.members .filter( item| item.state == ON ).isNullOrEmpty ) SmartSwitchDefaultLights.members .filter( item| item.state == OFF ) .forEach( item| item.sendCommand(ON) ) DayLights.members .filter( item| item.state == ON ) .forEach( item| item.sendCommand(OFF) ) playSound('Bleep.mp3') virtual_switch_off_timer = createTimer( now.plusMinutes(5)) [| Lights.members .filter( item| item.state == ON ) .forEach( item| item.sendCommand(OFF) ) ] } } end Next, I briefly describe the hardware switches .
Arduino Nano + Ehernet Shield

This switch consists of Arduino Nano and Ehernet Shield. Sketch code in the file light_switch.ino . For HTTP requests to OpenHAB, the library github.com/csquared/arduino-restclient is used .
Arduino eats through pin 5v from the power supply unit on a wire ~ 10 meters long.
At first I connected 12v to vin. I thought that because of the voltage drop, it would not be possible to use 5v, but at 12v, of course, the Arduino regulator was very hot.
Power is supplied via four wires of the UTP cable, two + 5v conductors and two Gnd conductors.
In this switch, I use Ehernet Shield based on the ENC28J60 chip, this is a budget and less common option, compared to the shields based on w5100.
When using it, instead of the standard Ethernet library, you need to connect arduino_uip

After that, for the scripts for standard modules to work, you need to replace:
#include <SPI.h> #include <Ethernet.h> on
#include <UIPEthernet.h> The same should be done in the libraries used, if they connect Ethernet.h
From 2kB of available memory, arduino_uip uses 400-600B, it is worth considering.
Raspberry pi

It is a bit strange to update Linux on the switch , it’s me that using Raspberry only to turn on the light is, of course, not optimal. Now, except for the buttons, only the door sensor (reed switch) is connected to the Raspberry.
Nutrition
The Raspberry Pi has test points for measuring voltage during operation. The voltage between the points should be in the range of 4.75 - 5.25V. After connecting to the 5V line from the power supply, the voltage was below the minimum (the wire was too long) and the regulator had to be used.

I use a simple linear regulator 7805, which I fixed on the radiator. Before and after the regulator installed capacitors as in the diagram.

To reduce the power that is dissipated on the regulator radiator, three her801 diodes are connected in series between it and the power supply unit. If we assume that the voltage drop on each diode is 1V, then at the input of the regulator we get approximately 9V. The input voltage must be at least 2.5V higher than the output, that is, for 7805 7.5v at the input, this is the minimum.
To avoid false positives button
The code for Raspberry Pi is written in Python, you can watch it in the file light_switch.py3
my.openHAB
At the end of the first part I will tell you about the service from the creators of OpenHAB, it will allow you to connect to OpenHAB while you are behind the local network. For me, this is convenient since the workshop does not have a separate external ip. You can connect via a browser or from mobile applications (Android, iOS). While the project is in closed beta, an application for an invite can be submitted here .
Source: https://habr.com/ru/post/248219/
All Articles