Deploying CUCM with VMware Workstation 10.0.3 and GNS3
Hello!
A small digression for those who do not know. This article is written exclusively for the "home" labs, but not under the Enterprise.
To begin with, this topic will help to bypass the sometimes painful, albeit trivial, installation of the CUCM image on VMware Workstation , since I’m going to throw a link to the archive, where you can download the ready-made CUCM template for Workstation. How exactly to install CUCM under the hypervisor for VMware ESXi 5.1 server platforms can be found in the article here . On the Workstation, the installation is similar, except that there is no need to install the hypervisor first. Therefore, we will skip the installation and move on to launching our virtual network under CUCM and launching the ready-made CUCM template. I also hope that this article will be used by people who already know how to work with GNS3 and VMware, so as not to repeat other articles (although in some places I will make some digressions from this rule).
')
For everything else, we need:
We configure the MSloopback interface in the Windows OS article and video.
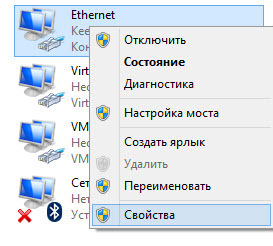
Let's share the Internet connection of the computer on which all this miracle is raised, for the MSLoopback interface.
Go Control Panel \ Network and Internet \ Network Connections .
Next in the pictures:
Let's make some settings in VMWare .
Check with the router Internet accessibility and CUCM, name resolution and time .
We try to go through the web-muzzle on CUCM .
I tested the transfer to two laptops, one Lenovo Yoga another HP. Transferred from another HP. If done consistently as described, then avoid heaps of unnecessary actions. The best way to access CUCM is using Mozils or Opera browsers.
Therefore, if accessibility problems begin after installation, be sure to check real physics and virtual, as well as whether all the settings have been applied to the router (for example, if it got to f0 / 1 interface, dhcp address). And do not forget about ping and trace.
There will be questions and suggestions on the article - write.
Good luck!
A small digression for those who do not know. This article is written exclusively for the "home" labs, but not under the Enterprise.
To begin with, this topic will help to bypass the sometimes painful, albeit trivial, installation of the CUCM image on VMware Workstation , since I’m going to throw a link to the archive, where you can download the ready-made CUCM template for Workstation. How exactly to install CUCM under the hypervisor for VMware ESXi 5.1 server platforms can be found in the article here . On the Workstation, the installation is similar, except that there is no need to install the hypervisor first. Therefore, we will skip the installation and move on to launching our virtual network under CUCM and launching the ready-made CUCM template. I also hope that this article will be used by people who already know how to work with GNS3 and VMware, so as not to repeat other articles (although in some places I will make some digressions from this rule).
')
For everything else, we need:
- Windows 7, 8, 8.1 (installed under 8 and 8.1);
- VMware Workstation at least version 10;
- GNS3 - preferably 0.8.5 (more stable);
- IOS for Cisco 2691 -c2691-advipservicesk9-mz.124-17IOS on this platform was more stable without any glitches. In the beginning I tried to deploy all this on the platform of the 3600 series, the router periodically began to fail because of the tasks assigned to it, it was necessary to reboot it. I didn’t want to understand it, although there are some guesses, I just found the solution easier for this case.
- Template with CUCM installed on Workstation;
- Installed MSloopback interface on a Windows machine.
Step 1
First you need to download
It is assumed that the necessary Windows version is already installed on your computer and you have downloaded and installed VMware Workstation of the current version (10 or 11).
- c2691-advipservicesk9-mz.124-17 IOS for GNS3
- VMware Template
Reservation
The file on the archived VMware-template is large = ~ 5 GB. Download, preferably, with a good Internet speed and download manager, otherwise this article will have almost no sense. On the torrent, I can not yet post it because of some technical issues and poor Internet speed for return.
Step 2
We configure the MSloopback interface in the Windows OS article and video.
Step 3
Let's share the Internet connection of the computer on which all this miracle is raised, for the MSLoopback interface.
Go Control Panel \ Network and Internet \ Network Connections .
Next in the pictures:
- In my case, the Internet is broadcast via an Ethernet adapter:
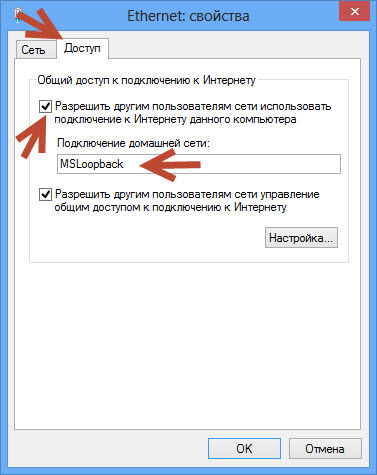
- We share the Internet on MSLoopback:
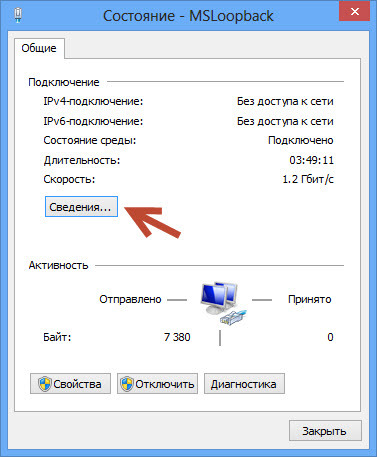
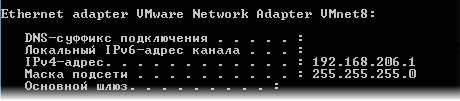
- Check the MSLoopback interface:

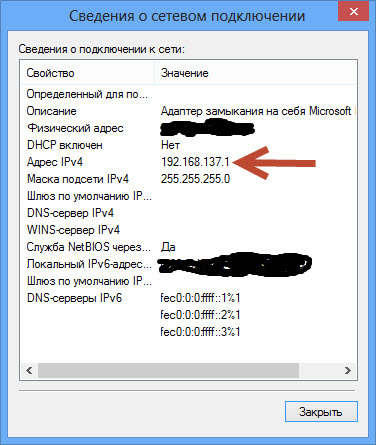
- We look:
- Usually, the ip-address is 192.168.137.1:
Step 4
Info
At this stage, it is assumed that the CUCM template for VMWare Workstation has already been unzipped, uploaded to the correct folder (by default it is located -> C: \ Users \ "Your User" \ Documents \ Virtual Machines ), and open (BUT not running. To run more EARLY) in VMWare.
Let's make some settings in VMWare .
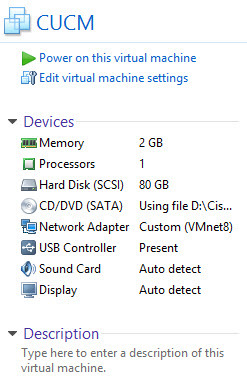
- With these settings will be a template CUCM:
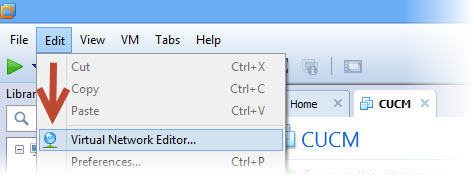
- Create a new VMnet interface and apply it in the CUCM template settings:
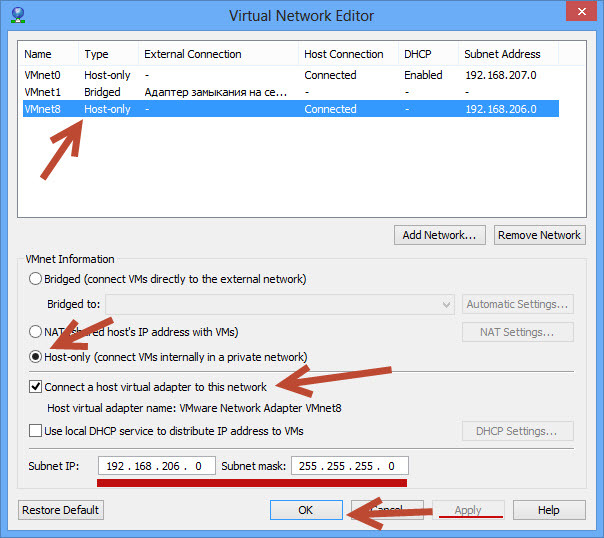
- What kind of VMnet will be - you decide. I have it - VMnet8. Settings on the picture:
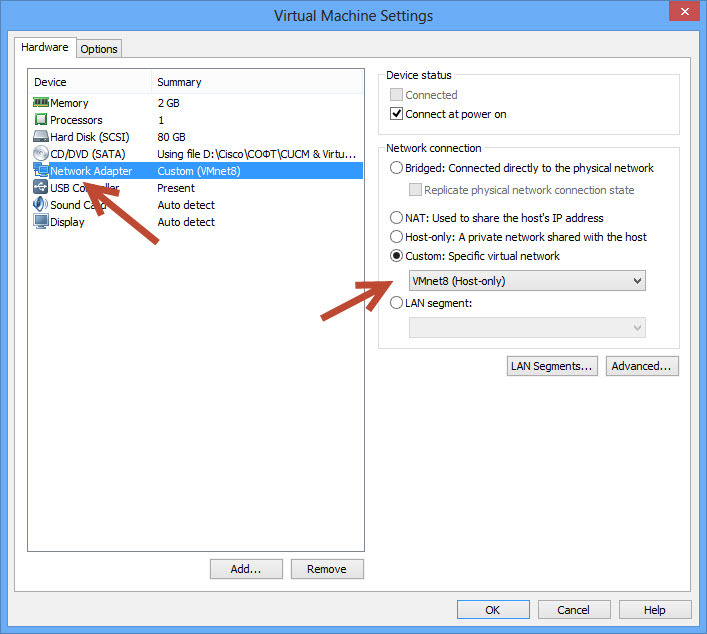
- We expose the VMnet adapter that you made yourself:
- Be sure to restart your computer for the changes to fully take effect.
- After that, check whether your VMnet interface appeared and picked up the ip-address 192.168.206.1:
Step 5
- Create a simple network in GNS3, which is required for CUCM to work.
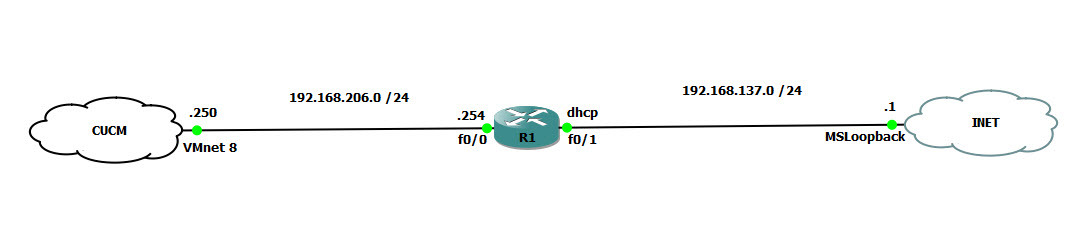
- We connect the router to MSLoopback and VMnet.
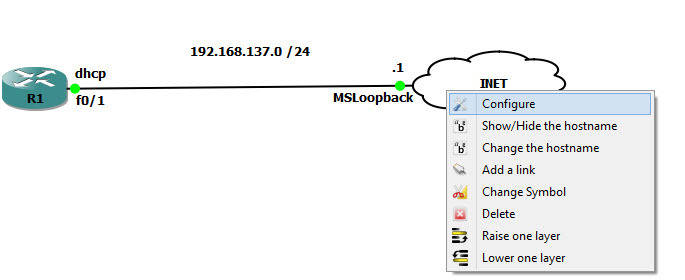
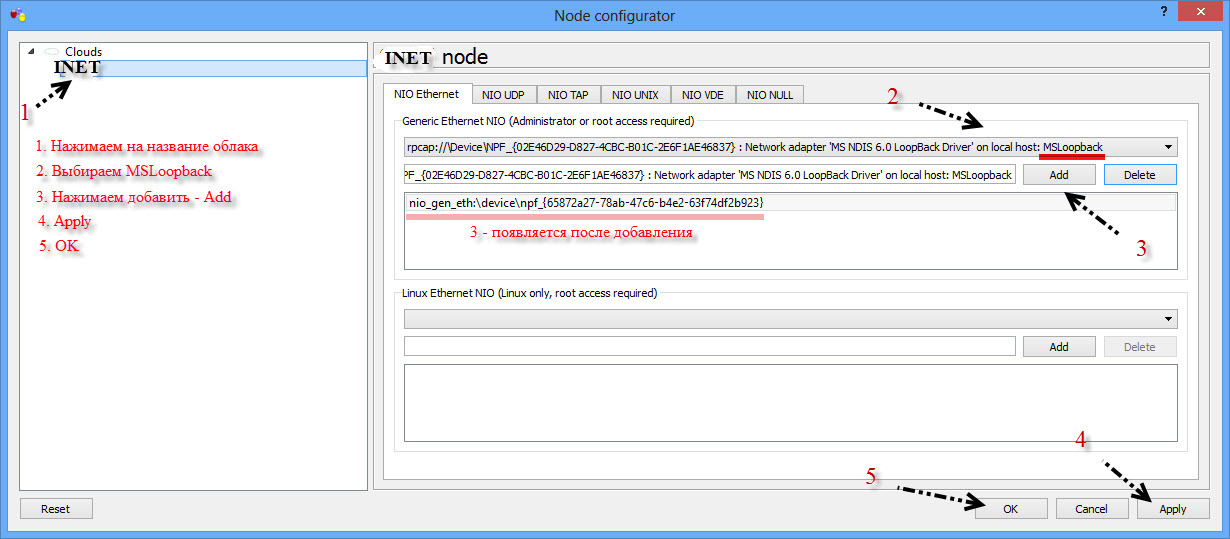
- Similarly, set up a connection to the VMnet interface:
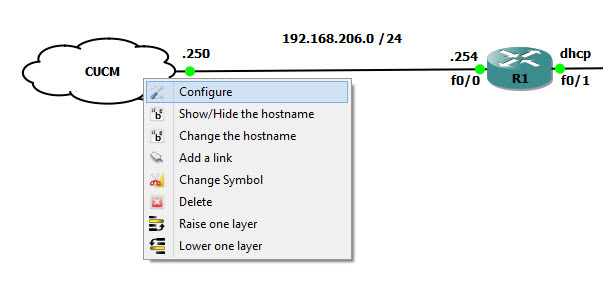
- Configure the router.WarningChanging the dns-addresses, ip-addresses and ntp-servers configured on the router will result in CUCM not working. Since the router in this case is the server and gateway for CUCM. As a server, it was possible to configure a Linux virtual machine, but I did not bother (or rather, but since this topic is designed for a simple familiarization with CUCM in "home" conditions, then I preferred Cisco). Those. better not to change anything and follow the instructions.Kopipastim
conf t
!
clock timezone MSK 3
!
!
!
ip domain timeout 2
ip domain name team.local
ip host cucm 192.168.206.250
ip host cucm.team.local 192.168.206.250
ip host gate 192.168.206.254
ip host gate.team.local 192.168.206.254
ip name-server 192.168.206.254
ip name-server 8.8.8.8
ip name-server 8.8.4.4
!
!
interface FastEthernet0 / 0
no sh
description = to CUCM =
ip address 192.168.206.254 255.255.255.0
speed 100
full-duplex
!
interface FastEthernet0 / 1
no sh
description = to INET =
ip address dhcp
speed 100
full-duplex
!
ip forward-protocol nd
!
ip dns server
!
ip domain lookup
!
ntp source FastEthernet0 / 1
ntp master 2
ntp server 178.18.228.131
ntp server 194.190.168.1
ntp server 78.140.251.2
ntp server 77.232.189.6
!
end
!
wr
!
Just in case it is better to first in the simplest notebook, and then from it in cisco. Although it is not crooked from here.
Step 6
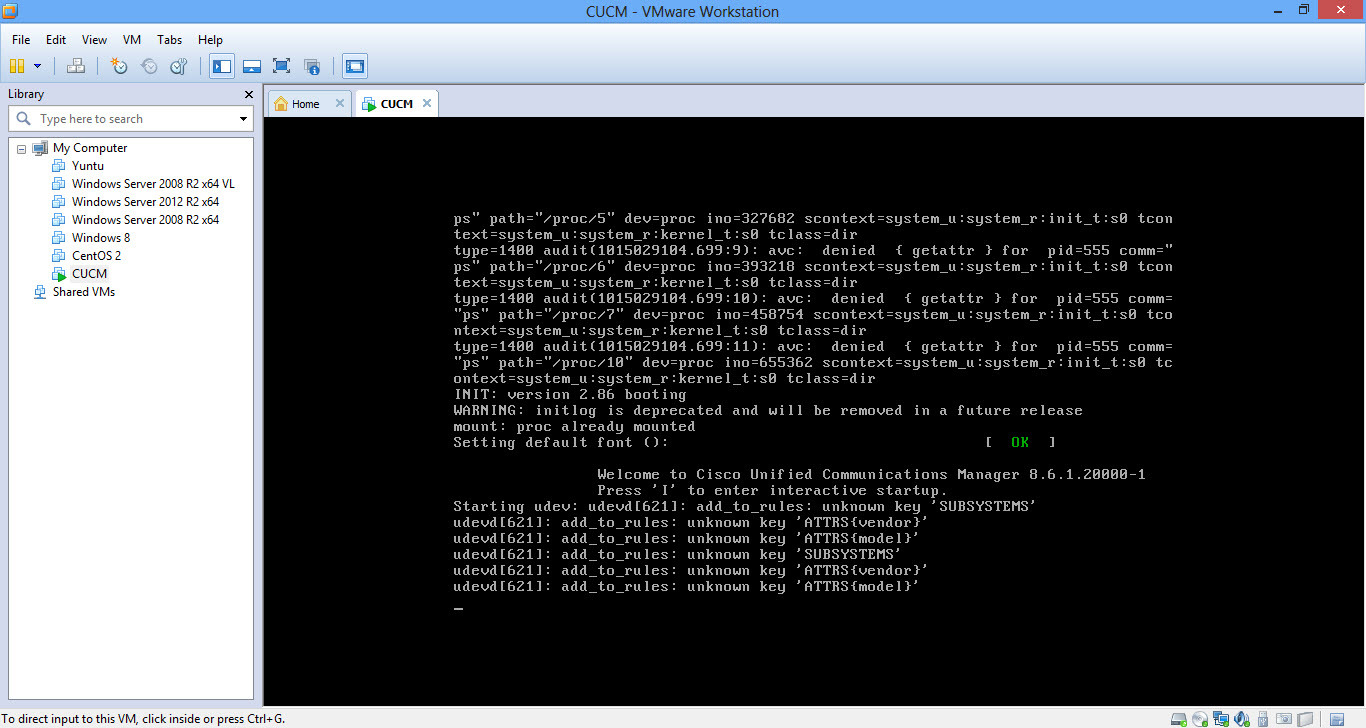
Launch our CUCM
- Loading
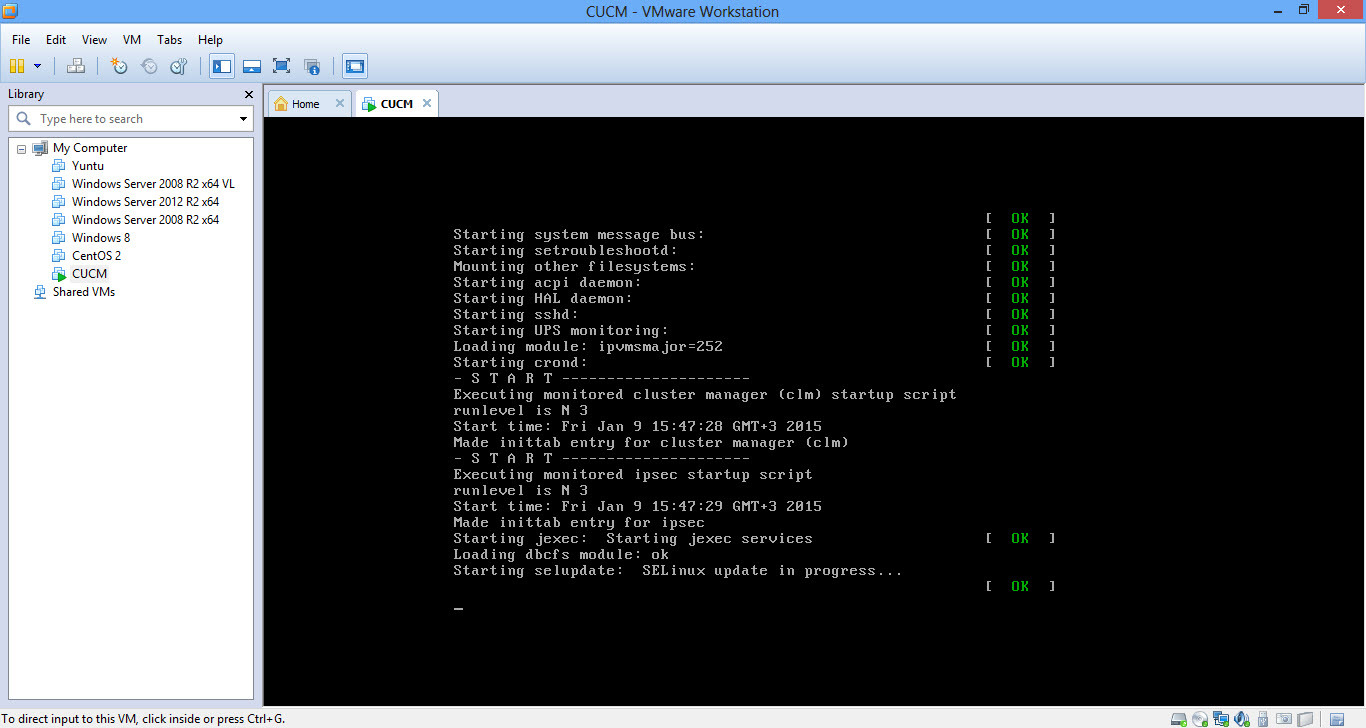
- Loading
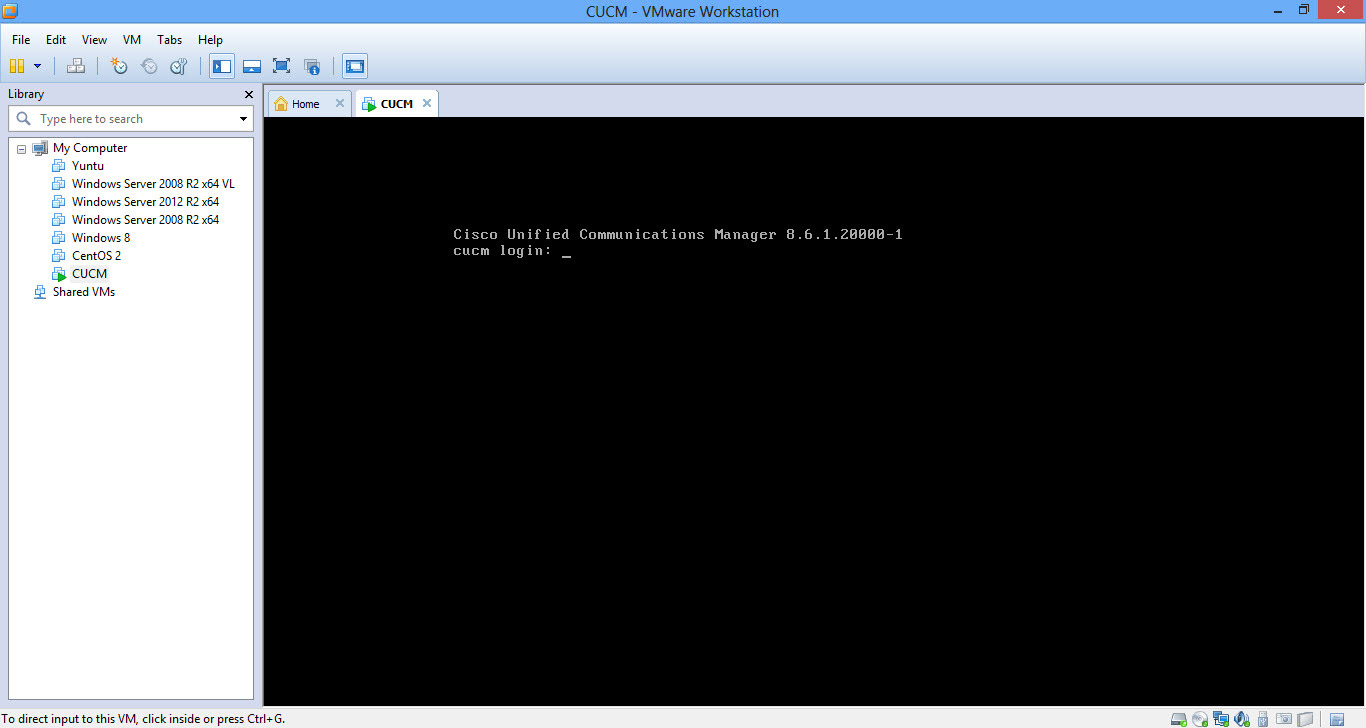
- Booted
Check with the router Internet accessibility and CUCM, name resolution and time .
- Internet is available:
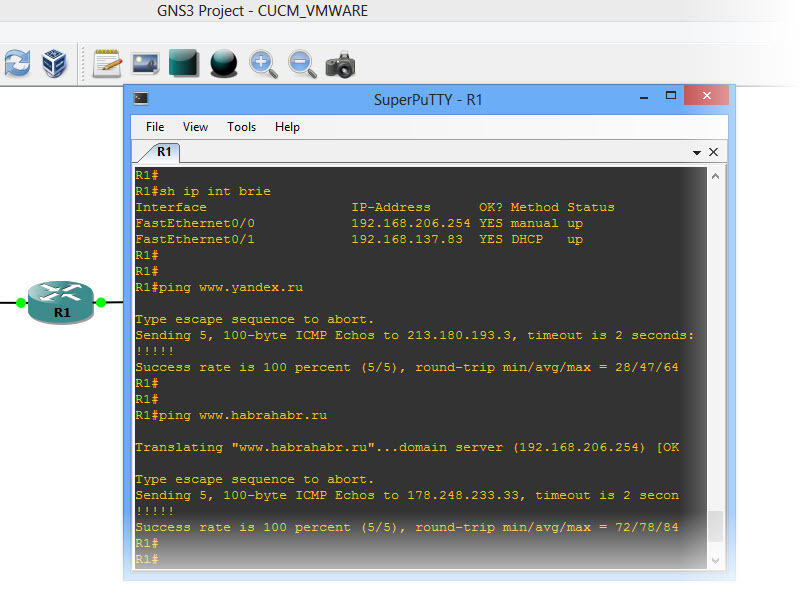
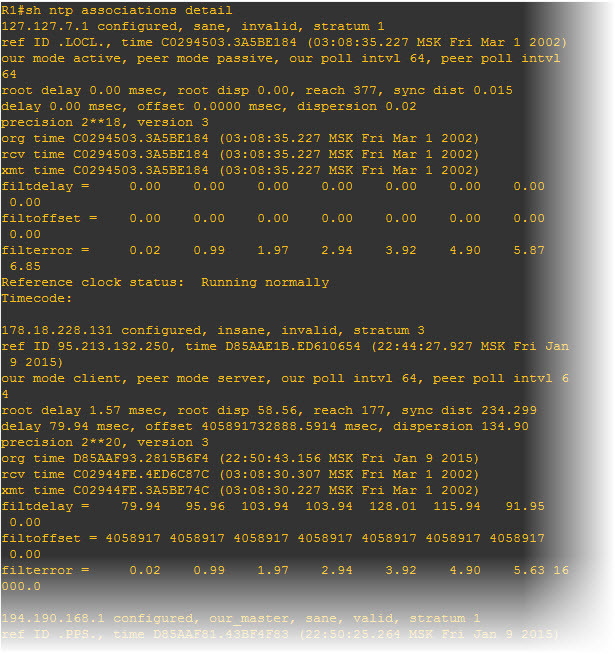
- Synchronization with NTP servers occurs, but not very quickly. Minutes 10 - 15. Then you can check the sh clock:
- CUCM is available:

Step 7
We try to go through the web-muzzle on CUCM .
Logins & Passwords
- Application (Browser - Opera) - username admin ; password 11default11
- CLI - admin id coast ; password 11coast11
- system security password 11system11
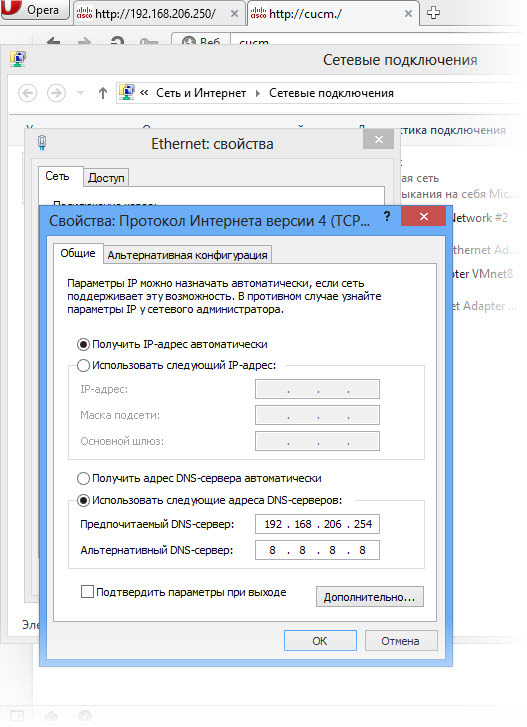
- In order to be able to open CUCM in the browser by name, in the interface of a Windows machine looking to the Internet, we manually register the DNS server in the following order:
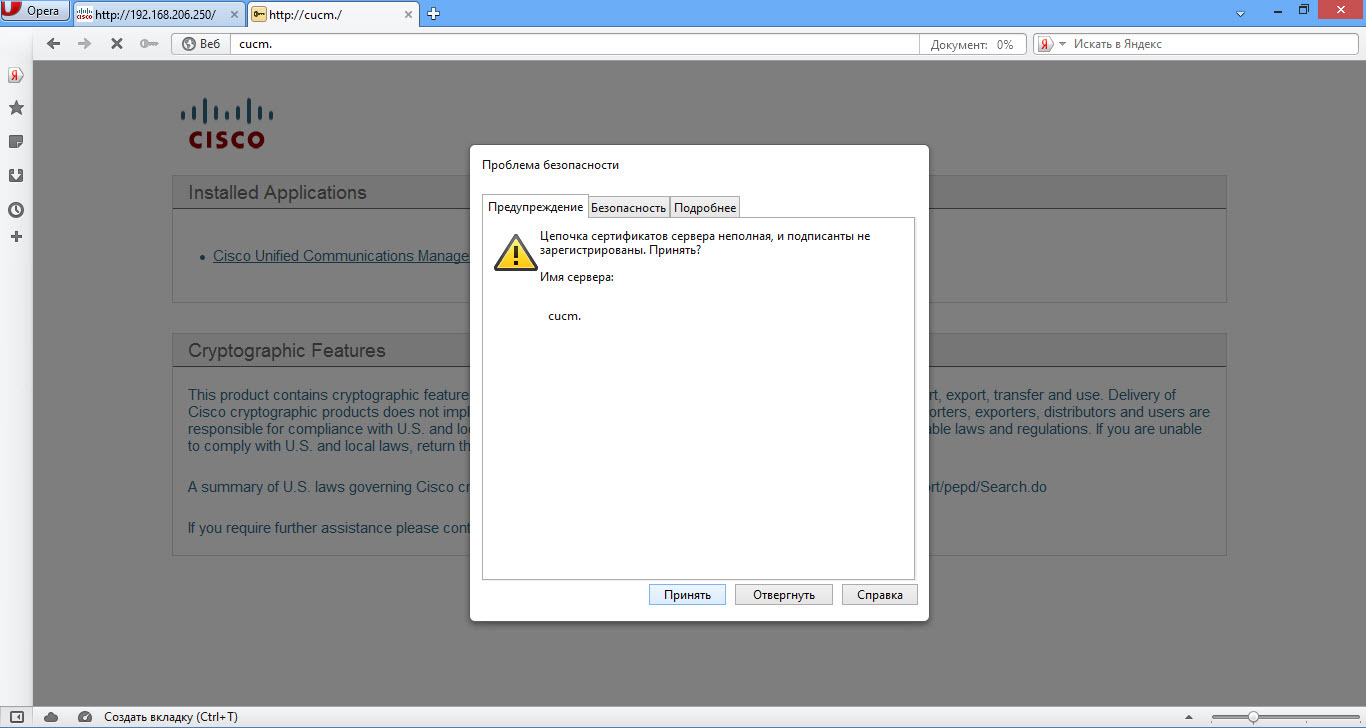
- Type cucm in the browser or 192.168.206.250 - the CUCM web-muzzle will appear. Zmakayte further and he will swear at security - understand and accept:
- Next, enter the required username and password admin 11default11 :
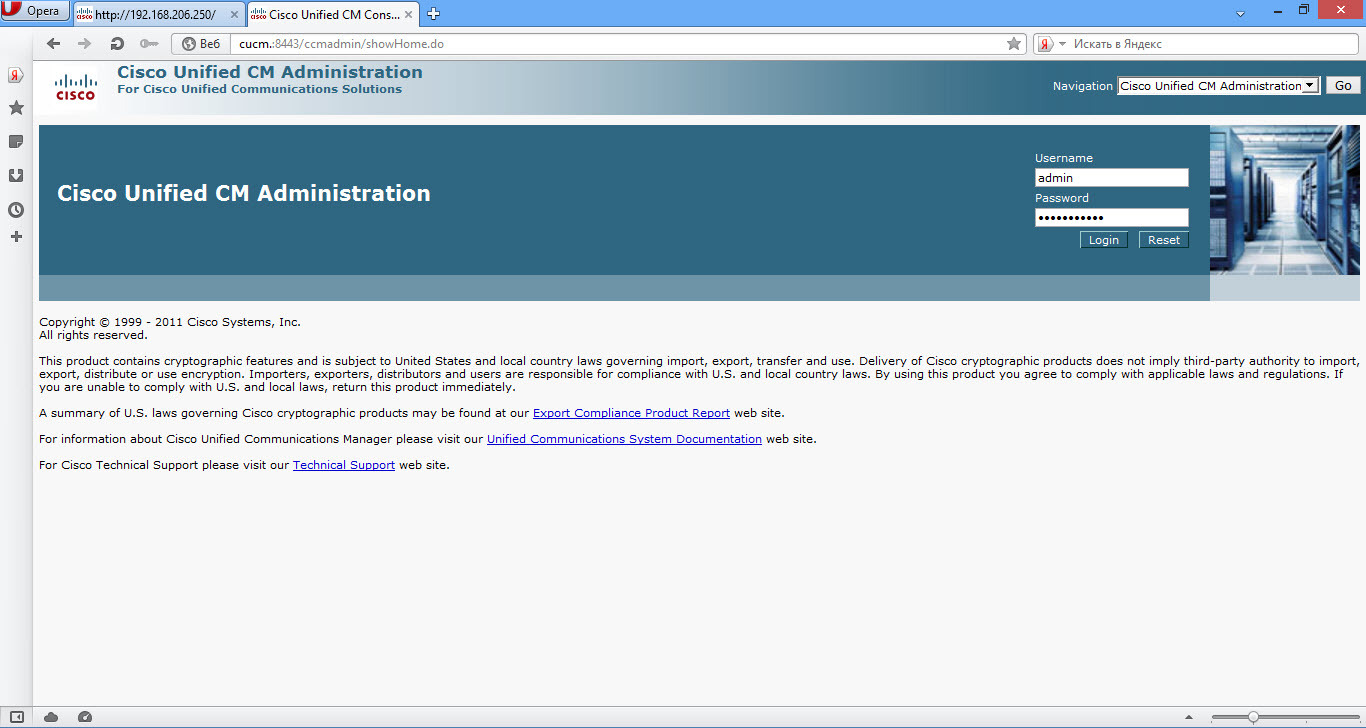
- Here we go:

Ps ps
I tested the transfer to two laptops, one Lenovo Yoga another HP. Transferred from another HP. If done consistently as described, then avoid heaps of unnecessary actions. The best way to access CUCM is using Mozils or Opera browsers.
Therefore, if accessibility problems begin after installation, be sure to check real physics and virtual, as well as whether all the settings have been applied to the router (for example, if it got to f0 / 1 interface, dhcp address). And do not forget about ping and trace.
There will be questions and suggestions on the article - write.
Good luck!
Source: https://habr.com/ru/post/248193/
All Articles