2D lighting system for Unity3D running on a GPU
Hello. As you know, Unity3D lacks lighting support for 2D games. In the Asset Store, you can find such a system , but it has one drawback - it runs on the CPU and consumes a lot of resources (64-4096 raikes per frame to each light source). Therefore, I decided to make my own lighting, the performance of which would be enough for mobile devices. For this, the calculations were transferred to the GPU. It turned out something similar light Terraria or Starbound.
Link to the demo. Arrows - movement, space - chassis, R - restart. Screenshots are taken from it.
All lighting is considered on small textures, in the example 160x88 pixels are used. If you increase the resolution, you can achieve a very fine grid, which will be difficult to see, although this is no longer for mobile platforms. Due to the fact that calculations are made on such small textures, you can use rather heavy shaders.
')
Three cameras are used for lighting, each of which is responsible for its own part of the system: light sources, light obstacles, and ambient light. Then the light sources and the ambient light are mixed and superimposed on the game camera.
Now more, in order of rendering.
Light obstacles

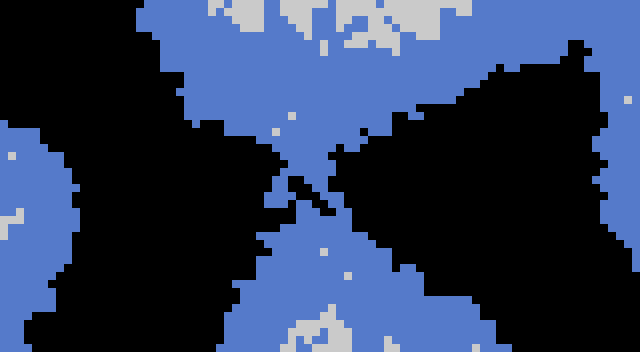
The texture of the obstacles of light. RGB channels. This and subsequent similar textures have a scale of 400%.
This is the texture of the camera. The black areas are completely transparent, the white areas are completely opaque. Color areas are also supported, for example, a completely red pixel will block the red part of the light and skip the green and blue.
Light of the environment
Ambient light sources

Sources of light environment. Alpha channel
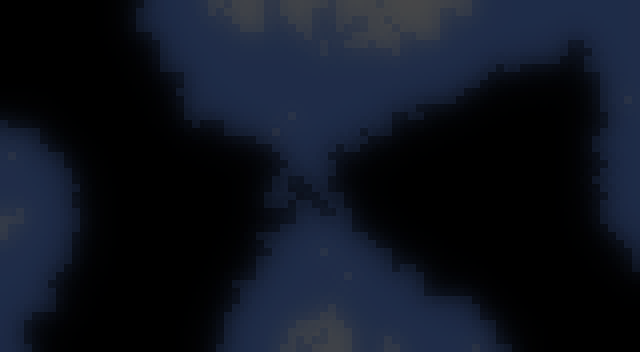
Iteratively generated ambient light texture

This is a slightly enhanced ambient light, without the usual light sources.
It's all a bit more complicated. I implemented this type of lighting in order to add weak light to the space where there are no light sources. In the example, with the help of it, a soft illumination of all free space is implemented. RGB channel controls the color, alpha channel luminous intensity. The main difference between this type of light and ordinary sources is that it is considered iterative and has no direction.
Calculation algorithm for one pixel:
- Take the initial pixel value from the previous iterative texture.
- Subtract from the pixel the strength of the obstacles from the texture of the obstacles.
- Add to the pixel the power of the glow from the texture of the surrounding light sources.
- Add to pixel the average value of the neighboring pixels
Sources of light
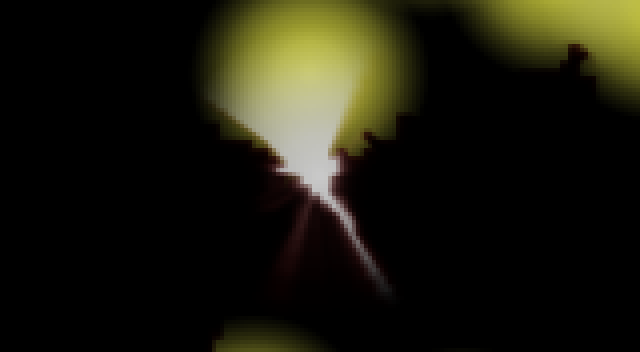
Sources of light
Conventional sources - the main part of the lighting system. For their drawing uses something like sprites. All color comes from the center, although if desired, the point can be moved anywhere.
For light sources, several shaders are available with a trace path and one without it. Traced shaders differ in the number of points traced. I use two such - one on 9 points, working with Shader Model 2.0, another on 20 points for Shader Model 3.0. A shader without path tracing is used for particle systems, since it does not need any additional information to work.
Path Tracing Algorithm:
- Take the pixel brightness of the texture.
- Find the position of the light source and the current pixel in the texture of the obstacles.
- Reduce the current brightness by the pixel values of the obstacles that lie between two points from the previous step.
9 point tracing shader
Shader "Light2D/Light 9 Points" { Properties { _MainTex ("Light texture", 2D) = "white" {} _ObstacleMul ("Obstacle Mul", Float) = 500 _EmissionColorMul ("Emission color mul", Float) = 1 } SubShader { Tags {"Queue"="Transparent" "IgnoreProjector"="True" "RenderType"="Transparent"} LOD 100 Blend OneMinusDstColor One Cull Off ZWrite Off Lighting Off Pass { CGPROGRAM // Upgrade NOTE: excluded shader from DX11 and Xbox360; has structs without semantics (struct v2f members sp) #pragma exclude_renderers d3d11 xbox360 #pragma vertex vert #pragma fragment frag #pragma glsl_no_auto_normalization #include "UnityCG.cginc" struct appdata_t { float4 vertex : POSITION; float2 texcoord : TEXCOORD0; fixed4 color : COLOR0; fixed4 normal : TEXCOORD1; }; struct v2f { float4 vertex : SV_POSITION; half2 texcoord : TEXCOORD0; fixed4 color : COLOR0; half4 scrPos : TEXCOORD2; half4 scrPosCenter : TEXCOORD1; }; sampler2D _ObstacleTex; sampler2D _MainTex; half _ObstacleMul; half _EmissionColorMul; v2f vert (appdata_t v) { v2f o; o.vertex = mul(UNITY_MATRIX_MVP, v.vertex); o.texcoord = v.texcoord; o.scrPos = ComputeScreenPos(o.vertex); o.scrPosCenter = v.normal; o.color = v.color; return o; } fixed3 maximize(fixed3 vec){ vec = max(vec, fixed3(0.01, 0.01, 0.01)); return vec/max(vec.x, max(vec.y, vec.z)); } half sum(half3 vec){ return vec.x + vec.y + vec.z; } fixed4 frag (v2f i) : COLOR { fixed2 thisPos = (i.scrPos.xy/i.scrPos.w); fixed2 centerPos = i.scrPosCenter; const fixed sub = 0.111111111111; fixed m = _ObstacleMul*length((thisPos - centerPos)*fixed2(_ScreenParams.x/_ScreenParams.y, 1)*sub); fixed4 tex = tex2D(_MainTex, i.texcoord); clip(tex.a - 0.005); fixed4 col = i.color*fixed4(tex.rgb, 1)*tex.a; fixed pos = 1; pos -= sub; col *= saturate(1 - tex2D(_ObstacleTex, lerp(centerPos, thisPos, pos))*m); pos -= sub; col *= saturate(1 - tex2D(_ObstacleTex, lerp(centerPos, thisPos, pos))*m); pos -= sub; col *= saturate(1 - tex2D(_ObstacleTex, lerp(centerPos, thisPos, pos))*m); pos -= sub; col *= saturate(1 - tex2D(_ObstacleTex, lerp(centerPos, thisPos, pos))*m); pos -= sub; col *= saturate(1 - tex2D(_ObstacleTex, lerp(centerPos, thisPos, pos))*m); pos -= sub; col *= saturate(1 - tex2D(_ObstacleTex, lerp(centerPos, thisPos, pos))*m); pos -= sub; col *= saturate(1 - tex2D(_ObstacleTex, lerp(centerPos, thisPos, pos))*m); pos -= sub; col *= saturate(1 - tex2D(_ObstacleTex, lerp(centerPos, thisPos, pos))*m); pos -= sub; col *= saturate(1 - tex2D(_ObstacleTex, lerp(centerPos, thisPos, pos))*m); col.rgb *= _EmissionColorMul; return col; } ENDCG } } } Mixing and blending light

Light Sources + Environment Light
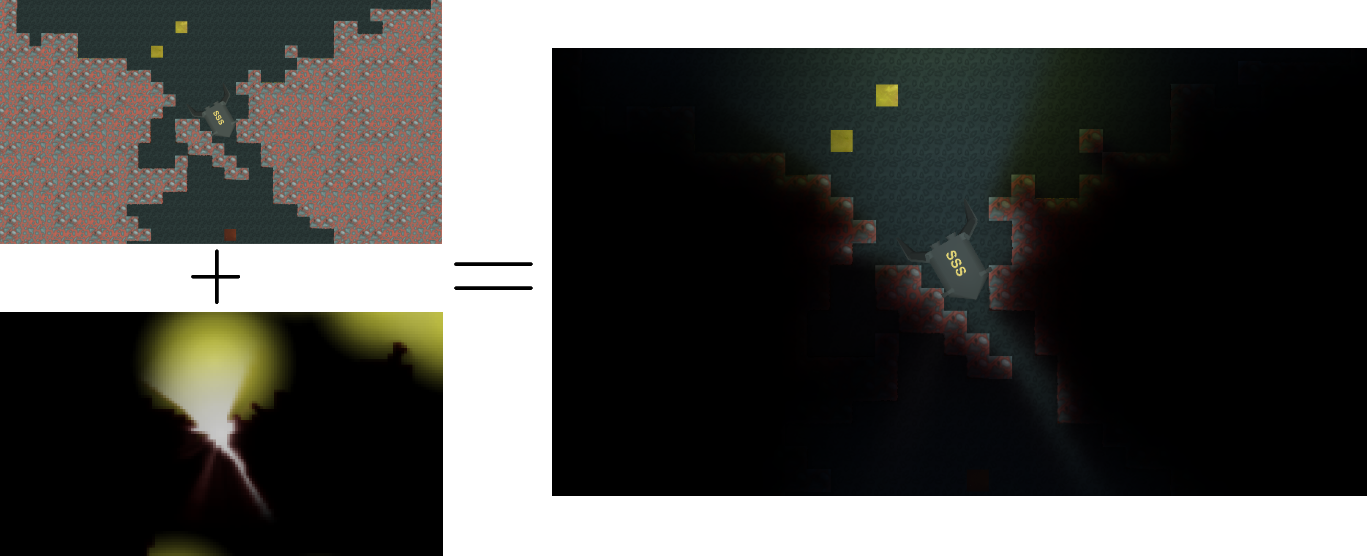
After the light sources and the ambient light are rendered, you can mix them with each other. For this, textures are multiplied by their alpha and added together. Then all this is superimposed on the image of the game and displayed on the screen.
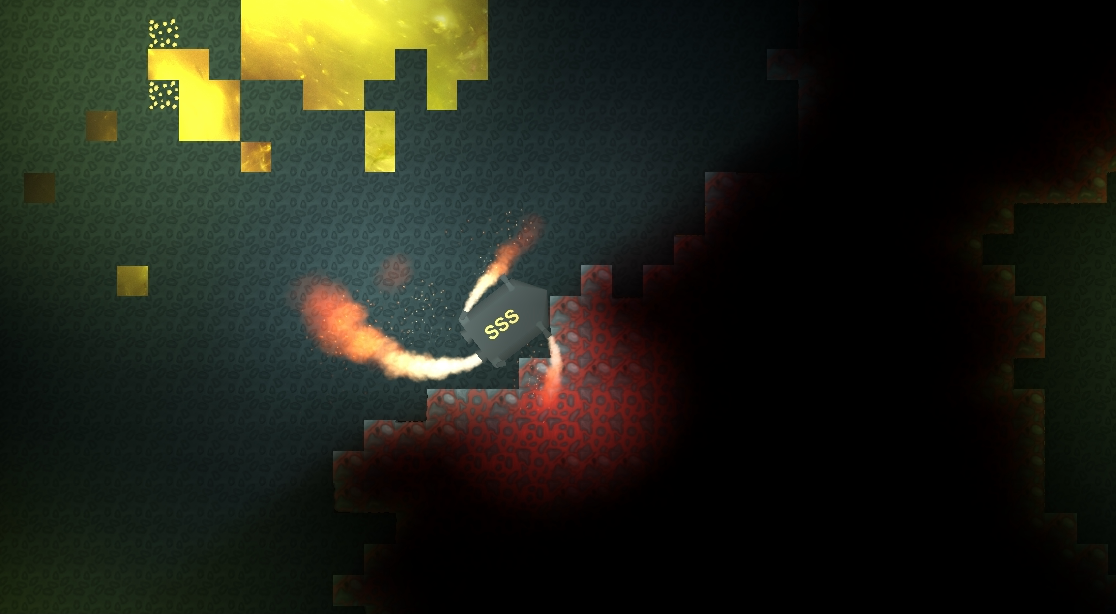
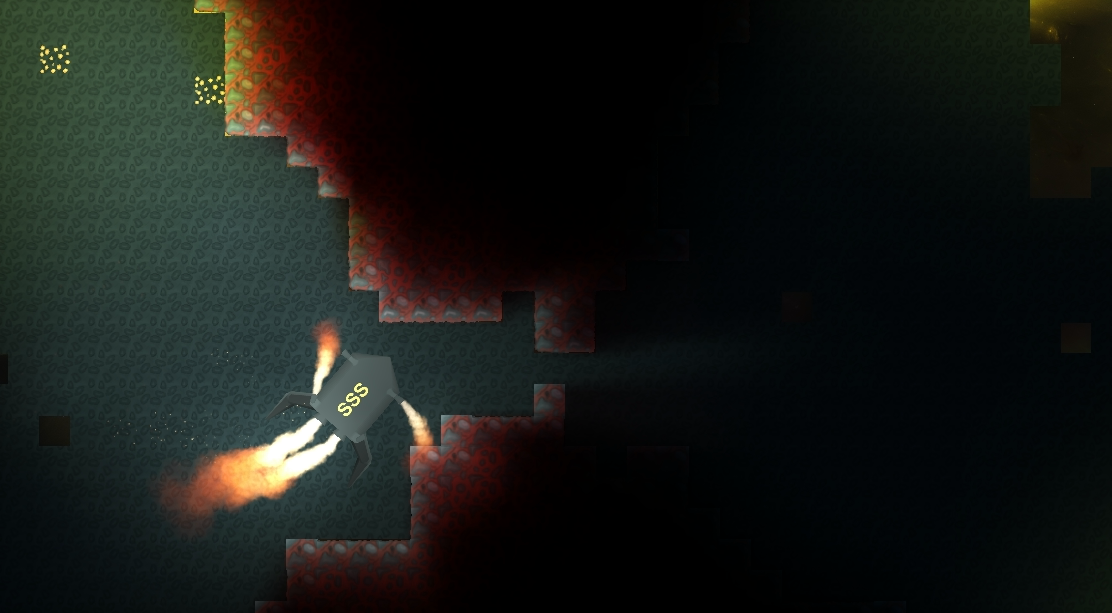
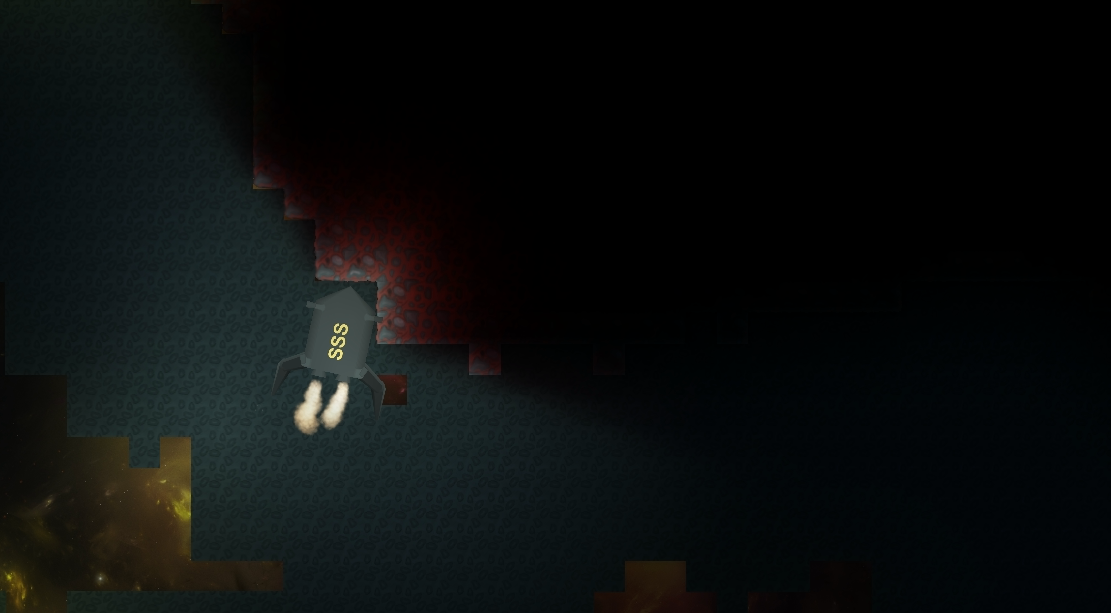
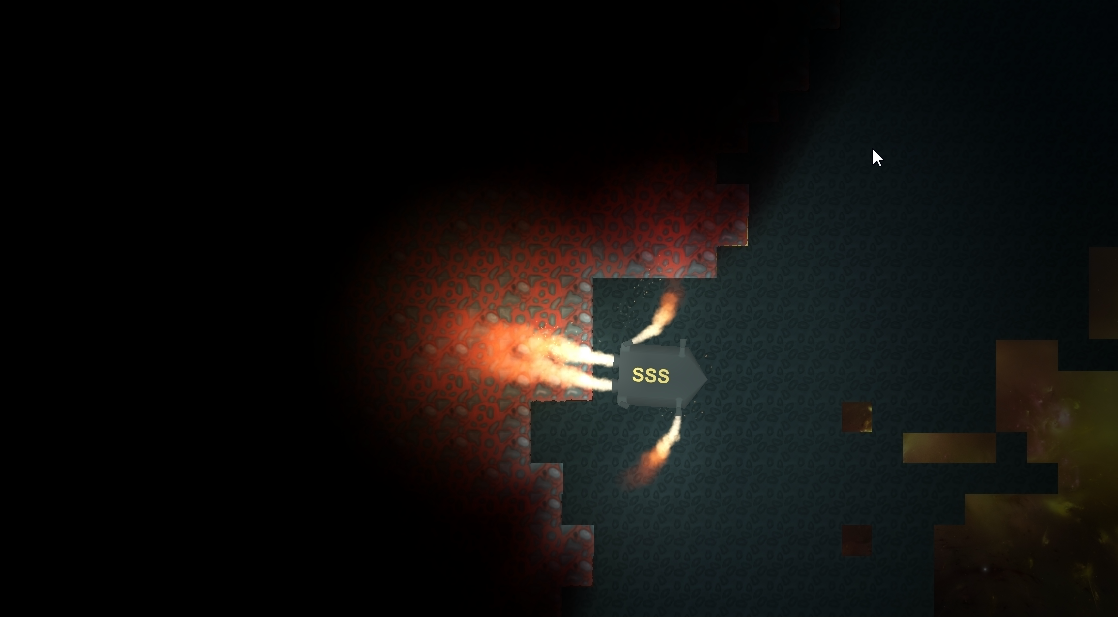
Screenshots of the result, higher resolution on click.
And finally, the pros and cons
Pros:
- Calculations take place on the GPU.
- Light sources are regular sprites, respectively, you can make a light source of any shape.
- Each light source consumes very few resources.
- Works on mobile devices, consuming ~ 8 ms per frame on Nexus 4.
- Fully dynamic lighting. Obstacles can be created and destroyed on the fly without any loss of performance.
- Support for ambient light.
- The system itself generates 6 DrawCalls, all light sources can fit one plus one more for the ambient light.
- Multi-colored light sources and obstacles.
- The ability to emit light sources in the particle system. Performance is almost the same as ordinary particle.
- Flexible quality settings.
Minuses:
- The system illuminates the grid, in consequence of which small obstacles can be ignored. On powerful platforms, you can make the grid very small.
- It is necessary to generate meshes for ambient light and obstacles.
- The size of the cameras in which the lighting is created must be larger than the size of the game camera so that the light sources behind the screen are correctly displayed.
- The computational complexity of the system is almost independent of the number of sources. This means that if it consumes 8 ms per frame with 10 light sources, then without sources it will consume about 8 ms.
PS In the presence of community interest, I will finalize and post it in the Asset Store.
PPS posted, here is the link
PPPS is now free and open-source. Github
Source: https://habr.com/ru/post/248149/
All Articles