3D to D
Good day, Habr!
I met language D at the 3rd year, but I decided to use it only one year later, when the book Alexandrescu was published. Immediately took to write laboratory, coursework. The main problem was the lack of necessary libraries (graphics, convenient mathematics) or inconvenient installation. Now much has changed, libraries are being written ( gfm , dlib , dlangui , etc.), dub has appeared. With one of these libraries I want to introduce in this post. Her name is DES . She grew up from the institute's groundwork, therefore, perhaps, it will be useful for someone to study and / or become a catalyst for learning the language.
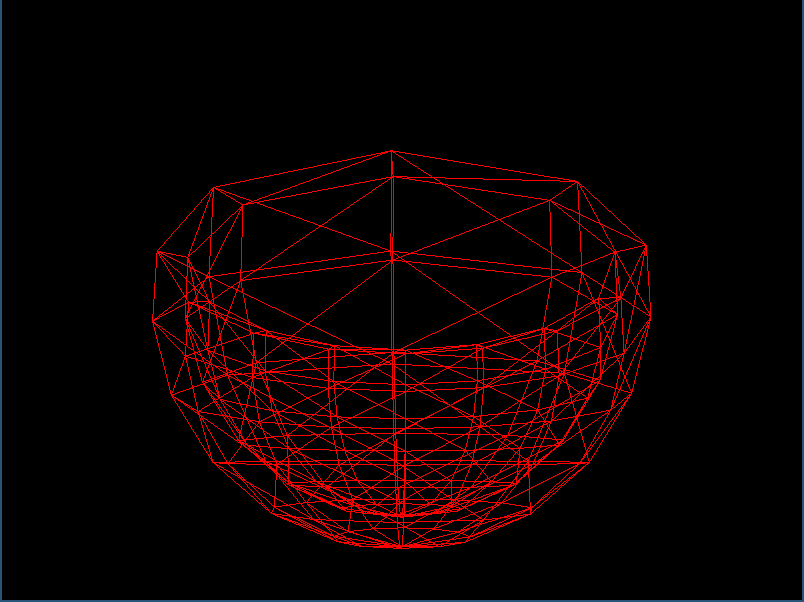
Let's write a simple application that draws some abstract mesh on the screen.
')
The first thing that is usually done is creating dub.json with the necessary settings.
Read more about dub here .
Create a couple of folders:
Let's do the source.
The DesApp class initializes SDL, GL, redirects SDL events to windows, and stores windows as such.
Let's move on to more interesting things.
Let's start the explanation with a strange construction
And let's start from afar. In D, there is an unpleasant feature associated with the garbage collector: you cannot manage memory in a destructor. And sometimes you want. Yes, and the destructor is not called explicitly. EMM - short for ExternalMemoryManager - external memory management. This is the basic interface for almost all classes in the library. External memory refers to objects that are difficult to deinitialize using GC. For example, these are OpenGL buffers, pointers to SDL windows, and so on. ExternalMemoryManager can store other child objects that implement this interface. All salt in the destroy method, which calls selfDestroy and destroy for all child objects. It turns out some object ownership model: when a parent is deinitialized, all child objects are deinitialized. To add a new bar object as a child in foo, you need to write the following code:
This situation occurs frequently, and to shorten it was decided to put this into the ExternalMemoryManager interface method:
The newEMM method is parameterized by the class to be created and the list of arguments that are passed to the class constructor inside the method, then a new one is returned and registered as a child object.
Let us turn to the signals. DesWindow is a descendant from DesObject, in which the connect method is declared. Each DesObject is the keeper of such a concept as SlotHandler. When a Slot object is created from a delegate, the SlotHandler is also passed, without which this is impossible. And already the Slot object is transmitted to the signal for registration. The question may arise: “Why not just write delegates to an array?”. Such difficulties are introduced into the architecture for further convenience. When we simply write a delegate to an array, everything is in order, the context reference is stored, the GC does not touch objects, but this is a different situation. The object that implements the ExternalMemoryManager may still exist, but now the call to any of its methods is no longer appropriate after the call to destroy (). For example, we can free the OpenGL buffer by this point, and the delegate in the signal will be recorded. Not good. SlotHandler is the impersonation of the context via the ExternalMemoryManager. It is a child of any DesObject, and when it is deleted, it disconnects itself from all connected signals, so we don’t need to worry about it. The signal has a connect method and we could write
In any case, we need someone who can be blamed for the validity of the delegate context.
ivec2 is just an alias for Vector! (2, int, "xy | wh | uv") ...
Next file src / draw.d
And the data / object.glsl file
A little bit about the camera and SpaceNode. In OpenGL to the 3rd version there was a concept of a stack of matrices, separately specific and matrix models. Everything is a bit simpler here, although you can make the same stack if you wish. Each SpaceNode contains a pointer to the parent SpaceNode and a transformation matrix from the local to the parent coordinate system. The parent SpaceNode can also be null. The camera is also a SpaceNode, but with some additional fields and methods. The main difference is the presence of the method of resolve, which takes SpaceNode and returns the transformation matrix from the object's coordinate system to the camera's coordinate system. For this, a separate Resolver class is used. In fact, it can be used to look from any SpaceNode object to any other.
But in general, that's all. Run the dub build and get the binary in the bin folder.
It is clear that there is little information in the article, so I suggest that interested people collect the documentation.
We focused on the documentation for the harbored-mod project, so if you want to generate a dock using the built-in dmd function, the result will disappoint you.
For unix systems, go to the ~ / .dub / packages / des-1.3.0 folder and run path / to / harbored-mod / bin / hmod and open doc / index.html in your favorite browser. Just do not forget about the package descore, which should lie next to the des, for him in the same way going to the documentation.
There are many interesting things, ranging from linear algebra, to logging and localization systems.
By the way, this example is in the folder des- / example / object_draw.
I hope someone will find this useful, thank you for your attention.
I met language D at the 3rd year, but I decided to use it only one year later, when the book Alexandrescu was published. Immediately took to write laboratory, coursework. The main problem was the lack of necessary libraries (graphics, convenient mathematics) or inconvenient installation. Now much has changed, libraries are being written ( gfm , dlib , dlangui , etc.), dub has appeared. With one of these libraries I want to introduce in this post. Her name is DES . She grew up from the institute's groundwork, therefore, perhaps, it will be useful for someone to study and / or become a catalyst for learning the language.
Let's write a simple application that draws some abstract mesh on the screen.
')
The first thing that is usually done is creating dub.json with the necessary settings.
Hidden text
{ "name": "example", "targetPath": "bin", "targetType": "executable", "sourcePaths": [ "src" ], "dependencies": { "des": ">=1.3.0" } } Read more about dub here .
Create a couple of folders:
- src - source will be here
- data - there will be a file with a shader
Let's do the source.
Src / main.d file
import des.app; // SDL: , , , , GL import window; // void main() { auto app = new DesApp; // , , , app.addWindow({ return new MainWindow; }); // while( app.isRuning ) app.step(); // , } The DesApp class initializes SDL, GL, redirects SDL events to windows, and stores windows as such.
Let's move on to more interesting things.
Src / window.d file
module window; import des.app; import draw; // Sphere import camera; // MCamera // class MainWindow : DesWindow { protected: MCamera cam; // Sphere obj; // , /+ , DesApp OpenGL : , GL, +/ override void prepare() { cam = new MCamera; obj = newEMM!Sphere( 1, 12, 12 ); // // , connect( draw, { obj.draw( cam ); } ); connect( key, &keyControl ); // connect( mouse, &(cam.mouseReaction) ); // connect( event.resized, (ivec2 sz) { cam.ratio = cast(float)sz.w / sz.h; } ); } // void keyControl( in KeyboardEvent ke ) { if( ke.scan == ke.Scan.ESCAPE ) app.quit(); // DesApp, } public: // title , , this() { super( "example", ivec2(800,600), false ); } } Let's start the explanation with a strange construction
obj = newEMM!Sphere( 1, 12, 12 ); And let's start from afar. In D, there is an unpleasant feature associated with the garbage collector: you cannot manage memory in a destructor. And sometimes you want. Yes, and the destructor is not called explicitly. EMM - short for ExternalMemoryManager - external memory management. This is the basic interface for almost all classes in the library. External memory refers to objects that are difficult to deinitialize using GC. For example, these are OpenGL buffers, pointers to SDL windows, and so on. ExternalMemoryManager can store other child objects that implement this interface. All salt in the destroy method, which calls selfDestroy and destroy for all child objects. It turns out some object ownership model: when a parent is deinitialized, all child objects are deinitialized. To add a new bar object as a child in foo, you need to write the following code:
auto bar = new Bar; foo.registerChildEMM( bar ); This situation occurs frequently, and to shorten it was decided to put this into the ExternalMemoryManager interface method:
auto bar = foo.newEMM!Bar(); The newEMM method is parameterized by the class to be created and the list of arguments that are passed to the class constructor inside the method, then a new one is returned and registered as a child object.
Let us turn to the signals. DesWindow is a descendant from DesObject, in which the connect method is declared. Each DesObject is the keeper of such a concept as SlotHandler. When a Slot object is created from a delegate, the SlotHandler is also passed, without which this is impossible. And already the Slot object is transmitted to the signal for registration. The question may arise: “Why not just write delegates to an array?”. Such difficulties are introduced into the architecture for further convenience. When we simply write a delegate to an array, everything is in order, the context reference is stored, the GC does not touch objects, but this is a different situation. The object that implements the ExternalMemoryManager may still exist, but now the call to any of its methods is no longer appropriate after the call to destroy (). For example, we can free the OpenGL buffer by this point, and the delegate in the signal will be recorded. Not good. SlotHandler is the impersonation of the context via the ExternalMemoryManager. It is a child of any DesObject, and when it is deleted, it disconnects itself from all connected signals, so we don’t need to worry about it. The signal has a connect method and we could write
draw.connect( this.newSlot( { obj.draw( cam ); } ); In any case, we need someone who can be blamed for the validity of the delegate context.
ivec2 is just an alias for Vector! (2, int, "xy | wh | uv") ...
Next file src / draw.d
He is a little more voluminous
module draw; import std.math; import des.math.linear; // , import des.util.stdext.algorithm; // amap array( map ... ) import des.util.helpers; // appPath -- import des.space; // , SpaceNode, import des.gl; // OpenGL class Sphere : GLSimpleObject, SpaceNode { /+ SpaceNode self_mtr matrix +/ mixin SpaceNodeHelper; protected: // GLBuffer pos, ind; void prepareBuffers() { // auto loc = shader.getAttribLocations( "pos" ); // createArrayBuffer createIndexBuffer GLSimpleObject, GLObject pos = createArrayBuffer; // ind = createIndexBuffer; // // setAttribPointer( pos, loc[0], 3, GLType.FLOAT ); // vec3[] buf; vec3 sp( vec2 a, float R ) { return spheric(a) * R; } buf ~= amap!(a=>a+vec3(0,0,0))( amap!(a=>sp(a,R))( planeCoord( uivec2( resU, resV/2 ), vec2(0,PI*2), vec2(PI,PI/2) ) ) ); buf ~= amap!(a=>a-vec3(0,0,0))( amap!(a=>sp(a,R*0.9))( planeCoord( uivec2( resU, resV/2 ), vec2(0,PI*2), vec2(PI/2,PI) ) ) ); // pos.setData( buf ); // ind.setData( triangleStripPlaneIndex( uivec2( resU+1, resV+2 ), uint.max ) ); } // uint resU, resV; float R; public: this( float r, uint u, uint v ) { R = r; resU = u; resV = v; import std.file; super( newEMM!CommonShaderProgram( // parseShaderSource( // 1 readText( // appPath( "..", "data", "object.glsl" ) // )))); prepareBuffers(); } void draw( Camera cam ) { // shader.setUniform!col4( "col", col4(1,0,0,1) ); glEnable( GL_PRIMITIVE_RESTART ); glPrimitiveRestartIndex(uint.max); glPolygonMode( GL_FRONT_AND_BACK, GL_LINE ); // shader.setUniform!mat4( "prj", cam.projection.matrix * cam.resolve(this) ); // drawElements( DrawMode.TRIANGLE_STRIP ); glDisable( GL_PRIMITIVE_RESTART ); } } // vec2[] planeCoord( uivec2 res, vec2 x_size=vec2(0,1), vec2 y_size=vec2(0,1) ) { vec2[] ret; float sx = (x_size[1] - x_size[0]) / res.u; float sy = (y_size[1] - y_size[0]) / res.v; foreach( y; 0 .. res.y+1 ) foreach( x; 0 .. res.x+1 ) ret ~= vec2( x_size[0] + sx * x, y_size[0] + sy * y ); return ret; } vec3 spheric( in vec2 c ) pure { return vec3( cos(cx) * sin(cy), sin(cx) * sin(cy), cos(cy) ); } uint[] triangleStripPlaneIndex( uivec2 res, uint term ) { uint[] ret; foreach( y; 0 .. res.y-1 ) { ret ~= [ y*res.x, (y+1)*res.x ]; foreach( x; 1 .. res.x ) ret ~= [ y*res.x+x, (y+1)*res.x+x ]; ret ~= term; } return ret; } And the data / object.glsl file
no frills
//### vert #version 330 in vec4 pos; uniform mat4 prj; void main() { gl_Position = prj * pos; } //### frag #version 330 uniform vec4 col; out vec4 color; void main() { color = col; } A little bit about the camera and SpaceNode. In OpenGL to the 3rd version there was a concept of a stack of matrices, separately specific and matrix models. Everything is a bit simpler here, although you can make the same stack if you wish. Each SpaceNode contains a pointer to the parent SpaceNode and a transformation matrix from the local to the parent coordinate system. The parent SpaceNode can also be null. The camera is also a SpaceNode, but with some additional fields and methods. The main difference is the presence of the method of resolve, which takes SpaceNode and returns the transformation matrix from the object's coordinate system to the camera's coordinate system. For this, a separate Resolver class is used. In fact, it can be used to look from any SpaceNode object to any other.
And the last src / camera.d
module camera; import std.math; import des.space; import des.app; class MCamera : SimpleCamera { protected: vec3 orb; vec2 rot; float rotate_coef = 80.0f; float offset_coef = 50.0f; float y_angle_limit = PI_2 - 0.01; public: this() { super(); orb = vec3( 5, 1, 3 ); look_tr.target = vec3(0,0,0); look_tr.up = vec3(0,0,1); near = 0.001; updatePos(); } // void mouseReaction( in MouseEvent ev ) { // if( ev.type == MouseEvent.Type.WHEEL ) moveFront( -ev.whe.y * 0.1 ); if( ev.type == ev.Type.MOTION ) { // if( ev.isPressed( ev.Button.LEFT ) ) { auto frel = vec2( ev.rel ) * vec2(-1,1); auto angle = frel / rotate_coef; addRotate( angle ); } // if( ev.isPressed( ev.Button.MIDDLE ) ) { auto frel = vec2( ev.rel ) * vec2(-1,1); auto offset = frel / offset_coef * sqrt( orb.len ); moveCenter( offset ); } } } protected: void moveFront( float dist ) { orb += orb * dist; if( orb.len2 < 1 ) orb = orb.e; updatePos(); } void addRotate( in vec2 angle ) { rot = normRotate( rot + angle ); orb = vec3( cos(rot.x) * cos(rot.y), sin(rot.x) * cos(rot.y), sin(rot.y) ) * orb.len; updatePos(); } void moveCenter( in vec2 offset ) { auto lo = (look_tr.matrix * vec4(offset,0,0)).xyz; look_tr.target += lo; updatePos(); } void updatePos() { pos = orb + look_tr.target; } vec2 normRotate( in vec2 r ) { vec2 ret = r; if( ret.y > y_angle_limit ) ret.y = y_angle_limit; if( ret.y < -y_angle_limit ) ret.y = -y_angle_limit; return ret; } } But in general, that's all. Run the dub build and get the binary in the bin folder.
It is clear that there is little information in the article, so I suggest that interested people collect the documentation.
We focused on the documentation for the harbored-mod project, so if you want to generate a dock using the built-in dmd function, the result will disappoint you.
For unix systems, go to the ~ / .dub / packages / des-1.3.0 folder and run path / to / harbored-mod / bin / hmod and open doc / index.html in your favorite browser. Just do not forget about the package descore, which should lie next to the des, for him in the same way going to the documentation.
There are many interesting things, ranging from linear algebra, to logging and localization systems.
By the way, this example is in the folder des- / example / object_draw.
I hope someone will find this useful, thank you for your attention.
Source: https://habr.com/ru/post/248119/
All Articles