A brief overview of the new Unity UI with examples of the organization of the interface
Perhaps, for many, the news about the release of the new Unity UI system (hereinafter simply UI) did not seem to be anything significant. At least - because of its dampness, as a maximum - because of the existence of NGUI. At first I was no exception, but the opening of the UI source code of the system ( 1 ) under the liberal license MIT / X11, as well as the enthusiasm of the developers of Unity Technologies made me change my mind.
In my opinion, the new UI will bring us quite a lot of advantages:
')
- It is a worthy tool out of the box;
- The ability to more deeply understand the work of the UI due to the availability of source codes;
- The generally accepted mechanism for making changes to the source code of a UI is the fork / pull request;
- The healthy competition between different UI systems will ultimately bear fruit in the form of better and more convenient tools for Unity, and possibly price dumping;
- The close interaction between the UI development team and the Unity core is already bearing fruit in the form of performance optimizations, and in the future I hope they will keep abreast.
Guided by these thoughts, it was decided to develop the game interface using the new UI. As time has shown, the decision was justified, the game saw the light and functions safely on Android devices. By the way, the final decision was after the announcement of the Unity 4.6.1 ( 2 ) patch, which included a ton of fixes and UI impruves.
Let's get to the specifics. I’ll start with a general idea that was formed after lighting up meager documentation, watching video lessons and digging out source code.
UI concept
The approach to the organization of the interface redesigned in principle. That is, if you previously worked with the GUI, in the new UI, you almost will not find anything like it. And vice versa - if you worked with NGUI, you will find a lot in common. In general, it can be called typical for environments with tools for visual development.
At the heart of the understanding of the new concept are three components: Canvas, Rect Transform and Event Trigger.
Canvas - is a container for all UI elements and determines the rendering mode. There can be more than one such container on the scene ( 3 ).
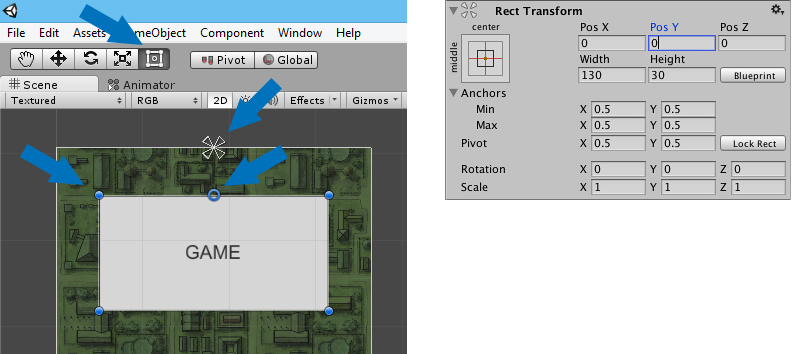
Rect Transform - this component allows you to set the position and size of the game object using convenient visual controls. He introduces the concepts of width and height, and not just scale ( 4 ).
Unity Event is a modified event system, specifically the Event component -> Event Trigger, which includes visual event call control components ( 5 ).
As I became familiar with the UI, I created for myself possible uses. Let's go on them and sort this whole kitchen. At the end of the article you can find a demo project, which I will refer to in the text. Unfortunately, these examples are far from ready-made recipes, as they are not sufficiently developed, plus they are sharpened for 2D games, although in some places they are also suitable for 3D.
Example # 1
Goals:
1. Tile background;
2. The fixed position of the controls regardless of the resolution and aspect ratio of the screen;
3. Controls should be proportional to the size of the screen.
Solution option:
1. Add Canvas to the scene and select the Screen space - Overlay render mode, this mode will automatically adjust its size to the size of the camera;
2. Add a tiled background, for this we just need to add our Canvas a new UI component - Image, select the desired sprite and change the Image Type field to Tiled;
3. In the Game window, we select the resolution that is convenient for us, for example, 480x800 and add the necessary controls to our Canvas — we place the necessary positions for them;
4. Next comes the new UI magic called anchors! The name speaks for itself, they allow you to fix a number of characteristics of the game object using the Rect Transform component. You can change them in the scene editing window, enabling the new mode, or in the inspector. Please note that the icon in the inspector of the Rect Transform component is clickable and opens a window for selecting preset positions and behaviors, and if you hold down the Shift button, you will also have the position of the pivot point;
5. One of the components of Canvas completes the picture, which is added to it by default Layout -> Canvas Scaler, namely one of its modes - Scale With Screen Size. This mode allows you to set the Reference Resolution, in our case it will be 480x800.
Example # 2
Goals:
1. The orientation is strictly portrait;
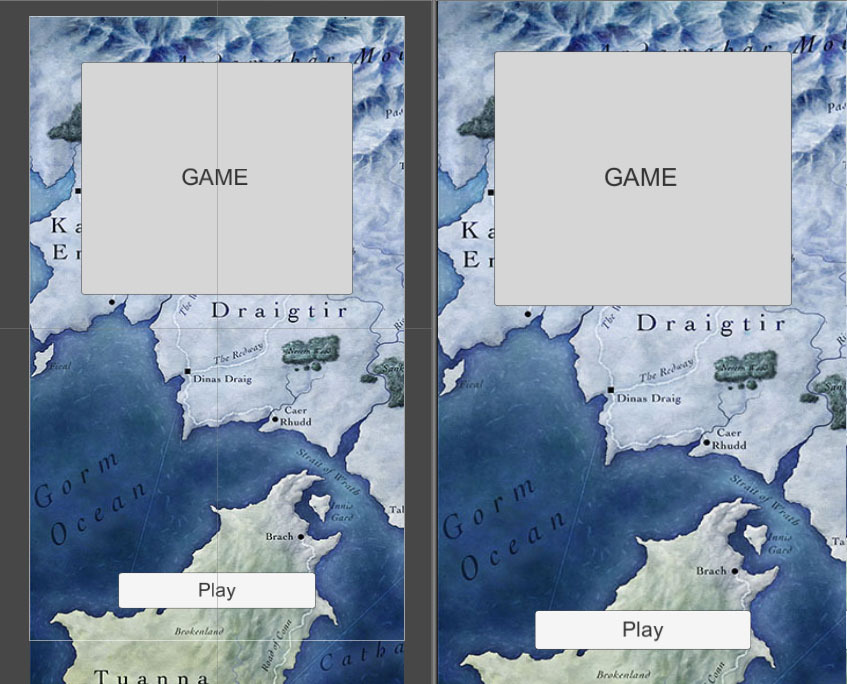
2. Universal for all aspect ratios the background, which is always displayed on the whole screen, and if necessary it is cut only from the bottom;
3. The fixed position of the controls regardless of the resolution and aspect ratio of the screen;
4. Controls should be proportional to the size of the screen.
Solution option:
1. Add a UI -> Image object to our Canvas, select the desired sprite and type of image Simple;
2. All magic is reduced to the location of the anchors and points of support in such a way that they would lie in the center of the upper edge of the Canvas;
3. In the Canvas Scaler component, set the Match value to 0.
Example # 3
Goals:
1. The orientation is strictly portrait;
2. Tile background that does not scale;
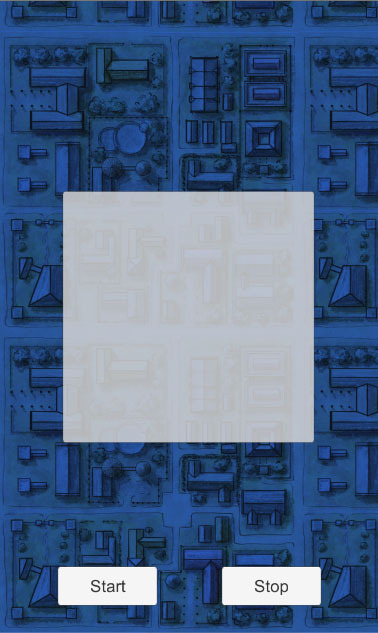
3. Fixed size playing field, for example 400x400;
4. The fixed position of the controls regardless of the resolution and aspect ratio of the screen;
5. Controls should be proportional to the size of the screen.
Solution option:
1. You can, of course, implement the background as a Sky Box or a Quad-type game object with a texture lined and dimensions that are obviously larger than the screen. But we will go the UI way and create a Canvas, similar to example # 1, just set the Screen Space - Camera render type and write our main camera in the Render Camera field;
2. Now create another Canvas with the World Space render type, preset the camera and set the Order in Layer value to 1, so that this layer would be drawn on top of the previous Canvas whose value is 0;
3. I advise you when rendering World Space _in advance_ to set the Canvas scale value so that you do not have problems with the font size;
4. Controls are set by a method already known to us.
Example # 4
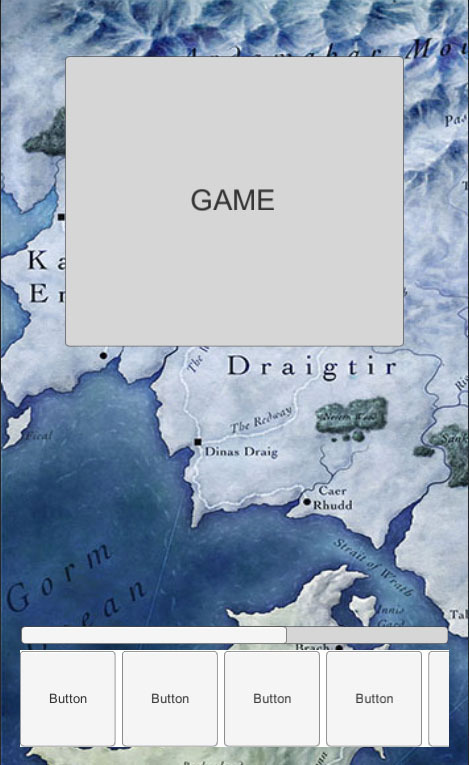
Goals:
1. Create a scroller;
2. Content should not be visible beyond the limits of the scroller;
3. It should scale along with the screen and stick to the bottom edge.
Solution option:
1. We need a game object to which we add a component UI -> Scroll Rect, the most important field of which is Content, specifying which we specify the container containing game objects (for example, twenty images of game levels 100x100 in size that do not fit the screen size);
2. Also, the UI -> Mask component will be useful to us (note that you also need to insert an empty Image component), which will clip the content beyond the limits of the game object to which it is added;
3. You can also create a UI -> Scrollbar object and bind it to our Scroll Rect
Example # 5
Some small amenities:
1. How to expand the list of processed events, for example, handle StartDrag, EndDrag, etc. using the Event Trigger component;
2. Application of the element UI -> Toggle for the realization of awards in the form of Stars with convenient scripting of the form isOn = true;
3. The simplest option Popup windows using the Canvas Group component and the good old animator without a single line of code.
Of course, these examples cover only a small part of the possible tasks and implementations, but I hope they will help you choose a convenient direction for finding a solution or, at a minimum, a sandbox in which you can try different options.
Project file with examples
www.dropbox.com/s/0d48cf04lekpfoe/DemoProjectUIv4_6_1.unitypackage?dl=0
Footnotes
1. bitbucket.org/Unity-Technologies/ui/overview
2. unity3d.com/unity/whats-new/unity-4.6.1
3. docs.unity3d.com/Manual/class-Canvas.html
4. docs.unity3d.com/Manual/class-RectTransform.html
5. docs.unity3d.com/Manual/SupportedEvents.html
Source: https://habr.com/ru/post/246605/
All Articles