Verve 2 Review: Basic Electronics for Kids and Teens. What can be done with the help of an electronic designer?

InXus Interactive has recently launched the Verve 2 universal board, thanks to which children aged 10 years and older, as well as gamers and technical artists, can learn the basics of electronics by creating their own smart device, but without having knowledge of programming and the same electronics.
Thanks to this device, you can work with quite easy-to-use and at the same time interesting and useful sensors, as well as create systems from sensors of varying complexity, ranging from controlling arcade games to home security systems.
')
Kit and design
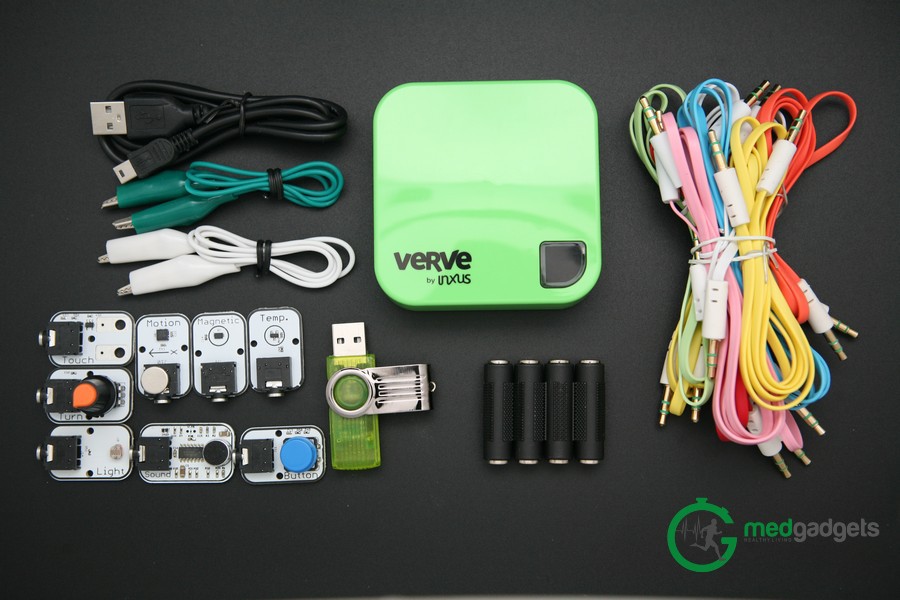
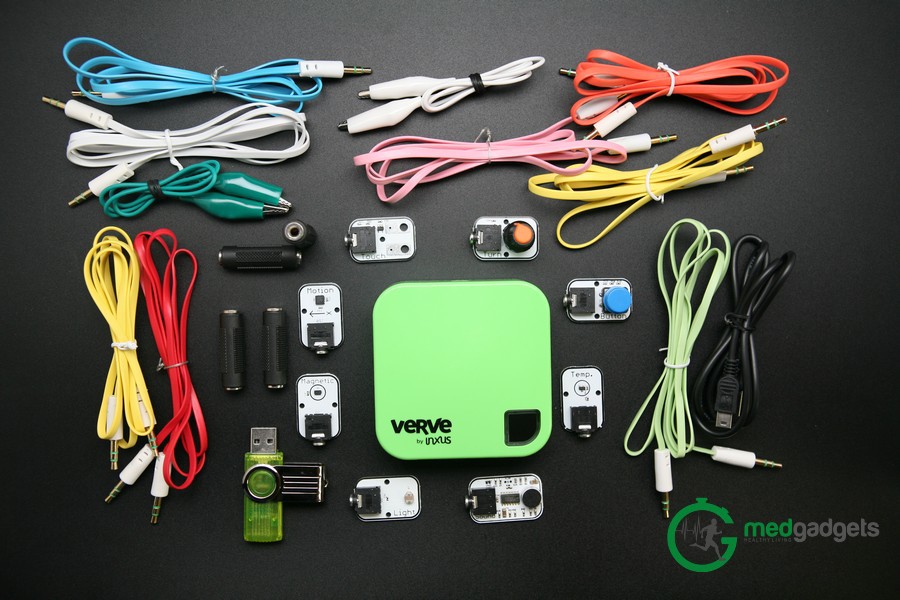
The starter kit that we got includes:
• VERVE hub;
• Verve-sensors: button, light, magnet, motion, sound, temperature, touch, turn;
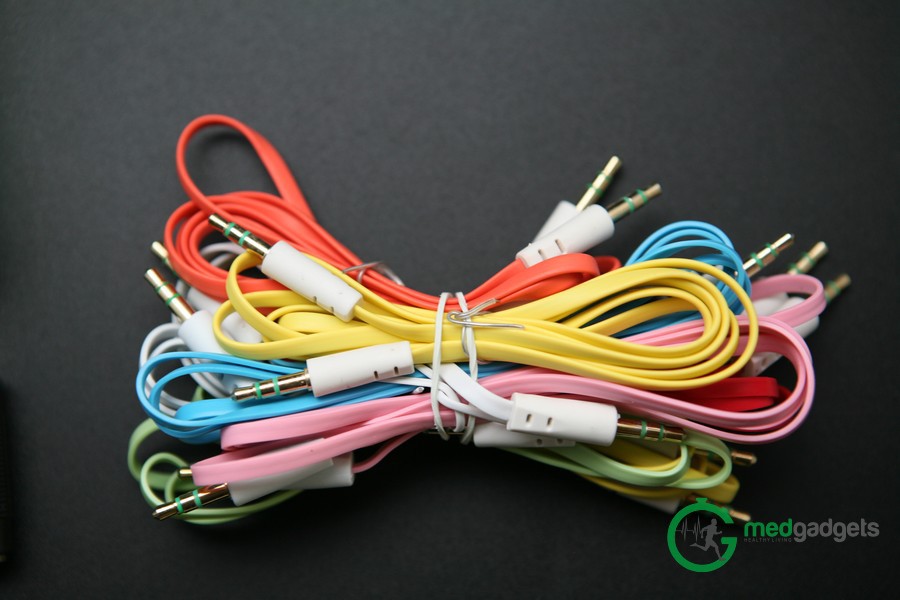
• 8 connecting cables with 3.5 mm connectors;
• 2 wires with 2 crocodile clips in the insulator;
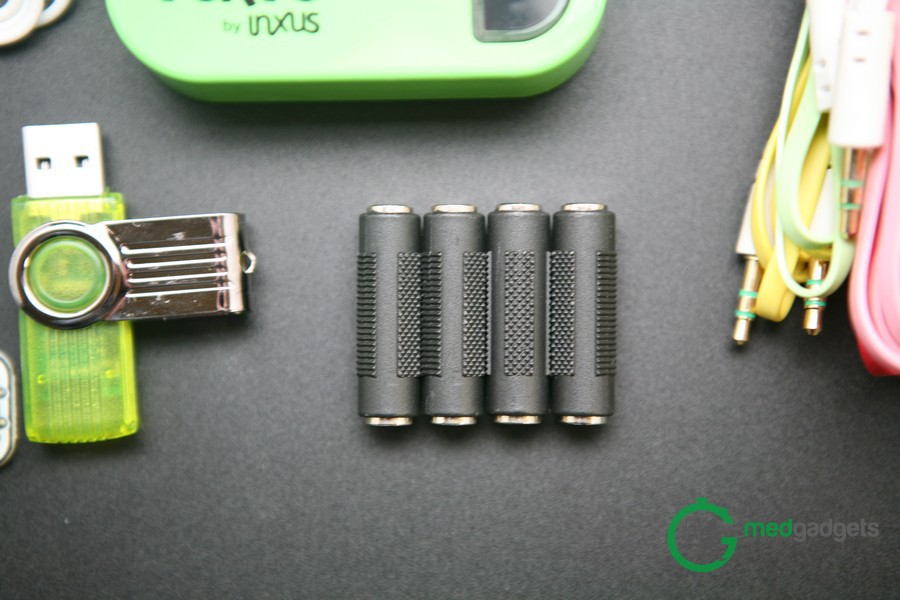
• 4 extension cables for connecting cables;
• Mini-USB cable;
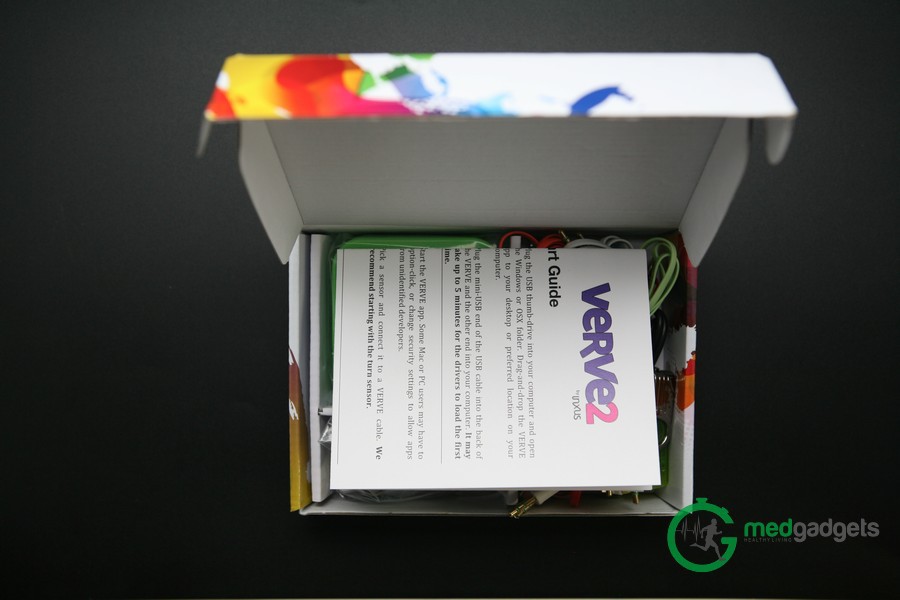
• Flash memory with software for MacOS and Windows with 2 applications and quick installation guide;
• user's manual.


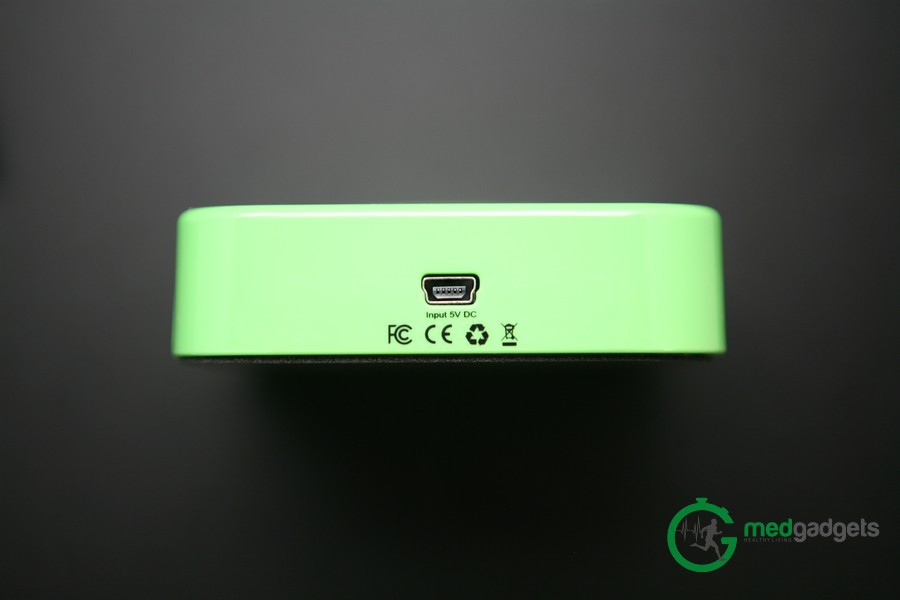
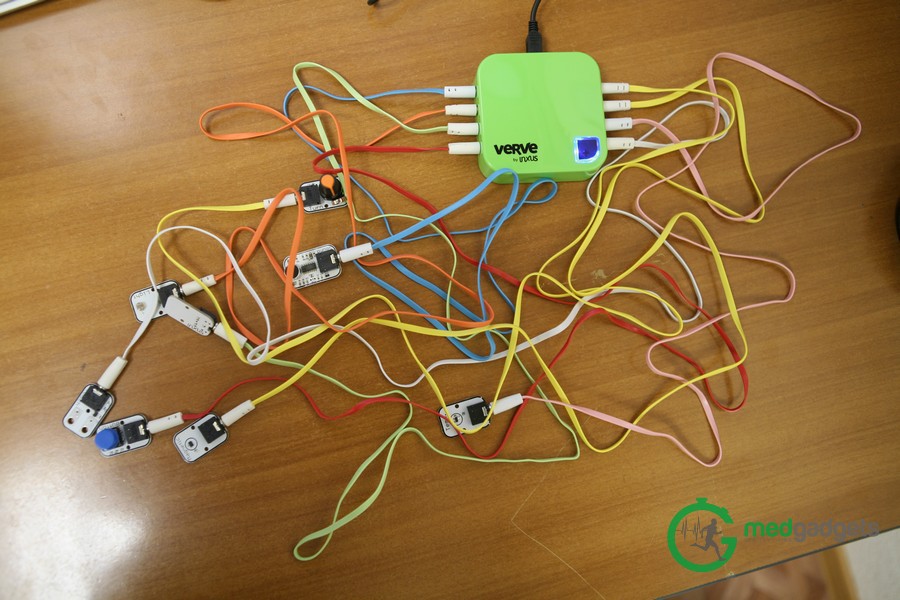
Verve 2 is a small plastic green case, inside which is the main board. On the front of the case there is a small black button that, when pressed, starts to turn blue, which means that the VERVE 2 is in keyboard emulation mode. On the side parts there are 4 numbered connectors through which the sensors are connected, i.e. In total, you can connect 8 sensors. In the upper side there is a mini-USB connector for powering and transferring data to the Verve 2.


Sensors and their functionality
It is worth noting that the sensors can be connected to the main board in any order. Purpose of the included sensors:
• Button sensor - a sensor that fixes a button press. It takes a measurement when you release the pressed button. Press the button so the sensor responds;
• Light sensor - light sensor - measures the level of illumination. For example, by shining a flashlight or creating a shadow (by covering the sensor with your hands, with your body or in another way), you can get a sensor response;
• Magnet sensor - magnetic sensor - measures magnetic fields. Bring it close to the magnet, for example, to the one included in the kit to get a response;
• Motion sensor - motion sensor - measures changes in speed. Shake it, for example, from left to right to get a reaction;
• Sound sensor - sound sensor - measures the level of the surround sound. To get a sensor response, you can, for example, click your fingers, clap your hands, or talk / shout next to it;
• Temperature sensor - temperature sensor - measures the ambient temperature. To react to the sensor, place it in a cold or warm place;
• Touch sensor - a touch sensor - measures small changes in electrical conductivity, for example, when your body touches both contacts. Attach, for example, contacts to your body (and your friends ’body) to get a sensor response;
• Turn sensor - turn sensor. The rotation sensor measures the rotation of the rotary knob. To get a response, you should rotate the knob back and forth.
Software and included applications
As mentioned above, Verve 2 comes with Flash-memory, on which you can find software for Windows and MacOS platforms, and it does not require installation. Also on the flash memory you can find 2 applications:
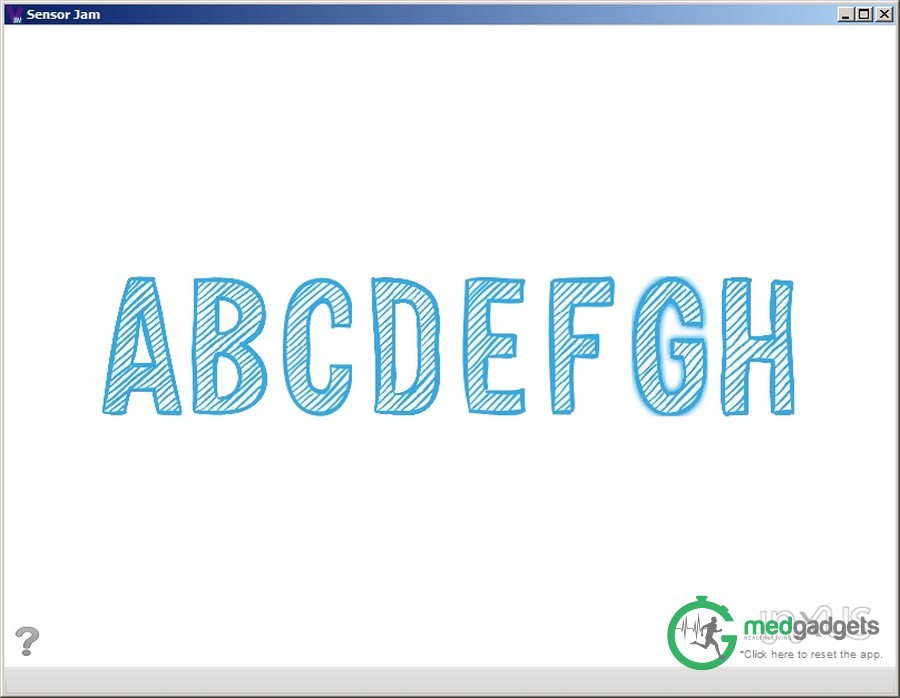
1. "Sensor Jam". After launching this application, you will see a window with large capital English letters from A to H. By pressing the corresponding letters on the keyboard, you can find that the program will start to emit various sounds depending on the button pressed. For example, by pressing the letter A on the keyboard, you will hear the sound of a drum.
At the same time, it is possible, by clicking with the left mouse button on the corresponding letter on the screen, to assign your sound in the “mp3” format.
What is all this for? When the blue indicator lights on the device, i.e. Verve 2 will be in keyboard emulation mode, you can configure it so that, for example, when the motion sensor “Motion” is shaken from left to right, the keyboard key “A” will work. In this case, the program will emit a sound at such activity of the sensor.
In fact, you can think of a lot of other applications.
If you want to reset the program settings to default values, then in the lower right corner of the screen, click the left mouse button on the text "* Click here to reset the app."

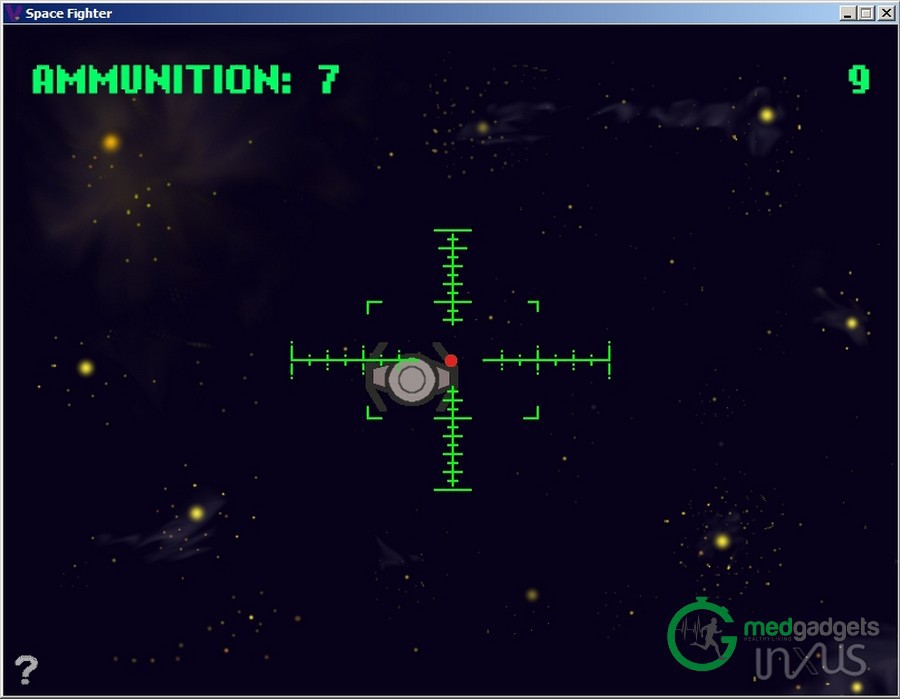
2. Space Fighter - Space fighter - a simulator for fans of arcade games. Although it seems to be a primitive game, it can be a special pleasure when setting up sensors to control a fighter.
Application Interface and Programming
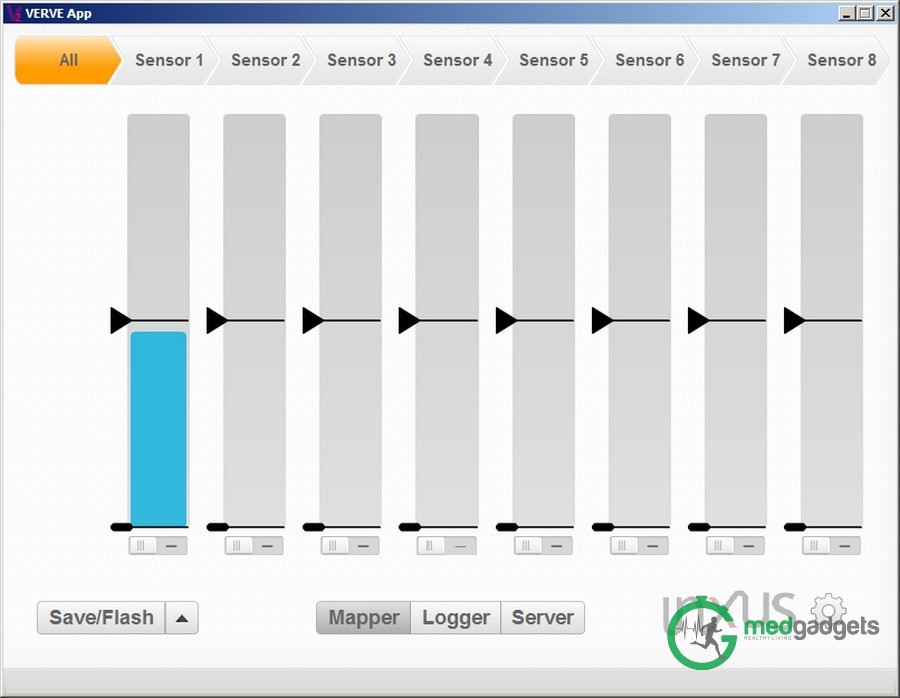
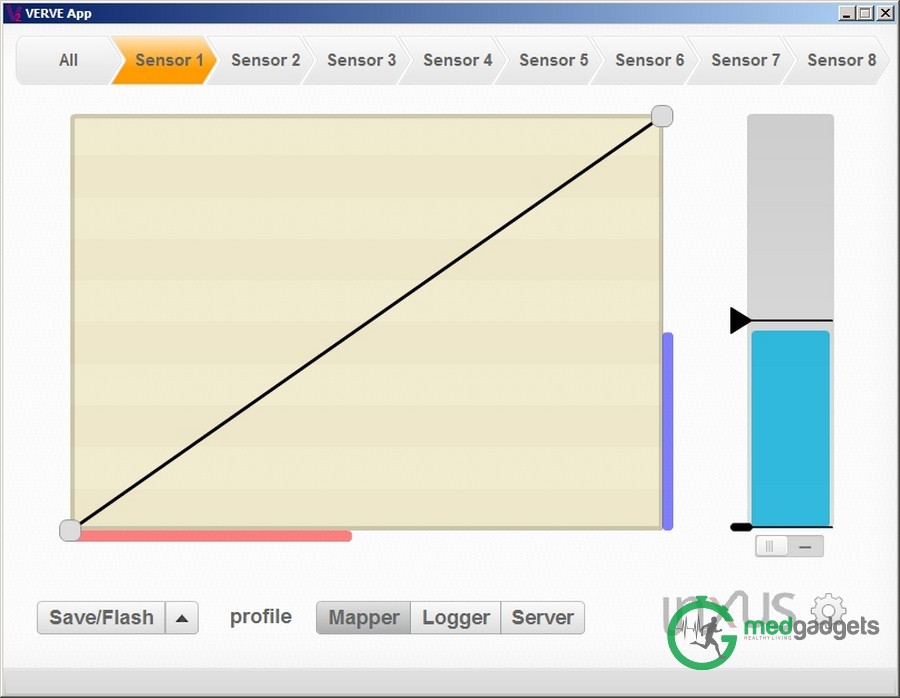
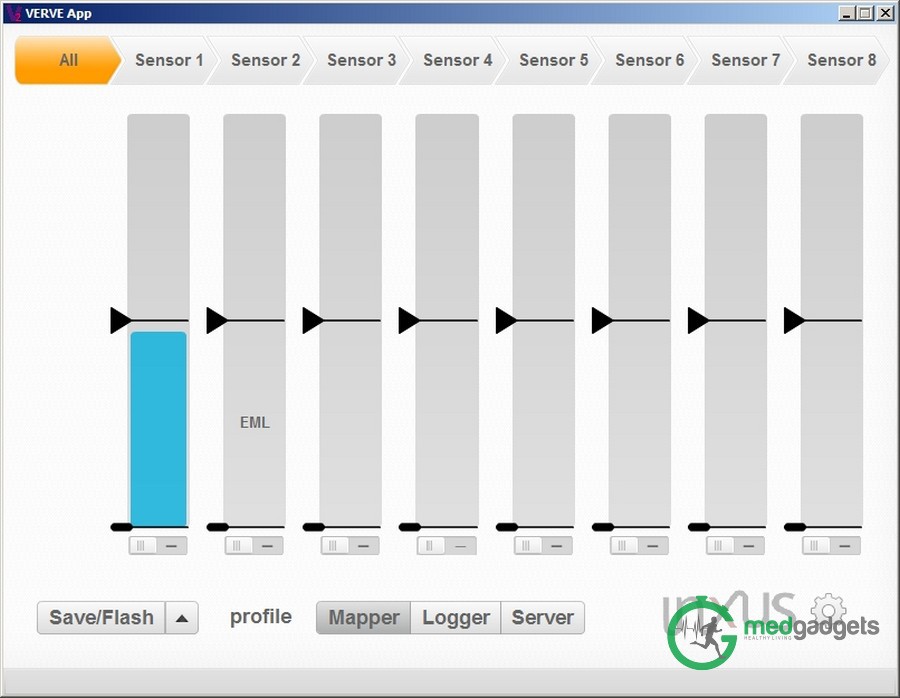
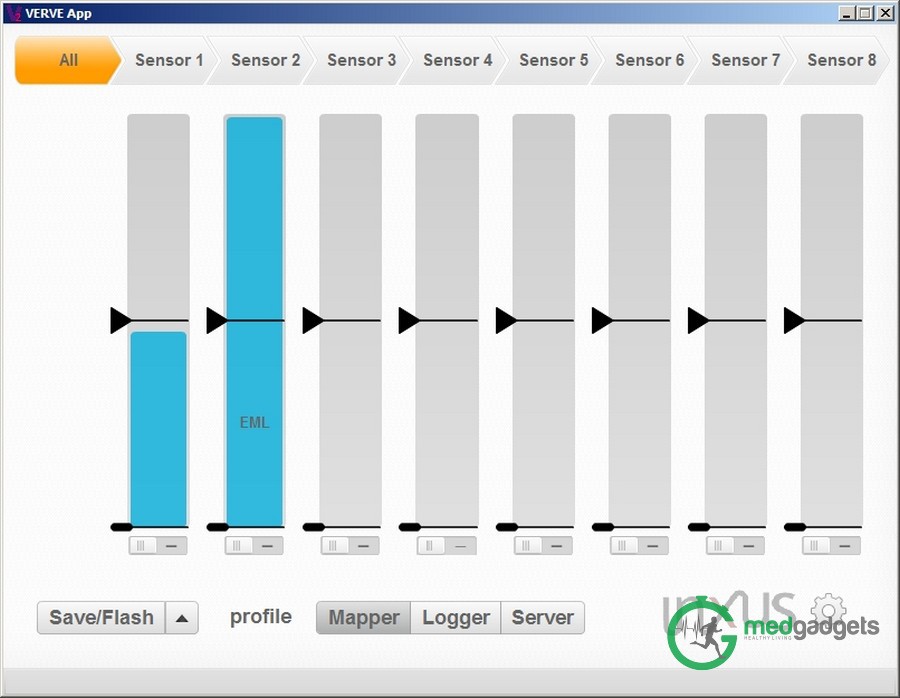
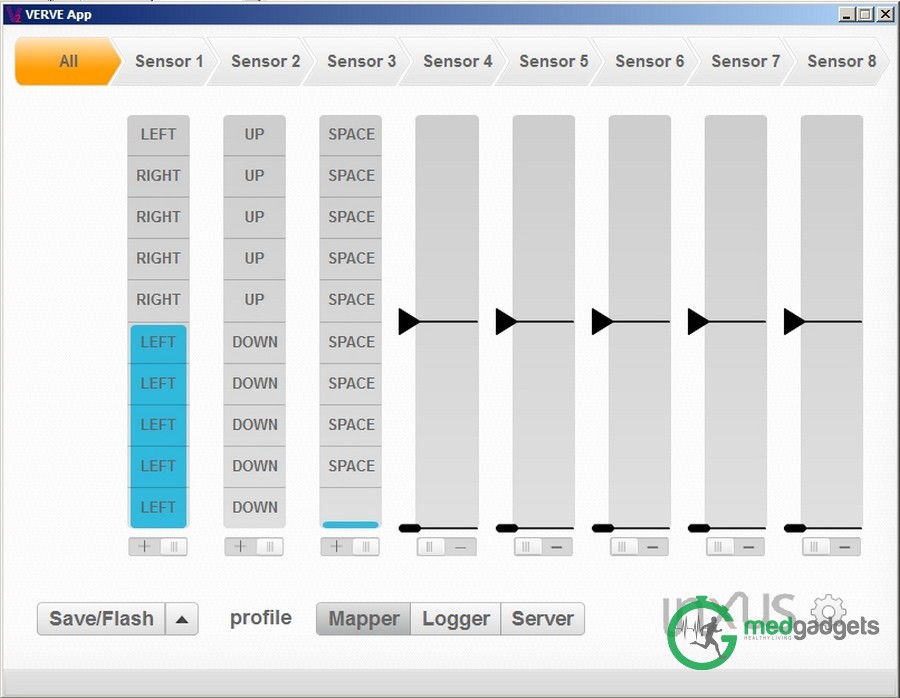
When you start the application "Verve2" a window opens with 8 diagrams that characterize the response of the sensor to any impact, depending on the purpose of the sensor. These responses are displayed in the "Mapper" tab, which is located at the bottom of the program. It is also possible to view the response of the sensors individually by selecting the corresponding sensor on the top panel. Each diagram has 2 “sliders” that set the threshold value or the range of sensor response values that we are interested in, which allows us to adjust it so that when the output signal falls within the required range, the notification will be triggered.

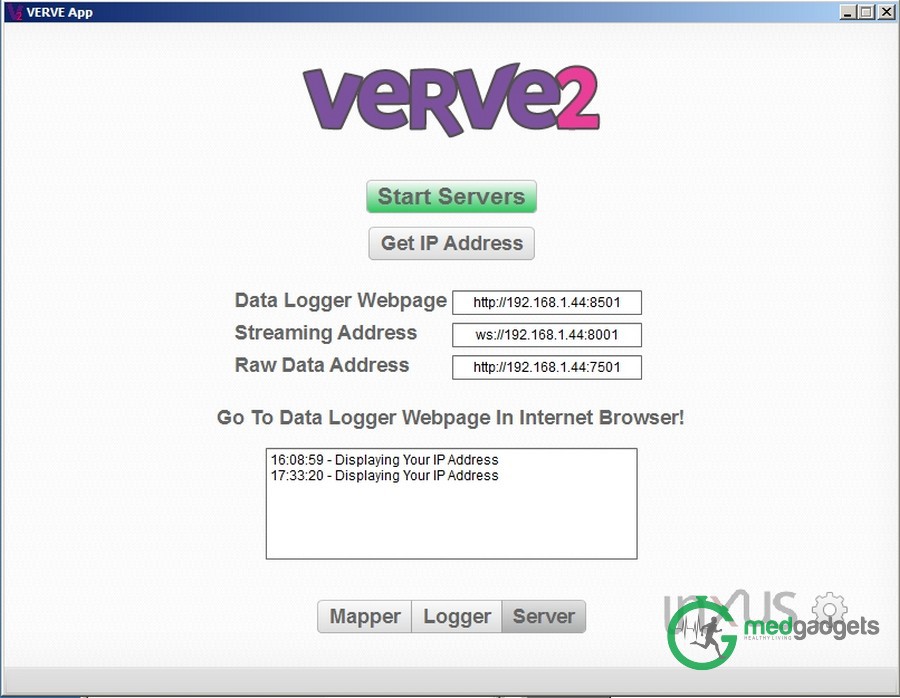
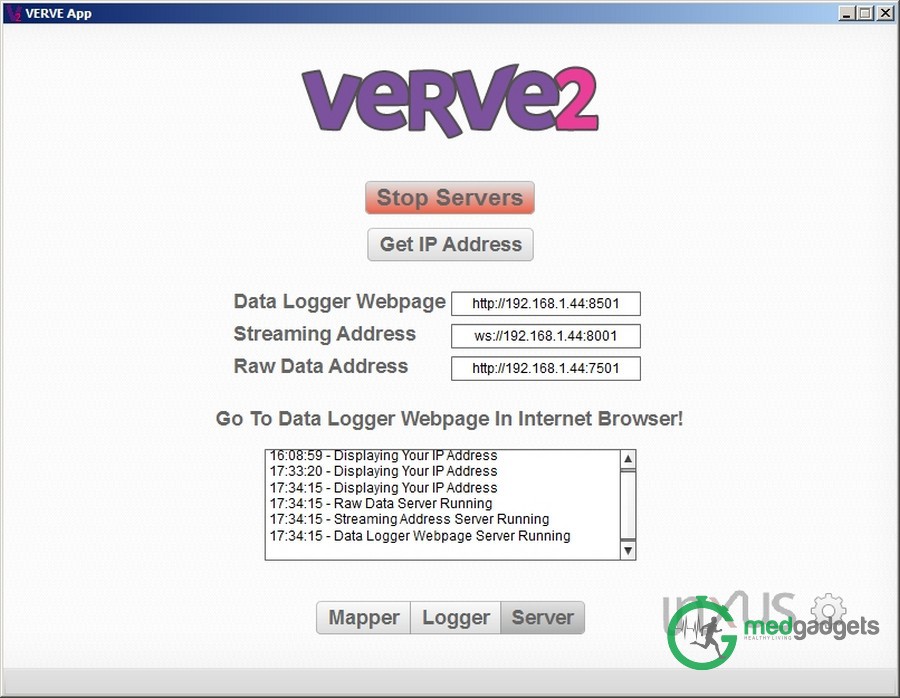
First of all, you need to set up an account. To do this, in the lower right part of the window, you need to left-click on the gear. In the window that appears, enter the email address, password, mail server (for outgoing messages). Remaining parameters to change at will. And save the changes.
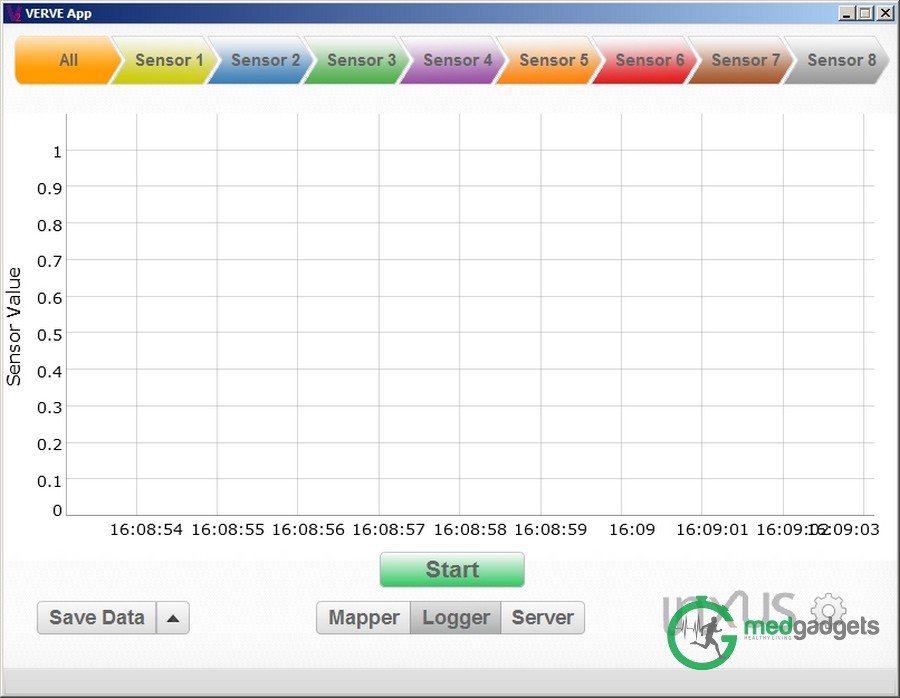

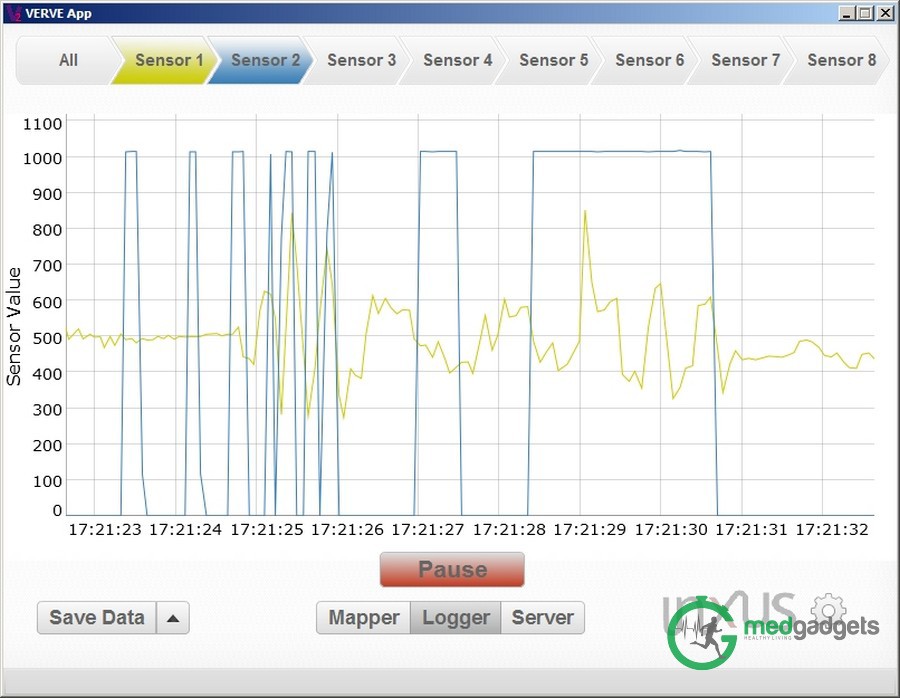
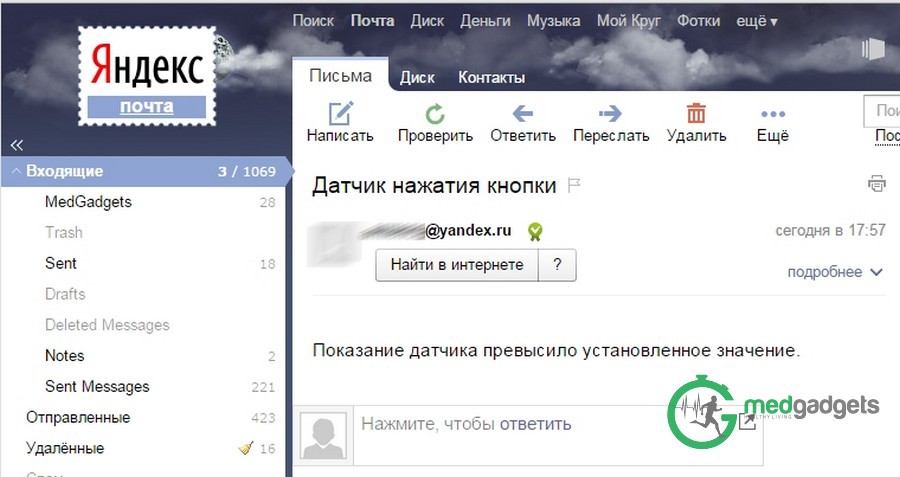
In the lower part of the program window there are 2 more tabs: “Logger” and “Server”. When you select the “Logger” tab, an empty graph opens, in which the dependence of the impact value, which the sensor sends to the program, is plotted on time. When you click on the “Start” button, the construction of the schedule starts, depending on what kind of manipulation takes place with the sensor (for example, if you press the “Button” sensor button or move the “Motion” sensor, etc.). It is possible to save the data in a log file in the format "csv" by clicking on the button "Save Data".
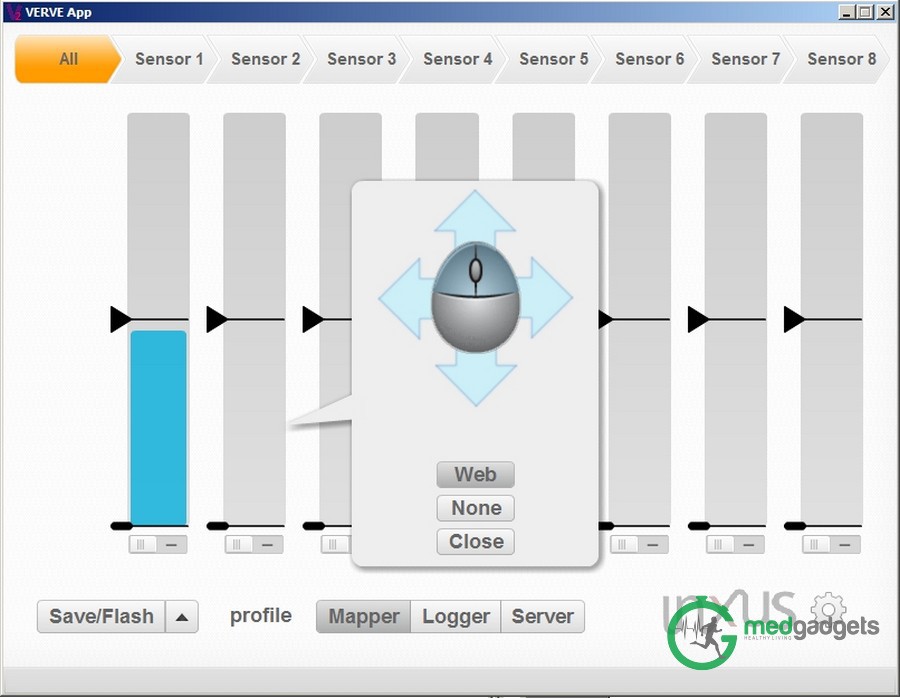


Under each chart there is a switch. Clicking on it, we see that the diagram is divided into a large number of cells. Due to this, if we are dealing with a sensitive sensor, we can configure it so that with a small impact, or when a certain value is reached, one or another button will work or the notification we need will be sent in the required form.
For example, to control the Space Fighter application, we will use 3 sensors: Motion sensor, Turn sensor and Button sensor. To control the ship in the game, you need to reprogram the buttons "Left", "Right", "Up", "Down" and "Space". The first sensor is set up to move the ship left and right, the second sensor is used to move the ship up and down, and the third sensor is set up for a shot that will be triggered by voice control, for example, when pronouncing the word “Shock!”. We configure it so that the lowest cell is not tied to any keyboard key in the case of a sound sensor, because there is no perfect silence, which means that the sensor will be triggered at the slightest sound or noise that does not suit us. This control will not please everyone, but in fact the process of such a game is very funny.
Management configuration can be saved by clicking on “Save / Flash” in the lower left part of the program.
Other uses
Sensors may be suitable for home security. For example, if you are not at home, but you want to check if no one has entered your apartment or switched on the light (or if you did not turn on the flashlight), then you must leave the light sensor on and set up sending notifications.
You can also attach an audio tape sensor to the window sill with adhesive tape or install it in another place, but next to the window, and if someone tries to enter your apartment through the window, the sensor will react to the noise and send you a notification.
Another possible use of a sensor against burglars is to attach a magnet to a wall, and to attach a magnetic sensor to a window or in some other way, but so that the sensor and magnet are close to each other. When the burglar tries to open the window, the energy of the magnetic field will decrease and Verve 2 will send you a notification.
Verve 2 sensors can also be used for other purposes. For example, the sound sensor can be used as a baby monitor by placing it near the baby’s bed. The sensor, having caught noise and rustles, will transfer the corresponding notification to the device of mother or father.
Conclusion
Verve 2 is a sensor system with feedback, a web server that provides real-time operation of the device over the Internet, as well as a system for collecting, processing, analyzing and storing data received from sensors (primary and secondary) connected to the device. The presence of a variety of sensors, as well as working with an open application programming interface, makes interaction with the device convenient and enjoyable, allowing you to come up with creative and useful ideas and translate them into reality.
Source: https://habr.com/ru/post/245695/
All Articles