Installation, configuration and testing of Fedora 21 Workstation on a personal or gaming computer
 On December 9th, a new Fedora 21 Workstation was released, which, according to a set of parameters, can be called the “freshest and most stable” Linux desktop.
During the use and testing of Fedora, I have gained deep sympathy for this platform and want to share this warmth and knowledge about it with you.
Over the course of the year, I watched her work as a working and playing place in different situations - from stations with dying iron to a new gaming laptop Asus G750JM with Nvidia Optimus.
')
Collected notes turned out to be somewhat rough, trying to cover both Linux newbies and experienced users with developers. Excuse me. I want to bring a lot of information in one article: on the general configuration and installation of Fedora, and on the Nvidia Optimus technology on laptops, wi-fi with proprietary drivers, on setting up nice fonts in Java and IDE from JetBrains, launching games on the Steam on a discrete video card , the results of comparative testing of games, graphics and browsers between Fedora and Windows 8.1, and even the establishment of one "absolute" record.
I want to note that fresh desktop Linuxs also feature high-quality support for high-resolution displays with good drawing of fonts and window elements, provide the highest degree of various personal settings, “hacks” and possibilities of operating with applications. All this allows not only to significantly improve the efficiency of their work, but also to do it comfortably for the eyes.
Since the themes of personal effectiveness, themes that are comfortable for the eyes and various “hacks” are quite extensive and specific, in the future I will devote two or three in-depth articles to them. And in this document there will be a general squeeze of information about how to configure and use Fedora 21 in general.
Content
About the Fedora distribution
Installing Fedora 21 Workstation
Sequential tuning
- To earn Wi-Fi on a laptop if it doesn't work
- First, we are updating the system.
- Slow down the mouse
- If you put Fedora in a virtual machine (VirtualBox)
General system settings
Gnome 3 - Default Desktop Environment
- First of all - a utility for configuring Gnome 3 and fonts
- Minimize-maximize windows - buttons and buttons
- Convenient Add-ons Gnome
- The Nautilus File Manager Subtleties
- Add software package management tools
- Network Accounts - sync with email, contacts and google calendar
Fonts
Development environments and editors for the Python programming language
Connecting to RPMFUSION repositories
Video, audio and books
- Video players
- Audio distributors + Vkontakte
- If your programs still lack codecs
- How to listen to audiobooks
- How to read books
Dropbox Installation
Installation of instant messengers
Installing browsers and flash
Proprietary video drivers
- Nvidia "ordinary"
- ATI Proprietary Drivers
- Nvidia Optimus - install bumblebee
- How to run programs and games on Steam on a discrete map
Benchmarks: Fedora 21 Optimus / Primus / Windows 8.1
- Cross-platform benchmark GPU - GPUTest
- Cross-platform benchmark Geekbench
- Solving the problem with idle WebGL from Chrome
- Browser benchmarks
- Basic information on my system for benchmarking
Steam and games
Run Windows games and Windows programs
Drawing programs
KDE
- Calligra office
- KDE configuration
- Google Contacts, Calendar, and Mail Sync
- Resolving the issue of repeated running of some QT programs
Learning foreign languages
Problem with low noise in headphones
Completion
About the Fedora distribution
Starting from version 21, Fedor’s installation distribution is divided into 3 types according to its intended purpose: for a workstation, a server, and a cloud. You can familiarize yourself with them on the updated Fedora site, where it is well designed and described: getfedora.org
Fedora 21 Release Notes : fedoramagazine.org/announcing-fedora-21
Release info plus many screenshots: www.webupd8.org/2014/12/fedora-21-available-for-download.html
A quick tour of the features of Gnome 3.14, which is the main runtime environment in Fedora 21 Workstation:
Fedora 21 Workstation is now positioned as an excellent workstation for developers with minimal distraction from work. The system includes a large number of necessary tools, as well as the latest software for use, tests and environmental studies.
Among the notable advantages of Fedora, I want to point out the lack of the need to connect third-party unreliable repositories to get fresh software. The overwhelming majority of useful programs are already in the rpmfusion repository and are well tested for compatibility with the main repository of Fedora. This has a very good effect on the stability and predictability of the entire system.
Of course, it should be noted that the most recent software carries not only new opportunities and advantages in work, but also sometimes "grows" problems with growth (as, for example, it happened some time ago with Gnome 3). However, in most cases, such problems are solved either by using an alternative (in my case then it was KDE), or in other ways.
Returning to Fedor's reliability: starting to work with it after other Linux distributions, you can note a decrease in the speed of updating and installing packages, since The system includes by default additional verification steps before and after installing packages. Before installation - execution of test transactions without making changes to the disk, after - verification of the completed transaction.
As I mentioned above, Fedor as a whole, in my opinion, is a very reliable distribution kit, and even in some situations of work on a failed gland, it survives well on it.
Also note that more and more software vendors recently, including proprietary ones, are releasing ready-made packages and testing them specifically for Fedora (and not just for Ubuntu). Among them, Viber, Dropbox and others.
Installing Fedora 21 Workstation
Download a torrent with a standard way for live testing and installation on a workstation:
for 64-bit systems torrent.fedoraproject.org/torrents/Fedora-Live-Workstation-x86_64-21.torrent
for 32-bit torrent.fedoraproject.org/torrents/Fedora-Live-Workstation-i686-21.torrent
This image is based on the Gnome 3 working environment, as the main one for Workstation.
Other options for downloading a Fedora 21 desktop image: getfedora.org/en/workstation/download
Torrents of all available versions of Fedora 21 images, including the so-called "backs", in which, instead of Gnome, other desktop environments are used: KDE, Xfce, LXDE, Mate, etc .: torrent.fedoraproject.org
And more information about the "backs" can be found here: spins.fedoraproject.org
Video of the installation process of Fedora on the workstation and the first acquaintance with it:
Installation Process Guide: docs.fedoraproject.org/install-guide
How to make a bootable USB flash drive: docs.fedoraproject.org/en-US/Fedora/20/html/Burning_ISO_images_to_disc/Making_USB_Media.html
In order to avoid problems that sometimes happen when writing a flash drive, and prevent the system from starting normally from it, I recommend using the old reliable dd if possible (/ dev / sdc - your device with a flash drive):
sudo dd if=~/Download/Fedora-Live-Workstation-x86_64-21-5.iso of=/dev/sdc Do not forget before starting and installing from a flash drive to check in BIOS the variable "Secure Boot Menu" in the section "Security" - it must be turned off for normal installation of the new system. Also in BIOS for convenient work with a connected monitor, you can enable the “Launch CSM” option in the “Boot” section. At least so these variables look on my laptop.
If you want to upgrade your Fedora 20 to the latest version 21 without reinstalling:
fedoramagazine.org/upgrading-to-fedora-21-workstation-from-fedora-20
Now go to the sequential configuration of the system and programs in it.
Sequential tuning
To earn Wi-Fi on a laptop if it doesn't work
If your Wi-Fi chip belongs to the Broadcom's BCM4311-, BCM4312-, BCM4313-, BCM4321-, BCM4322-, BCM43224-, BCM43225-, BCM43227- or BCM43228 series, you will need to install proprietary drivers to make it work correctly.
You can see your card model in the terminal using the lspci command.
I have a Broadcom Corporation BCM4352 802.11ac Wireless Network Adapter (rev 03)
After we made sure that our card belongs to the above series, we will install drivers for it. You will need internet via an Ethernet cable or you will have to remove the packages manually through another computer. Below I describe the simplest option when you have internet access via cable.
First you need to connect the rpmfusion repository - information about this is in the article below. After connecting it, go back here.
So, the recommended driver installation option for our wi-fi is as follows:
su - -c "yum install kmod-wl" The team will ask for the root password. To the question “install with dependencies” answer “y”.Read more about this installation here: www.cyberciti.biz/faq/fedora-linux-install-broadcom-wl-sta-wireless-driver-for-bcm43228
This was not enough for me in connection with the bug, which is discussed here:
ask.fedoraproject.org/en/question/57806/broadcom-4321-wireless-not-working-in-fedora-21
And it took a few more manipulations:
su - -c "yum reinstall kmod-wl akmod-wl" su - -c "yum install akmods kernel-devel" su - -c "yum update" Reboot. su - -c "akmods" (this command reassembles the module for wi-fi, here you may need the akmodsbuild command from the user)Reboot.
su - -c "modprobe wl" (we load the module for wi-fi)After that, the wi-fi module finally worked and I was able to disconnect the Ethernet wire, feeling freedom.
For information, I'll leave here one of the fresh, but not proven, recommendations for installing this same driver:
su - -c "yum install broadcom-wl kmod-wl akmod-wl rfkill" su - -c "rfkill list" su - -c "rfkill unblock all" Further actions are performed after installing Fedora on the hard disk and booting from it.
First, we are updating the system.
It is important! Without updating the system, you may get in trouble when installing the following packages, which are necessary for compiling additional modules and other inconsistencies.
To do this, press Win and write the first letter "te" or "those" (Gnome searches for both Russian and English program names simultaneously), then it remains to press Enter and start the terminal. This is information for newcomers to Gnome 3.
Then we go into the execution of commands from the root:
su - You can speed up the loading of packages from the repository, if you choose the fastest mirrors.
To do this, it is enough to install an addition to yum, which tests the response speed of the server and switches to the fastest ones:
yum install yum-plugin-fastestmirror And finally, we update all installed packages in the system:
yum update Slow down the mouse
Some of us have mice that support different sensor resolutions (1000 ... 8000 dpi).
In Linux, it may turn out that your mouse is too nimble, and it is impossible to reduce its speed using ordinary settings in graphical mode.
For these cases, there is a simple solution to slowing the pointer:
It is necessary to register the config for X, in which you specify braking as a constant variable.
In my case, double braking is enough, displayed in the ConstantDeceleration value.
It looks like this:
$ cat /etc/X11/xorg.conf Section "InputClass" Identifier "Logitech Gaming Mouse G600" MatchIsPointer "on" MatchProduct "Logitech Gaming Mouse G600" Option "ConstantDeceleration" "2" EndSection You can find out the name of your mouse like this:
$ xinput list ⎡ Virtual core pointer id=2 [master pointer (3)] ⎜ ↳ Virtual core XTEST pointer id=4 [slave pointer (2)] ⎜ ↳ Logitech Gaming Mouse G600 id=12 [slave pointer (2)] ... It is possible to set a slowdown through the xinput command, without resorting to configuration x, but this option is limited to the mouse pointer numbers in the system, which change when the mouse is pushed to another port or sometimes when it is restarted.
If you put Fedora in a virtual machine (VirtualBox)
From the root perform:
yum install binutils gcc make patch libgomp glibc-headers glibc-devel kernel-headers kernel-devel dkms More information on this topic: www.if-not-true-then-false.com/2010/install-virtualbox-with-yum-on-fedora-centos-red-hat-rhel
Then in the virtual machine itself in the menu select Devices - Insert Guest Additional CD image
VirtualBox downloads the desired guest OS add-on image file.
The virtual Fedora will detect the “inserted disk” and will offer an autorun for the installer located on it.
After launching this program and proposing to login with a password root, do not forget that you may need to switch back to the English layout (Alt + Shift), since in Fedor there will be Russian input by default (now with the Russian locale selected during installation, Russian is the same language as the default keyboard input).
The results of the installation of the guest OS add-ons installation will be displayed in the same terminal.
When modules are successfully installed and after rebooting, Fedor’s guestbook will be convenient for use in a virtual machine - respond to changes in the size of its window, correctly switch to Fullscreen, etc.
And it will be possible to proceed to further configuration or experiments.
I remind you that switching to system consoles in a virtual machine is not performed by the usual Ctrl + Alt + F1..F7, but with the help of the host key: right control + F1..F7
General system settings
Add the ability to use sudo
We perform from the root
usermod sampleusername -a -G wheel where sampleusername is your user loginMore information on this topic: fedoraproject.org/wiki/Configuring_Sudo
After executing the command, log out and log in again.
Tip for newbies:
1. To exit the root in the console, type exit, then either exit again, or close the window (with the mouse or hotkey Alt + F4).
2. To exit Gnome, click right next to the triangle or next to it (it also responds by dropping this menu), then click on the name of our user, “Finish Session” appears below it, click on this item.
3. To enter and correctly specify the password, if you have it in the English layout, do not forget to switch to Alt + Shift again.
After that, all the commands “from root” can be executed via sudo.
Install Midnight Commander (mc)
The MC is very convenient and familiar to me, so on any new system I start with its installation.
sudo yum install mc If you use MC and are used to getting out of it using F10, then in the Gnome terminal you need to disable the shortcut to open the menu of the Gnom terminal using F10:
“Edit” - “Settings” - Enable shortcut for accessing the menu (by default F10)
Or reassign it.
Font in the system console
If you chose Russian as the main language of the system during installation, then the system console will also be with the correct Russian.
However, if you set it by selecting English, then Russian characters in the system console will be displayed as squares or redoes.
To "cure" it is necessary to prescribe the line in /etc/profile.local
setfont Cyr_a8x16 Gnome 3 - Default Desktop Environment
The main redistributable version of Fedora 21 Workstation is by default based on the Gnome 3.14 environment.
This solution has its pros and cons.
Among the benefits - interesting for some of the dynamics of working with windows, desktops, and information.
The ability to search simultaneously and programs, and services, and their contacts, and a lot of other information.
But here I will describe what can be done with it for a cozy living. :)
If you do not plan to work with Gnome or use the "spin" with another working environment, you can skip this section.
Reviews of the latest version of Gnome with pictures and videos you can see here:
www.opennet.ru/opennews/art.shtml?num=40669
www.webupd8.org/2014/09/gnome-314-released-see-whats-new.html
First of all - a utility for configuring Gnome 3 and fonts
Install:
sudo yum install gnome-tweak-tool Run:
Win key, then type "tw" or "add", Enter
Tab (button) "Fonts".
On it, we can increase all fonts by 1-2 points for better readability, and also choose the anti-aliasing (hinting) option, which is better suited for our monitor and personal preferences. I prefer the “slight” hinting option.
Screenshot of the font fonts window with the specified changes:

Terminal window with open MC after applying changes:

Minimize-maximize windows - buttons and buttons
By installing the Gnome tweaking utility, we can control the display of buttons in the window titles.
In the Gnome Tweak Tool (also called “Advanced Options”) in the “Windows” section, you can turn on the display of the usual “Expand” and “Minimize” buttons in the window header, next to the “Close” button.
I do not use these buttons. In Gnome, the standard window shutdown shot: Win + H
He also calls me by clicking on the additional button of the mouse.
It is also convenient to use Shotkeys Win + arrow, they maximize-restore windows in different directions.
Convenient Add-ons Gnome
Those who want to use the maximum space on the screen for useful content, especially laptop and netbook owners, can supply 2 add-ons for Gnome:
1. Maximus Two extensions.gnome.org/extension/844/maximus-two
2. Frippery Move Clock extensions.gnome.org/extension/2/move-clock
Screenshot Firefox in Gnome 3 without the specified additions:

And after installing add-ons that extend the usable space:

There are other add-on options similar to the above.
In general, there are many useful additions to the Gnome. You can find them on the site extensions.gnome.org
For example, “Bumblebee” for owners of laptops with Optimus technology, which shows the use of a discrete card in the system with an icon (I will install and configure Nvidia Optimus and Bumblebee benchmarks separately below). Or the addition of accelerating animation work with windows in Gnome.
There are reviews - what exactly is it worth to put out of add-ons on Gnome 3. So, if this environment is nice for you, do not be lazy to familiarize yourself with them by entering them through the key phrases you are looking for.
Often, people use the recovery of the usual type of environment - the bottom panel with running programs, the usual tray with a bunch of icons of running programs and an extended menu for operations on the window through it.
I don’t need it, as I try to minimize any distractions, and the idea of hiding icons suits me perfectly. In this case, alerts in the system are made unobtrusively and intelligibly, they are not so easy to miss.
The Nautilus File Manager Subtleties
By default, sorting does not set the folder to the list of files, everything is displayed in a mix.
We fix:
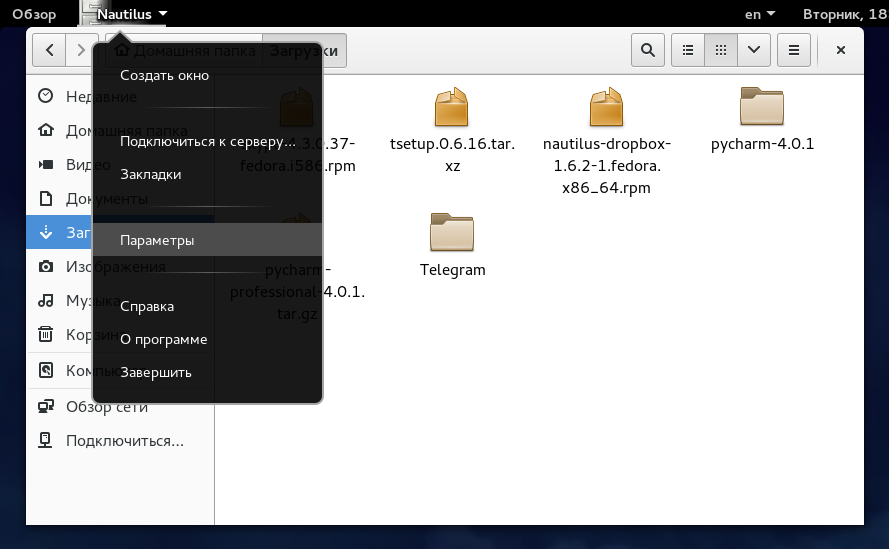
Nautilus - Options -> check the checkbox “Place folders before files”
Also, I prefer to navigate the computer without double clicking the mouse. If you agree with me that the action in 1 click is more pleasant - in the same window switch to the “Behavior” tab, and check in “Behavior” - “Open objects with one click”.
After that, you can close the settings window.
The Nautilus file manager has an unobvious opportunity to add your own “entry points” - bookmarks to the addresses you need. To do this, being at the right address or in the right directory, press Ctrl + D or select the icon with horizontal lines with the mouse, and there in the menu click on “Add a bookmark to this address”.

After that, a tab with your address or folder will appear at the bottom left. You can organize them by dragging the mouse, delete them by calling the context menu, rename or perform other required operations.
Add software package management tools
The standard tool for managing programs in Gnome is not for packages, but for selected programs. To be able to more fully study the repositories of available software and manage them, you must install Yumex or use the pre-installed Apper in KDE.
Install Yumex:
sudo yum install yumex Network Accounts - Sync with Google Mail, Contacts and Calendar
The Dwarf has built-in excellent integration with your basic data from your Google account, as well as with many other network services.
Just go to the main menu of the system and write “Set” - you will be prompted to select the setting of the “Network accounts” section.
By specifying your Google access settings and confirming them with a code (if you have two-step authorization), you get integration of the calendar, tasks, contacts and mail with your system.
So, when you click on the time will appear information about your upcoming calendar events. And when you drive in a part of the name of one of your contacts in the main menu of the system, his card will appear right before your eyes. Then you can contact him in 2 clicks.
And the convenience of network records is not limited to this. Try it!
Fonts
I have LCD monitors and I prefer fonts with a slight smoothing. From here variables in the following config.
If you like a different smoothing value (medium, strong or without it), you can substitute the appropriate value for the hintstyle variable instead of hintslight: hintmedium, hintfull or hintnone.
You may also need to make changes to the lcdfilter variable. But you can read more about this, for example, here wiki.archlinux.org/index.php/font_configuration
The following config text improves fonts in a variety of programs, including Firefox, KDE with the default setting “As in the system” and in programs launched from under it.
You need to create the /etc/fonts/local.conf file with the following contents:
<?xml version='1.0'?> <!DOCTYPE fontconfig SYSTEM 'fonts.dtd'> <fontconfig> <match target="font"> <edit mode="assign" name="rgba"> <const>rgb</const> </edit> </match> <match target="font"> <edit mode="assign" name="hinting"> <bool>true</bool> </edit> </match> <match target="font"> <edit mode="assign" name="hintstyle"> <const>hintslight</const> </edit> </match> <match target="font"> <edit mode="assign" name="lcdfilter"> <const>lcddefault</const> </edit> </match> <match target="font"> <edit mode="assign" name="autohint"> <bool>false</bool> </edit> </match> <dir>~/.fonts</dir> </fontconfig> After this, we exit the session and enter again.
The system is now fully aware of how smoothing fonts you want to use.
In some cases, it is necessary to change the standard dpi of the screen so that the fonts and graphics after the above settings are really excellent.
I still leave this moment to you for self-study, if you realize that you need to perform it in order to gain happiness on your system.
We replace thin fonts in IDE from JetBrains (IntelliJ, PyCharm and others) and in Java
Although some people like exactly the version of thin fonts, there is a large group of people who need a more "dense", weighty font rendering. And if, for example, in Eclipse with “dense” fonts, everything is in order, then here are the popular development environments from JetBrains bear the imprint of Java and sometimes cause rejection of their own fonts.
Pycharm with default font - Gnome 3

Pycharm with default font - KDE

Pycharm with the font change described below - KDE

Below, I will describe one of the most workable solutions to this problem (suitable for Mac), with the result that we get “dense” fonts in the programs we need, which some developers think looks much better than in Windows.
The basic idea is simple - if Java does not process the font hinting instructions correctly, then you just need to delete these instructions from the font.
Here is how it is done:
1. Choose your favorite fonts that you want to use in IntelliJ IDEA and other IDEs of this line.
For example, Liberation Sans and Liberation Mono.
2. Install the font editing program:
sudo yum install fontforge 3. Launch it and open the font we need to change.
For example, the following files are in the / usr / share / fonts / liberation / directory:
LiberationSans-Regular.ttf
LiberationMono-Regular.ttf
4. Press Ctrl + A, than select all the characters of the font. In the "Hints" menu, select the item "Clear instructions".
5. In the “Element” - “Font Information” menu, add the number “2” to all fields of titles, so that “LiberationSans2” stands in the “Font Name” field. Click OK. Immediately, the program will report that the font does not have a unique identifier, but carries the old one. Click on the "Change" button, and our font will generate a new UID.
6. Menu "File" - "Create Fonts". In the window that appears, on the right, click on the wrench icon and select the "Show hidden files" option. Then go to the home directory and create a folder in it. Fonts (if it is not there yet). Save our font with a new name (for example, LiberationSans2.ttf). I usually choose the type of saved TrueType file. If there are self-intersection type error messages, click OK. Let him save.
Repeat for another selected font. Then we close both windows, refusing to save fonts in the sfd format.
Now our system has two new fonts that look good in the programs we need. Go to the settings IntelliJ and specify to use the new font in the editor.
Brief comparison of the result with the default font in Windows:


Full-sized screenshots with fonts for Gnome 3 and Windows 8.1
Full-sized screenshots with fonts for Gnome 3 and Windows 8.1


Learn more about font improvement methods in Java here:
superuser.com/questions/614960/how-to-fix-font-anti-aliasing-in-intellij-idea-when-using-high-dpi/623596#623596
Unfortunately, such a font replacement does not work with the popular mind mapping program - Freemind. The fonts in it all the same remain thin.

However, there is a good commercial alternative to this program, which has no problems with fonts - XMind , which can be used both for free and after paying for some advanced features. You can get acquainted with it at www.xmind.net
If you want to try it, download for Fedory Portable version of the program from here www.xmind.net/download/portable
Unzip the archive, go to the created folder of the type xmind-portable-3.5 ... then to the folder corresponding to the architecture of your distribution (for example, in XMind_Linux_64bit) and run the XMind file
You can create a shortcut for the menu for this program in ~ / .local / share / applications by analogy with the labels from / usr / share / applications
Development environments and editors for the Python programming language
Linux , , . , , . .
, — . , flash «».
Geany
/ -IDE.
sudo yum install geany geany-plugins-common geany-themes yumex . «» — «».
Eclipse + pydev
, , .
sudo yum install eclipse-pydev . .«» — «». « ».

pydev — LiClipse www.liclipse.com
Kdevelop + kdev-python
, KDE. , .
sudo yum install kdevelop kdevelop-python IDE , : ninja-ide, spe, PyPE, spyder, anjuta, eric
, .
4 :
Pycharm
IDE . . , .
www.jetbrains.com/pycharm/download
(Community Edition) .
«» — «».
Wing IDE
- « 1», - . « 2» IDE. Java.
wingware.com/downloads
(Wing IDE 101) .
2100 .
.

Komodo IDE
IDE , .
komodoide.com
Sublime text
.
www.sublimetext.com/3
Fedora 21.
RPMFUSION
Fedora , , flash, , : Rpmfusion Free NonFree
— :
su -c 'yum localinstall --nogpgcheck http://download1.rpmfusion.org/free/fedora/rpmfusion-free-release-$(rpm -E %fedora).noarch.rpm http://download1.rpmfusion.org/nonfree/fedora/rpmfusion-nonfree-release-$(rpm -E %fedora).noarch.rpm' «» rpmfusion.org/Configuration,
MPV — , , .
MPV ( rpmfusion):
sudo yum install mpv mpv, ~/.config/mpv/mpv.conf
# , save-position-on-quit=yes # fullscreen fs=yes # , softvol=no # - , , osd-bar-align-y=1 osd-bar-h=1 osd-border-size=1 osd-color='#aaaaaaaa' MPV :
wiki.archlinux.org/index.php/Mpv
github.com/mpv-player/mpv/blob/master/etc/example.conf
MPV mplayer. :
j —
# —
D — ( )
: manpages.ubuntu.com/manpages/trusty/man1/mpv.1.html
: smplayer vlc
sudo yum install smplayer vlc , ., .
, rpmfusion «rawhide», . Yumex, - rpmfusion fedora 21. , , - .
+
Rhythmbox
- .
. yumex apper.
Rhytmbox : github.com/radistmorse/rhythmbox-vk
: boutnew.ru/tehnika-i-tehnologii/muzyika-s-vk-com-cherez-rhythmbox-na-ubuntu-12-04-12-10-13-04-13-10.html
, .
Exaile
www.exaile.org
.
. .
Clementine
www.clementine-player.org/ru
.
Like, there is a plugin for Vkontakte. The installation methods of the plugin are also left to your research.
Of the benefits - "easier" the next Amarok.
Amarok
amarok.kde.org
KDE ( KDE ). .
:
1. «» « »
2. «vk»
3. , - . «».
4.
5. « vk», .
— , .
sudo yum install gstreamer1-libav gstreamer1-plugins-bad-free-extras gstreamer1-plugins-bad-freeworld gstreamer1-plugins-good-extras gstreamer1-plugins-ugly gstreamer-ffmpeg xine-lib-extras xine-lib-extras-freeworld k3b-extras-freeworld gstreamer-plugins-bad gstreamer-plugins-bad-free-extras gstreamer-plugins-bad-nonfree gstreamer-plugins-ugly gstreamer-ffmpeg Banshee Fedora 21:
sudo yum install banshee banshee-community-extensions Rhythmbox. banshee.fm2 :
1. Banshee ( )
2. «»- .
.
fb2 / epub
Calibre ( , ) fbreader
sudo yum install calibre fbreader pdf: evince (Gnome) okular (KDE)
djvu
Gnome evince
sudo yum install evince-djvu KDE .— Calibre
www.dropbox.com/install?os=lnx
.
( «»).
Dropbox. . .
: Fedora 21 , «, »:
sudo yum-config-manager --save --setopt=Dropbox.skip_if_unavailable=true , .Skype
., :
www.skype.com/ru/download-skype/skype-for-computer
«» ( «», yumex ).
( , 32- ) , , , .
Gnome 3 , :
extensions.gnome.org/extension/696/skype-integration
or
extensions.gnome.org/extension/192/status-icon-fixer
, :
env PULSE_LATENCY_MSEC=30 skype %U , 30 60., /usr/bin/skype /usr/bin/skype2, /usr/bin/skype :
#!/bin/sh env PULSE_LATENCY_MSEC=30 skype2 %1 & : sudo chmod +x /usr/bin/skype — ., , -:
one.
sudo mcedit /usr/share/applications/skype.desktop 2. Exec=skype %U Exec=env PULSE_LATENCY_MSEC=30 skype %U .«skype» .
Viber
RPM- viber.com/products/linux
( , «»)
.
Telegram
desktop.telegram.org , . (« », ). «Telegram» . .
.
:
~/.local/share/applications /usr/share/applications
« » — «»
flash
Firefox -.
Google chrome
:
Stable www.google.ru/chrome/browser/desktop
Beta www.google.com/chrome/browser/beta.html
64- 32- Fedora. Download .
.
, ..
, , , , :
one.
sudo yum remove google-chrome 2 sudo yum install google-chrome-beta - - .
. Copr « ». copr.fedoraproject.org/coprs/churchyard/chromium-russianfedora
:
1. copr.fedoraproject.org/coprs/churchyard/chromium-russianfedora/repo/fedora-21/churchyard-chromium-russianfedora-fedora-21.repo
2. /etc/yum.repos.d
3
sudo yum install chromium Flash
64bit :
sudo yum install http://linuxdownload.adobe.com/adobe-release/adobe-release-x86_64-1.0-1.noarch.rpm 32bit:
sudo yum install http://linuxdownload.adobe.com/adobe-release/adobe-release-i386-1.0-1.noarch.rpm :
sudo rpm --import /etc/pki/rpm-gpg/RPM-GPG-KEY-adobe-linux sudo yum install flash-plugin ( Firefox).
.
.
64bit:
sudo ln -s /usr/lib64/mozilla/plugins/libflashplayer.so /usr/lib64/chromium-browser/plugins/libflashplayer.so 32bit: sudo ln -s /usr/lib/mozilla/plugins/libflashplayer.so /usr/lib/chromium-browser/plugins/libflashplayer.so : ask.fedoraproject.org/en/question/10217/how-to-install-adobe-flash-on-fedora
rpmfusion ( ).
Nvidia «»
1 —
yum update - yum install akmod-nvidia xorg-x11-drv-nvidia-libs kernel-devel : jsn-techtips.blogspot.ru/2013/12/fedora-20-nvidia.html
2 —
sudo yum install akmod-nvidia : sudo yum install vdpauinfo libva-vdpau-driver libva-utils , :
lsmod |grep nouveau Nvidia:
sudo yum remove xorg-x11-drv-nvidia\* Nvidia :1.
sudo akmod --force 2. : sudo yum install kernel-devel 3. sudo akmod --force 4. — .() /etc/X11/xorg.conf ( - , Nvidia).
Nvidia :
blog.xenodesystems.com/2014/12/como-instalar-drivers-propietarios.html
rpmfusion.org/Howto/nVidia
ATI
.
Wiki blog.xenodesystems.com/2014/12/como-instalar-drivers-propietarios-ati.html
Nvidia Optimus — Bumblebee
Nvidia Optimus , — Intel () NVIDIA.
: fedoraproject.org/wiki/Bumblebee
«21» , , «20».
, Linux «» «», () . .
, 1..3 . , - .
1. optirun
[ERROR]Cannot access secondary GPU - error: [XORG] (EE) No devices detected. [ERROR]Aborting because fallback start is disabled. or Cannot access secondary GPU - error: [XORG] (EE) systemd-logind: failed to get session BusID Nvidia-. : lspci | egrep 'VGA|3D' :
00:02.0 VGA compatible controller: Intel Corporation 3rd Gen Core processor Graphics Controller (rev 09) 01:00.0 VGA compatible controller: NVIDIA Corporation GF108M [GeForce GT 630M] (rev ff) — BusID , BusID nvidia:BusID 01:00:0
xorg.conf.nvidia:
sudo gedit /etc/bumblebee/xorg.conf.nvidia BusID, BusID ( BusID , , '#'). ( ): # BusID "PCI:02:00:0" BusID "PCI:01:00:0" help.ubuntu.ru/wiki/bumblebee2. :
[ERROR]Cannot access secondary GPU - error: [XORG] (EE) [drm] failed to open device nvidia nouveau, :Driver=nvidia /etc/bumblebee/bumblebee.conf
blacklist nouveau:
$ grep -R nouveau /etc/modprobe.d/* https://ru.opensuse.org/SDB:Bumblebee3. :
setiathome.berkeley.edu/forum_thread.php?id=74094
kaischroed.wordpress.com/howto-install-nvidia-driver-on-fedora-replacing-nouveau
sudo mcedit /etc/modprobe.d/blacklist.conf 'blacklist nouveau':
sudo yum remove xorg-x11-drv-nouveau.x86_64 NVidia :
cat /etc/modprobe.d/modprobe.conf blacklist nvidia , .4. , . Fedora - SELinux («enforcing»). «permissive» .
SELinux:
/usr/sbin/getenforce /usr/sbin/sestatus :
sudo mcedit /etc/selinux/config SELINUX= : SELINUX=permissive .SELinux, () .
SELinux .
Steam
, ( ) . .
, («Library»). «» («Properties»). « » («Set Launch Options ..») :
optirun -b primus %command% We save. .:
forum.ubuntu.ru/index.php?topic=209722.0
support.steampowered.com/kb_article.php?ref=6316-GJKC-7437
: Fedora 21 Optimus / Primus / Windows 8.1
, , () Win8.1
— FPS Serious Sam 3 «»-.
Windows 8.1 FPS 30-55. «» 60.
Fedora 21 60 fps, 55. 48.
60 — , .
, Linux FPS
vblank_mode=0 optirun -b primus %command% ( optirun optirun -b primus )vblank_mode:
askubuntu.com/questions/285342/why-does-vblank-mode-improve-framerate-drastically-in-benchmarks
GPU — GPUTest
: www.geeks3d.com/gputest
Windows, OpenGL 4.4.0
FurMark — 1186 points (FPS: 19)
TessMark X8 — 10306 points (FPS: 171)
TessMark X16 — 9006 points (FPS: 150)
TessMark X32 — 7499 points (FPS: 125)
TessMark x64 — 4460 points (FPS: 74)
GiMark — 1922 points (FPS: 32)
PixMark JuliaFP32 — 9079 points (FPS: 151)
PixMark JuliaFP64 — 765 points (FPS: 12)
PixMark Piano — 443 points (FPS: 7)
PixMark Volplosion — 1412 points (FPS: 23)
Plot3D — 11127 points (FPS: 186)
57205 .
Linux, OpenGL 4.4.0 ( optirun )
FurMark — 1655 points (FPS: 27)
TessMark X8 — 8914 points (FPS: 148)
TessMark X16 — 8322 points (FPS: 138)
TessMark X32 — 6346 points (FPS: 105)
TessMark X64 — 3598 points (FPS: 59)
GiMark — 1633 points (FPS: 27)
PixMark JuliaFP32 — 5843 points (FPS: 97)
PixMark JuliaFP64 — 612 points (FPS: 10)
PixMark Piano — 355 points (FPS: 5)
PixMark Volplosion — 1065 points (FPS: 17)
Plot3D — 8914 points (FPS: 148)
47257 .
FurMark, Linux Win. .
Linux, OpenGL 4.4.0 ( vblank_mode=0 optirun -b primus )
FurMark — 1868 points (FPS: 31)
TessMark X8 — 11448 points (FPS: 190)
TessMark X16 — 11521 points (FPS: 192)
TessMark X32 — 11072 points (FPS: 184)
TessMark X64 — 4831 points (FPS: 80)
GiMark — 1842 points (FPS: 30)
PixMark JuliaFP32 — 9831 points (FPS: 163)
PixMark JuliaFP64 — 625 points (FPS: 10)
PixMark Piano — 357 points (FPS: 5)
PixMark Volplosion — 1153 points (FPS: 19)
Plot3D — 11395 points (FPS: 189)
65943 .
TessMark. ?
Triangle — Linux :
Win Triangle — 21966 points (FPS: 366)
Lin optirun Triangle — 10179 points (FPS: 169)
Lin vblank_mode=0 optirun -b primus Triangle — 11594 points (FPS: 193)
Geekbench
Steam. , .. .
Linux
Integer Score 3651 15278
Floating Point Score 3540 16041
Memory Score 3314 3631
Geekbench Score 3539 13253
Windows
Integer Score 3623 14898
Floating Point Score 3474 15923
Memory Score 3233 3578
Geekbench Score 3485 13044
Win .
.
WebGL
WebGL optirun Google Chrome WebGL ( Disable WebGL: Enable → Disable )
optirun google-chrome --ignore-gpu-blacklist askubuntu.com/questions/110132/problem-with-running-webgl-with-chromeoptirun google-chrome-beta :
'librrfaker.so' from LD_PRELOAD cannot be preloaded (cannot open shared object file) , virtualgl 32-bit 64-bit ( 64- ).LD_LIBRARY_PATH .
sudo, , . lists.fedoraproject.org/pipermail/scm-commits/Week-of-Mon-20130506/1014107.html
LIBGL_DEBUG=verbose primusrun…
code.google.com/p/chromium/issues/detail?id=351804
«» , .. . --disable-gpu-sandbox
, WebGL : chrome://gpu
WebGL .
— Linux , Widows. www.wirple.com/bmark - .
, Nvidia Optimus, — . , . . .
1 — peacekeeper.futuremark.com
Windows
Firefox 34 — 3661
Chrome 40 — 4313
Linux
Firefox 34 — 6433
optirun Firefox 34 — 6441
Chrome — 5837
optirun, vblank nosandbox .
2 — browsermark.rightware.com
Windows
Firefox — 3306
Chrome — 5525
Chrome — 6527
Linux
Firefox — 5167
optirun Firefox — 5468
nosandbox Chrome — 7138
vblank + nosandbox Chrome — 7223
:
Desktop Linux with Google Chrome 40 is faster than 99% of all Desktops tested so far.
3 — www.wirple.com/bmark
Windows
Firefox: 1281 (Canvas score — Test 1: 77 — Test 2: 630, WebGL score — Test 1: 274 — Test 2: 300)
Chrome: 3172 (Canvas score — Test 1: 535 — Test 2: 1537, WebGL score — Test 1: 629 — Test 2: 471)
Linux
Firefox: 1116 (Canvas score — Test 1: 188 — Test 2: 354, WebGL score — Test 1: 306 — Test 2: 268)
optirun Firefox: 1546 (Canvas score — Test 1: 466 — Test 2: 372, WebGL score — Test 1: 361 — Test 2: 347)
vblank .
Chrome: 2506 (Canvas score — Test 1: 629 — Test 2: 614, WebGL score — Test 1: 677 — Test 2: 586)
:
optirun -b primus google-chrome-beta --disable-gpu-sandbox --enable-webgl --ignore-gpu-blacklist Chrome: 4240 (Canvas score — Test 1: 794 — Test 2: 2222, WebGL score — Test 1: 677 — Test 2: 547):
Your results compared to other users:
You score better than 100% of all users so far!
You score better than 100% of the people who use the same browser and OS!
, .
«» vblank_mode=0
+vblank_mode Chrome: 3363 (Canvas score — Test 1: 769 — Test 2: 1443, WebGL score — Test 1: 626 — Test 2: 525)
.
Asus G750JM
CPU: Intel I7-4710HQ/BGA
RAM: DDR3L 1600 8Gb*2
Nvidia Optimus
Nvidia GeForce GTX 860M 2
Windows 8.1
Nvidia: 344.48
Chrome Beta: 40.0.2214.10
Firefox: 34
Linux 3.17.4-300
Nvidia: 340.46
Firefox: 33.1
Chrome Beta: 40.0.2214.10
Fedora 21.
Steam
Steam
RPMFusion
sudo yum install steam .64- , 32- :
1. flash - :
sudo yum install http://linuxdownload.adobe.com/adobe-release/adobe-release-i386-1.0-1.noarch.rpm sudo yum install flash-plugin.i386 2. 3D Wine, :
OpenGL GLX context is not using direct rendering, which may cause performance problems. Nvidia 32- :rpmfusion.org/Howto/nVidia#x86_64_.2864bit.29_users
, xorg-x11-drv-nvidia-libs 32bit .
3.
libGL error: Couldn't dlopen libudev.so.1 or libudev.so.0, driver detection may be broken. Finished uploading minidump (out-of-process): success = no error: libcurl.so: cannot open shared object file: No such file or directory /home/vyacheslav/.local/share/Steam/steam.sh: line 730: 3585 Segmentation fault : sudo yum install systemd-libs.i686 ask.fedoraproject.org/en/question/54746/steam-wont-run
Windows- Windows-
PlayOnLinux: www.playonlinux.com/ru
. .
GIMP www.gimp.org
sudo yum install gimp gimp-elsamuko gimp-data-extras GIMP. yumex/apper.— Inkscape inkscape.org
sudo yum install inkscape KDE :
Krita () Karbon (). KDE — Calligra. .
KDE
KDE, - :
sudo yum install @kde-desktop KDE- pdf:
sudo yum install ark okular KDE . « Plasma» .
- Amarok:
sudo yum install amarok KDE KDM, :
1. KDM:
sudo yum install kdm 2. : sudo yum install system-switch-displaymanager-gnome 3. system-switch-displaymanager KDM.
Calligra
Fedora - LibreOffice. - — KDE — Calligra, (Krita) (Karbon).
:
sudo yum install calligra Calligra , -, «calligra» Yumex/Apper.
, Calligra :
sudo yum install calligra-krita calligra-karbon Gimp Inkscape.Krita:
Krita «Settings» — «Configure Krita ..» -> Canvas Input Settings — Zoom Canvas
Mouse Wheel Input , , Ctrl. Ctrl. . «Ok» .
KDE
KDE Gnome 3. , .
Fonts
-> -> ( ). «».
1-2 .
:
QT , « ». .
, Gnome-, - KDE: - « :» «» «». « » — rgb « » — (, , ).
Google:
1. Kontact, , - ( )
2. Krunner, Alt+F2:
, ( ) .
, Gmail Kontact KMail KDE . .
Gmail IMAP- 5 .
QT-
~/.bash_profile :
TMPDIR=/var/tmp export TMPDIR .- QT-.
, - qbittorrent Firefox.
Learning foreign languages
— StarDict
, , , - .
:
sudo yum install stardict StarDict . - — .Linux:
1. /usr/share/stardict/dic ~/.stardict/dic
2. , Stardict --> --> . «RealPeopleTTS search path» , , /home/your_name/.stardict/en_snd/
Stardict. .
Anki
Fedora Anki .
.
, , .
Fedora, .
Linux :
1. DVD-
2. BIOS
3. ( CPU )
4. hdajackretask
, :
sudo yum install alsa-utils hdajackretask — . — . : ubuntuforums.org/showthread.php?t=22491305. ( , )
6.
7.
, «» , .
, , .
, .
Source: https://habr.com/ru/post/245651/
All Articles