Arduino for $ 1
As an introduction, I will not talk extensively about how people who did not hold a soldering iron in their hands, do not know the words “programmer”, joyfully stick the wires into the connectors of the electronic “designer” called Arduino together with the children. And in no way will I remember the “hardcore” camp, who consider this to be pampering and / or outrage at the very ideology of microcontrollers.
I will say for myself - I like the Arduino. The fact that you can quickly build something working. In fact, I just don’t like prices. Well, expensive. The module is much more expensive than the microcontroller used in it. Such reflections have repeatedly pushed me to "jump off", but then I opened Aliexpress and ordered another batch. The Chinese version of the Arduino Nano - 3-4 $. Pro Mini (without USB) - 2-3 $.
')
Then it became interesting - and where is the limit of the minimum retail (or micro-wholesale) price. But so that you can work, and not look for hacks in order to save a couple of bytes. A couple of questions to the world of reason, the shortest study of the materiel, the solution: "I will poke around with ATTiny, but in order with the Arduino."
Before turning to hardware, software, rakes and curses, I will mention the nature of the tasks to be solved. Just two examples. The first is a four-channel timer for turning on and off lights above the cages with birds. The second is a LED ribbon controller for lighting an non-electrified garage (over-discharge of a lead-acid battery, PWM brightness control). Primitive, but for pennies there are no ready-made solutions.
| ATtiny 44 | ATtiny 84 | ATtiny 45 | ATtiny 85 | Note | |
| Max. frequency, MHz | eight | eight | eight | eight | From the internal generator |
| RAM, byte | 256 | 512 | 256 | 512 | |
| Flash, Kb | four | eight | four | eight | |
| I / O pins | eleven | eleven | five | five | RESET do not consider |
| Price, $ | 1.66 | 1.8 | 1.49 | 1.69 | Retail DigiKey, just for comparison |
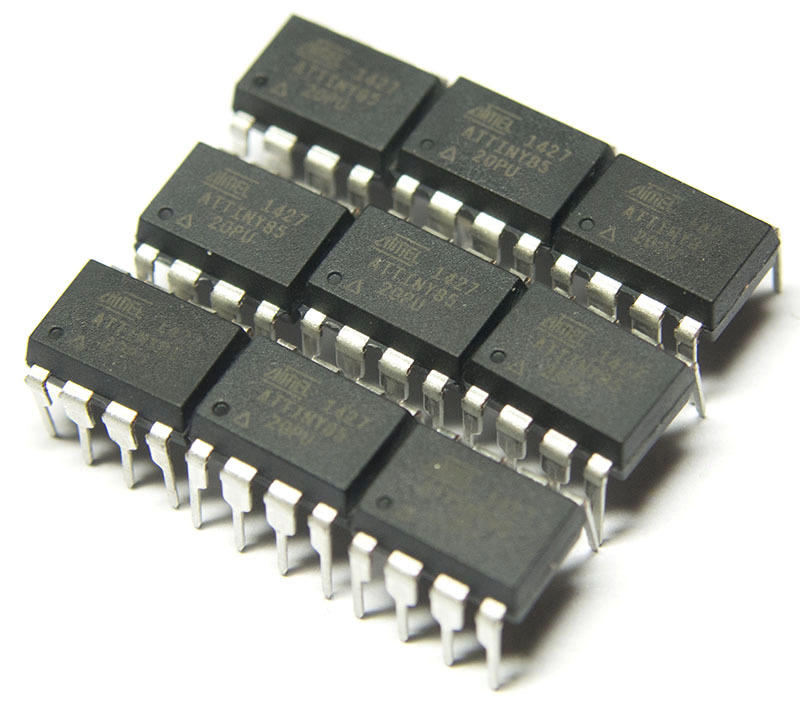
Okay, to the point. We will consider microcontrollers ATtiny 44/84 and 45/85. Basic specifications are given in the nameplate. I have as an experimental 85th in a DIP-package, with a price of $ 1 apiece when buying a dozen from the Chinese.
What can be achieved?
At ATTiny 85, you can use 5 pins (RESET is not considered, its useful use in the case of the Arduino involves beating a decent diameter tambourine). On three ADC is available, on two - PWM. That is, my second illustration problem (there need 2 ADC channels, one PWM and one LED) is already perfectly solved. ATtiny 84 allows you to use 11 conclusions, but more expensive - and we have a sports price reduction.
How to program?

The easiest way is through ISP. As a programmer, you can use the Arduino board, or kopek ISP-programmer.
The first rake appears on the scene.
For the experiments were ordered ATtiny 85 and, in fact, the programmer. The latter was confidently identified by the PC as a USB HID device. This is bad, in this form the gadget can be used with a minimum amount of software, the Arduino IDE is not included there. However, a quick googling showed that the problem is known and solved. There is a ready-made firmware that turns the miracle of Chinese science into USBASP.
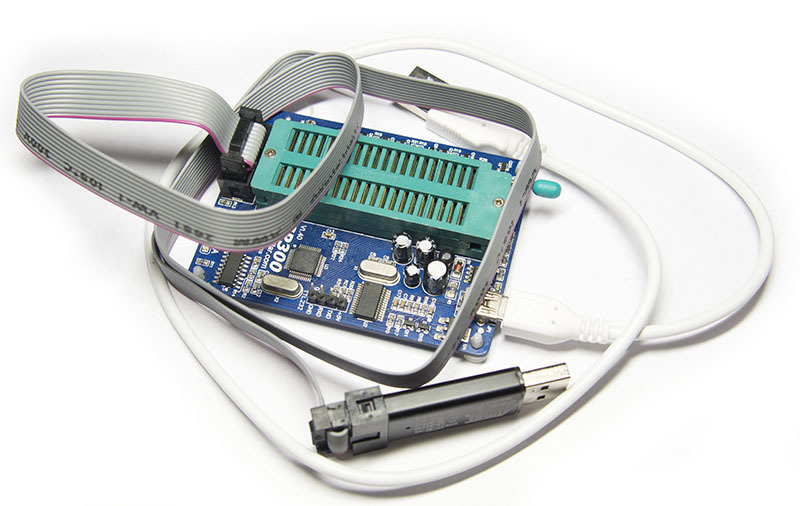
Yes, yes, I take the second programmer (it was a dubious part called SP300 found in the bins), connect it with an ISP cable to the first one, plug it into USB, put the destination in the SP300 software - ATmega8 ISP, and after a split second I get the desired USBASP.
Arduino IDE
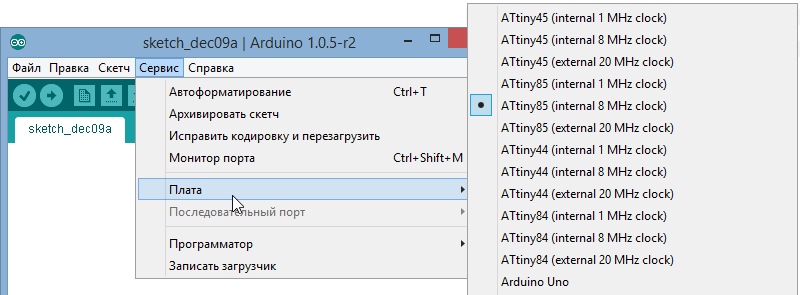
In order to work with ATtiny, you need to add card descriptions to the IDE (in fact, chips). I used these . The descriptions are placed in the folder with the sketches as follows:% folder with the sketches% \ hardware \ attiny, there will be a Variants directory and file boards.txt.
Secondary rake materialization
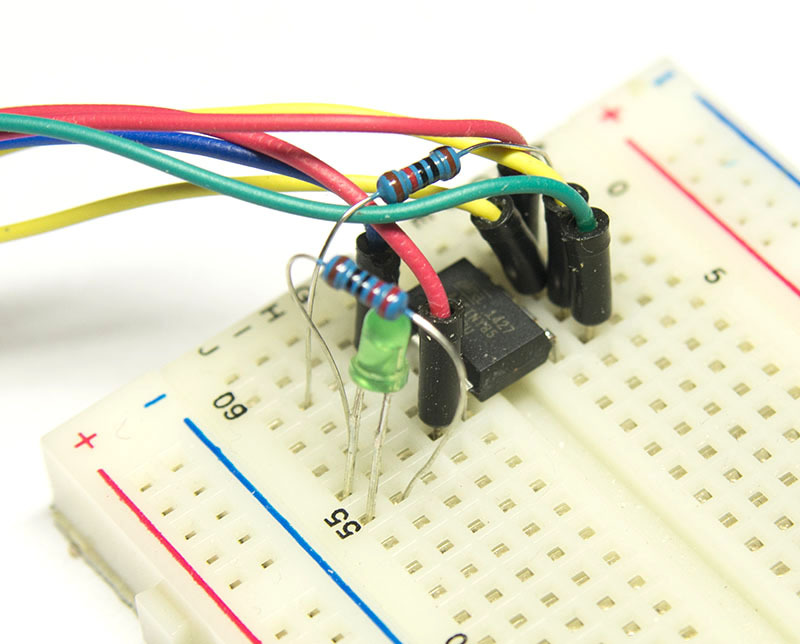
I install the chip in the bread board, connect it to the programmer, set the resistor to 10 KΩ . between the power plus and the RESET pin (as a low level reset signal). I choose USBASP programmer in IDE, I try to flash the bootloader - and silence. More precisely, AVRDude claims that there is no connection with the microcontroller.
Casket opens simply, but not quite obvious. The fact is that the “naked” ATtiny is not flashed with the AVRDude settings used in the Arduino IDE. ISP programming clock frequency too high. Moreover, this frequency cannot be specified in the IDE settings.
Solution: take AVRDude and flash it through the command line of ATTiny fusion so that the chip is clocked from the internal generator with a frequency of 8 MHz. In this case, we indicate a low frequency (to be exact, it is not the frequency that is indicated, but the duration of the clock) clocking at ISP programming (the -B key). As a result, the "magic line" looks like this:
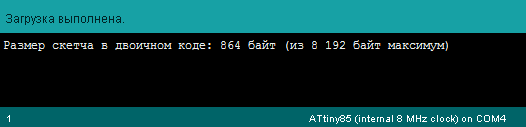
avrdude -p t85 -c usbasp -U lfuse:w:0xC2:m -U hfuse:w:0xDF:m -U efuse:w:0xFF:m -B 5 After that, ATtiny 85 is normally stitched through the Arduino IDE. Functioning is performed using the legendary demonstration project Blink. We change the pin in the sketch from the 13th to the 4th (this is the 3rd pin of the ATtiny 85), we connect the LED and the resistor, we load using the programmer. The LED is blinking, the goal is reached.
Total
We conclude that ATtiny 85 microcontrollers (as well as 44, 84, 45) can be worked through the Arduino IDE. Those interested can come to the horror of the fact that the blinking code LED eagerly eats almost a kilobyte of memory (with 8 available).
I cannot make an unequivocal conclusion about the practical value of the research carried out (the savings are small, but there is little memory and conclusions), but it was quite funny.
Source of Inspiration
Source: https://habr.com/ru/post/245429/
All Articles