New GNS3 - step forward or jump on the spot?
GNS3 1.2
In the early 2000s, the situation with network equipment emulators looked quite pitiable.
But then Dynamips and Dynagen (console frontend to Dynamips) appeared, which provided an opportunity to emulate some Cisco IOS routers.
For the first time Dynamips was presented to the public in the distant 2005th year.
It was essentially the development of one person.
The project developed little by little, but was abandoned in 2007, the latest version from the original author was number 0.2.8-RC2.
The management was far from convenient: the text configuration files had to describe the entire topology manually.
And then, in 2007, Jeremy Grossman (Jeremy Grossman) began the development of GNS3, as his graduation project while studying at the university.
Over time, GNS3 became the most recognizable and popular solution for emulating network equipment, primarily for those who were preparing for certification exams.
And now, in the 2014th year, the evolutionary (from the developers' point of view) version GNS3 1.0 comes out.
But before we start a thorough study of the new version, we will briefly return to the last year, at the moment when the new GNS3 milestone was launched.
How it all began
After the total GNS3 download reached 10 million, the founders of GNS3 decided to launch a fundraising campaign to further develop the project.
')

More than 13,000 people participated in the financing of GNS3 and eventually $ 550,000 was raised.
The initial goal (at $ 35,000) was achieved in just 3.5 hours!
This certainly shows a huge interest in the project among users, engineers and all those interested in emulating network equipment.
After successful financing, the development of a new version immediately began.
And then the first alpha version was introduced as early as April 2014.
After a series of alpha versions, in the middle of July the first beta version of GNS3 was released.
The release release (version 1.0) was originally scheduled for December 2014, but it took place earlier - at the end of October.
Then versions 1.1 and 1.2 were quickly released (the latter was released quite recently, in November).
And if version 1.1 was a bug fix and mostly corrected, then version 1.2 contained many new things inside.
In this version, support for VirtualBox has changed (for the better), the converter from a separate utility has become part of GNS3 (which now allows opening previous GNS3 projects).
And the most striking change is the completely redrawn GUI.
What came to

According to the founder of the project, the old version of GNS3 was a heap of various patches, modules and code remnants from different developers, so it was decided to start the project from scratch.
The developers claim that in the process of creating GNS3 1.0 less than 5% of the code of the old version was used!
The new version was developed with an eye to the fact that it will be a framework in which you can easily add support for solutions from VMWare, HP, Juniper and other vendors.
At the same time, it was planned to maintain a friendly interface and increase the responsiveness of work, significantly improve the performance of the program.
GNS3 is still a platform for experimentation and testing, for demonstrations and, of course, for learning about networking technologies.
As before, GNS3 is a cross-platform tool and works under Windows, Linux and Mac OS X.
In order to download the latest version of GNS3, you must register on the official website (www.gns3.com) and create an account on the GNS3 jungle portal.
Registration is currently free.
Well, now turn to the most interesting - to consider all the changes in the latest version of GNS3.
All innovations GNS3 version 1.2
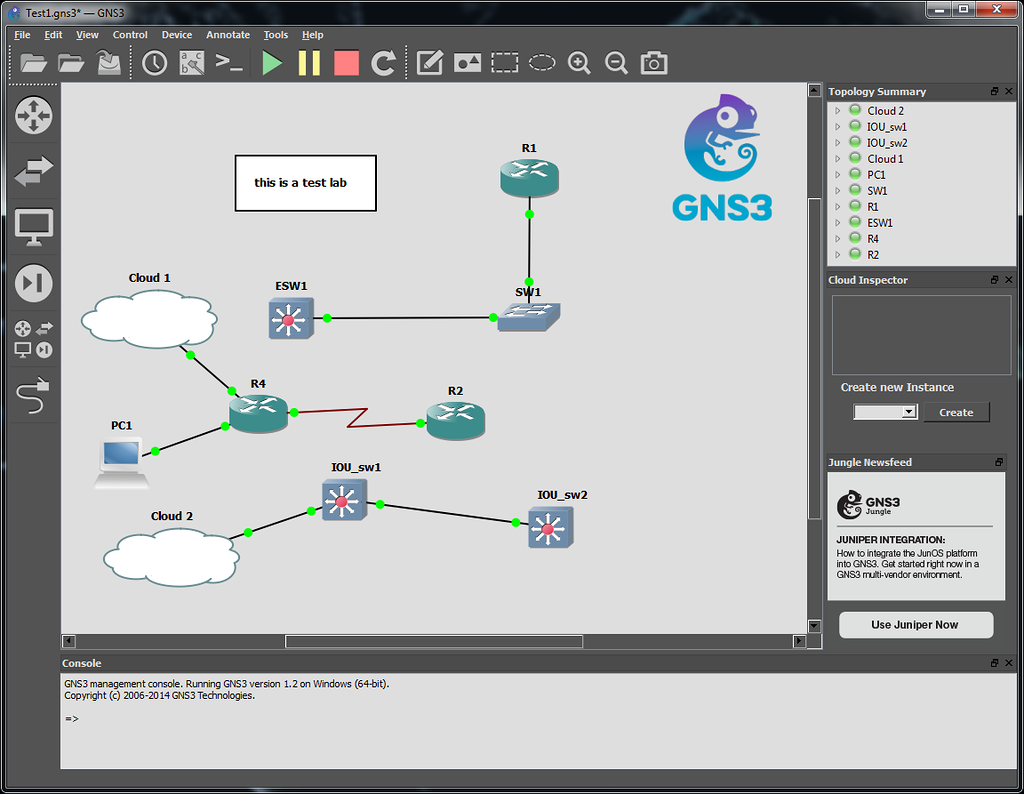
First of all, the interface was redrawn, while all the main elements remained in their places and a lot of time searching for virtual hardware did not go away.
Most changes occurred in the options, they were regrouped and now look more logical.
If we consider the changes in essence, we can distinguish several major changes and a number of small ones.
The biggest changes were in switches and switching.
It was stated as many as three options - you can use a simple “drawn” switch, which only knows how to work with vlans at the most basic level, use MLS as a router extension card (which already allows a little more, for example, there is support for VTP, work with 802.1q and STP ), or use IOU L2 (where the functionality is as wide as possible, although not without exceptions).
It is the integration of IOU that was designated as the biggest innovation in GNS3.
What happened in the end and whether the promises of developers were fulfilled, we will see a little later.
In the meantime, let's dwell on the "new" L3 switch, which was called the EtherSwitch.
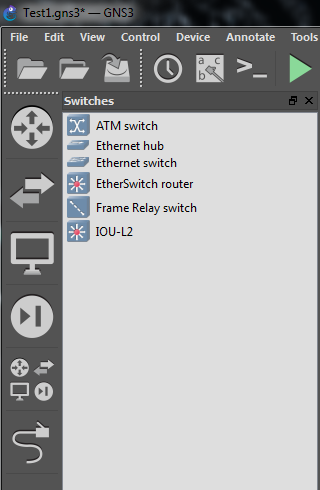
If you look at the switches tab, then there appeared an “EtherSwitch router” - which is in fact a regular 3725 router, just with already installed expansion cards and with a new icon under the MLS switch.
That is, you no longer need to manually recruit fees, you can add a small switch a little faster, but it turns out that in fact, apart from supporting IOU-L2, nothing more appeared in the direction of switching and did not appear.
We will continue the movement on the new features of GNS3 and now we will direct attention to the changes that have occurred with the final hosts.
In the most recent version, there are four different ways to add hosts to the topology.
If you just need a final host, in order to just go pings - you can use Virtual PC Simulator or abbreviated VPCS.
It is extremely easy to use VPCS, you just need to drag such an object onto the main topology, connect as usual to any device and start it.
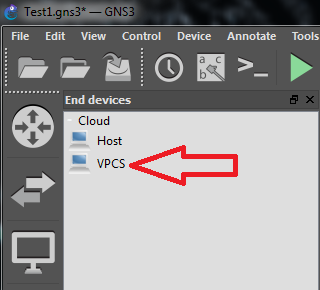
On the right click on the VPCS object, as in the case of any other device, you will be able to select a console connection.
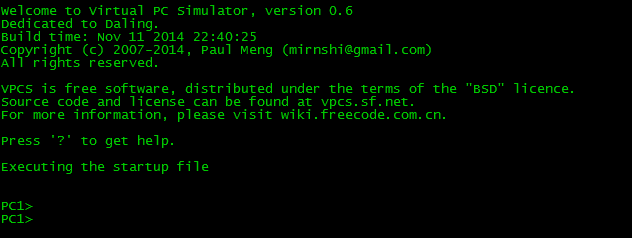
As suggested after entering “?” You can get detailed help on using and configuring such a virtual host.
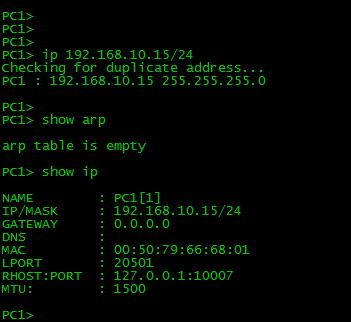
Everything is configured quite obvious, for example, setting the IP address and viewing various parameters can be seen in the screenshot below.
Returning to the different ways of adding end hosts, the second way is to use Qemu or VirtualBox virtualization systems.
Both options are fairly well supported in GNS3.
The third way is simply to add another router, but with routing disabled (no ip routing command in global configuration mode).
And finally, the fourth way is to use your own PC and add it to the GNS3 virtual network.
Moving on to the embedded features further, it is worth noting two more aspects on which developers are relying - the community portal GNS3 Jungle and GNS3 Assist.
GNS3 Jungle is a resource that is somewhat reminiscent of a social network for those interested in networking and emulation of various equipment.

This is a great forum designed to gather and unite the GNS3 user community.
There is a rating system and scoring for various actions - for example, for having one or another Cisco or Juniper certification, for contributing to the GNS3 project (testing, bug reporting, participation in a fundraising campaign).
At the moment, these points and points are only a certain indicator of the involvement of a particular person in the project. In the future, it is supposed to buy something in a special store for these best-earned points.
If we consider GNS3 Assist, then this is a service that provides various support.
The GNS3 project decided to follow the path of the open source project and provide paid support to all who are interested in it.
These can be enterprise customers, the commercial sector, or ordinary GNS3 users.
The developers claim that the money earned in this way will be used to strengthen the GNS3 user community and help to further improve the project as a whole.
Along with the support, access is also provided to a special section of the forum, containing various ready-made topologies and labs, as well as to the knowledge base of the GNS3 project and on some certification exams.
This is where major changes end and now it is worth considering smaller, but still noticeable changes.
Minor changes to GNS3
All small changes mainly affected usability and entered a number of convenient trifles.
For example, it became possible to add several devices of the same type at once.
To do this, in the process of drag and drop, you need to leave the shift key pressed.
Immediately after releasing, a window will appear, where from the drop-down list you can select the number of identical devices, then they will immediately be placed in the main topology window.
This is useful in cases where you need to immediately add, for example, 5-6 routers. Now it can be done at once.
Support for text instructions for the lab has been added, and files with the name “instructions. *” Are automatically opened from the selected project directory.
Also, it is possible to open such a file at any time, using the menu “Help” - “Lab instructions” .
There was a button “console connect to all devices” , which allows you to immediately call the console connection to all active devices with one click.
If, in this case, not PuTTY is used as a client, but, say, SecureCRT, then each connection will open in its tab.
The new GNS3 now includes the SolarWinds Response Time Viewer .
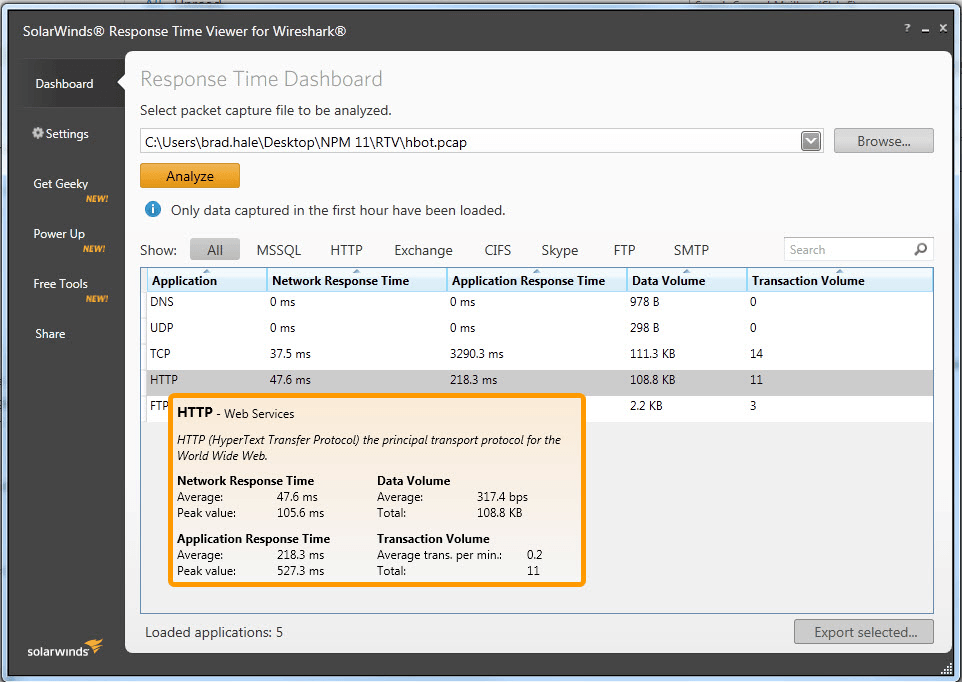
This is a separate free utility that accepts saved traffic dumps (in various formats) and performs a series of actions.
Parsing and analyzing the application response time, network response time and the amount of data transferred by each application.
And then all the results are displayed in a visual table.
The utility will also show which applications and resources (websites and social networks) were found in the dump being analyzed.
It is also worth noting that the new GNS3 uses a different topology file format (now it is .gns3 instead of the previous .net files), which is completely incompatible with the previous version of GNS3, which is why all the previously assembled labs will not start.
Fortunately, the solution appeared rather quickly as a separate converter ( http://gns3-converter.readthedocs.org/en/latest/usage.html ), and in the current version the converter was integrated and now when trying to open a project of the old version carry out the conversion.
It is worth emphasizing that the conversion is not always going smoothly: if different objects of the “cloud” type were used, then you may have to make many corrections manually, after the conversion process has passed.
This completes all the changes, and now let's see how the process of interaction with the IOU is structured.
Integrating IOU into new GNS3
Despite the developers declared the full integration of IOU, immediately after installation, nothing like this is observed.
We'll have to do a bit of the file and put it all together.
To achieve the goal (the appearance of IOU in GNS3) will require something from the virtualization systems (we are recommended to use only VirtualBox, but as we shall see, this is not necessary), the virtual machine prepared by the developers and, in fact, the IOU firmware itself.
Before you use an IOU, you should remember about hard licensing restrictions.
You can read more about IOU here for example.
We proceed to connect IOU, and the first step is to deploy a virtual machine, the image of which is located at http://sourceforge.net/projects/gns-3/files/IOU%20VMs/
Although we strongly recommend using only VirtualBox, you can import this virtual machine into VMWare Workstation, and the result will be the same.

The only thing you need to pay attention to is the type of virtual network interface. It is best to use the “host-only” option so that GNS3 can easily access this virtual machine.
After the virtual machine is deployed in one way or another, you need to use the browser on the main system to follow the link like http: // <IP address that the virtual machine received>: 8000 / upload.

A simple web form will appear that allows you to upload IOU firmware to a virtual machine (the virtual machine itself does not contain them).
After adding each firmware, it is worth somewhere to copy the full path, which will look like "/ home / gns3 / GNS3 / images / name_l2 | l3_information.bin .
This information is useful in the future.
That's where all the preparatory steps are completed, and you can already go to the settings in GNS3 itself.
To do this, go to the menu "Edit" and select "Preferences" .
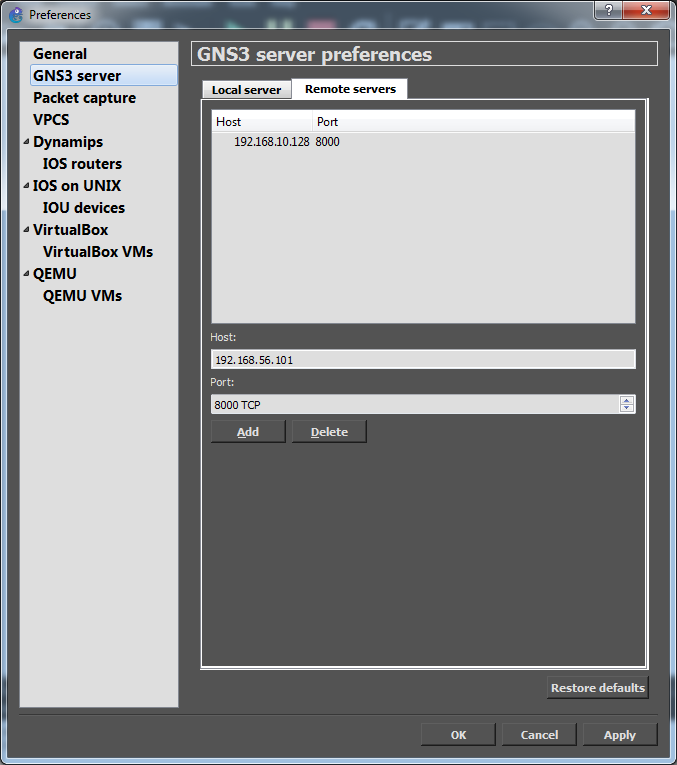
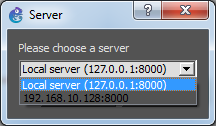
In the options we will be interested in the “GNS3 Server” item, or rather the “Remote Servers” tab, this is where you need to add the IP address of the newly created virtual machine.
After that, you need to go down in the options just below to the section "IOU Devices" , where after clicking the "New" button you will need to fill in all the fields.
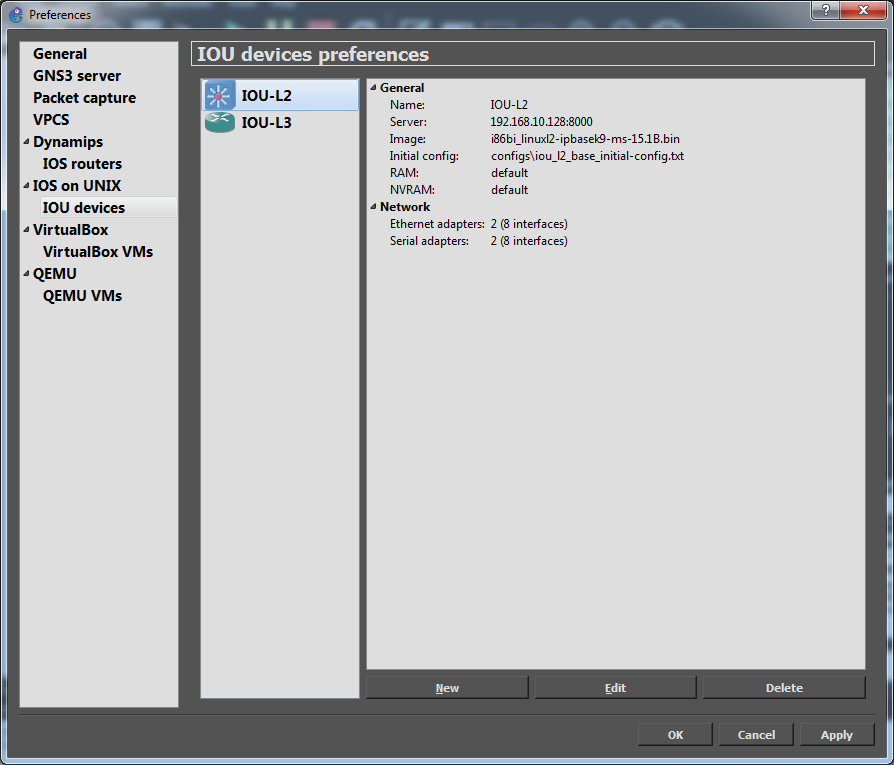
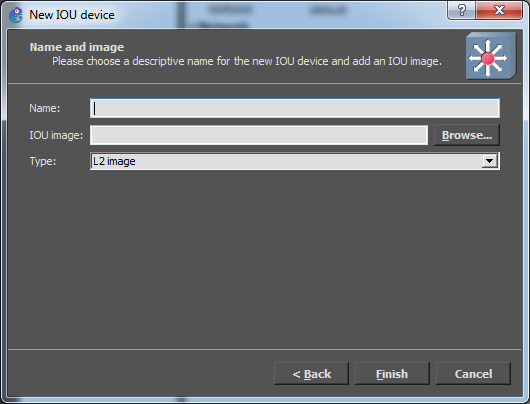
In the “Name” field , specify the name of the firmware (it will then be displayed in the collected projects), the “IOU image” field (those are the most complete paths to each image that you need to save somewhere) and remember to choose the type of firmware - L2 or L3 .
Naturally, this will have to be done for each image loaded earlier on the virtual machine.
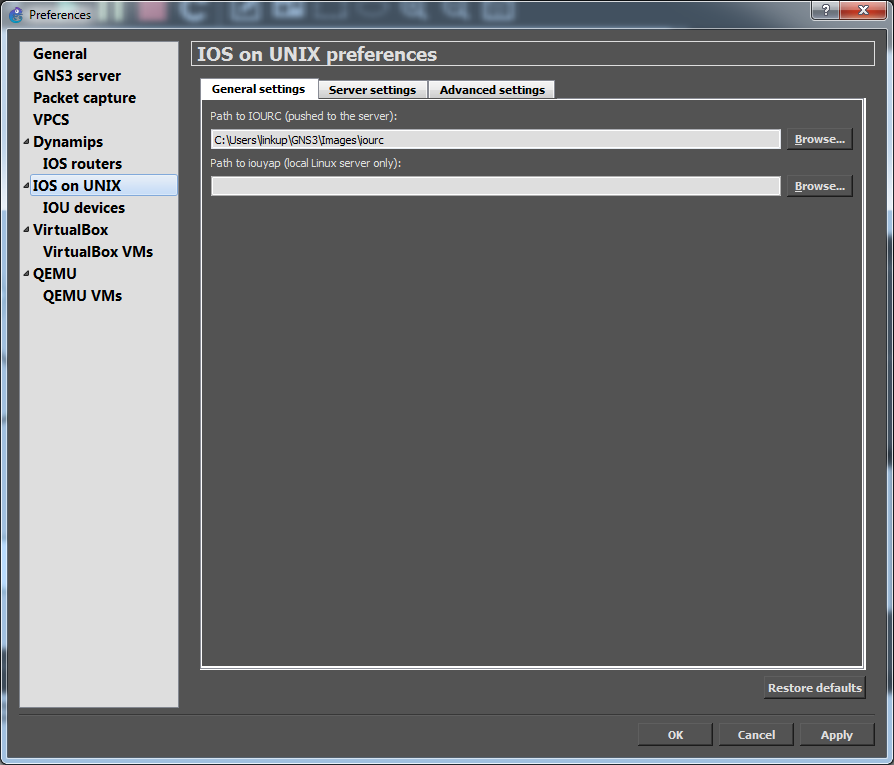
And finally: it remains to go to the options section “IOS on UNIX” , where you need to specify the path to the IOU license file (this file should be stored locally, on the same host where GNS3 itself is installed).
This completes the IOU connection process, and along with the classic GNS3 devices, it becomes possible to add IOU L3 or L2 devices from the Routers or Switches panels , respectively.
But here, not everything is as good and convenient as it may seem.
If you try to connect together any IOU device and classic GNS3 router, an error message will appear
"Server 127.0.0.1 cannot communicate with server 192.168.10.128, most likely because it is set to a local address".
Remember that when IOU was integrated into GNS3, it was necessary to add the IP address of the virtual machine, which actually contains the IOU.
If, using the “Cloud” object, to try to bring IOU to a local network, for example, another error will occur
"This device can only be connected to the cloud on the same host."
As a result, despite the promised integration of IOU in GNS3, in fact, it is only possible to connect different IOU devices to each other.
But a way out was found.
In the process of adding a “cloud” to the working draft, a window appears where you can choose a local server or a virtual machine with IOU on board.
Accordingly, if you select a virtual machine as a server, then in the settings of this “cloud”, you will be able to select the eth0 interface, which in turn will allow you to connect it to any IOU device.
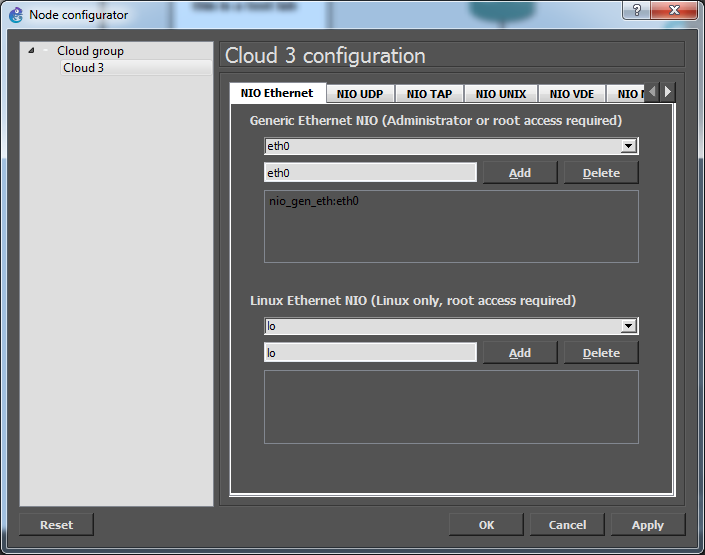
After that, already through the virtualization system, be it VirtualBox or VMWare, it will be possible to combine various network devices - GNS and IOU.
What is the result
The path of developers to version 1.2 took almost 7 years, during which time more than 40 releases were released.
Whether the result has been achieved and whether the new version has become evolutionary, time will probably show, since the development is not finished.
In the near future, GNS3 expects full support for VMWare, cloud features and support for Arista solutions (vEOS).
A complete picture revealing the further development of the project can be viewed at this address https://community.gns3.com/community/software/ideation/roadmap
You can read the various official GNS3 documentation here https://community.gns3.com/community/support/documentation
Naturally, the new GNS3 even with the integration of IOU does not allow the use of all existing network technologies.
Most likely, you will not be able to work with EtherChannel, dynamic arp inspection, DHCP snooping, QinQ and other things.
In turn, Cisco Systems has already released such emulators as IOS-XE (works in VMWare and KVM), NX-OS (works in VMware ESX / ESXi) and virtual IOS-XR, which was called XRv (it can be run even in VirtualBox or Qemu).
This topic has already been published .
But recently something really new has come out.
About VIRL
Attentive readers probably noticed the VIRL logo at the very beginning of the article.
Despite the fact that the article was primarily about the GNS3 emulator, it was impossible to bypass the topic of VIRL.
The history of VIRL began with the fact that at the CiscoLive conference it was announced about the creation of a special platform that will allow you to virtualize various equipment of Cisco Systems and collect various laboratories.
Then came the first details.
It turned out that three different versions of VIRL are planned.
Personal version - for various research and training, limited to 15 nodes.
A separate version of CML (Cisco Modeling Labs) , which in turn will focus on the corporate segment, allowing you to virtualize hundreds, and in the future, thousands of different nodes.
Finally, the free version of Devnet All-in-one , for those who want to look at new IOS routers, this is the most limited version, consists of only three routers.
And so, on December 1, 2014, the expected release of VIRL from Cisco took place.
This is a personal solution, for those who study, test and simulate various conditions.
All the details and prices can be viewed on the official resource http://virl.cisco.com/about-virl-2/
It is worth noting that VIRL is never an IOU.
VIRL is a new platform for creating and modeling various laboratories.
IOU, in turn, is an emulator that allows you to run only certain firmware that was developed specifically for it.
VIRL on this background looks promising and truly progressive.
But there was not without unpleasant flaws.
The problem is that at the moment L2 switching is not implemented and as yet there is no exact data whether it will be added to VIRL at all.
DevNet All-in-One
And finally, consider the virtual machine DevNet All-in-One .
Most likely, the Devnet free virtual machine is the limited version of VIRL with the maximum cut functionality.
All-in-One is a single OVA file that can be downloaded for free from https://developer.cisco.com/site/onepk/downloads/all-in-one-vm/index.gsp
Then this virtual machine will need to be imported into VMWare or VirtualBox.
After the download, Ubuntu Linux is detected, you need to use the cisco login and the cisco123 password to log in .
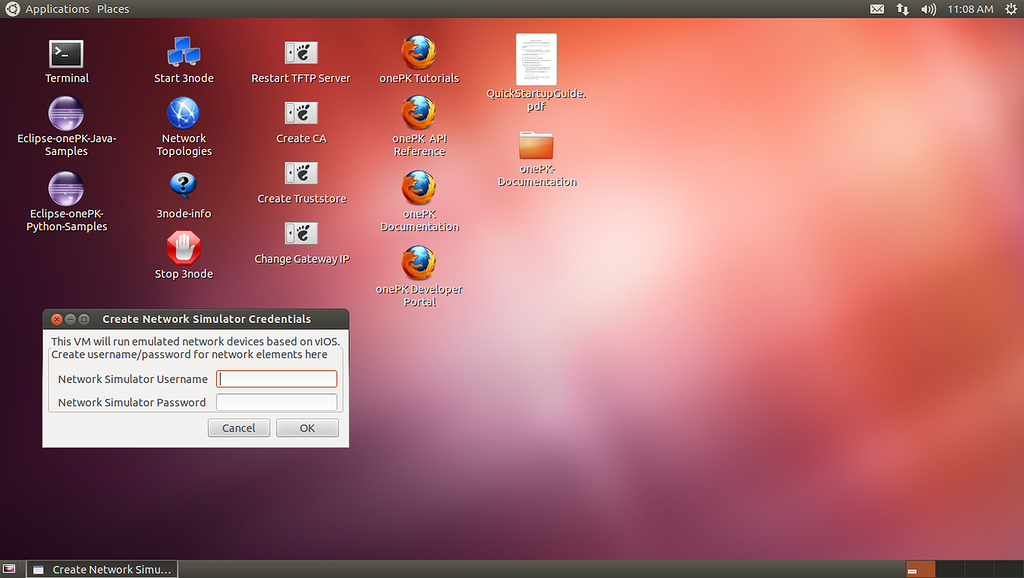
There are several documentation files on the desktop, as well as the “Start 3 Node” label, which launches those three routers.
Immediately after this, three terminals will open, which will provide access to the command line of the routers.
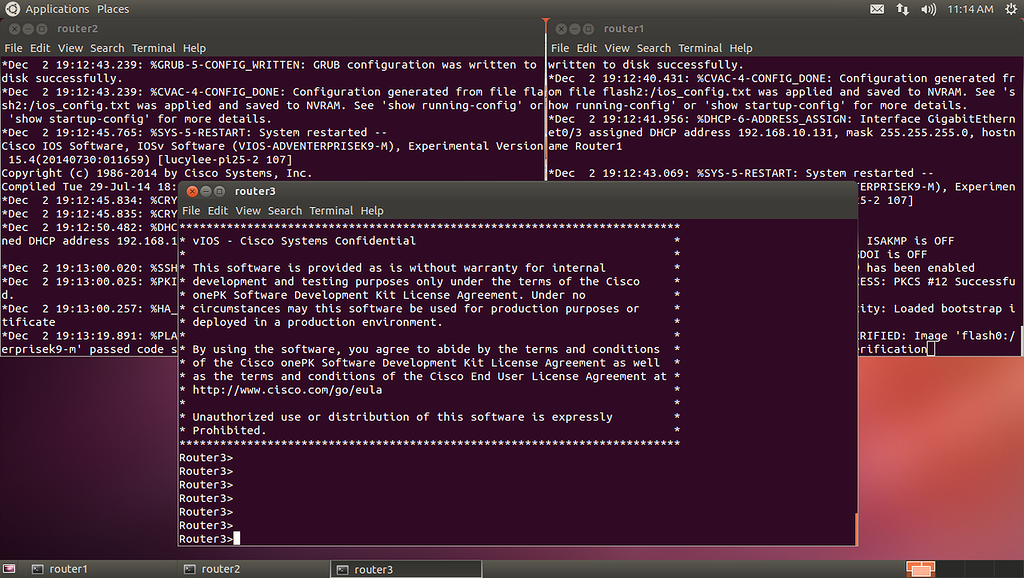
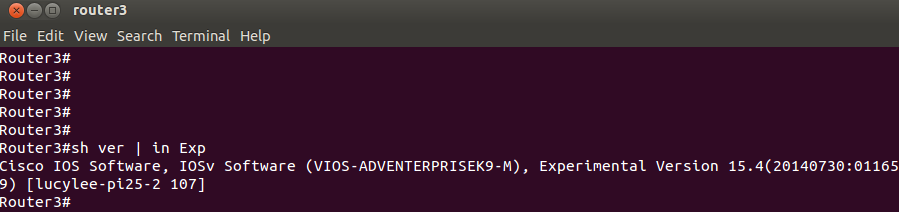
Of course, you can view the All-in-One virtual machine only as an early, perhaps even a demo version of VIRL, for example, with IOSv version 15.4.
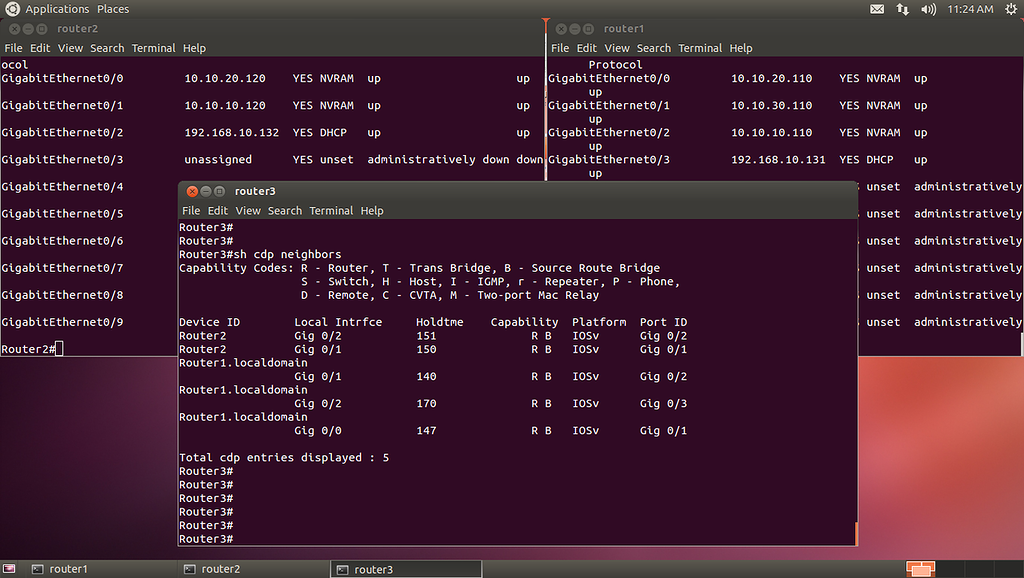
Three routers that start up are already slightly configured - there is addressing on several interfaces and telnet is configured.
And finally, that confirms that we still have VIRL.
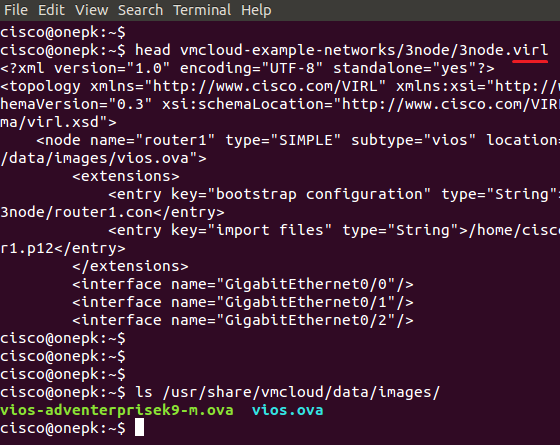
Well, here you can look at the utility itself, which is used to run virtual routers.

Final conclusions

We looked at the history of the GNS3 emulator and the latest developments from Cisco.
Of course, not everything appears immediately, but the main thing is that the process of development and evolution of various platforms for emulation does not stand still, and it is quite possible that in the future we will get a unified environment where it will be possible to launch and build stands containing the most various vendors.
Source: https://habr.com/ru/post/244955/
All Articles