"Raspberry Eye" - webcam on the servo

Webcams are fun and useful stuff. And the ability to remotely control their viewing angle further extends their usefulness. There are many use options, most often cameras are used to look after a house while on vacation or for animals. And, for example, you can give your friends the opportunity to control the camera installed in another country so that they “take part” in some event. In any case, a camera connected to the Internet on a turntable gives you the opportunity to control the situation much better. This post describes one of the many self-made managed webcam projects.
We put Pi in a network
Raspberry Pi is an excellent base platform for designing Internet-connected devices. Also, the Flask framework is very convenient for such tasks. It allows you to use existing Python applications (your preferred language for developing under the Raspberry Pi) and add HTML templates to them to create a web interface for the end user. This project uses a clean template, so you can easily figure it out and modify it to your liking.
Streaming video from pi
First you need to find a way to broadcast a video stream via Pi to the Internet. When using such a low-power system, every bit on the account, and therefore real-time compression and streaming can be too much load on the system. As a result, MJPG-Streamer was chosen, since it demonstrated a very high speed.
')
Servo Motor Control
Also needed was a way to control the servos for turning / tilting the camera. The standard library in Raspberry Pi for accessing I / O pins is called GPIO . Although it is easier to perform simple operations with it, for control of servomotors it provides too low accuracy. After a lot of trial and error, an alternative library was chosen called RPIO . With its help, I got access to a semi-controllable PWM signal . It was the last element of the mosaic to build a full-featured project and a great starting point for connecting to the Internet!
All code for this project can be downloaded from Github , and 3D models from Thingiverse .
NOTE : There is a list of Pi-compatible USB webcams on eLinux. This project uses the C260 webcam, which may not be available already. C525 , according to reviews, “works well without add. Power ", but not tested with our design. C270 "works well with add. Power "in the form of an active USB hub. 3D models of the design are sharpened for C260 / 270, but you can modify them for your camera.
Step # 1: Write the image to the SD card

• As an OS for this project, Raspbian, adapted for the Raspberry Pi Linux distribution, was chosen. Most of the standard settings are still in place, including the password (raspberry). After the installation is complete, you will need to log in, run raspi-config, change the password and other settings to your liking.
• A lot of changes need to be made to the Raspbian image to make this project work. You can download a complete PiCam image from cdn.makezine.com/make/WeekendProjects/HomeSentrySecurityCamera/PiCam.img and burn it to your SD card.
• The story about recording the image itself pulls into a separate article. In this case, you can follow the guidelines from the Raspberry Pi Foundation at http://elinux.org/RPi_Easy_SD_Card_Setup .
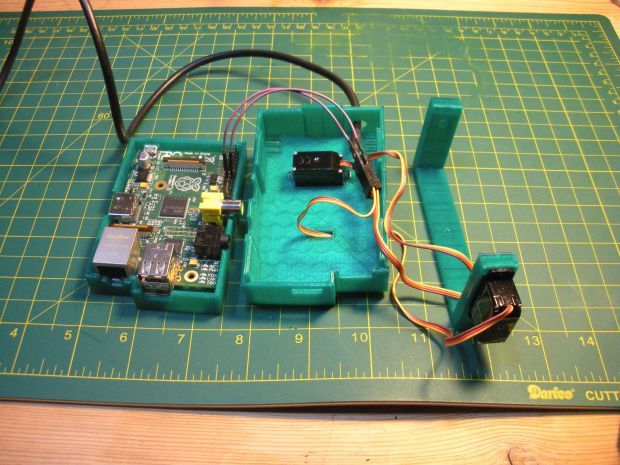
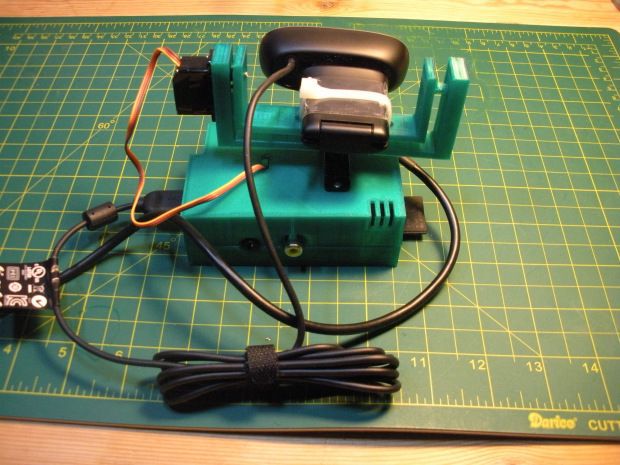
Step # 2: Type, Build, or Purchase a Case
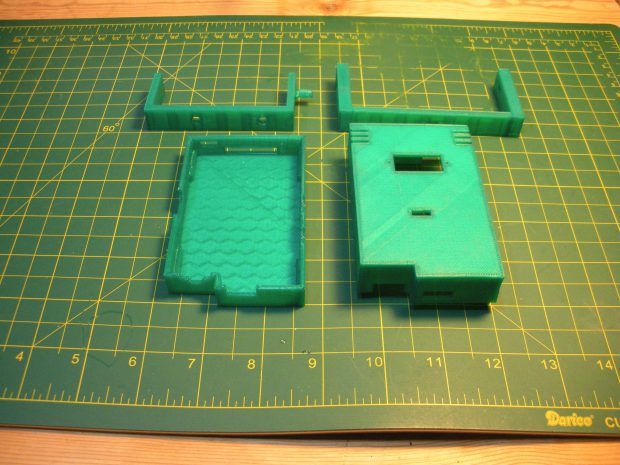
• In order to place Pi and create a base for the pan / tilt mechanism, I developed a case model for a 3D printer. This is a rewrite of Thingiverse's Josh Campbell . You can download it from here http://www.thingiverse.com/thing:274468 .
• If you do not have access to a 3D printer, you can buy a case at Shapeways or any other online store. Or stick together independently of plastic scraps.
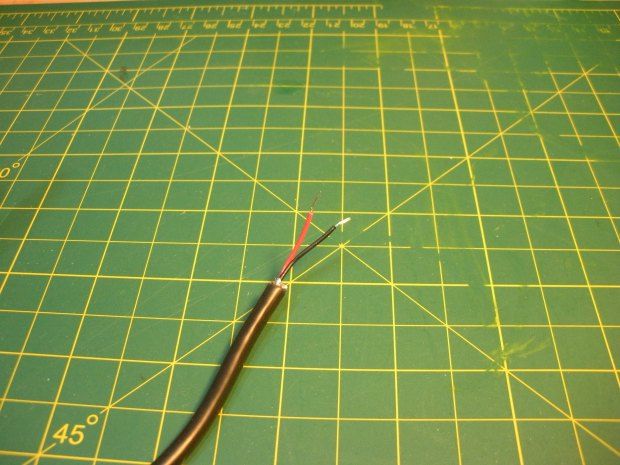
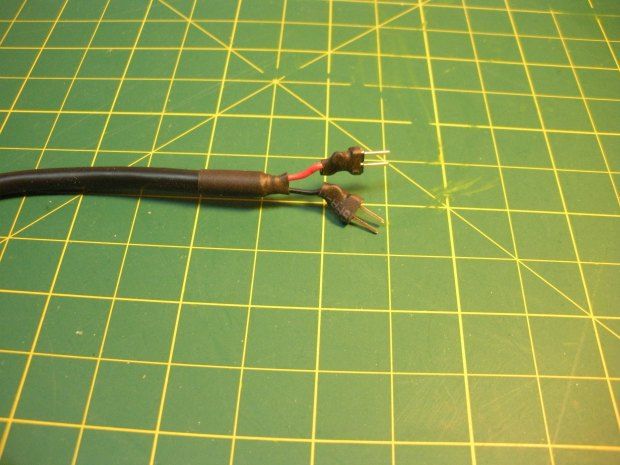
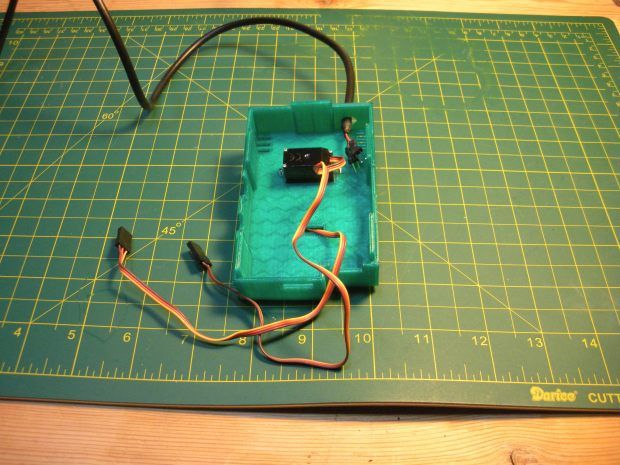
Step # 3: Prepare power cable for servomotors
• Cut the small Micro-B plug from one of your two USB cables.

• Remove approximately 2.5 centimeters of external insulation; inside you will find four wires (black, red, white, green).
• Remove approximately 6 mm of insulation from the black and red wires. Using a multimeter, make sure that it is really "+" and "earth."
• Remove the cable shielding and cut the white and green wires.
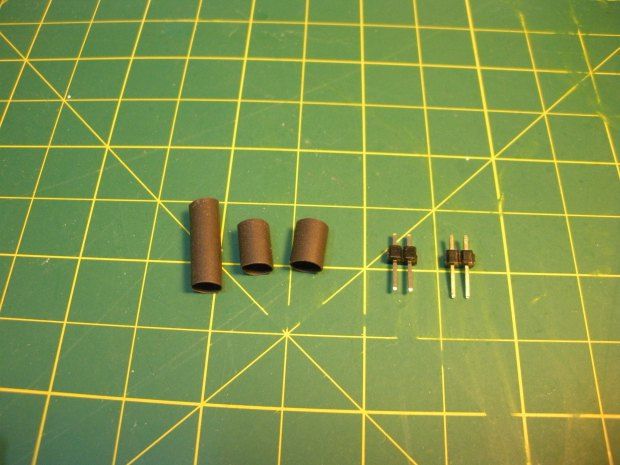
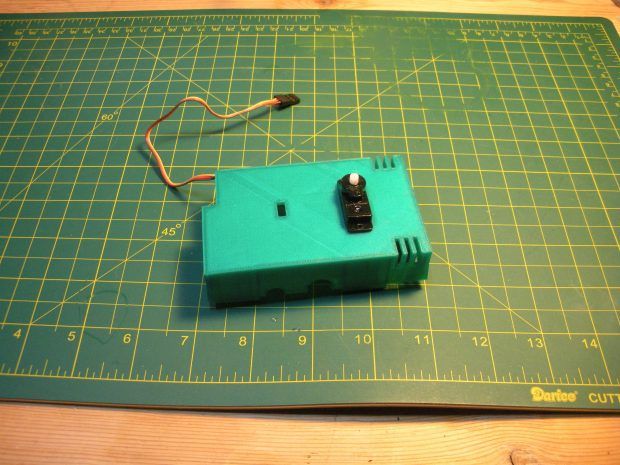
Step # 4: Solder the cable
• Cut three pieces of heat shrink tubing: one 13 mm and two 9 mm each.
• Trim tips from two double jumpers.
• Put on the wire shrink 13 mm and push a couple of centimeters, so as not to hurt when soldering.
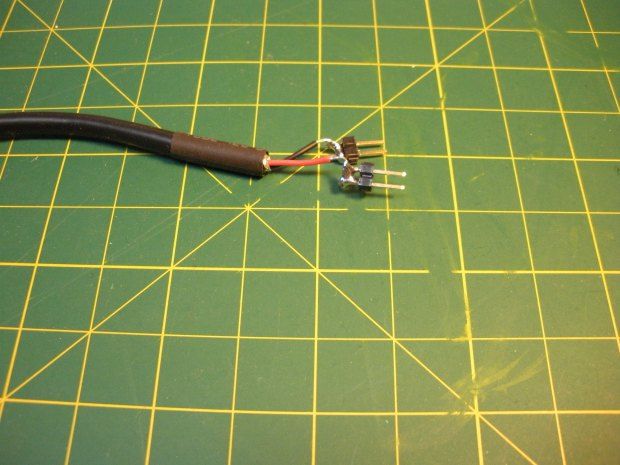
• Carefully separate and wind the end of the red wire around both short leads of one of the jumpers.
• Solder the wire to the jumper and make sure that it is securely connected to both terminals.
• Do the same with the black wire.
• Put the remaining heat shrink tubing on each set of jumpers and stretch them a little, closing the spike. Lift up the long tube so that it covers the white and green wires that you cut earlier.
• Heat shrink.
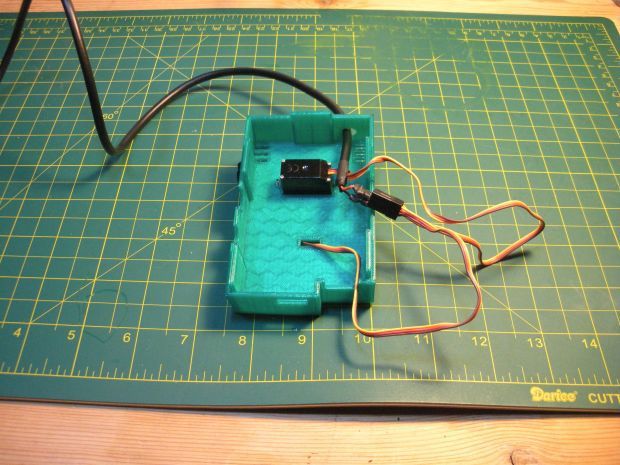
Step 5: Installing the swing motor
• Pass the wire of one of your servomotors through a large rectangular hole and insert a motor into it. If it gets stuck, use a small file or sandpaper.
• When the servomotor is set in place, tighten the 2 long screws to secure the motor.

Step 6: Add a tilt motor
• Pass the second servo connector through a small rectangular opening. Both wires from the motors should now go to the middle of the case.
• Do not install this motor yet.
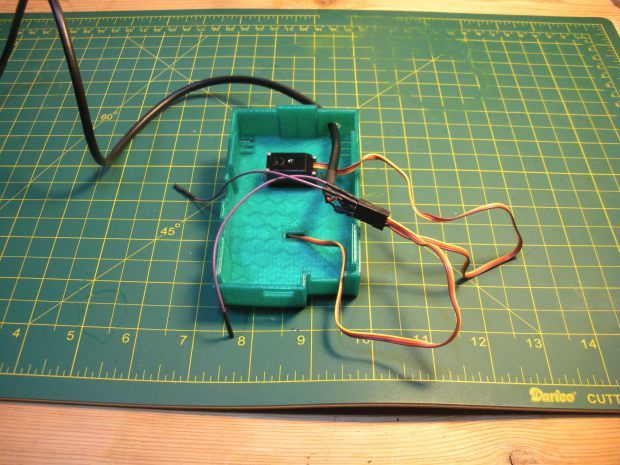
Step 7: Connecting Motors
• Pass the end of the wire with the jumper through the round hole in the side face of the housing.
• Connect the black wire leads to the holes in the servomotor connectors corresponding to the brown wires.
• Connect the red wire leads to the holes in the servomotor connectors corresponding to the orange wires.
• Take two purple wires with jumpers and insert each into the holes corresponding to the yellow wires.
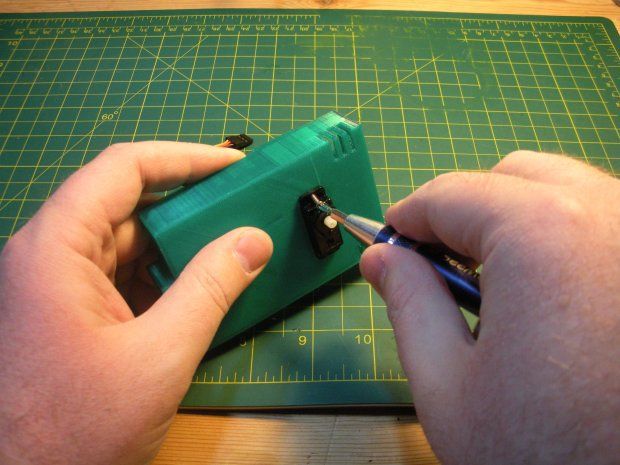
Step # 8: Tilt Motor Installation
• Insert the tilt servo into a similarly shaped hole on the larger of the two printed holders.
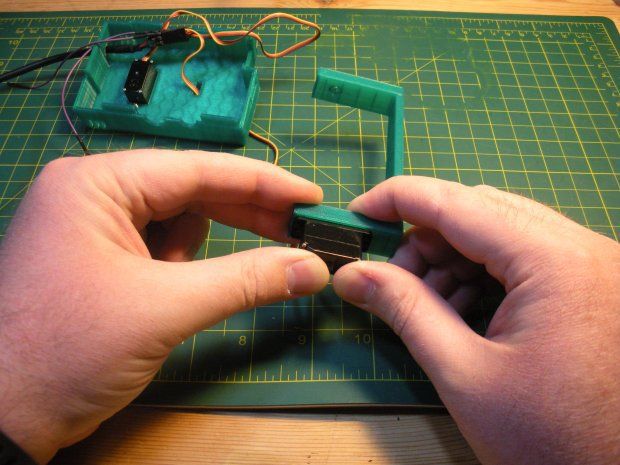
• Screw the motor with two long screws.

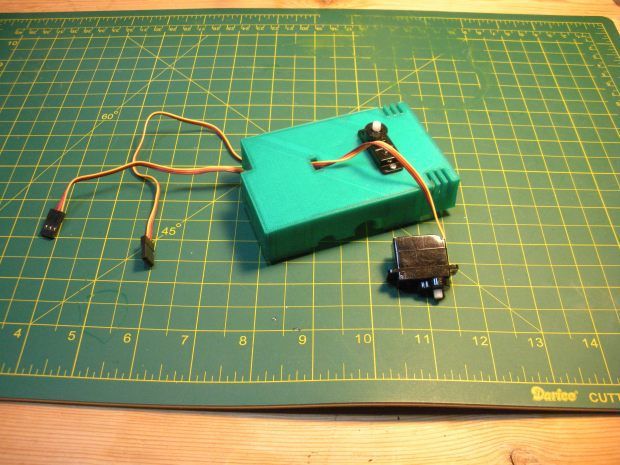
Step # 9: Connect servos to Pi
• Two purple wires must be connected to the Raspberry Pi. These are the control wires through which the signal for changing the position of the motors will be sent.
• The signal wire from the turn motor must be connected to pin 23. This is the eighth pin in the outer row.
• The signal wire from the tilt motor needs to be connected to pin 22. This is the eighth pin in the internal row.
Step # 10: First Power On
• Insert your formatted SD card into Pi and connect an Ethernet cable. If this is the first launch of the OS, then you may need a USB keyboard, mouse and HDMI monitor.
• Plug both (one from Raspberry, second from motors) USB cable into a dual USB charger and connect the USB cable to the Raspberry Pi next to the SD card. Now Pi should turn on.

Step # 11: Zero servos
• To remotely connect to Pi, use the SSH utility built into Mac and Linux. (If you are a Windows user, you can use Putty as an SSH client. Hey, Microsoft, give us native SSH!)
• In the terminal window, type:
ssh pi@picam and press Enter. If you could not connect, try the ping picam . If you receive a ping: cannot resolve picam: Unknown host , connect the monitor and keyboard to find out your IP address (using the ifconfig utility), and then connect using your IP address, like so: ssh pi@192.168.1.10 .• After connecting, go to the picam directory:
cd picam• Run the picam.py script as root:
sudo python picam.py . You should see the output of the script:Using hardware: PWM
PW increments: 10us
Initializing channel 0...
add_channel_pulse: channel=0, gpio=23, start=0, width=154
init_gpio 23
add_channel_pulse: channel=0, gpio=22, start=0, width=154
init_gpio 22
* Running on 0.0.0.0:80/• After running the script, you should hear both servomotors return to their starting position.
• Press Ctrl + C to end the program. After that, type
sudo shutdown -h now to turn off Pi. After shutdown is complete (usually takes about 30 seconds), unplug the power wires from the Raspberry.Step # 12: Install Frames
• Now that the servos are in zero positions, you can attach frames to them. Start with the larger frame of the swing motor. Place it in such a way that the long side is parallel to the body and the servomotor is on the same side as the USB and Ethernet ports on the Pi. Secure frame with a small screw.
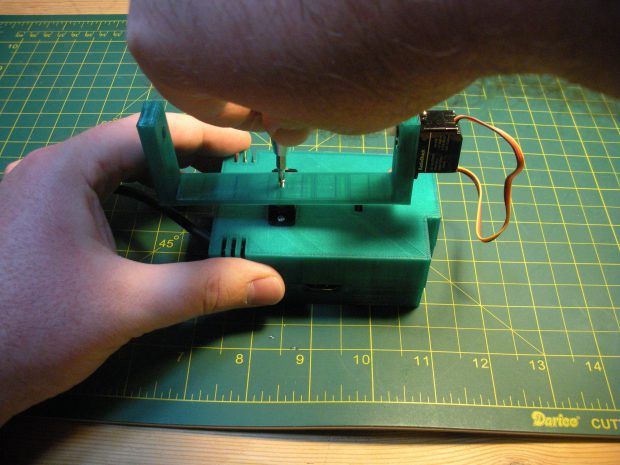
• Pass the tie through the bottom holes of the tilt frame. The ends should be pointing up until you connect them.

• Attach the tilt frame to the servomotor on the pivot frame. Screw in with the small screw.
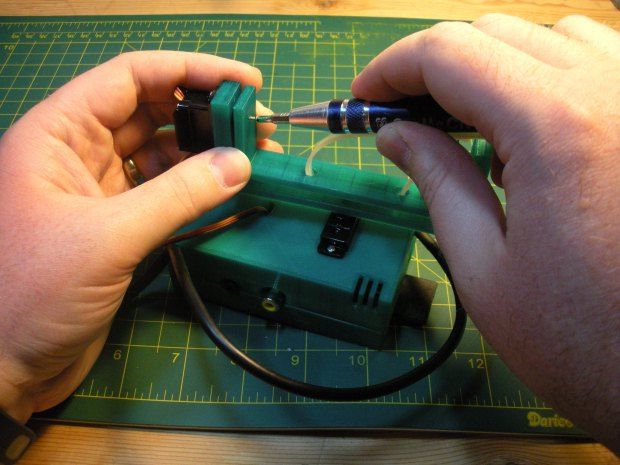
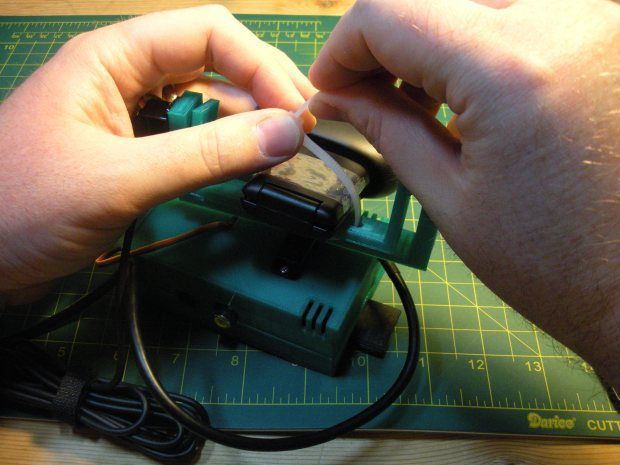
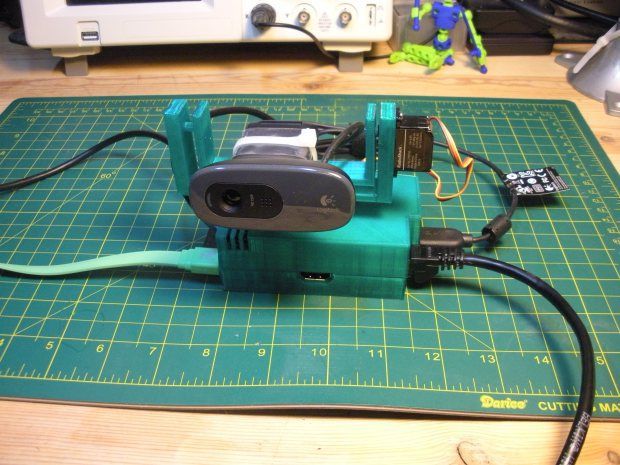
Step # 13: Mounting the Camera
• Place the camera on the frame and secure with a tie. Make sure you tighten it tightly so that it does not touch the screw head or the second frame.
• Connect the camera to one of the USB ports and insert the SD card, power cable and Ethernet cable.
Step # 14: Launch the Camera
• After Pi is loaded, re-connect via SSH.
• First go to the folder containing the program with which you will stream the video. In the terminal type:
cd ./mjpg-streamer/mjpg-streamer• Now run mjpg-streamer with the command:
./mjpg_streamer -i "./input_uvc.so" -o "./output_http.so -w ./www" &
You will see some errors, but they relate to unused modules. The LED on the webcam should light up and at the end of the program output you should see:
o: www-folder-path...: ./www/
o: HTTP TCP port.....: 8080
o: username:password.: disabled
o: commands..........: enabled
• Now press Ctrl + C to go back to the terminal. Type
cd and press Enter to return to the root directory.Step # 15: Appearance
• Now that everything is up and running, time to give it a look.
• In the terminal, return to the picam directory:
cd picamand run the PiCam application:
sudo python picam.py• When the application is launched, go to the browser address
picam picam . You should see the video from your camera and control buttons. Each press rotates the camera 10º.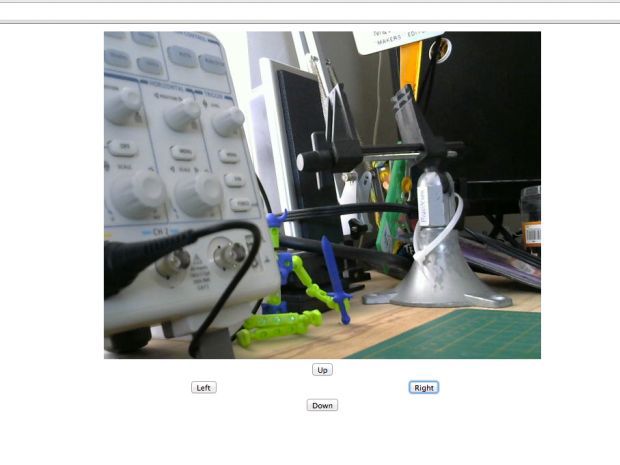
• To access the camera from the Internet, you need to configure port forwarding on the router. One port should be transferred to port 80 (for the web page), and one to port 8080 (for video broadcasting). Details about port forwarding and server startup on Pi can be read at http://raspberrywebserver.com/serveradmin/get-your-raspberry-pi-web-site-on-line.html . However, do not forget that in this case the camera is in no way protected from intruders, and you will need to somehow solve the security problem.
At last
In this remote webcam project, you can optionally add Wi-Fi, use a weatherproof case for outdoor use, or even hide the camera in an ordinary thing like a book.
Experiment!
Source: https://habr.com/ru/post/244427/
All Articles