We build robotboks with Wifi control, camera, gun, blackjack, etc.
Hello. I still had an overwhelming desire to share my achievement with the world. The achievement is a tank that rulitsya via WiFi from a gamepad, transmits live video to the console, transmits sound from the console and the console, and also has a gun with a laser sight from which you can shoot at someone.
This post will be the first test, in order to understand whether it is interesting to someone other than me. In it I will describe the general structure, the technologies and devices used.
')
UPD: added video.
For a start, a small video to attract attention. The sound comes from the tank column.
How it all began
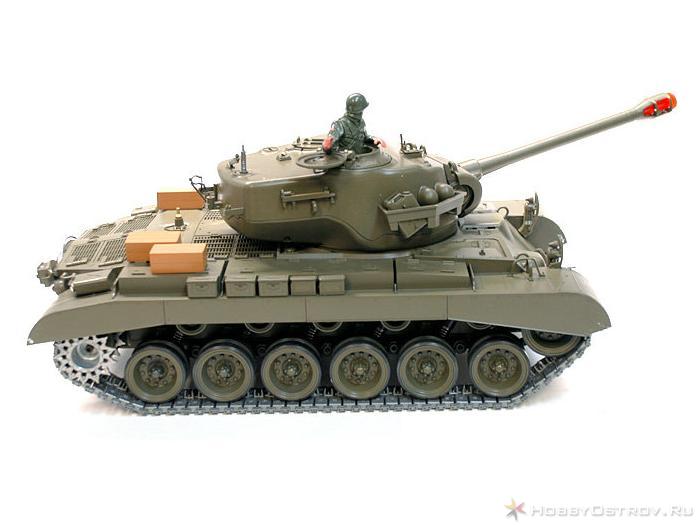
Long ago, I had a dream to make a tracked robot that could be remotely controlled. The main problem was the lack of directly tracked chassis. In the end, I had already decided to buy a radio-controlled tank for disassembly, but I was lucky; among the junk there was a Snow Leopard (Pershing) tank - USA M26 with burned-out electronics, but with a fully serviceable mechanical part. It was exactly what you need.
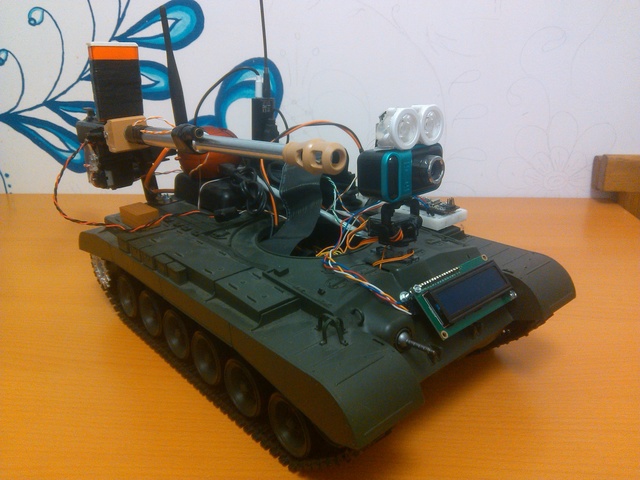
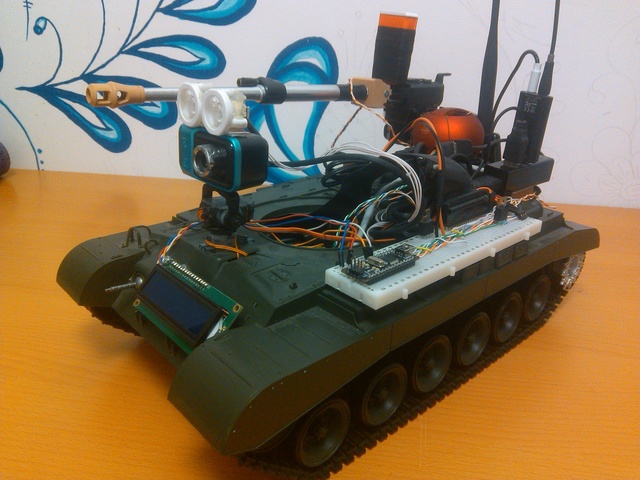
In pursuit of the chassis, two voltage regulators for collector motors, a tripod for a two-servo camera, a webcam with hardware support for mjpeg, and an external WiFi TP-LINK TL-WN7200ND card were purchased. A little later, a portable speaker, a Creative SoundBlaster Play USB sound and a simple microphone, as well as a pair of USB hubs were added to the device list to connect all this to the control module, which was Raspberry Pi. The turret from the tank was dismantled, it was very inconvenient to steer it, since all the regular mechanics were built on conventional engines without feedback.
Immediately make a reservation that the pictures were taken when the tank was almost ready, and not in the manufacturing process.
Power and wiring
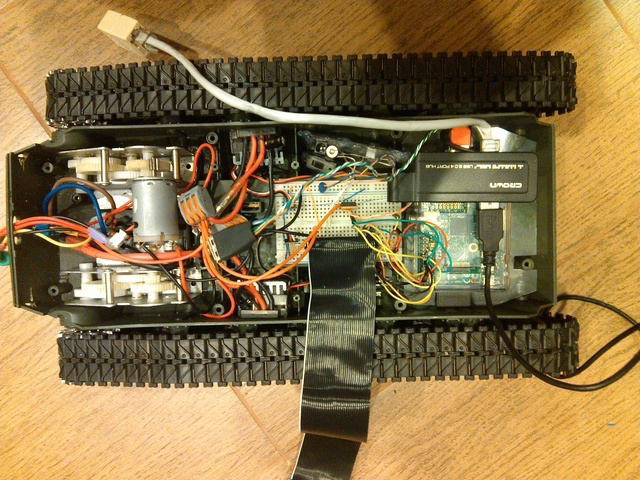
In the battery compartment, I crammed the largest Li-Po battery, which got in there. It turned out to be a two-canned 3300 mAh battery in a solid case, which is usually used in model cars. I was too lazy to solder, so for the whole switching a standard prototyping board with a step of 2.54 was used. Later, the second appeared on the top cover and a train that connected them. For each of the two engines, I had my own voltage regulator, which in the form of a bonus gives a stabilized power of about 5.6 volts. The Raspberry and the WiFi card were powered from one regulator, power from the second went to servo drives and a USB hub with peripherals.
We must make it move
We had to somehow start it. Raspberry was not chosen by chance. Firstly, it allows you to put a normal full linux, and secondly it has a bunch of GPIO legs, which, among other things, can generate a pulse signal for servo drives and stroke controllers. You can generate such a signal using the ServoBlaster utility. After launch, it creates the file / dev / servoblaster, into which you can write something like 0 = 150, where 0 is the channel number and 150 is the pulse length in tens of microseconds, that is, 150 is 1.5 milliseconds (for most servos, the range of values 700-2300 ms).
So, we connect regulators for 7 and 11 GPIO pins and start servoblaster with the command:
# servod --min=70 --max=230 --p1pins=7,11 Now, if you write the lines 0 = 230 and 1 = 230 in / dev / servoblaster, the tank will jerk forward.
We connect the camera
Riding back and forth was great, but I wanted to do it at least in the next room, and ideally through the Internet, so I had to adjust the video in real time. On the Internet there was a simple project called tinycamd . The project is a service that is controlled by http, can take screenshots and change camera settings. Not a lot, but I didn’t find anything better, so I had to remember C and add what the author didn’t realize, namely, broadcast the MJPEG stream over HTTP (by the way, how to share the modified source with the world?). It is crucial here that the JPEG comes from the camera itself, the Raspberry processor is not enough for this. In the end, I connected to the tank via ssh, opened the video stream through the browser, drove around the house and was happy until the channel sank. It was very funny to first look at the frozen frame, and then get everything that was stuck in an accelerated mode. Streaming realtime video over TCP is evil.
Upgrades, upgrades, etc.
Then there was a long process of writing the server and client parts in Python using the pygame library to receive events from the gamepad, finishing tinycamd to send a video stream via UDP and installing the camera on a tripod from the servos, so that it would be possible to look around. After that, the tank went on the first trip around the office beyond the line of sight. And at that moment it came to be understood that I wanted not only to watch the video, but also to have a two-way audio channel, for example, to ask colleagues to open the door or call the elevator.
Sound
To play the sound was used a cheap pocket USB column, bought in the supermarket for the promotion. It was connected with a simple microphone via USB zvukovuhu. The pyalsaaudio library was useful for working with sound. After finishing the server and client, it became possible to talk and listen while splitting up on a tank.
Shine
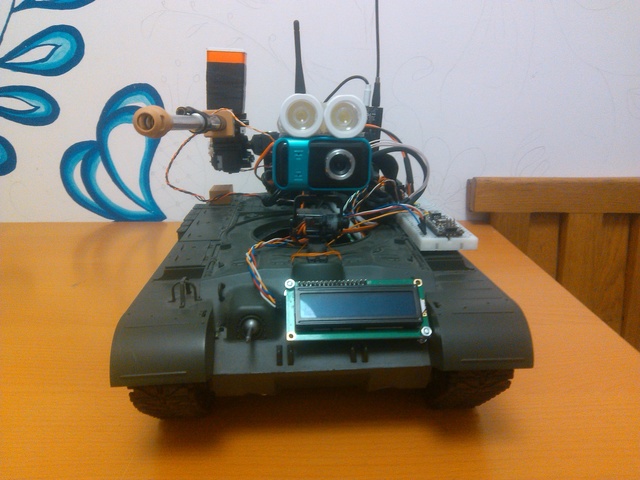
The next feature was the headlight. At some point, it became clear that the sensitivity of the camera can easily be missed and there is a chance to drive into the dark and not go. The first idea was infrared light. A line of infrared LEDs was assembled, but, as practice has shown, zero sense from them. The light is very bad and not enough. And ready-made infrared illuminators require 12v power (and I have only 2 banks, that is, 8v maximum), they eat a lot of current, they are cumbersome and expensive. As a result, it was decided to go into the visible range, two powerful white SMD LEDs and lenses for them were bought. To power the headlights, the work colleagues created a driver with current regulation, which was switched on via the field-effect transistor by supplying a unit to the Raspberry's GPIO leg. From now on, dark rooms have ceased to be an obstacle.
Battery, more precisely its charge level
At all stages it remained unclear how much more you can ride without killing the battery (Li-Po cannot be discharged lower than 3.3v per can). I did not find a way to measure the voltage using the Raspberry feet GPIO, so I put the Arduino Nano as a meter, which I immediately connected to the future an LCD screen with an I2C adapter. The battery is connected through a half divider to the analog leg of the Arduino, after which it remains only to calibrate the readings. Arduino traditionally communicates with the main module through the COM port, which is also displayed on the GPIO legs of the Raspberry.
What is a tank without a gun
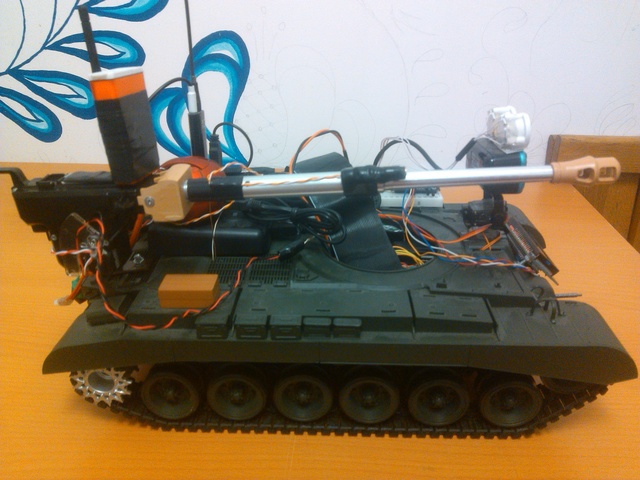
One of the last parts of the tank was the gun. The gun was bought in the same place, in the shop of radio-controlled models in the form of spare parts. True, it was intended for another model of the tank, but the essence of it has not changed. The gun is pneumatic, it has an engine that cocks the piston spring, and a contact that closes when fired. From the horizontal rotation of the gun, I have so far refused, so as not to demolish the whole kit, which is attached to the top cover, and for the vertical I used a powerful servo drive. To make it easier to steer, I made a turn of the gun in sync with the turn of the camera. That is, where we look (vertically), go there and shoot. For aiming at the gun barrel a laser LED was attached to the pointer. So that once again not to waste the battery and not to shine with a laser where it is not necessary, it was necessary to make the gun detachable. The process of the shot is also not entirely simple. It is necessary to turn on the power of the engine and wait for the contact to close, and then turn off the engine. As a result, the control of the shot and the power of the serva and the laser was hung on the arduin, and the signal for the servo is generated by the Raspberry. For the engine, the gun also had to carry out a separate power wire and turn it on gradually, using PWM, since otherwise the interference on power supply arrives and the Arduino goes into reboot. For the filing of shells, that is, balls, a box of TicTac dragees with a hole in the bottom was used.
Probably enough for the first time. If you like the article, I will slowly write the details in the following posts. And a few more photos in the end, as well as a fresh video. True, the quality was not very good, so I apologize to the aesthetes in advance. github link
Source: https://habr.com/ru/post/244407/
All Articles