Creative programming: openFrameworks - installation and example of music visualization
When was the last time you programmed in C ++?
Maybe this is your everyday work, and my last (until yesterday) project in C ++ was back in 2000 - a graduation project based on Visual Studio 4.2 (a good one, by the way, the system was), and has since moved to the web development - scripting languages.
')
So now I’m a beginner in C ++, but this didn’t stop me from deploying the infrastructure in a couple of hours, making and building a multimedia application in C ++ that visualizes music with different effects. And this helped me:
- open framework for creating interactive applications - openFrameworks
- free IDE Code :: Blocks
See what I did
It all started like this - after another listening to music from one composer from Samara, I thought - it would be interesting to try to make music visualization, and turned to Denis Perevalov (who has been creating various interactive art / performance systems for the first year) - he answered me that this is done without problems based on openFrameworks and that in the examples for his book (and he is the author of the book on openFrameworks), there is an implementation of such a task.
That is, I only needed to install the framework, refine and compile an example in C ++ ... This process will be installed, configured, and a brief description of openFrameworks.
openFrameworks is a system with which you can program an interactive multimedia application, that is, art, performances , etc., it is free, open and cross-platform system (linux, mac, win), and there are also versions for ARM (for example, for RPi), and builds for the iPhone and Android.
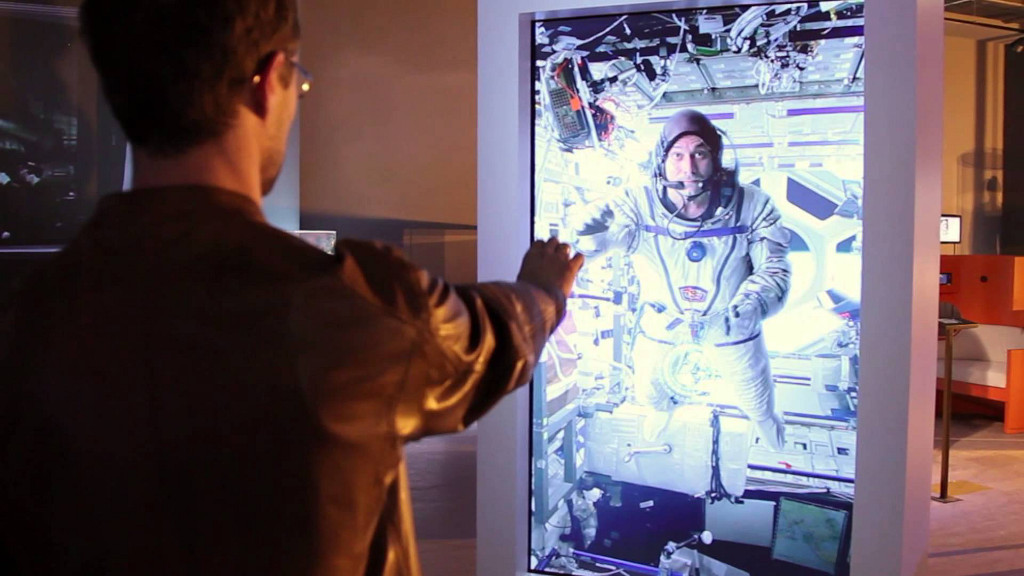
By the way, at KDPV - one of the installations based on openFrameworks (Seven Video Guides. Exhibited at the Exhibition of Economic Achievements in the exposition of the Polytechnic Museum. Moscow, 2014).
What is openFrameworks? This is a set of modules - for integration with Arduino, with kinektom, with OpenCV image recognition system, drawing 3D graphics, working with sound, cameras, etc. with which you can make an interactive application. And all this is based on C ++.
OpenFrameworks got into my field of vision when I went to a robotic installation created with its help.
The plan is:
- 1. Configure openFrameworks
- 2. Basic principles of openFrameworks application
- 3. Test case
1. Configure openFrameworks
Next steps:
- install openFrameworks (for CodeBlocks)
- install IDE CodeBlocks
- copying the openFrameworks libraries for the CodeBlocks compiler
Install openFrameworks
According to this download page, I chose the version of openFrameworks, for my OS and for the IDE on which I planned to work.

In my case, win and code :: blocks: download the archive of_v0.8.4_win_cb_release.zip
Unpack, the archive contains the following folders:
* addons
* apps
* docs
* examples
* export
* libs
* other
* projectGenerator
* scripts
These are openFrameworks C ++ libraries, examples, add-ons, etc.
In order to create an openFrameworks application, it is better to use IDE.
Installing IDE CodeBlocks
As an IDE, I decided to choose code :: blocks (visual studio is still too big for me now)
CodeBlocks is a free and open IDE based on the wxWidgets cross-platform GUI library. According to this page openframeworks.cc/setup/codeblocks download IDE CodeBlocks. Release Version 12.11 From here . This build goes along with MinGW - an open development environment for a win platform.
This is what IDE CodeBlocks looks like.

Copying the openFrameworks libraries for the CodeBlocks compiler
An important point is that in order for IDF CodeBlocks to successfully build openFrameworks projects, you need to copy additional files to MinGW.
Here is the item .
Download Additions for Code :: Blocks to work with openFrameworks zip archive.
We unpack it in a temporary folder, and copy it into the appropriate folders in the installed CodeBlocks, according to this instruction:
Add the contents of the folder "add_to_codeblocks_mingw_include" into "... \ CodeBlocks \ MinGW \ include"
Add the contents of the folder "add_to_codeblocks_mingw_lib" into "... \ CodeBlocks \ MinGW \ lib"
That's it, now we are ready to build openFrameworks projects!
2. Basic principles of openFrameworks application
Build a test project
Open the test project, for this we select from the start page of the IDE CodeBlocks, select "Open an existing project ..." (or in File - Import Project - Dev-C ++ project ... - and select the file type *. *)
Go to the folder where we deployed openFrameworks, go in examples / empty / emptyExample, and open the project file emptyExample.
This is what an IDE looks like after opening a project:

Let's try to start the project right away - the icon on the image is indicated by an arrow or press F9 - RUN.
If the application is not assembled, the assembly will be started (after your confirmation) and after the assembly is completed - the application starts.
If everything is configured correctly, then at the end of the build process a console window will open, and we will see this window:

Congratulations! So everything is set up correctly. And in the bin daddy appeared application emptyExample.exe, which you can already run independently.
Files
Now let's look at the files of our emptyExample project, they are located in the src folder:
* main.cpp
* ofApp.h
* ofApp.cpp
Main.cpp file:
Hidden text
#include "ofMain.h" #include "ofApp.h" //======================================================================== int main( ){ ofSetupOpenGL(1024,768, OF_WINDOW); // <-------- setup the GL context // this kicks off the running of my app // can be OF_WINDOW or OF_FULLSCREEN // pass in width and height too: ofRunApp( new ofApp()); } It defines the window of our application, and then creates an instance of the class ofApp.
File ofApp.h :
Hidden text
#pragma once #include "ofMain.h" class ofApp : public ofBaseApp{ public: void setup(); void update(); void draw(); void keyPressed(int key); void keyReleased(int key); void mouseMoved(int x, int y); void mouseDragged(int x, int y, int button); void mousePressed(int x, int y, int button); void mouseReleased(int x, int y, int button); void windowResized(int w, int h); void dragEvent(ofDragInfo dragInfo); void gotMessage(ofMessage msg); }; This class defines our class ofApp, inherited from ofBaseApp. And methods.
The main application class ofApp.cpp :
Hidden text
#include "ofApp.h" //-------------------------------------------------------------- void ofApp::setup(){ } //-------------------------------------------------------------- void ofApp::update(){ } //-------------------------------------------------------------- void ofApp::draw(){ } //-------------------------------------------------------------- void ofApp::keyPressed(int key){ } //-------------------------------------------------------------- void ofApp::keyReleased(int key){ } //-------------------------------------------------------------- void ofApp::mouseMoved(int x, int y){ } //-------------------------------------------------------------- void ofApp::mouseDragged(int x, int y, int button){ } //-------------------------------------------------------------- void ofApp::mousePressed(int x, int y, int button){ } //-------------------------------------------------------------- void ofApp::mouseReleased(int x, int y, int button){ } //-------------------------------------------------------------- void ofApp::windowResized(int w, int h){ } //-------------------------------------------------------------- void ofApp::gotMessage(ofMessage msg){ } //-------------------------------------------------------------- void ofApp::dragEvent(ofDragInfo dragInfo){ } As we can see, nothing has been implemented, we have seen just an empty, but working openFrameworks application.
Work cycle of openFrameworks application
The main methods of our class are:
  void setup ();
		 void update ();
		 void draw ();
The architecture of any openFrameworks application is as follows:

The setup method contains settings, resource preparation, and so on. This method is executed once at the start of the application, before the start of the main loop.
The main loop is update and draw, where in the first method, only calculations occur, and in the second draw, drawing. And after that the cycle repeats.
Exit occurs by pressing Esc.
3. Test case
Here we come to our task - the visualization of music.
This site provides examples of the book Mastering openFrameworks: Creative Coding Demystified. The files themselves can be downloaded for free from the book card (after registration).
Here are some video examples .
Basic example Dancing Cloud
And here is an example that I wanted to base and modify - called the Dancing Cloud (06-Sound / 06-DancingCloud):
I downloaded this example, and unpacked the archive in the root of my openFrameworks folder - this is important, because project folder should be 2 levels lower.
Here is the complete source code, Project 06-Sound / 06-DancingCloud:
main.cpp :
Hidden text
#include "testApp.h" #include "ofAppGlutWindow.h" //-------------------------------------------------------------- int main(){ ofAppGlutWindow window; // create a window // set width, height, mode (OF_WINDOW or OF_FULLSCREEN) ofSetupOpenGL(&window, 1024, 768, OF_WINDOW); ofRunApp(new testApp()); // start the app } testApp.h :
Hidden text
#pragma once #include "ofMain.h" /* This example draws points cloud and plays music track. Also it analyzes music spectrum and use this data for controlling the radius and shuffle of the cloud. It's the example 06-DancingCloud from the book "Mastering openFrameworks: Creative Coding Demystified", Chapter 6 - Working with Sounds Music track "surface.wav" by Ilya Orange (soundcloud.com/ilyaorange) */ class testApp : public ofBaseApp{ public: void setup(); void update(); void draw(); void mousePressed(int x, int y, int button); ofSoundPlayer sound; //Sound sample void keyPressed(int key); void keyReleased(int key); void mouseMoved(int x, int y); void mouseDragged(int x, int y, int button); void mouseReleased(int x, int y, int button); void windowResized(int w, int h); void dragEvent(ofDragInfo dragInfo); void gotMessage(ofMessage msg); }; testApp.cpp
Hidden text
#include "testApp.h" const int N = 256; //Number of bands in spectrum float spectrum[ N ]; //Smoothed spectrum values float Rad = 500; //Cloud raduis parameter float Vel = 0.1; //Cloud points velocity parameter int bandRad = 2; //Band index in spectrum, affecting Rad value int bandVel = 100; //Band index in spectrum, affecting Vel value const int n = 300; //Number of cloud points //Offsets for Perlin noise calculation for points float tx[n], ty[n]; ofPoint p[n]; //Cloud's points positions float time0 = 0; //Time value, used for dt computing //-------------------------------------------------------------- void testApp::setup(){ //Set up sound sample sound.loadSound( "surface.wav" ); sound.setLoop( true ); sound.play(); //Set spectrum values to 0 for (int i=0; i<N; i++) { spectrum[i] = 0.0f; } //Initialize points offsets by random numbers for ( int j=0; j<n; j++ ) { tx[j] = ofRandom( 0, 1000 ); ty[j] = ofRandom( 0, 1000 ); } } //-------------------------------------------------------------- void testApp::update(){ //Update sound engine ofSoundUpdate(); //Get current spectrum with N bands float *val = ofSoundGetSpectrum( N ); //We should not release memory of val, //because it is managed by sound engine //Update our smoothed spectrum, //by slowly decreasing its values and getting maximum with val //So we will have slowly falling peaks in spectrum for ( int i=0; i<N; i++ ) { spectrum[i] *= 0.97; //Slow decreasing spectrum[i] = max( spectrum[i], val[i] ); } //Update particles using spectrum values //Computing dt as a time between the last //and the current calling of update() float time = ofGetElapsedTimef(); float dt = time - time0; dt = ofClamp( dt, 0.0, 0.1 ); time0 = time; //Store the current time //Update Rad and Vel from spectrum //Note, the parameters in ofMap's were tuned for best result //just for current music track Rad = ofMap( spectrum[ bandRad ], 1, 3, 400, 800, true ); Vel = ofMap( spectrum[ bandVel ], 0, 0.1, 0.05, 0.5 ); //Update particles positions for (int j=0; j<n; j++) { tx[j] += Vel * dt; //move offset ty[j] += Vel * dt; //move offset //Calculate Perlin's noise in [-1, 1] and //multiply on Rad p[j].x = ofSignedNoise( tx[j] ) * Rad; p[j].y = ofSignedNoise( ty[j] ) * Rad; } } //-------------------------------------------------------------- void testApp::draw(){ ofBackground( 255, 255, 255 ); //Set up the background //Draw background rect for spectrum ofSetColor( 230, 230, 230 ); ofFill(); ofRect( 10, 700, N * 6, -100 ); //Draw spectrum ofSetColor( 0, 0, 0 ); for (int i=0; i<N; i++) { //Draw bandRad and bandVel by black color, //and other by gray color if ( i == bandRad || i == bandVel ) { ofSetColor( 0, 0, 0 ); //Black color } else { ofSetColor( 128, 128, 128 ); //Gray color } ofRect( 10 + i * 5, 700, 3, -spectrum[i] * 100 ); } //Draw cloud //Move center of coordinate system to the screen center ofPushMatrix(); ofTranslate( ofGetWidth() / 2, ofGetHeight() / 2 ); //Draw points ofSetColor( 0, 0, 0 ); ofFill(); for (int i=0; i<n; i++) { ofCircle( p[i], 2 ); } //Draw lines between near points float dist = 40; //Threshold parameter of distance for (int j=0; j<n; j++) { for (int k=j+1; k<n; k++) { if ( ofDist( p[j].x, p[j].y, p[k].x, p[k].y ) < dist ) { ofLine( p[j], p[k] ); } } } //Restore coordinate system ofPopMatrix(); } //-------------------------------------------------------------- void testApp::keyPressed(int key){ } //-------------------------------------------------------------- void testApp::keyReleased(int key){ } //-------------------------------------------------------------- void testApp::mouseMoved(int x, int y){ } //-------------------------------------------------------------- void testApp::mouseDragged(int x, int y, int button){ } //-------------------------------------------------------------- void testApp::mousePressed(int x, int y, int button){ } //-------------------------------------------------------------- void testApp::mouseReleased(int x, int y, int button){ } //-------------------------------------------------------------- void testApp::windowResized(int w, int h){ } //-------------------------------------------------------------- void testApp::gotMessage(ofMessage msg){ } //-------------------------------------------------------------- void testApp::dragEvent(ofDragInfo dragInfo){ } Comment from Denis (author of the book), about the algorithm that visualizes music:
300 points (const int n = 300;) move along the Perlin noise trajectories, and the adjacent points are connected by segments.
Cloud radius and speed of movement are two parameters that are taken from sound analysis.
Sound analysis is as follows: the original sound is transformed into a spectrum (using the windowed Fourier transform). Two spectrum values are selected, which become the two parameters that control the movement of a cloud of points. These two frequencies are shown on the spectrum in black.
We look at the differences from our emptyExample.
main.cpp is identical in nature.
In testApp.h, the sound attribute of the class ofSoundPlayer has been added:
ofSoundPlayer sound; //Sound sample ofSoundPlayer is the base class for working with sound, docs .
The most interesting is in testApp.cpp.
Here are the variables that are used to implement the logic:
const int N = 256; // float spectrum[ N ]; // float Rad = 500; // float Vel = 0.1; // int bandRad = 2; // Rad int bandVel = 100; // Vel const int n = 300; // // float tx[n], ty[n]; ofPoint p[n]; // float time0 = 0; // dt - This is what is written in the testApp :: setup () method, which initializes music, variables for displaying the spectrum, and cloud points:
void testApp::setup(){ //Set up sound sample sound.loadSound( "surface.wav" ); sound.setLoop( true ); sound.play(); //Set spectrum values to 0 for (int i=0; i<N; i++) { spectrum[i] = 0.0f; } //Initialize points offsets by random numbers for ( int j=0; j<n; j++ ) { tx[j] = ofRandom( 0, 1000 ); ty[j] = ofRandom( 0, 1000 ); } } We see that the music is loaded, and immediately begins to play, and the cycle.
In the testApp :: update () method, all the “magic” of calculating the point distribution occurs.
Hidden text
void testApp::update(){ //Update sound engine ofSoundUpdate(); //Get current spectrum with N bands float *val = ofSoundGetSpectrum( N ); //We should not release memory of val, //because it is managed by sound engine //Update our smoothed spectrum, //by slowly decreasing its values and getting maximum with val //So we will have slowly falling peaks in spectrum for ( int i=0; i<N; i++ ) { spectrum[i] *= 0.97; //Slow decreasing spectrum[i] = max( spectrum[i], val[i] ); } //Update particles using spectrum values //Computing dt as a time between the last //and the current calling of update() float time = ofGetElapsedTimef(); float dt = time - time0; dt = ofClamp( dt, 0.0, 0.1 ); time0 = time; //Store the current time //Update Rad and Vel from spectrum //Note, the parameters in ofMap's were tuned for best result //just for current music track Rad = ofMap( spectrum[ bandRad ], 1, 3, 400, 800, true ); Vel = ofMap( spectrum[ bandVel ], 0, 0.1, 0.05, 0.5 ); //Update particles positions for (int j=0; j<n; j++) { tx[j] += Vel * dt; //move offset ty[j] += Vel * dt; //move offset //Calculate Perlin's noise in [-1, 1] and //multiply on Rad p[j].x = ofSignedNoise( tx[j] ) * Rad; p[j].y = ofSignedNoise( ty[j] ) * Rad; } } Here is the drawing method; here, according to the calculated data, the spectrum, points of the cloud, and lines between the points are displayed (provided that they are closer than float dist = 40):
void testApp::draw(){ ofBackground( 255, 255, 255 ); //Set up the background //Draw background rect for spectrum ofSetColor( 230, 230, 230 ); ofFill(); ofRect( 10, 700, N * 6, -100 ); //Draw spectrum ofSetColor( 0, 0, 0 ); for (int i=0; i<N; i++) { //Draw bandRad and bandVel by black color, //and other by gray color if ( i == bandRad || i == bandVel ) { ofSetColor( 0, 0, 0 ); //Black color } else { ofSetColor( 128, 128, 128 ); //Gray color } ofRect( 10 + i * 5, 700, 3, -spectrum[i] * 100 ); } //Draw cloud //Move center of coordinate system to the screen center ofPushMatrix(); ofTranslate( ofGetWidth() / 2, ofGetHeight() / 2 ); //Draw points ofSetColor( 0, 0, 0 ); ofFill(); for (int i=0; i<n; i++) { ofCircle( p[i], 2 ); } //Draw lines between near points float dist = 40; //Threshold parameter of distance for (int j=0; j<n; j++) { for (int k=j+1; k<n; k++) { if ( ofDist( p[j].x, p[j].y, p[k].x, p[k].y ) < dist ) { ofLine( p[j], p[k] ); } } } //Restore coordinate system ofPopMatrix(); } My modifications
I took the music volfworks: soundcloud.com/volfworks
The author kindly agreed to my use of his composition Star.
The first thing - I replaced wav with mp3 - openFrameworks supports mp3. I also did streaming playback (otherwise, all 8MB should be immediately loaded - added true to the second parameter, docs ).
sound.loadSound( "zvezda.mp3", true ); Added loading background image:
stars.loadImage("stars.jpg"); Changed the color scheme, made the effects of transparency dependent on time.
Fragment from ofApp :: draw ():
// , // bg_transparent ofEnableAlphaBlending(); ofSetColor(0, 0, 0, bg_transparent); ofRect(0, 0, 1000, 700); ofDisableAlphaBlending(); // , ofSetHexColor(0x606060); ofDrawBitmapString("Music by: volfworks", 800,610); The whole project is posted on github: github.com/nemilya/of_volfworks_example
Video creation
There were some difficulties in this, and ultimately it was performed using Camtasia Recorder.
Links
The main site of the project: openframeworks.cc there are provided fairly good tutorials.
If you are working with openFrameworks, or it is interesting to try, then I invite you to the Russian-speaking group on openFrameworks .
Source: https://habr.com/ru/post/244265/
All Articles