Evolution: graphics and mechanics
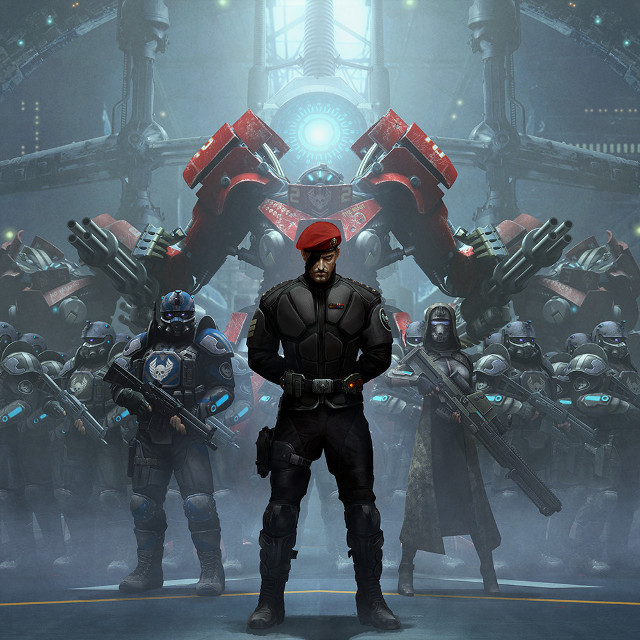
In January of this year, our gaming department released the mobile game Evolution: Battle for Utopia. The game was well received, people like to play it. I often see people with "Evolution" in the subway. I even started to make wishes when I find myself between players. And in this post, prepared according to my report at KRI 2014, I would like to tell you more about the development process and the features of the “Evolution”.
Recently we have released a large content update “Black Legion”. It naturally attracted a lot of new players, but most importantly, we returned most of our players who have already gone through the main storyline. In this article I will talk about how our game mechanics developed during the development process. Briefly mention the third-party tools that we used. And I will pay more attention to the graphic "chips", I will tell you how to get real dynamic shadows and dynamic lighting on weak devices.
Game mechanics
At the beginning of development, in the first concepts, “Evolution” looked quite different than it is now. We had two cameras, split screen, and they displayed two armies, which were located quite far from each other. This distance between them was not felt at all. For example, one army throws grenades. They fly to the center of the screen, disappear for a while and then appear on the second part of the screen. The players were uncomfortable. We did some research, drew various schemes, brainstormed, invented a new mechanic and gameplay. Then they slowly began to realize all this.
')
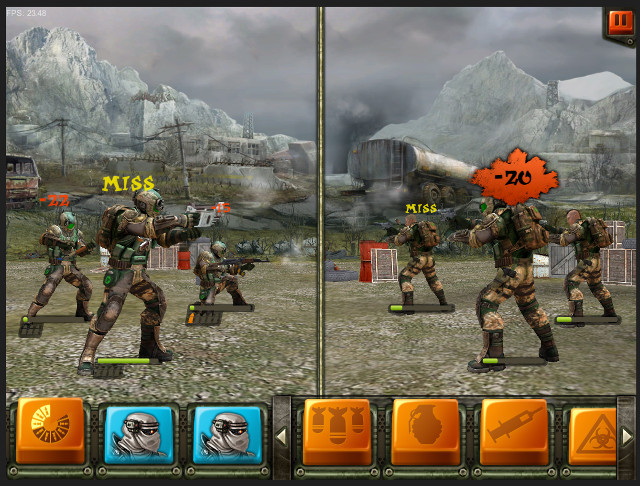
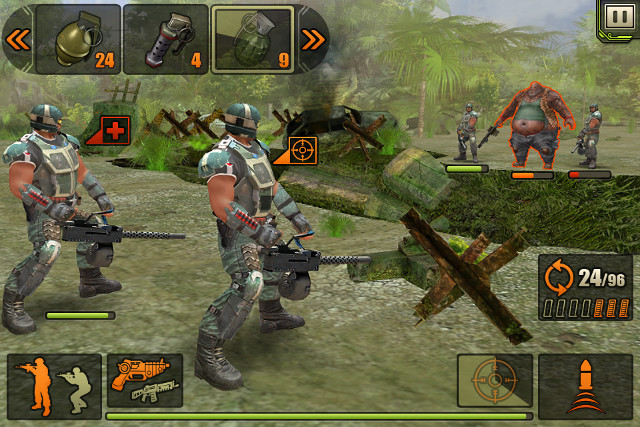
In earlier versions, we didn't even have auto-fire. We forced the player to constantly press the appropriate button to shoot at the selected opponent. Plus, we had a sight imitating the dispersion of bullets during recoil: you shoot, the scope moves apart and begins to gradually converge. Until it is reduced, you do a little less damage. It was all too difficult, even for our hardcore audience. At this time, the game "Dead Trigger 2" was released. This is the usual First Person Shooter. But, to our surprise, auto-fire was introduced in this game. We looked, tried to introduce a similar control scheme in Evolution and came to such mechanics, which is presented in the game today.
Do not be afraid to develop your project. This is the price of the original gameplay that you have to pay as developers. If you have an original game mechanic, then you need to check it on real people, you may have to give up something, you will have to add something.
Third Party Tools
In our game, almost 80% of all game mechanics are built around a GUI. In “Juggernaut” we used our own developed GUI system, it still works in some state there. But when we designed the Evolution, we looked at what was offered on the market. So we found NGUI and compared its functionality with what we had. After that, they came to the conclusion that we will either have to complete our system for several months, or we can take a ready-made solution.
We use NGUI version 2.2.3, which had several bugs. We have a lot of things in it patch. For example, they wrote an automatic scaling for different resolutions and a special atlas manager that unloads large textures when changing screens. Due to this, the lags disappeared when switching screens and stopped falling from memory.
Look at these buildings, they are animated in the game. This is the usual flash animation. To import it, we used another tool called uniSWF . They interact well with NGUI.
Another great framework we used in Evolution is PlayMaker . When we started to design the “Evolution”, we needed some kind of technology for animated and, in general, for gaming machines of states (Finite state machines or finite state machines). The technology of Mecanim at that time was in its infancy, and did not allow us to do something very necessary for us, namely, to switch animation sets. The player can take into battle two types of weapons - a pistol and something heavier: a machine gun, a shotgun, etc. Mecanim was not allowed to do this in that state of development. Therefore, we have taken the PlayMaker technology as a basis, which not only allows us to describe a good state machine for animation, but also allows us to add some logic from the scripts.
Lighting system
For Evolution, we wrote our own lighting system. In general, why write something of your own, if everything is already ready in the engine, just take it and use it? The thing is that the systems built into Unity are pretty versatile. For maintenance of these systems have to pay performance. Especially if the target device is poorly productive. In fact, you need to pay for a universal lighting system with your FPS. Therefore, we abandoned this approach in favor of the so-called Dynamic Light Probe. We also completely abandoned the conventional dynamic light sources that Unity has. We cover all static geometry using Lightmap. For the characters we use a special Light Probe, and our own shader.
Light Probe is a spherical harmonic containing information about the light at a specified point. There are dozens of such Light Probe on stage. The engine selects the 4 closest to the character Light Probe and interpolates them into one. Then we add light to it from our special dynamic light sources. Thus, it turns out Dynamic Light Probe - i.e. spherical harmonic with the addition of dynamic light. After this, the rendering of the character with a shader that can work with spherical harmonics begins.
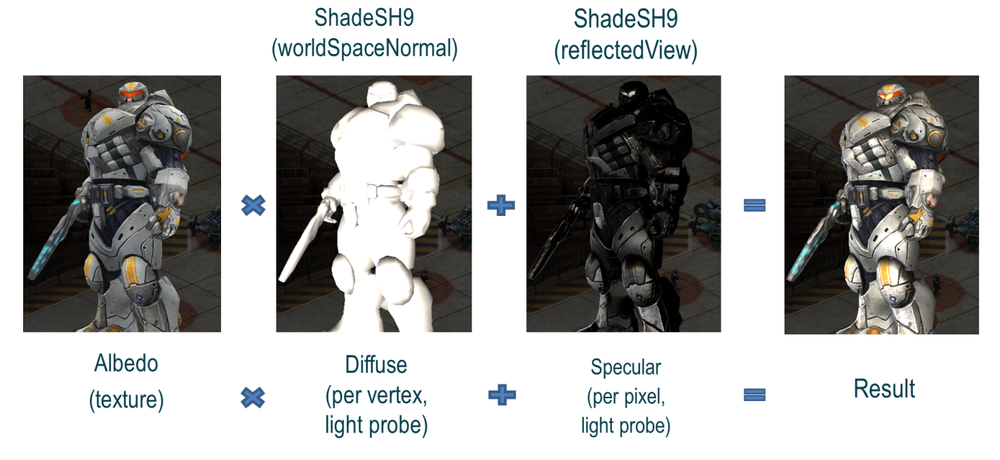
If you imagine a spherical harmonic simplified, then its functionality will be similar to the cubic texture (Cube map). In the shader, we sample the spherical harmonics by vector (similar to the Cube map). For diffuse illumination we use the surface normal vector, for specular - the reflected vector of gaze.
Diffuse lighting is considered to be in a vertex shader, reflected - in a pixel shader. Thus, we are for one Draw Call render character model with dynamic lighting from multiple light sources.
Shadows
Before joining Mail.Ru Group, for several years I developed my own engine, and managed to work out almost all algorithms for rendering shadows and lighting, and I understand how Unity and shadow rendering works in particular. It uses shadow mapping, or rather PSSM - parallel split shadow mapping. It is not possible on a weak device to get a high FPS using this technique.
Therefore, I have developed three systems to try which one will be more productive. I stopped at the planar-shadows algorithm, or shadows, which are drawn on a plane. This is the easiest algorithm, but at the same time the most productive.
What are planar shadows? This is a rendering of the same model, only flattened along one of the axes to zero. The selection of the scaling axis depends on the angle of the light source.
On the Internet you can find a bunch of examples of how to calculate such a scaling matrix. I would like to focus on other aspects. First is the shadow blending. If you blend it directly, you get such artifacts as in the following figure.
Where several polygons intersect, they blend several times. And the shadow turns out in some places more darkly. How to deal with it? We draw all these shadows first in the stencil buffer, disabling the record in the back buffer. Then, when all the shadows are in the stencil buffer, we make the final rendering pass, on which we fill the entire screen with the desired color, taking into account the stencil mask. We get the correct dynamic shadows, which in no way (!) Affect the FPS. Secondly, planar shadows can only be rendered on flat surfaces (no wonder they are called planar shadows).
With this fight does not make sense, in our opinion. We simply reworked the content so that the shadows always fall on a continuous plane.
Post effects
The standard post effects solution used in all Unity examples is the use of the OnRenderImage method. Its essence is as follows: not only programmers work with Unity, but also game designers, artists, animators and other specialists. They all have different qualifications, and Unity developers are forced to make universal decisions so that users simply take the engine out of the box and get some more or less working post-process. Because of this versatility, Unity resorted to the following technique - they copy the back buffer into a separate texture for you and give it to you for processing. What is the problem here? Copying back buffer to a texture on iPad 2 will kill more than half of the FPS. Even a simple method call OnRenderImage without further processing reduces performance by more than 2 times. How to deal with it? We specify a separate render texture for the camera and process it in the OnPostRender method. The only thing that needs to be done additionally is to draw the result in the back buffer.
Also, if possible, if you can figure out how to replace such a powerful pixel post-process with some kind of geometric effects, then this should be done, because geometric effects work obviously faster.
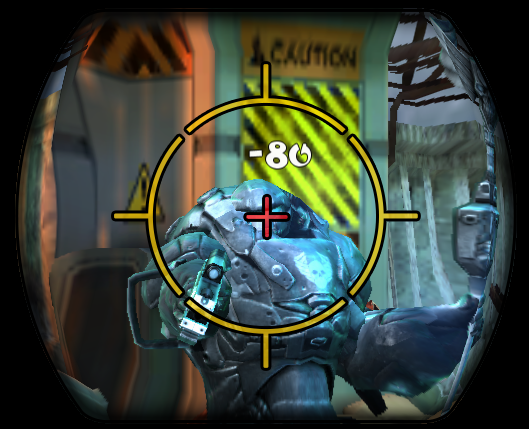
A couple of words about the geometric post-process: since we still render the whole scene into our render-texture, we can later use it as we like. In this case, by drawing a sniper scope, we impose a texture on a specially prepared mesh, whose texture coordinates are stretched, in such a way that it creates the impression of refraction at the edges. In dynamics, it looks as if you are looking through a lens. This post process does not affect the FPS at all.
With these methods and tricks we got our 30 FPS (and higher) on iPad 2 and iPhone 4S. With some effort, we got, practically, free-of-charge dynamic lighting and shadows in terms of performance. We have come a long way to develop, have changed a lot of mechanics and approaches to get the game that you see now. If you have any questions, I will be glad to answer them in the comments.
Presentation with KRI:
Alexander Chernyakov
IT Territory Programmer, Mail.Ru Group Studios
Source: https://habr.com/ru/post/243737/
All Articles