Moving from online to offline IDE when programming Nucleo-F401RE
 I liked the Nucleo platform and I purchased the Nucleo-F401RE board.
There was no desire to go deep into the internal structure of the microcontroller, and mbed attracted my attention. This library claims support for this card.
On Habré there are already publications on the quick start Nucleo + mbed ( "Quick Start ST Nucleo-F401 + Quick Start Guide" , "STM32 Nucleo. Connect the TFT LCD based on the ILI9341 chip" ). But all examples are given for online IDE. But I didn’t like that option and started looking for a desktop IDE.
')
I tried Eclipse on an article from mbed.org. But since the example was written for another controller, and I did not succeed in adapting the instruction for the STM, this option was dropped.
Then he began to look towards CooCox CoIDE . Unfortunately, CoIDE does not officially support the STM32F401RE controller. But try, so try.
So, download CoIDE . At the bottom of the page there are two links: the first is loaded CoCenter. This is such a launcher that allows you to manage the installation and update of all programs offered by the CooCox website. I only needed CoIDE, so I used the second link. This program works only in the Windows environment, but it suited me.
CoBuilder and CoDebugger are integrated into CoIDE. But the compiler is missing and must be installed separately.
On the same page there is a link to the instructions for setting up an external compiler, where the installation of GCC ARM Embedded is recommended. From here we download the installation package for Windows.
Next, go to the installation. Install CoIDE. I chose the path to install "c: \ CooCox \ CoIDE \" in order to avoid problems with the Cyrillic alphabet in the paths. Then install the compiler. I do not plan to use this compiler for other purposes, so the installation path chose "c: \ CooCox \ GNU Tools ARM Embedded \ 4.8 2014q3 \".
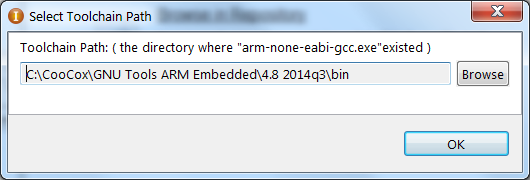
Launch CoIDE, select the menu item “Project - Select Toolchain Path”:

and specify the path to the compiler "C: \ CooCox \ GNU Tools ARM Embedded \ 4.8 2014q3 \ bin".
Everything, you can write programs.
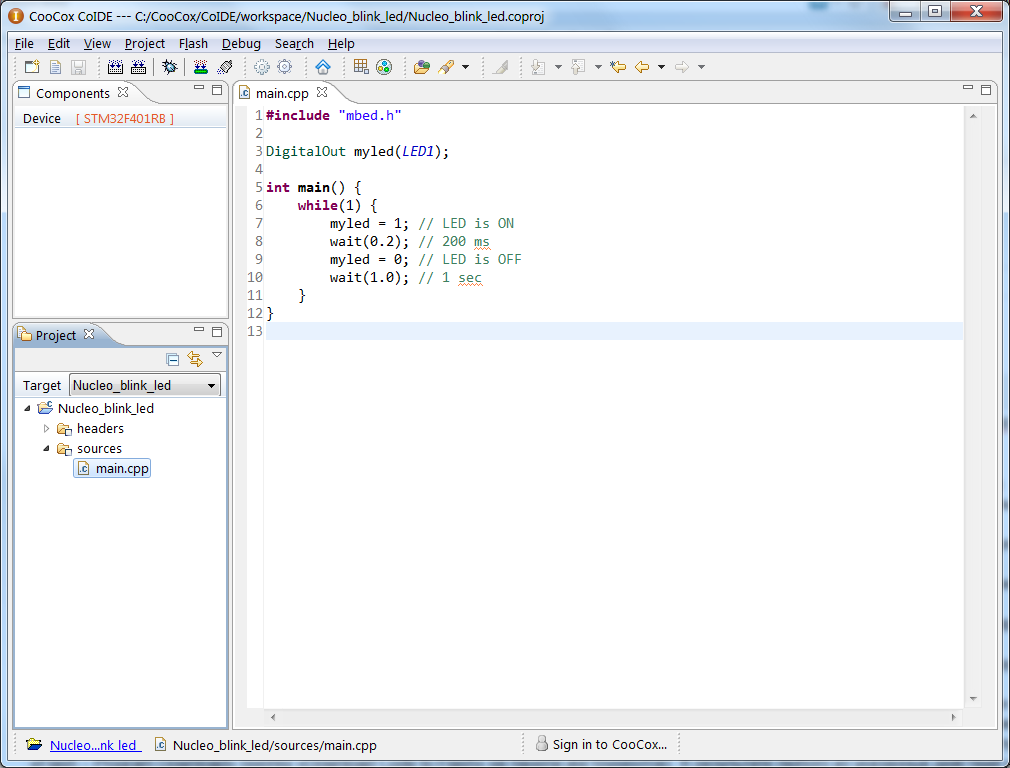
But I wanted to use the mbed library. This is where the quick start articles will come in handy. We go to the site and select any of your existing projects. I will work with the most beloved project “Nucleo_blink_led”.
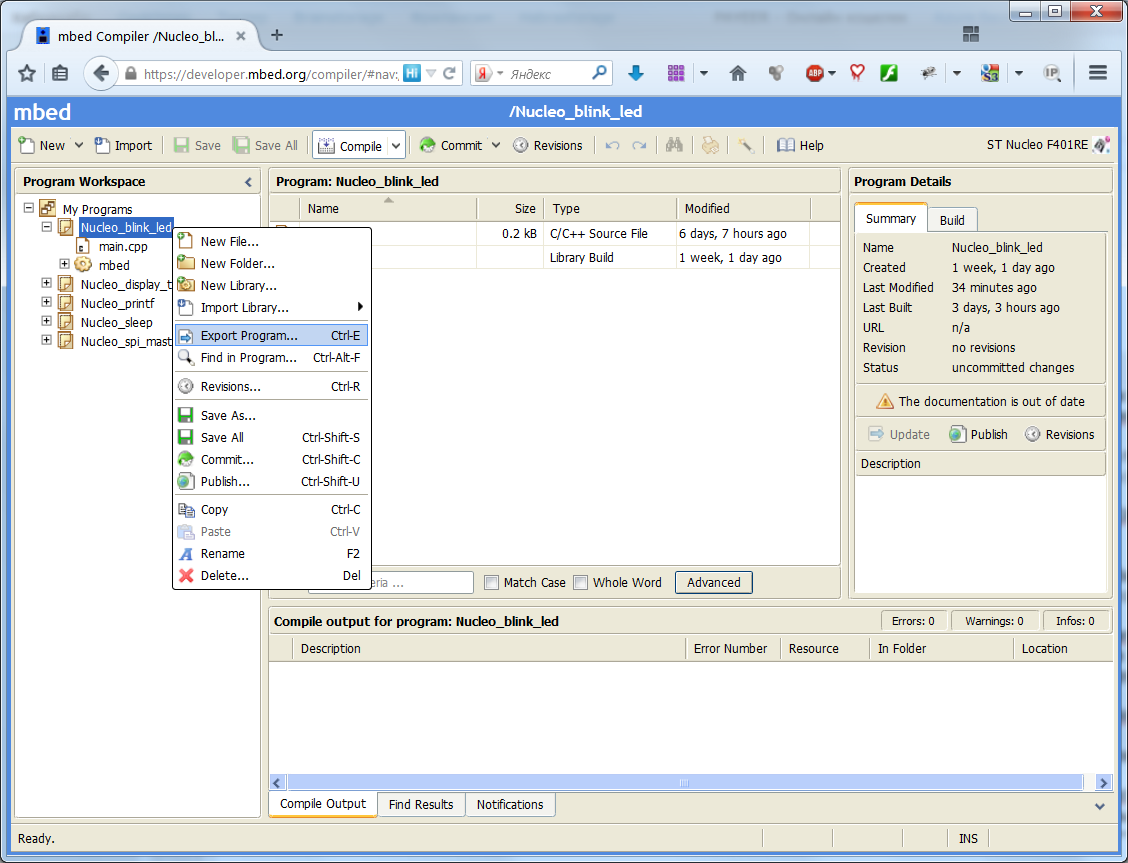
We select this project in the tree and, by pressing the right mouse button, in the opened menu, select the item “Export Program ...”. Next, we indicate the target platform (“ST Nucleo F401RE”) and our IDE (“CooCox CoIDE”).

Press the “Export” button and get the archive “Nucleo_blink_led_coide_nucleo_f401re.zip”. The archive will have a folder with the name of our project “Nucleo_blink_led”, which must be unpacked into the folder with the CoIDE projects. In my case, this is “c: \ CooCox \ CoIDE \ workspace \”.
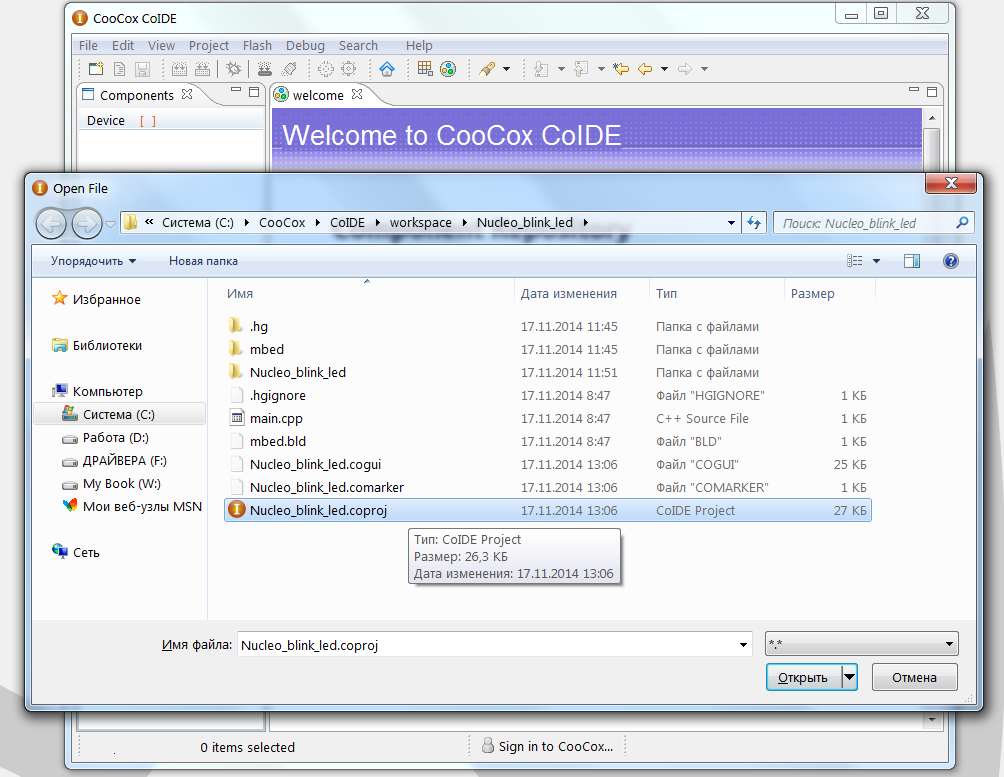
In the CoIDE we started, select the menu item “File - Open File ...” and in the folder “C: \ CooCox \ CoIDE \ workspace \ Nucleo_blink_led” select the file “Nucleo_blink_led.coproj”.
Our project is open and ready for compilation.
Select the menu item "Project - Build" (button Build on the toolbar or the F7 key). In the console that appears, we should get the message "BUILD SUCCESSFUL".

Then there are several ways - we can, as in the case of the online IDE, copy the resulting file “Nucleo_blink_led.bin” from the “c: \ CooCox \ CoIDE \ workspace \ Nucleo_blink_led \ Nucleo_blink_led \ Debug \ bin \” folder to our board, or we can start the debugging mode by selecting the “Debug - Debug” menu item (the “Start Debug” button on the toolbar or Ctrl + F5), or simply flash the controller with the finished program by selecting the “Flash - Program Download” menu item (the “Download Code to Flash "on the toolbar).

As a result of any of the above actions, the green LD2 LED should blink cheerfully on our board.
You could stop at this, but blinking with one LED is boring.
Therefore, we will assemble a not complicated scheme with the seven-segment indicator CA56-12SRWA. The legs of the indicator with numbers 12, 9, 8, 6 control the inclusion of the digits of the indicator 1, 2, 3, 4 when high voltage is applied to them. The rest of the legs are responsible for the individual segments of each familiarity and points and must be connected through the current-limiting resistor to the outputs with a low voltage level. Segments are managed simultaneously in all digits, so we will make a dynamic indication.
Main.c code for dynamic display.
#include "mbed.h" #define pause 0.005 void disp(char n); DigitalOut seg1(D8); DigitalOut seg2(D3); DigitalOut seg3(D5); DigitalOut seg4(D7); DigitalOut seg5(D9); DigitalOut seg6(D2); DigitalOut seg7(D4); DigitalOut seg8(D6); //dp DigitalOut dig1(D10); DigitalOut dig2(D11); DigitalOut dig3(D12); DigitalOut dig4(D13); int main() { dig1=0; // 1 dig2=0; // 2 dig3=0; // 3 dig4=0; // 4 seg8=1; // // while(1) { disp('0'); // '0' dig1=1; // wait(pause); // dig1=0; // disp('1'); // '1' dig2=1; // wait(pause); // dig2=0; // disp('2'); // '2' dig3=1; // wait(pause); // dig3=0; // disp('3'); // '3' dig4=1; // wait(pause); // dig4=0; // } } // void disp(char n) { switch (n) { case '0': // '0' seg1=0; // a ( ) seg2=0; // b ( ) seg3=0; // c ( ) seg4=0; // d ( ) seg5=0; // e ( ) seg6=0; // f ( ) seg7=1; // g ( ) break; case '1': seg1=1; seg2=0; seg3=0; seg4=1; seg5=1; seg6=1; seg7=1; break; case '2': seg1=0; seg2=0; seg3=1; seg4=0; seg5=0; seg6=1; seg7=0; break; case '3': seg1=0; seg2=0; seg3=0; seg4=0; seg5=1; seg6=1; seg7=0; break; default: seg1=1; seg2=1; seg3=1; seg4=1; seg5=1; seg6=1; seg7=1; break; } } All comments are in the text of the program.
We are flashing the controller and our indicator displays the text "0123".
The program does not claim perfection and, if necessary, on the website mbed.org you can find ready-made libraries for managing such indicators.
As a result, I received an IDE for working with Nucleo and the mbed library without using the Internet.
My project used library mbed revision 91. When updating the library, we can update our project “Nucleo_blink_led” on the site developer.mbed.org/compiler and re-export it to our computer. Then we just need to update the “mbed” folder in our project to a new one and recompile the project.
Source: https://habr.com/ru/post/243395/
All Articles