Analyzing HTTP traffic with Mitmproxy

In the practice of a web developer, situations often arise when it is necessary to track and analyze the traffic of applications communicating with the server using the HTTP protocol (for example, testing applications for mobile devices or the HTTP API).
The tools traditionally used to listen to traffic (tshark, about which we have already written , as well as ngrep and tcpdump) are poorly suited for this purpose: their functionality for working with the HTTP protocol is limited.
')
There is a more specialized, simple and effective solution for analyzing HTTP traffic. Meet: mitmproxy . There are almost no detailed publications about it in Russian. In this article we will share our experience with mitmproxy and hope that you will find it useful.
general information
Mitmproxy is a whole set of software tools, which includes:
- mitmproxy itself is an interactive console program that intercepts traffic “on the fly”;
- mitmdump is a utility that can be described as an analogue of tcpdump for the HTTP protocol: it intercepts traffic and saves all the information about it into a text file;
- libmproxy is a Python library that implements all the mitmproxy functionality.
The very name mitmproxy comes from the abbreviation MITM, which means man in the middle, or "man in the middle." This is the name of the method of compromising a communication channel, in which a hacker connects to a transmission channel between two contractors and intervenes in the transmission protocol, viewing, deleting and distorting information. mitmproxy works in a similar way: it is used as a proxy server, registering all HTTP traffic. Like any proxy server, in some cases mitmproxy can modify both user requests and responses to them.
Consider the principles and features of mitmproxy in more detail.
How it works
In the case of unencrypted HTTP connections, everything is simple: mitmproxy accepts a connection from a client (for example, from a browser on a mobile device), displays information about it on the console (or saves it to a text file), and then returns a response from the recipient to the client.
Mitmproxy can also be used to intercept protected HTTPS traffic. When running mitmproxy or mitmdump, a set of CA files is created in the ~ / .mitmproxy directory, based on which substitute certificates are generated. Naturally, the browser will identify these certificates as suspicious, giving a warning on every attempt to establish an SSL connection using mitmproxy.
To prevent this warning, you can add a certificate from mitmproxy to the list of certificates used by the browser (detailed instructions are available here ).
When these two conditions are met, the client concludes that the connection being established is secure.
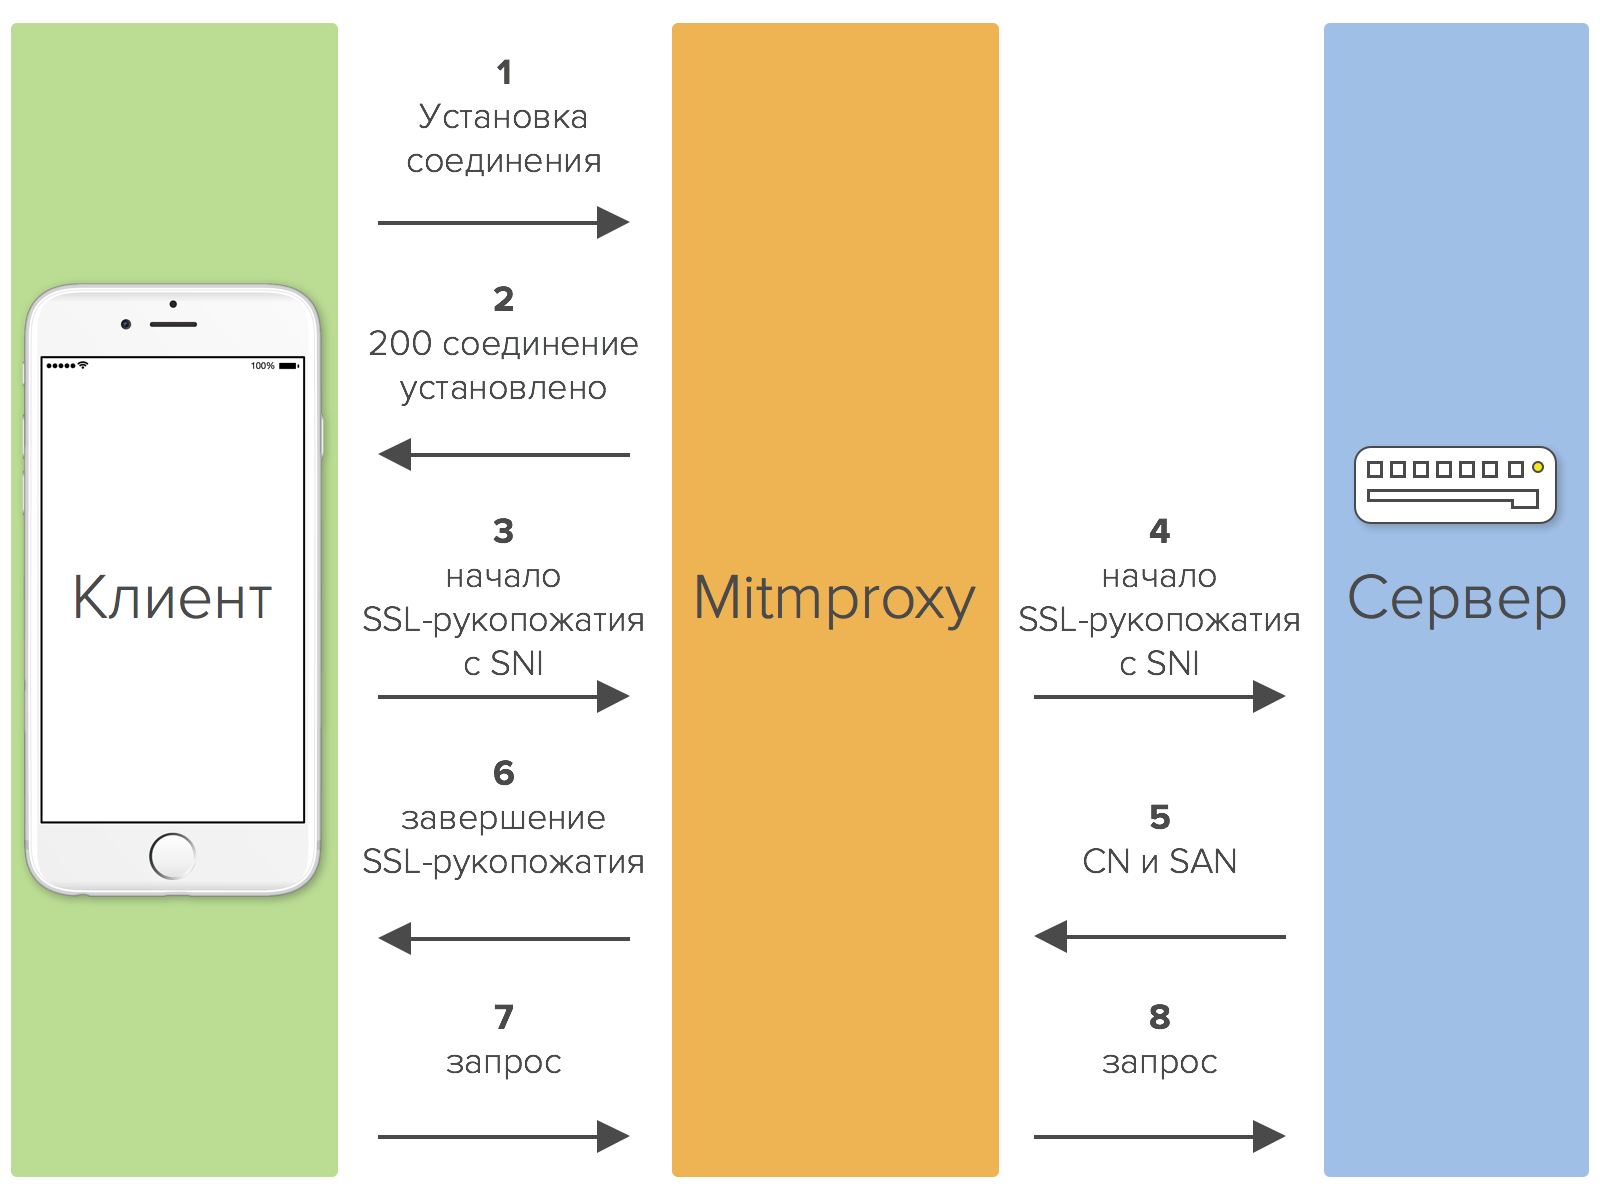
Mitmproxy can intercept and secure HTTPS traffic. The interception procedure consists of the following steps:
- The client establishes a connection with mitmproxy.
- Mitmproxy sends a response code 200 to the client (connection established).
- The client interacts with mitmproxy in the same way as with a remote server and establishes an SSL connection. To specify a host name, it uses SNI.
- Mitmproxy connects to the server and establishes an SSL connection using the hostname specified by the client.
- In response, the server sends an SSL certificate containing the values of the CN and SAN parameters, on the basis of which a substitute certificate will then be created.
- Mitmproxy generates a spoof certificate and continues the SSL conversation with the client, suspended in step 3.
- The client sends the request via the established SSL connection.
- Mitmproxy sends the request to the server over the SSL connection established in step 4.
More clearly, the process of intercepting protected traffic can be represented as the following graphic scheme:
Why do you need it
The name mitmproxy comes from the name of one of the most common types of attacks. Even the official documentation for the product is replete with words such as "attack", "interception" and the like. All this suggests that this tool can act as a tool for hacking. Of course, mitmproxy (like all products with a similar set of functions - the so-called sniffers) may well be used for illegal purposes, but for obvious reasons we will not discuss this and focus on the legal use cases.
Mitmproxy can be used, firstly, to test and debug web applications. With it, you can get detailed information about what requests the application makes and what answers it receives. Also mitproxy can help in studying the features of the functioning of some REST API, especially poorly documented and using closed (and often very suspicious) technologies.
Secondly, Mitmproxy can work in transparent proxy mode with traffic interception , which means that it can be used to analyze the network activity of suspicious applications.
Testing Mitmproxy
Installation
Today, mitmproxy is included in the linux repositories and can be installed using the standard package manager:
$ sudo aptitude install mitmproxy
You can also install it in other ways:
$ pip install mitmproxy
or
$ easy_install mitmproxy
First start
Let's look at specific examples of how mitmproxy works. Open the browser (in our case, it’s Firefox) in the settings (Settings menu → Network → Connection) and in the Manual proxy service settings section, specify the machine on which mitmproxy is installed as a proxy server.
Now connect to the server where mitmproxy is installed, via ssh and execute the following command:
$ mitmproxy
The console then looks like this:
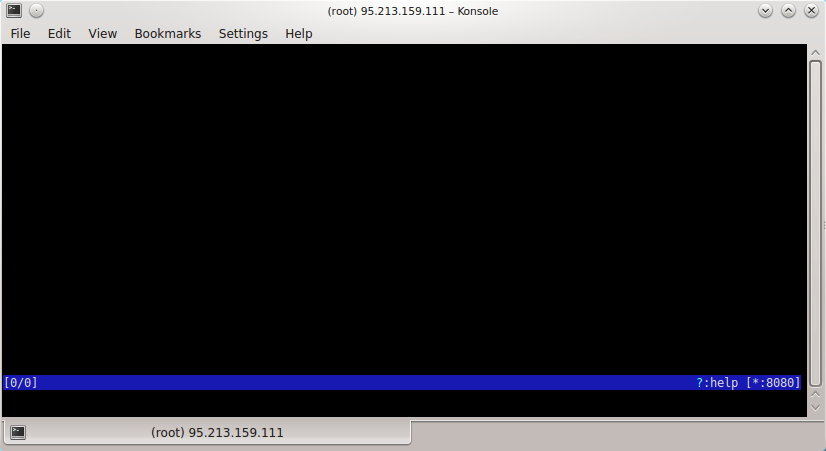
To exit this mode, press the q key. You can get help by pressing the key combination that indicates the question mark (?).
Now open any site in the browser - for example, ya.ru. All requests to this site will be displayed on the console:
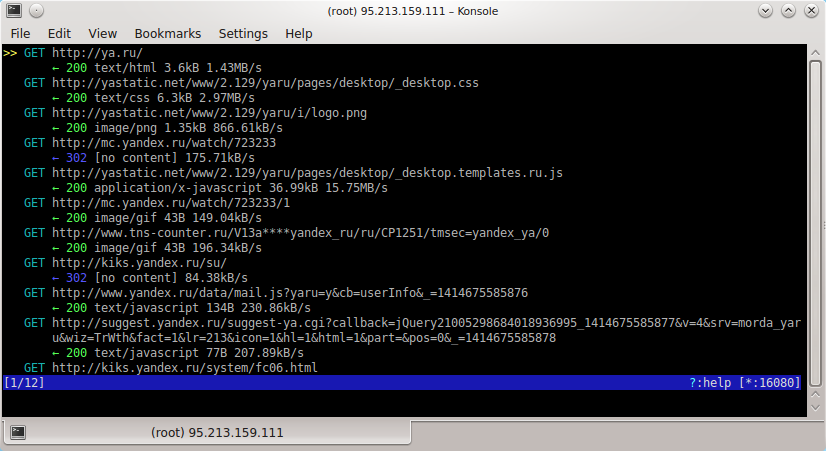
You can navigate through the list of requests by clicking on the arrow keys. You can return to the main window by pressing the q key. To view detailed information about a particular request, you need to move the cursor to it and press the Enter key:
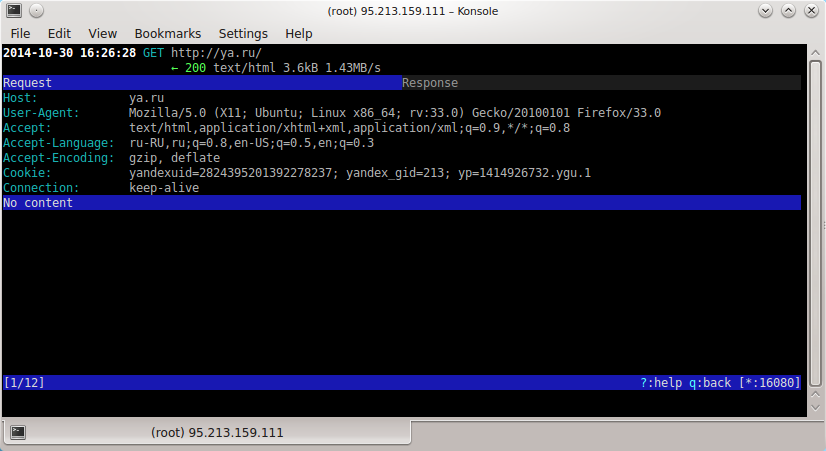
The Request field displays detailed information about the request (the requested host, the software with which the request was made, the transmitted headers), and the Response field displays information about the response received.
You can switch between these fields using the Tab key. You can return to the request list by pressing the q key.
Requests and responses can be modified. To do this, use the so-called interception filters. To enter a filter, you need to press the i key. We introduce as a filter, for example, ya.ru All requests containing this address will be intercepted. The intercepted requests in the list will be highlighted in orange:

Such requests will not be processed unless we accept them. To accept the request, you need to move the cursor to it and press the a key, and to accept all intercepted requests, press the A key.
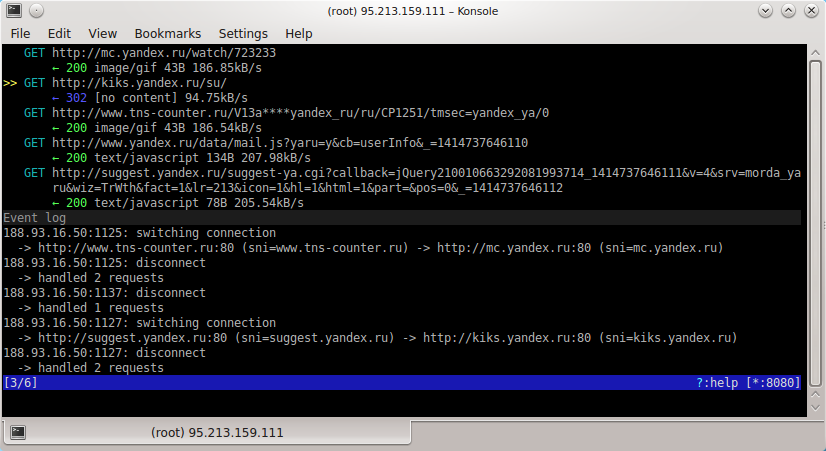
More detailed information about the request can be viewed by moving the cursor to it and pressing the E key (E is the first letter in the English word event - “event”). The event log that occurred during the processing of this request will be opened:
Both requests and responses can be edited. The editing function can be useful when testing: you can, for example, simulate a specific situation and see how the application will behave when it receives a certain response from the server.
Let's move the cursor to the query that interests us, move the cursor to it and press the Enter key. Then move the cursor to the Request field and press the E key (the first letter in the word edit is edit). The edit menu will appear at the bottom of the console:
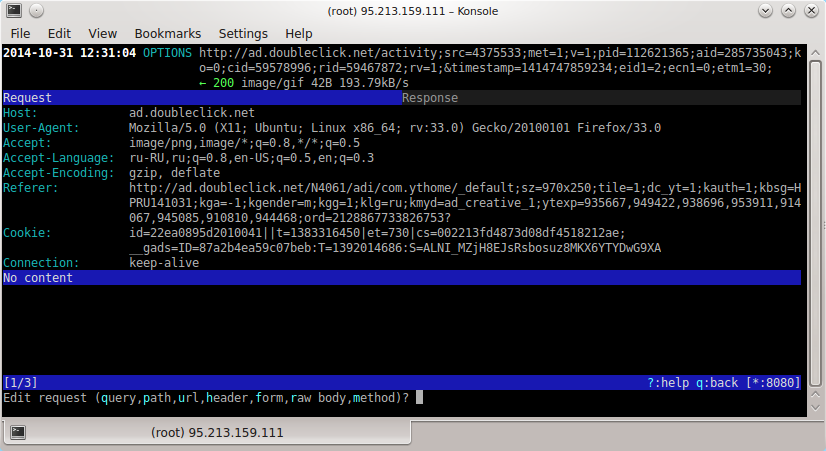
You can change both the entire query (the Q key) and its individual parameters: the path (the P key), the URL (U), the header (H), the form (F), the body ® and the method (M).
The answer is edited in the same way. You can edit its code (C key), message (M), headers (H) and body ®.
Additional functions
Proxy Authentication
In mitmproxy, you can activate user authentication mode before using a proxy. Authentication headers are removed from requests and are not transferred to upstream servers. Currently, only basic HTTP authentication is supported. Authentication configuration is performed using the following options:
 # ban anonymous users from using proxy
 $ mitmproxy --nonanonymous

 # allow only specified user to use proxy
 $ mitmrpoxy --singleuser <username>

 # allow proxy usage only when entering one of the passwords specified in the file;
 $ mitmproxy —htpasswd <password file path>
Binding cookies
The cookie binding function (sticky cookies) is useful when working with services that require authorization. It is enough to log in to this service once, and mitmproxy will automatically add the appropriate cookie to each request. After that, all requests will be transmitted to the server without re-authorization.
Cookie mode is activated as follows:
$ mitmproxy -t <filter>
You can also add authorization headers to all proxied requests. Use the -u option for this.
Reverse proxy mode
In this mode, all requests are sent to the upstream server. Mitmproxy in this case can be used as a temporary layer, observing and intercepting requests.
The reverse proxy mode is activated using the command:
$ mitmproxy -P http [s]: // hostname [: port]
Anticache function
Mitmproxy can remove if-modified-since and if-none-match headers from a request. Because of this, you can always view the full response from the server, even if the browser reports that the requested document is in the cache.
This feature is activated with the following command:
$ mitmproxy - anticache
Replay client requests
The client side replay feature allows you to play queries from previously saved HTTP conversations. Requests are executed one after another: sending one request, mitmproxy waits for a response from the server, and only then proceeds to the next. Therefore, the client's behavior may differ from that recorded in the saved dialog, in which some requests could be executed simultaneously.
You can play client requests using the command:
$ mitmproxy -c <path to saved dialog>
Mitmdump
As mentioned above, Mitmdump is a utility that works just like tcpdump, only for the HTTP protocol. It intercepts all HTTP traffic and writes information about it into a separate text file.
To get started with mitmdump, you need to start mitmproxy in proxy mode, and then run the following command:
$ mitmdump -w <filename>
Saved information can be filtered using regular expressions and then saved to a new file:
$ mitmdump -nr <file1> -w <file2> "~ m post"
In the above example, mitmdump selects from the file 1 requests that meet a specific criterion (in our case, POST requests), and writes them to file 2.
Mitmdump can read already saved information about client requests from a file, replay these requests again, and save the results to a new file:
$ mitmdump -nc <file 1> -w <file 2>
This feature may be useful when testing some web applications.
Conclusion
In this article, we gave a brief overview of the capabilities of mitmproxy. For those who want to learn more, here are some links:
- official mitmproxy documentation ;
- an article about tracking mobile application traffic ;
- A description of how Mitmproxy works by the developer is Aldo Cortesi .
Readers who for one reason or another are not able to leave comments here are invited to our blog .
Source: https://habr.com/ru/post/242727/
All Articles