Layout of business cards in LaTeX
Good day to all!
There are already a lot of articles on Habré about how and where layout is used in LaTeX. From standard scientific articles and presentations to calendars and resumes.
The main advantage of LaTeX was initially the release of the writer from the need to think about the location of the text on the page: the author writes the content, and the engine places everything in the right places.
')
Hence, an overwhelming desire tostart drilling with a saw and cut with a gimlet using LaTeX to solve a task that requires complete control of the text on the page. A classic example is the layout of business cards, which we will do.
Immediately make a reservation that we will not deal with the development of design - someone has already chosen for us all indents, fonts, leading, etc., etc. We just embody this TZ in the template LaTeX.
Suppose that the TK is as follows:
So let's go. First you need to choose a compiler: latex and pdflatex (actually, in a sense, it’s the same thing, but for this article it doesn’t matter) we don’t need it, because non-native fonts digest very badly. If someone wants to make friends pdflatex and, say, the font Myriad, then the number of necessary movements will go all reasonable limits. XeLaTeX can work with any fonts and understands Unicode, and we don’t need anything else.
The type of document is, in principle, unimportant to us, anyway, we will locate elements on the page, bypassing standard mechanisms. We need the fontspec package to work correctly with otf fonts and, among other things, it allows you to easily adjust the font size and leading (more on this just below).
The next item: how to solve the issue with the size of the page. Here the geometry package comes to the rescue, which copes with it perfectly.
Finally, a key subtask: how to control the position of text blocks on a page, in particular, indents from fields. For this we will use the textpos package:
The package is connected with the absolute option, that is, the positioning of the blocks will be in absolute units.
The adjustbox package is also useful to us - this is one of the ways to control the position of images (and generally so-called boxed content):
We use the export option so that the standard package commands also extend to \ includegraphics.
Finally, the xcolor package, since we want to introduce our own colors.
Now let's set up all the packages:
Here, as you might guess, we set the paper size, the size of the space on which we will place the text, and the margins.
Let's set the main text color, and also define macros for phone numbers and addresses:
And the team
If we want to insert logos and / or images on our business card, then the best option would be to use vector formats. Let these files be called, respectively, LogoUni.eps and LogoLab.eps. We will locate them next to our main file. In principle, xelatex can work out of the box with many image formats (unfortunately, svg does not belong to this list).
You can begin to implement the requirements:
We arrange our university logo so that the upper left corner of the image has coordinates (4.2 mm, 4.2 mm) and the logo height is 20.6 mm. To do this, we will use the environment:
Decoding is quite simple: a text block with a width of width must be positioned so that at a point on a sheet with absolute coordinates (xcoord, ycoord) there is a point of the block with relative coordinates [a, b], which vary from zero to one. If a = 0, b = 0, then we have the upper left corner, if a = 1, b = 0, then the upper right, if a = 1, b = 1, then the lower right, and if a = 0.5, b = 0.5 is the center of our text block.
To adjust the image height, just use the standard \ includegraphics method:
The \ noindent command is needed so that the engine does not insert a red line and does not spoil the indents. I also note that the% signs at the end of each line - comments in TeX - are essentially here, since normal hyphenation is treated as spaces and can harm the layout.
Similarly, we proceed with the laboratory logo: we place the upper right corner of the logo at the specified coordinates.
The right option in \ includegraphics aligns the image to the right of the text.
Then place a block of text with the name and position immediately below the picture with the logo, the left indent is 24.8 mm (the height of the picture plus the indent of the picture itself):
The \ setmainfont command sets the font family for the main text (for more information, see the documentation for the fontspec package), and \ fontsize {x} {y} defines the font size x and leading y. The \ selectfont command applies the changes entered by fontsize. The last command \\ * makes a soft hyphen and does not start a new paragraph.
Finally, we place the last block of text with telephones and the address of the laboratory with the same indent of 18.5 mm so that the bottom margins are 4.2 mm:
If we want to make the back side of a business card - or make several business cards in one file, then the usual commands to start a new page (\ pagebreak, \ newpage, \ clearpage, \ cleardoublepage, etc.) simply will not work. There is no usual text on the page, so the engine considers that it is not necessary to start a new page. It all costs as follows:
Already on the thumb we add a picture with the logo, place the center of the text block in the center of the paper:
I myself sketched the logos for this article in Inkscape, I picked up the colors and fonts "as long as it was", so I will not vouch for the aesthetic component.
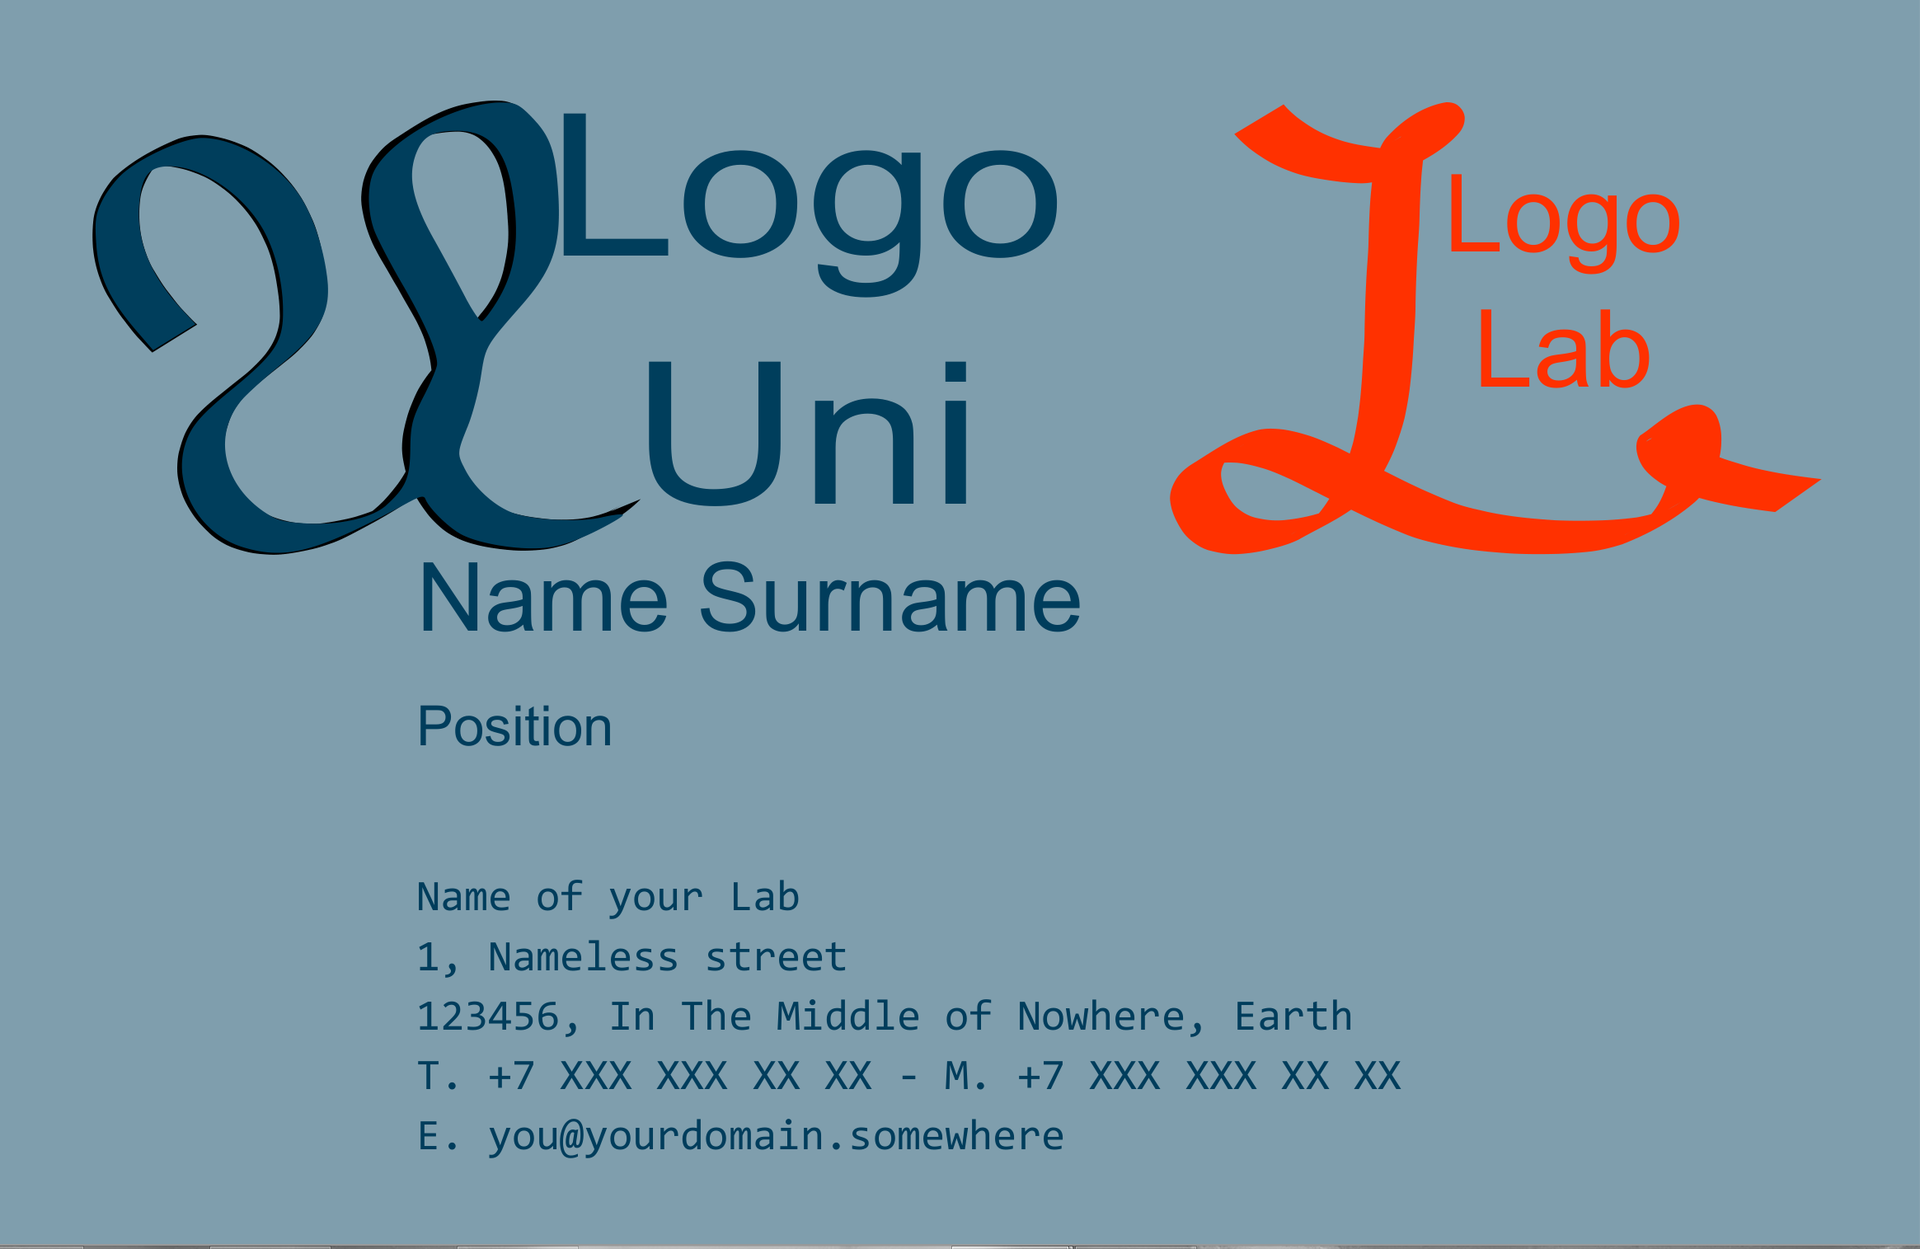
Summary front and back:

Links to used packages documentation:
adjustbox
geometry
textpos
xcolor
There are already a lot of articles on Habré about how and where layout is used in LaTeX. From standard scientific articles and presentations to calendars and resumes.
The main advantage of LaTeX was initially the release of the writer from the need to think about the location of the text on the page: the author writes the content, and the engine places everything in the right places.
')
Hence, an overwhelming desire to
Immediately make a reservation that we will not deal with the development of design - someone has already chosen for us all indents, fonts, leading, etc., etc. We just embody this TZ in the template LaTeX.
Suppose that the TK is as follows:
- University logo: image height is 20.6 mm, the top left corner is 4.2 mm from the top left corner of the card in both coordinates
- Lab logo: image height 20.6 mm, upper right corner away from the right
the top corner of the card is 4.2 mm in both coordinates - RGB text color: (00,62,92)
- Background color - text color, diluted white by 50% (or RGB (00,31,46))
- Text with the name and surname in Arial type: size 12, leading 14.4. Located immediately below the logos, the indentation from the left edge is 18.5 mm, the margin to the right is 4.2 mm.
Under it from a new line the text with the post, Arial, size 7, leading 7.5 - Text with the name of the laboratory, phone numbers and address: Consolas, size 5.5, leading 7.5. Left indent is 18.5mm, bottom indent is 4.2mm, field to the right is 4.2mm
- The downside of the business card: the full-width university logo, centered vertically and horizontally
So let's go. First you need to choose a compiler: latex and pdflatex (actually, in a sense, it’s the same thing, but for this article it doesn’t matter) we don’t need it, because non-native fonts digest very badly. If someone wants to make friends pdflatex and, say, the font Myriad, then the number of necessary movements will go all reasonable limits. XeLaTeX can work with any fonts and understands Unicode, and we don’t need anything else.
\documentclass{article} \usepackage{fontspec} The type of document is, in principle, unimportant to us, anyway, we will locate elements on the page, bypassing standard mechanisms. We need the fontspec package to work correctly with otf fonts and, among other things, it allows you to easily adjust the font size and leading (more on this just below).
The next item: how to solve the issue with the size of the page. Here the geometry package comes to the rescue, which copes with it perfectly.
\usepackage{geometry} Finally, a key subtask: how to control the position of text blocks on a page, in particular, indents from fields. For this we will use the textpos package:
\usepackage[absolute]{textpos} The package is connected with the absolute option, that is, the positioning of the blocks will be in absolute units.
The adjustbox package is also useful to us - this is one of the ways to control the position of images (and generally so-called boxed content):
\usepackage[export]{adjustpage} We use the export option so that the standard package commands also extend to \ includegraphics.
Finally, the xcolor package, since we want to introduce our own colors.
\usepackage{xcolor} Now let's set up all the packages:
\geometry{paperwidth=85mm, paperheight=55mm, layoutwidth=85mm, layoutheight=55mm, left=0mm, top=0mm, right=0mm, bottom=0mm} Here, as you might guess, we set the paper size, the size of the space on which we will place the text, and the margins.
Let's set the main text color, and also define macros for phone numbers and addresses:
\definecolor{bl}{RGB}{0,62,92} \newcommand{\phonei}{T. +7~XXX~XXX~XX~XX - M. +7~XXX~XXX~XX~XX} \newcommand{\emaili}{you@domain.somewhere} \newcommand{\urli}{www.domain.somewhere} \newcommand{\firstlineaddress}{Name of your Lab} \newcommand{\secondlineaddress}{1, Nameless street\\* 123456, In The Middle of Nowhere, Earth} And the team
\pagecolor{bl!50!white} sets the background color by diluting the already known color “bl” with white by 50%.If we want to insert logos and / or images on our business card, then the best option would be to use vector formats. Let these files be called, respectively, LogoUni.eps and LogoLab.eps. We will locate them next to our main file. In principle, xelatex can work out of the box with many image formats (unfortunately, svg does not belong to this list).
You can begin to implement the requirements:
\begin{document}% We arrange our university logo so that the upper left corner of the image has coordinates (4.2 mm, 4.2 mm) and the logo height is 20.6 mm. To do this, we will use the environment:
\begin{textblock*}{width}[a,b](xcoord,ycoord) \end{textblock*} Decoding is quite simple: a text block with a width of width must be positioned so that at a point on a sheet with absolute coordinates (xcoord, ycoord) there is a point of the block with relative coordinates [a, b], which vary from zero to one. If a = 0, b = 0, then we have the upper left corner, if a = 1, b = 0, then the upper right, if a = 1, b = 1, then the lower right, and if a = 0.5, b = 0.5 is the center of our text block.
To adjust the image height, just use the standard \ includegraphics method:
\begin{textblock*}{50mm}[0,0](4.2mm,4.2mm)% \noindent% \includegraphics[height=20.6mm]{LogoUni.eps}% \end{textblock*} The \ noindent command is needed so that the engine does not insert a red line and does not spoil the indents. I also note that the% signs at the end of each line - comments in TeX - are essentially here, since normal hyphenation is treated as spaces and can harm the layout.
Similarly, we proceed with the laboratory logo: we place the upper right corner of the logo at the specified coordinates.
\begin{textblock*}{20mm}[1,0](80.8mm,4.2mm)% \noindent% \includegraphics[height=20mm, right]{LogoLab.png}% \end{textblock*} The right option in \ includegraphics aligns the image to the right of the text.
Then place a block of text with the name and position immediately below the picture with the logo, the left indent is 24.8 mm (the height of the picture plus the indent of the picture itself):
\setmainfont{Arial}% \fontsize{12}{14.4}\selectfont% \begin{textblock*}{62.3mm}[0,0](18.5mm,24.8mm)% {\color{bl}% \noindent\namei\\*% \fontsize{7}{7.5}\selectfont% \posi% }\end{textblock*}% The \ setmainfont command sets the font family for the main text (for more information, see the documentation for the fontspec package), and \ fontsize {x} {y} defines the font size x and leading y. The \ selectfont command applies the changes entered by fontsize. The last command \\ * makes a soft hyphen and does not start a new paragraph.
Finally, we place the last block of text with telephones and the address of the laboratory with the same indent of 18.5 mm so that the bottom margins are 4.2 mm:
\setmainfont{Consolas}% \fontsize{5.5}{7.5}\selectfont% \begin{textblock*}{62.3mm}[0,1](18.5mm,50.8mm) {\color{bl}% \noindent\firstlineaddress\\*% \secondlineaddress\\*% \phonei\\% E. \emaili}\end{textblock*}% If we want to make the back side of a business card - or make several business cards in one file, then the usual commands to start a new page (\ pagebreak, \ newpage, \ clearpage, \ cleardoublepage, etc.) simply will not work. There is no usual text on the page, so the engine considers that it is not necessary to start a new page. It all costs as follows:
\null\newpage% Already on the thumb we add a picture with the logo, place the center of the text block in the center of the paper:
\begin{textblock*}{85mm}[0.5,0.5](42.5mm,27.5mm)% \noindent% \includegraphics[width=85mm]% {LogoUni.eps}% \end{textblock*}% \end{document} Final Document:
\documentclass{article} \usepackage{fontspec} \usepackage{geometry} \usepackage{xcolor} \usepackage[export]{adjustbox} \usepackage[absolute]{textpos} \usepackage{tikz} \geometry{paperwidth=85mm, paperheight=55mm, layoutwidth=85mm, layoutheight=55mm, left=0mm, top=0mm, right=0mm, bottom=0mm} \definecolor{bl}{RGB}{0,62,92} \newcommand{\phonei}{T. +7~XXX~XXX~XX~XX - M. +7~XXX~XXX~XX~XX}% \newcommand{\namei}{Name Surname} \newcommand{\posi}{Position} \newcommand{\emaili}{E. you@yourdomain.somewhere} \newcommand{\urli}{yourdomain.somewhere} \newcommand{\firstlineaddress}{Name of your Lab} \newcommand{\secondlineaddress}{1, Nameless street\\* 123456, In The Middle of Nowhere, Earth} \pagecolor{bl!50!white} \begin{document}% \begin{textblock*}{50mm}[0,0](4.2mm,4.2mm)% \noindent% \includegraphics[height=20.6mm]{LogoUni.eps}% \end{textblock*}% \begin{textblock*}{50mm}[1,0](80.8mm,4.2mm)% \noindent% \includegraphics[height=20.6mm,right]{LogoLab.eps}% \end{textblock*}% % \setmainfont{Arial}% \fontsize{12}{14.4}\selectfont% \begin{textblock*}{62.3mm}[0,0](18.5mm,24.8mm){\color{bl}\noindent\namei\\*% \setmainfont{Arial}% \fontsize{7}{7.5}\selectfont% \posi% }\end{textblock*}% \setmainfont{Consolas}% \fontsize{5.5}{7.5}\selectfont% \begin{textblock*}{62.3mm}[0,1](18.5mm,50.8mm){\color{bl}\noindent\firstlineaddress\\*% \secondlineaddress\\*% \phonei\\% \emaili}\end{textblock*}% \null\newpage% \begin{textblock*}{85mm}[0.5,0.5](42.5mm,27.5mm)% \noindent% \includegraphics[width=85mm] {LogoUni.eps}% \end{textblock*}% \end{document} I myself sketched the logos for this article in Inkscape, I picked up the colors and fonts "as long as it was", so I will not vouch for the aesthetic component.
Summary front and back:
Links to used packages documentation:
adjustbox
geometry
textpos
xcolor
Source: https://habr.com/ru/post/242089/
All Articles