Side menu icon from Material Design (like on Google Play)
Hi, Habrazhiteli!
Probably, many have noticed that in the latest versions of Google Play and Google+ Photos for Android, the side menu icon (NavigationDrawer) has a beautiful animation (switching from three bars to an arrow). An example is here . I wondered how this was implemented, and I went on a journey across the expanses of the World Wide Web in search of an answer to this question. Now, I hasten to share with you this recipe.
Who cares, I ask under the cat.
')
Immediately proceed to the creation of the project. At first I wanted to call it ActionBarDrawerToggleWithAnimationFromGooglePlayDemo, but then changed my mind.
So, the project is called AnimatedDrawerToggleDemo. A prerequisite is that the minimum SDK must be 7 or higher, because the components are in the v7 AppCompat library.
I tried to make the example as simple as possible, so I removed everything unnecessary: even when I click on the NavigationDrawer element, nothing happens.
First, create strings in the res / values / strings.xml file :
In order to realize the effect we need, we will use the new Toolbar component instead of the ActionBar. To do this, disable the display of the ActionBar itself, I did it in the program's topic ( res / values / styles.xml ):
The theme for all APIs should inherit from Theme.AppCompat.NoActionBar or Theme.AppCompat.Light.NoActionBar , so also make changes to the res / values- xx /styles.xml files , if you have them.
Read more about the Toolbar here . By the way, thanks to the author of the translation.
Create a res / layout / activity_main markup file:
Here we declare a Toolbar and NavigationDrawer, which contains FrameLayout (for a fragment that we don’t have) and ListView (sidebar).
Finally we move on to the most interesting - the program code. The src / com.ed.animated_drawer_toggle_demo / MainActivity file :
First, we initialize the Toolbar and assign it to our Activity instead of the ActionBar.
Then we find the ActionBarDrawerToggle and assign it to the side menu. All beauty (adding animation) is described with just one line of code - toggle.setDrawerIndicatorEnabled (true); .
After that we create a simple menu so that there is at least something.
The last three methods are needed for the correct operation of ActionBarDrawerToggle.
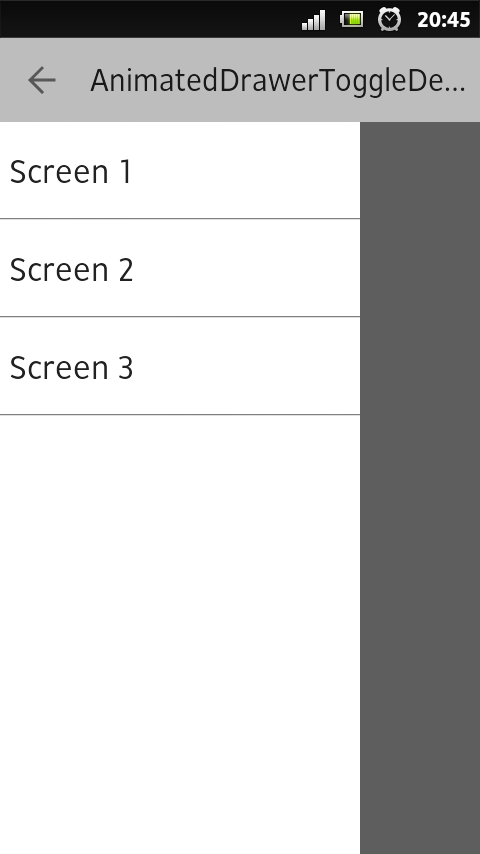
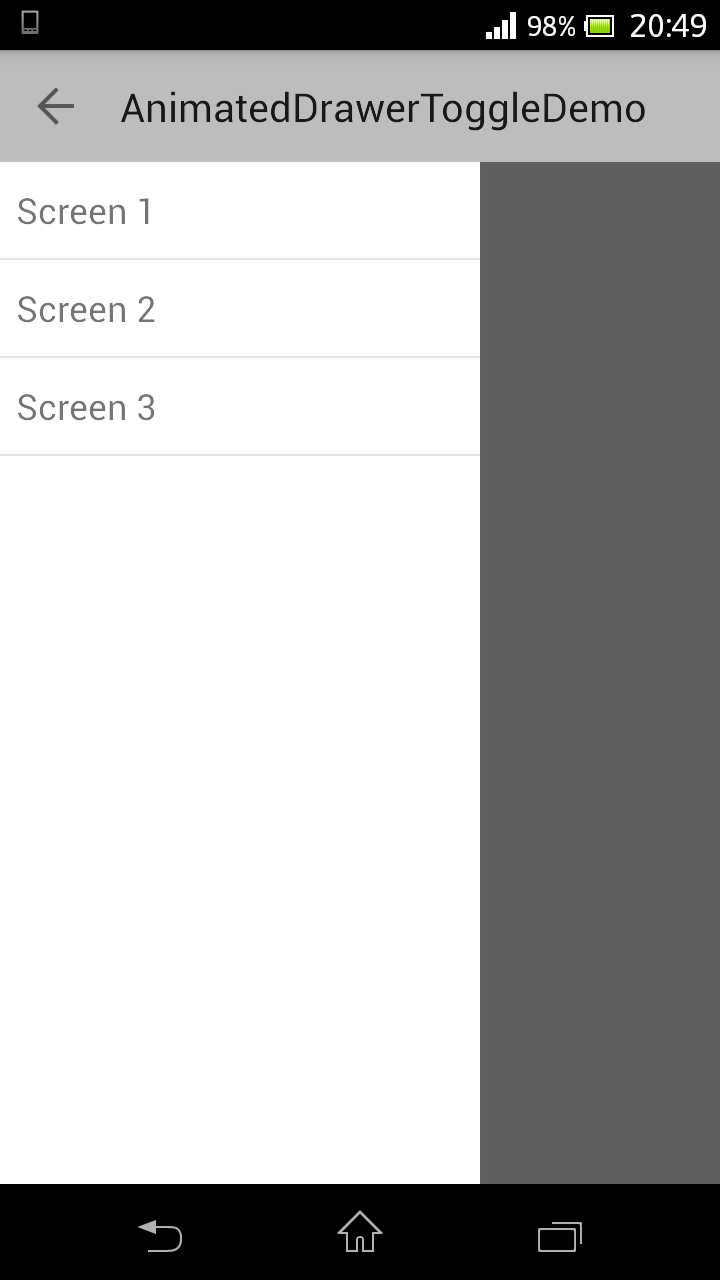
That's all! The application works correctly on all versions:
PS the idea and the code areimpudently taken from here .
Probably, many have noticed that in the latest versions of Google Play and Google+ Photos for Android, the side menu icon (NavigationDrawer) has a beautiful animation (switching from three bars to an arrow). An example is here . I wondered how this was implemented, and I went on a journey across the expanses of the World Wide Web in search of an answer to this question. Now, I hasten to share with you this recipe.
Who cares, I ask under the cat.
')
Immediately proceed to the creation of the project. At first I wanted to call it ActionBarDrawerToggleWithAnimationFromGooglePlayDemo, but then changed my mind.
So, the project is called AnimatedDrawerToggleDemo. A prerequisite is that the minimum SDK must be 7 or higher, because the components are in the v7 AppCompat library.
I tried to make the example as simple as possible, so I removed everything unnecessary: even when I click on the NavigationDrawer element, nothing happens.
First, create strings in the res / values / strings.xml file :
<string name="navigation_drawer_open">Open navigation drawer</string> <string name="navigation_drawer_close">Close navigation drawer</string> In order to realize the effect we need, we will use the new Toolbar component instead of the ActionBar. To do this, disable the display of the ActionBar itself, I did it in the program's topic ( res / values / styles.xml ):
<resources> <style name="AppTheme" parent="Theme.AppCompat.Light.NoActionBar"> </style> </resources> The theme for all APIs should inherit from Theme.AppCompat.NoActionBar or Theme.AppCompat.Light.NoActionBar , so also make changes to the res / values- xx /styles.xml files , if you have them.
Read more about the Toolbar here . By the way, thanks to the author of the translation.
Create a res / layout / activity_main markup file:
<LinearLayout xmlns:android="http://schemas.android.com/apk/res/android" xmlns:tools="http://schemas.android.com/tools" android:layout_width="match_parent" android:layout_height="match_parent" android:orientation="vertical" > <android.support.v7.widget.Toolbar android:id="@+id/toolbar" android:layout_width="match_parent" android:layout_height="wrap_content" android:minHeight="?attr/actionBarSize" android:background="?attr/colorPrimary" theme="@style/ThemeOverlay.AppCompat.ActionBar" /> <android.support.v4.widget.DrawerLayout android:id="@+id/drawer_layout" android:layout_width="match_parent" android:layout_height="match_parent" > <FrameLayout android:id="@+id/container" android:layout_width="match_parent" android:layout_height="match_parent" /> <ListView android:id="@+id/lv_navigation_drawer" android:layout_width="240dp" android:layout_height="match_parent" android:layout_gravity="start" android:background="@android:color/white" /> </android.support.v4.widget.DrawerLayout> </LinearLayout> Here we declare a Toolbar and NavigationDrawer, which contains FrameLayout (for a fragment that we don’t have) and ListView (sidebar).
Finally we move on to the most interesting - the program code. The src / com.ed.animated_drawer_toggle_demo / MainActivity file :
package com.ed.animated_drawer_toggle_demo; import android.support.v4.widget.DrawerLayout; import android.support.v7.app.ActionBarActivity; import android.support.v7.app.ActionBarDrawerToggle; import android.support.v7.widget.Toolbar; import android.content.res.Configuration; import android.os.Bundle; import android.view.MenuItem; import android.widget.ArrayAdapter; import android.widget.ListView; public class MainActivity extends ActionBarActivity { private ActionBarDrawerToggle toggle; @Override protected void onCreate(Bundle savedInstanceState) { super.onCreate(savedInstanceState); setContentView(R.layout.activity_main); Toolbar toolbar = (Toolbar) findViewById(R.id.toolbar); setSupportActionBar(toolbar); DrawerLayout drawerLayout = (DrawerLayout) findViewById(R.id.drawer_layout); toggle = new ActionBarDrawerToggle( this, drawerLayout, R.string.navigation_drawer_open, R.string.navigation_drawer_close); toggle.setDrawerIndicatorEnabled(true); drawerLayout.setDrawerListener(toggle); ListView lv_navigation_drawer = (ListView) findViewById(R.id.lv_navigation_drawer); lv_navigation_drawer.setAdapter(new ArrayAdapter<String>( this, android.R.layout.simple_list_item_1, new String[] {"Screen 1", "Screen 2", "Screen 3"})); } @Override public boolean onOptionsItemSelected(MenuItem item) { if (toggle.onOptionsItemSelected(item)) return true; return super.onOptionsItemSelected(item); } @Override protected void onPostCreate(Bundle savedInstanceState) { super.onPostCreate(savedInstanceState); toggle.syncState(); } @Override public void onConfigurationChanged(Configuration newConfig) { super.onConfigurationChanged(newConfig); toggle.onConfigurationChanged(newConfig); } } First, we initialize the Toolbar and assign it to our Activity instead of the ActionBar.
Then we find the ActionBarDrawerToggle and assign it to the side menu. All beauty (adding animation) is described with just one line of code - toggle.setDrawerIndicatorEnabled (true); .
After that we create a simple menu so that there is at least something.
The last three methods are needed for the correct operation of ActionBarDrawerToggle.
That's all! The application works correctly on all versions:
Android 2.3


Android 4.1


PS the idea and the code are
Source: https://habr.com/ru/post/242033/
All Articles