Geek competition: how we did it (part 2) and the results
As promised in the first part , we tell in more detail about our project, about successful and unsuccessful solutions, problems and unexpected surprises.
We begin, perhaps, with the printer.
')
We removed the plastic stand for the printed sheets (it is mounted on the latches), and we had a fairly good height difference. This allowed us to use the force of gravity (“Use force, Luke!”), Under the action of which tickets slid down along the tray at the angle. At the same time I did not have to produce extra travolators to push the sheet inside the tray.
When we brought the printer, we happily opened the box (I don’t know how you like it, but I like the smell of the new technology!) And started setting it up. The first test went to “Hurray”, the printer printed our test tickets regularly. However, when more thorough testing began, it turned out that duplex printing only works on A4 paper. And our ticket format was A5 (after all, we care about the environment and don’t want to waste too much paper). That is, A5 tickets were printed face down. We already started to think about how to place the camera below, but after a couple of days we found a wonderful driver for UNIX (we will tell about the server below) and did teach him to print in duplex.
In general, the printer showed itself quite well. About 30,000 tickets were printed, and during all this time the paper jam only happened three times (!).
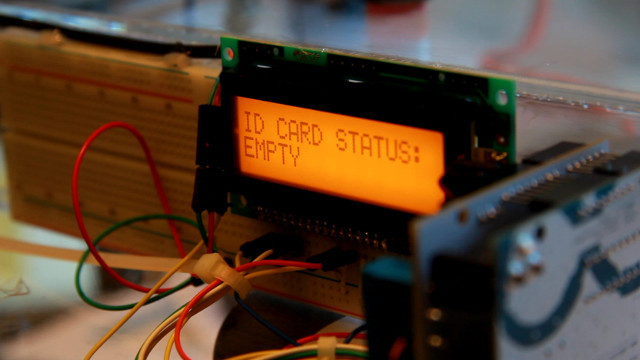
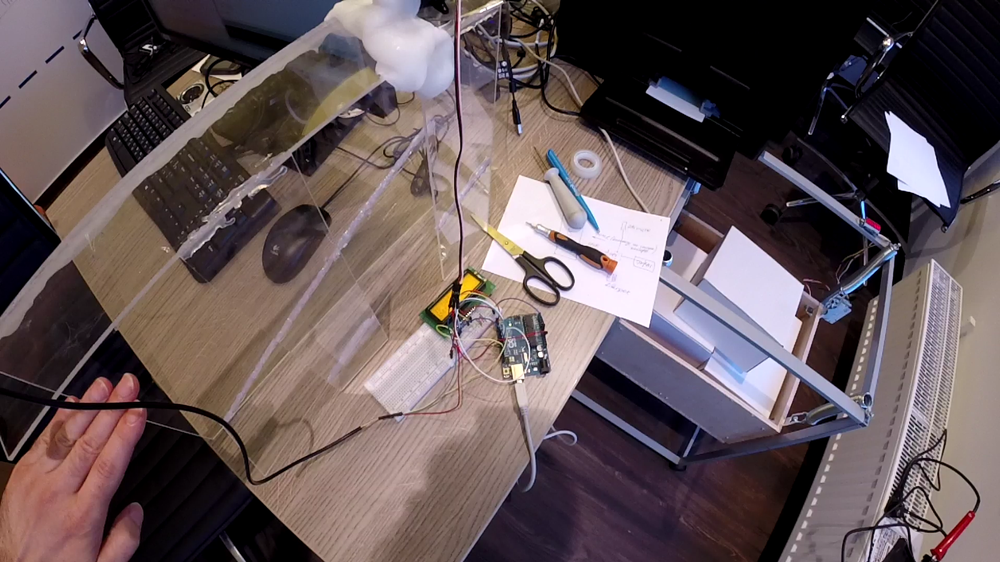
The first Arduino was responsible for opening and closing the tray. The second is for receiving information from the gradient sensor (later another sensor appeared - the ultrasonic range finder), and outputting this information to the screen. The quick assembly showed that there shouldn't be any problems, the engine was spinning regularly, test information was displayed on the screen.

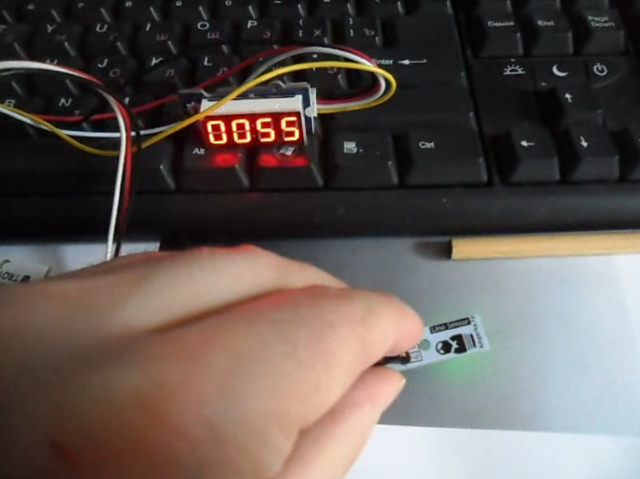
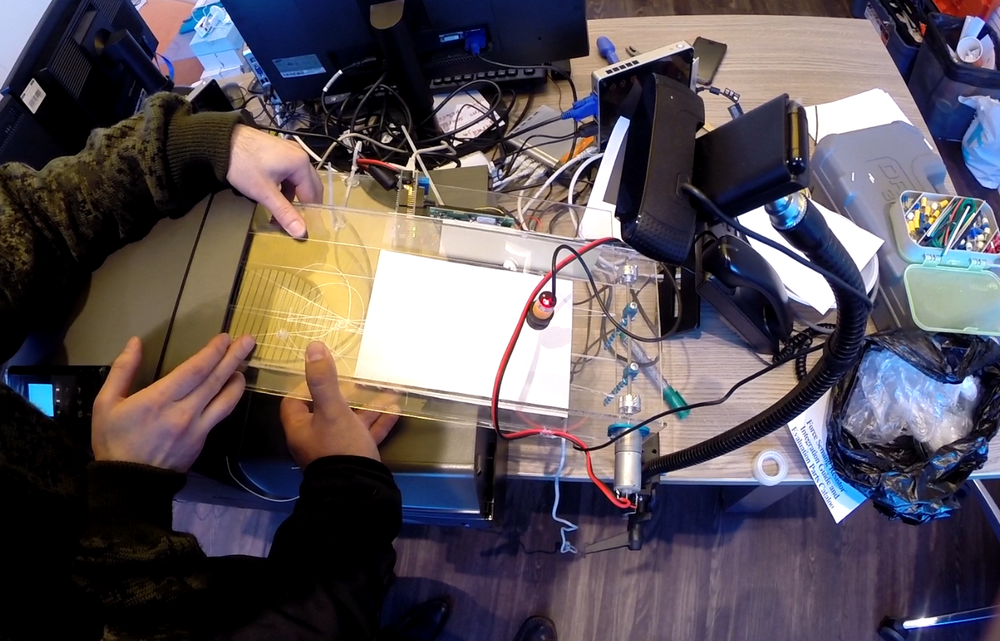
The analog line sensor gave us very well the data on the level of illumination on the test gradient:
We placed the gradient on the side of the urn, and above it secured the line sensor:
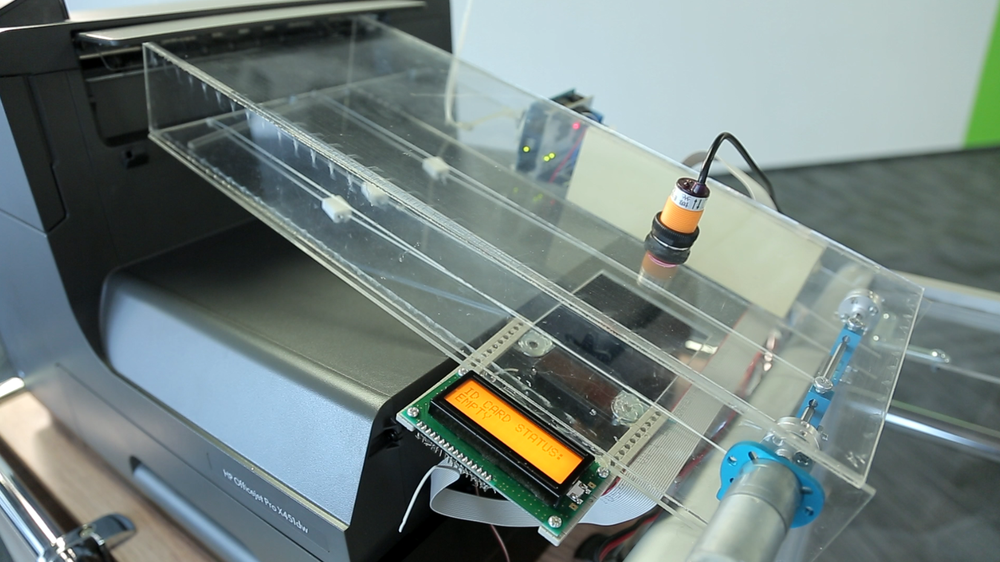
Another sensor connected to the Arduino is an infrared obstruction sensor . It is located on the top lid of the tray, under it, a special hole is cut in the bottom wall of the tray. Its task is to notify the server that the ticket printed out and fell into the tray:
As soon as the ticket falls into the tray, the sensor sends a signal to the Arduino, which in turn sends it to the server, and that one starts recording the camera. After a few seconds, the camera turns off and power is applied to the servo, which opens the "curtain". The curtain we made from the elements of Makeblock .
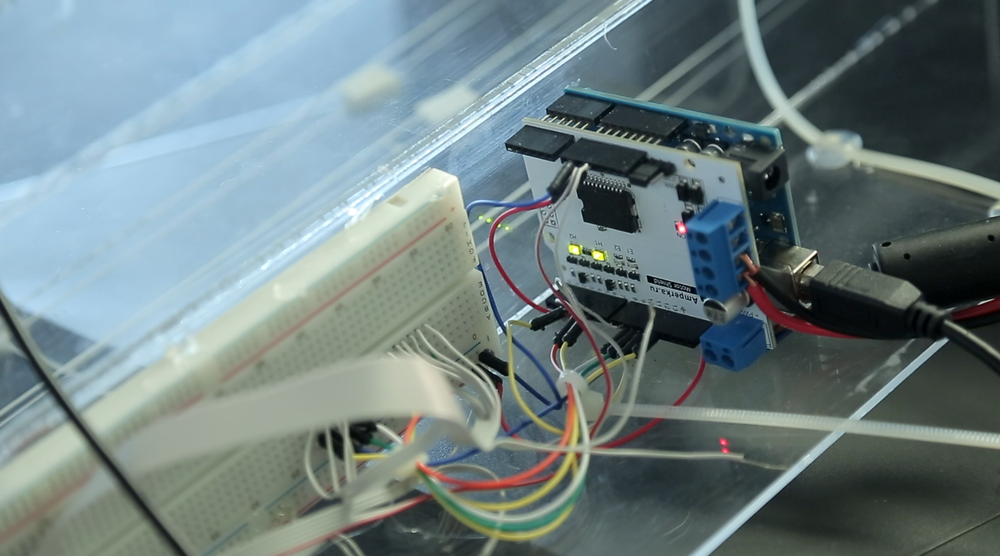
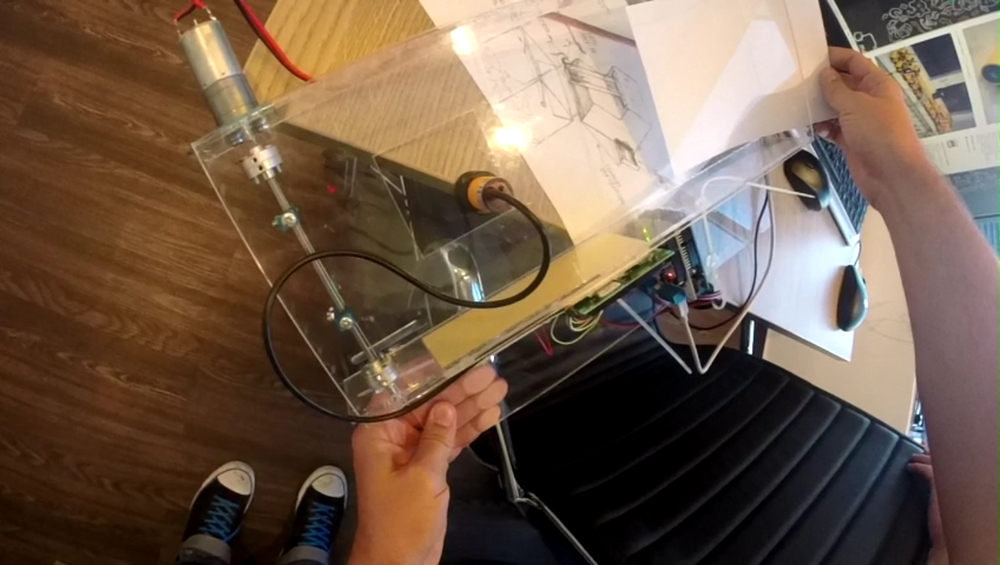
The third sensor connected to the Arduino is the ultrasonic range finder . It measures the distance between the bottom of the urn and the floor, is an additional source of information for calculating the weight. After the final assembly, we did not hide the arduinks in the nightstand, but placed them behind a transparent tray so that the colored wires and flashing LEDs would please the eyes of geek-porn fans (and we work a lot in the company).
After we more or less selected the dimensions, the location of the camera, the sensors and the servo with a curtain, we made a drawing and cut out all the details with a laser cutter (thanks to the guys from lab3dprint.ru ). The parts were glued together with dichloroethane (in no case could we allow cracks and irregularities when gluing), and the result was a more decent design with smooth seams:
However, even despite the hole under the obstacle sensor, the paper sheet was often stuck (stuck to the Plexiglas), and the force of attraction was not so high as to overcome the force of friction.
To reduce the area of contact with the surface of the tray, we pulled the badminton strings:
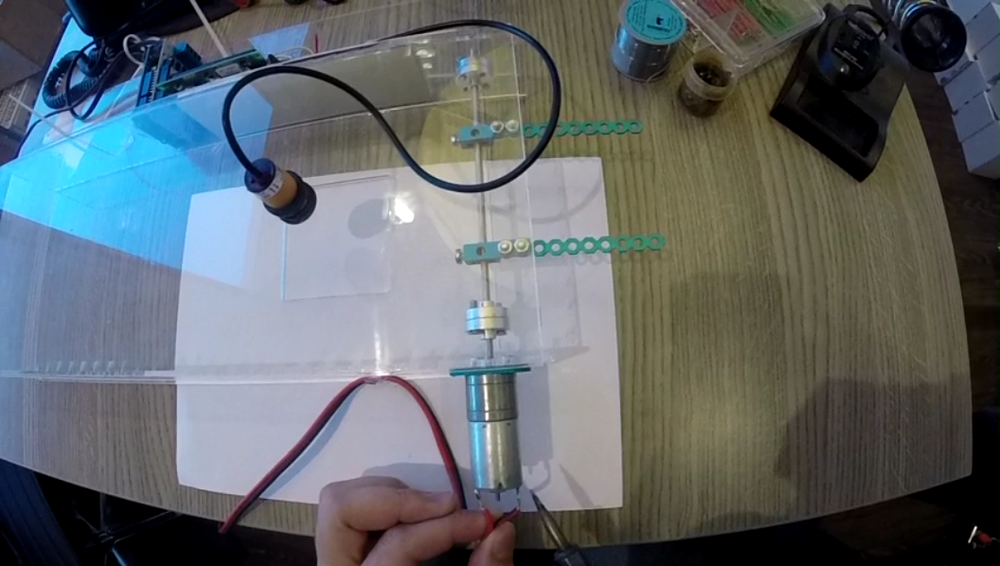
However, this did not help much either, the ticket stubbornly stuck on the last leg and did not even reach the curtain. Then we went even further, and attached the bottom of the servo with a plastic six-petal gear, which begins to rotate immediately after the curtain opens:

Such a “pushing” of the ticket from the bottom solved the problem, and now the tickets slid off with a whistle. We breathed a sigh of relief and switched to the ballot box.
Do not worry, not a single "Zhiguli" was hurt, all the springs were bought in the auto parts store. :) Measurements of the estimated weight of competitive tickets, spring stretch coefficients, basket volume and other parameters showed that the design should be much larger and the springs should be more powerful:

The second version of the urn and frame looks like this:
The urn was assembled from exhibition aluminum profiles and plexiglass, and the frame from structures known in the market as “Joker Uno”. More powerful springs were purchased in the construction market, with holders we connected them with flexible metal cables:
So that the frame with the urn is not accidentally moved relative to the printer, we decided to add a special nightstand for the printer to the design, as a result, everything began to look like this:
For convenience, we organized the script management via SSH access, this is how the project management panel looks like:
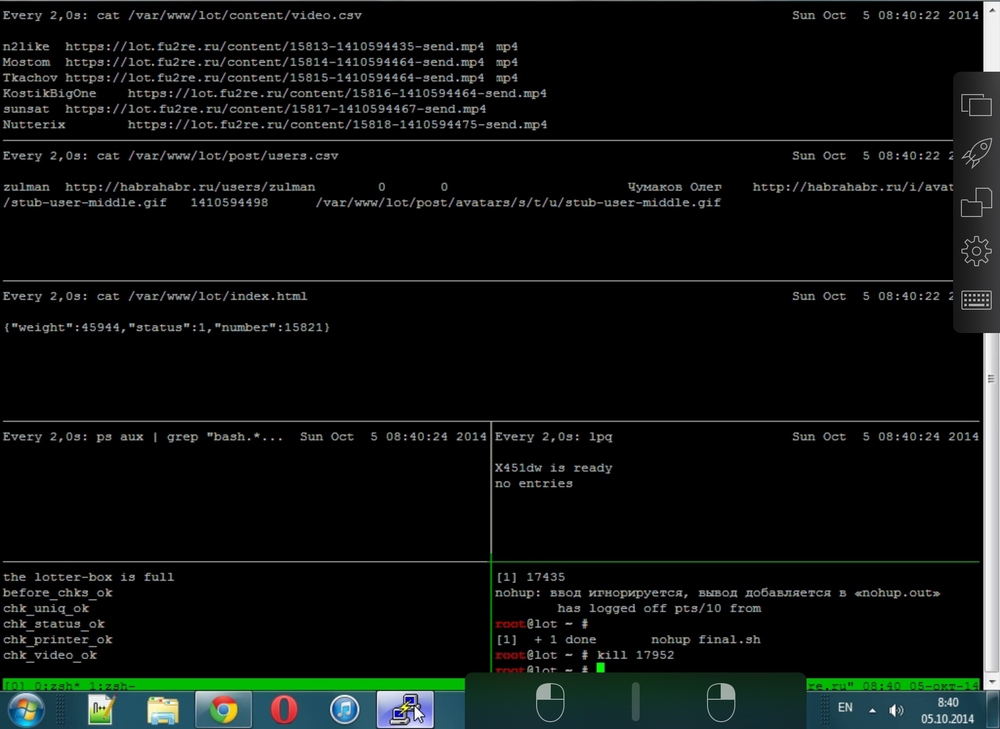
Data is transmitted in batches of 10 entries. After the information is received, the script launches the assembly of the PDF file for the first ticket, where it inserts the avatar, nickname, surname and name of the participant, as well as his karma and rating. The generated PDF is sent to the printer, and the waiting for the signal from the infrared obstacle sensor is triggered. As soon as the ticket is printed and comes into view of the sensor:

(we tested, of course, on our most favorite Habr users)
... starts recording from the camera located above the tray. After the recording is made, one of 30 video messages from Anatoly Wasserman is attached to it, and the file is put into the outbox daddy. The next time you access the Habr server, it will take these recorded videos. Next, we open the curtain and wait for the ticket to fall into the ballot box. As soon as the infrared sensor stops seeing the ticket, we recalculate the weight and start printing the next ticket.
If all the tickets received from Habr have already been printed, then we change the status to “0”, which means that we are ready to accept a new batch of data. Along the way, the script checks the camera, the printer and the Arduino for errors, and if suddenly there is something wrong with some of the devices, we will receive an SMS notification (you can't make the contestants wait!).
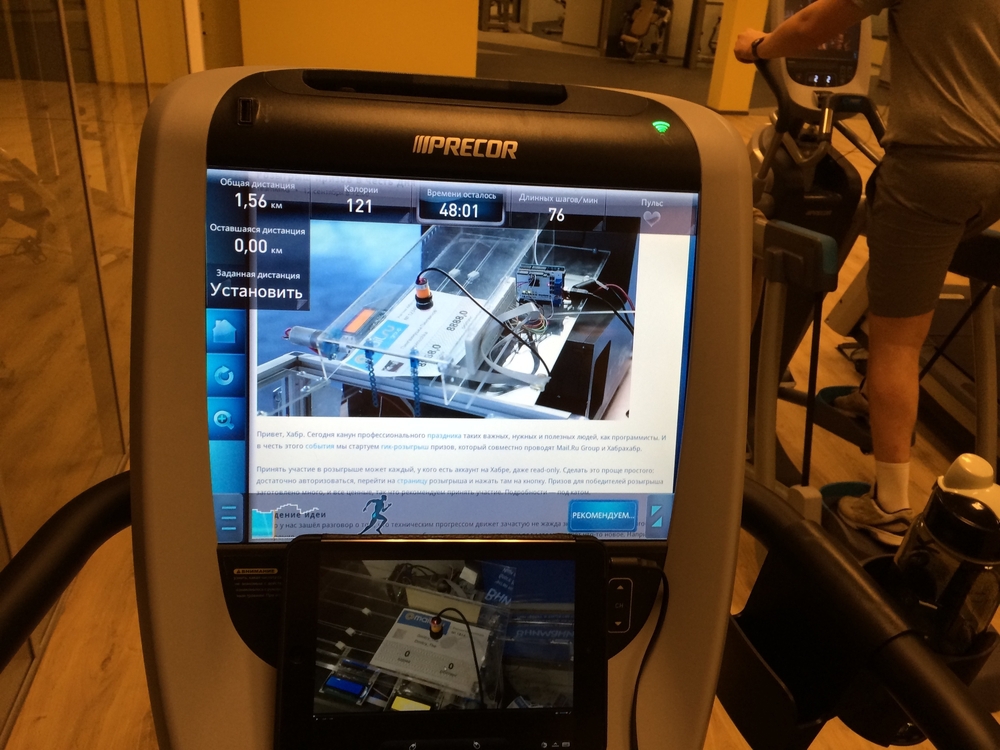
Honestly, we are no exception. The project lasted 45 days, and during this time, our adrenaline enthusiasm after the launch gradually changed to a slight apathy. Nevertheless, we regularly monitored the project, and if the server sent us an SMS, we honestly connected via SSH and watched what happened there. Sometimes it was necessary to simply restart the script, sometimes call the guard to feed the printer with paper (after hours security service performed this honorable mission, thank you so much!), Sometimes go down and pull out the stuck ticket or replace the cartridge. Sometimes an alarming SMS caught up with us in the most unexpected places, for example, in a fitness center:
Or driving:

But now, when the project is finished, it is impossible not to admit that it was one of the most interesting in our life, and our hands are itching again to come up with something more fun! Thanks to all of you who are not indifferent to the project and have taken part in our competition. ;)
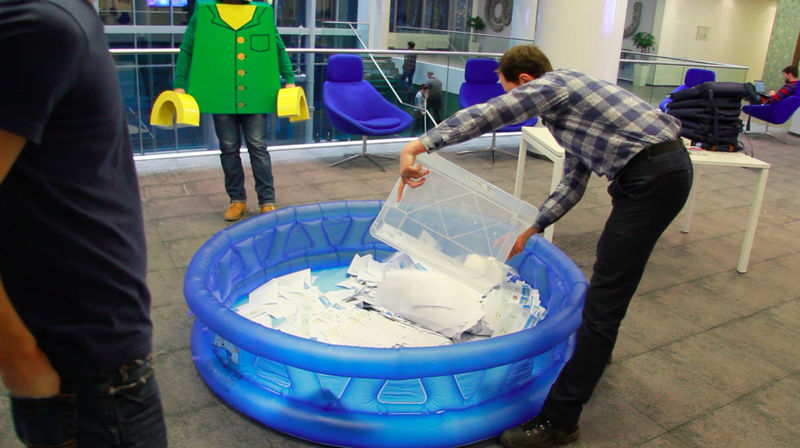
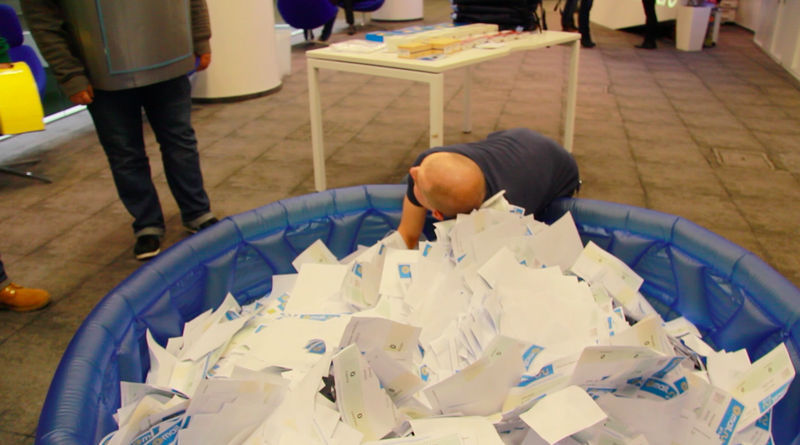
There were a lot of tickets, and we decided to pour them into the inflatable pool. Every ticket had to literally dive.
We begin, perhaps, with the printer.
')
Printer
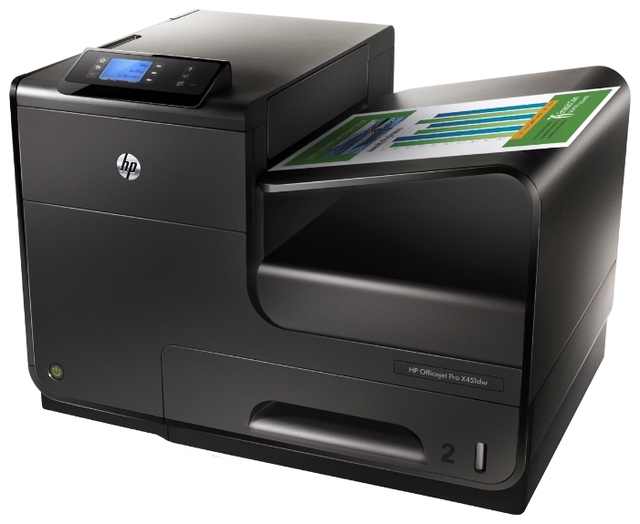
For obvious reasons, the printer is a critical node of our project, so we approached its choice with particular care. After going through about 15 different models, we stopped on an HP Officejet Pro X451dw inkjet printer with duplex printing capability (that is, on both sides of the paper). Its competitive advantage is also high printing speed, a large 500-sheet tray (with the ability to purchase one more for the same amount) and a fairly large height, on which the output window for printed sheets is located.We removed the plastic stand for the printed sheets (it is mounted on the latches), and we had a fairly good height difference. This allowed us to use the force of gravity (“Use force, Luke!”), Under the action of which tickets slid down along the tray at the angle. At the same time I did not have to produce extra travolators to push the sheet inside the tray.
When we brought the printer, we happily opened the box (I don’t know how you like it, but I like the smell of the new technology!) And started setting it up. The first test went to “Hurray”, the printer printed our test tickets regularly. However, when more thorough testing began, it turned out that duplex printing only works on A4 paper. And our ticket format was A5 (after all, we care about the environment and don’t want to waste too much paper). That is, A5 tickets were printed face down. We already started to think about how to place the camera below, but after a couple of days we found a wonderful driver for UNIX (we will tell about the server below) and did teach him to print in duplex.
In general, the printer showed itself quite well. About 30,000 tickets were printed, and during all this time the paper jam only happened three times (!).
Arduino, servos and sensors
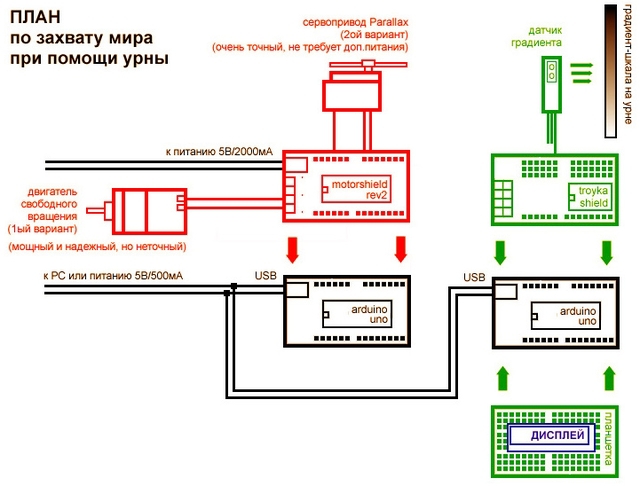
For the project, two sets of Arduino Uno, Troyka Shield, servos, displays, sensors and other trifles were purchased. In the original version, the Arduino wiring diagram looked like this:The first Arduino was responsible for opening and closing the tray. The second is for receiving information from the gradient sensor (later another sensor appeared - the ultrasonic range finder), and outputting this information to the screen. The quick assembly showed that there shouldn't be any problems, the engine was spinning regularly, test information was displayed on the screen.
The analog line sensor gave us very well the data on the level of illumination on the test gradient:
We placed the gradient on the side of the urn, and above it secured the line sensor:
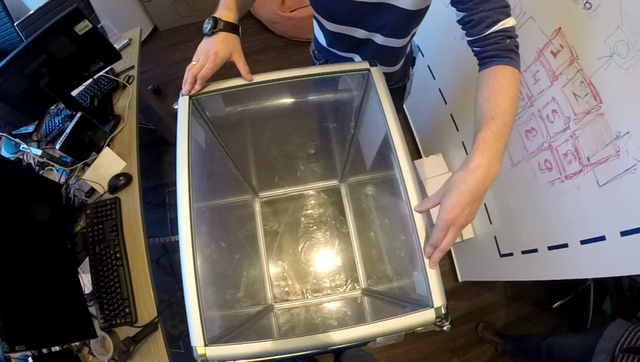
Another sensor connected to the Arduino is an infrared obstruction sensor . It is located on the top lid of the tray, under it, a special hole is cut in the bottom wall of the tray. Its task is to notify the server that the ticket printed out and fell into the tray:
As soon as the ticket falls into the tray, the sensor sends a signal to the Arduino, which in turn sends it to the server, and that one starts recording the camera. After a few seconds, the camera turns off and power is applied to the servo, which opens the "curtain". The curtain we made from the elements of Makeblock .
The third sensor connected to the Arduino is the ultrasonic range finder . It measures the distance between the bottom of the urn and the floor, is an additional source of information for calculating the weight. After the final assembly, we did not hide the arduinks in the nightstand, but placed them behind a transparent tray so that the colored wires and flashing LEDs would please the eyes of geek-porn fans (and we work a lot in the company).
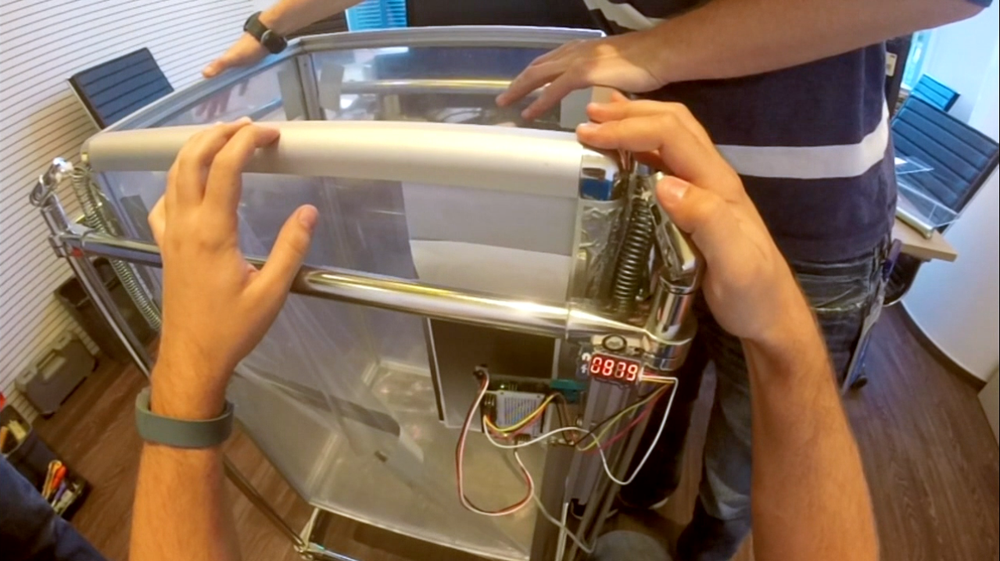
Tray
Another crucial place for our design is the tray. A printed competitive ticket gets into it, and it was necessary to make the tray so that the ticket did not turn over, fell exactly under the camera and did not get stuck. The first prototype, glued with a glue gun made of plexiglass scraps, looked like this:After we more or less selected the dimensions, the location of the camera, the sensors and the servo with a curtain, we made a drawing and cut out all the details with a laser cutter (thanks to the guys from lab3dprint.ru ). The parts were glued together with dichloroethane (in no case could we allow cracks and irregularities when gluing), and the result was a more decent design with smooth seams:
However, even despite the hole under the obstacle sensor, the paper sheet was often stuck (stuck to the Plexiglas), and the force of attraction was not so high as to overcome the force of friction.
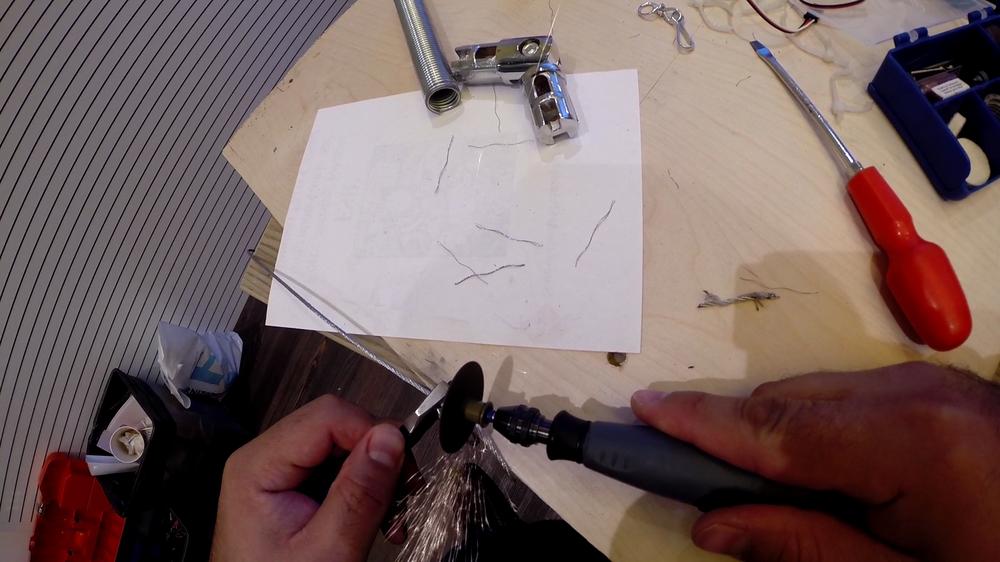
To reduce the area of contact with the surface of the tray, we pulled the badminton strings:
However, this did not help much either, the ticket stubbornly stuck on the last leg and did not even reach the curtain. Then we went even further, and attached the bottom of the servo with a plastic six-petal gear, which begins to rotate immediately after the curtain opens:
Such a “pushing” of the ticket from the bottom solved the problem, and now the tickets slid off with a whistle. We breathed a sigh of relief and switched to the ballot box.
Urn
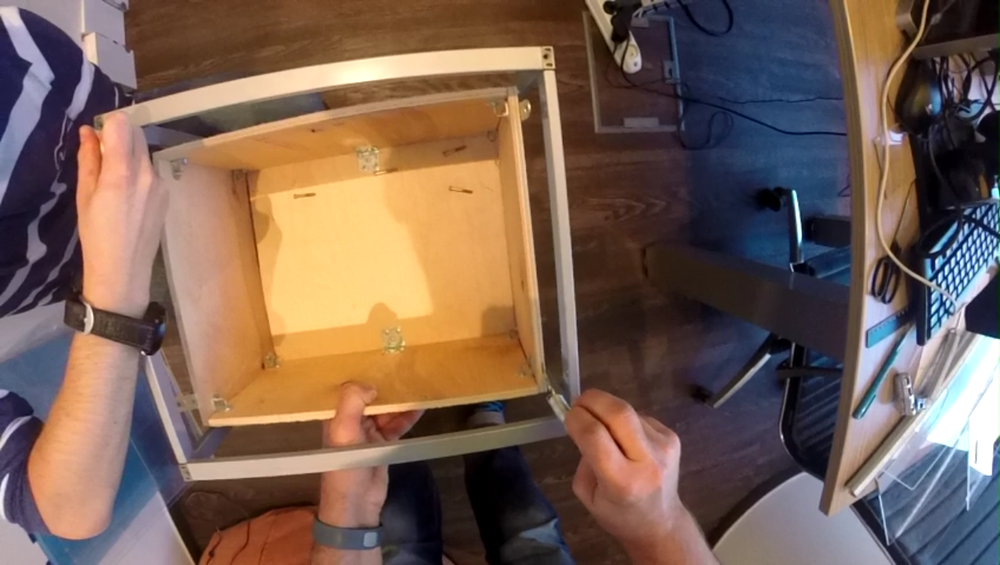
As you probably already guessed, we have an urn, too, is not the simplest element of the design. After all, we are not looking for easy ways, and decided to measure the weight not with ordinary weights (although in the very first version of the design we thought lazily about weights with Wi-Fi), but to do it with the help of two sensors that have already been written above. And in order for these sensors to measure the dynamics of weight changes, we had to hang the ballot box on the springs. For the test construction, we found a metal frame from an old bedside table, made a wooden box of plywood and hung it on springs from the VAZ 2101 clutch pedal:Do not worry, not a single "Zhiguli" was hurt, all the springs were bought in the auto parts store. :) Measurements of the estimated weight of competitive tickets, spring stretch coefficients, basket volume and other parameters showed that the design should be much larger and the springs should be more powerful:
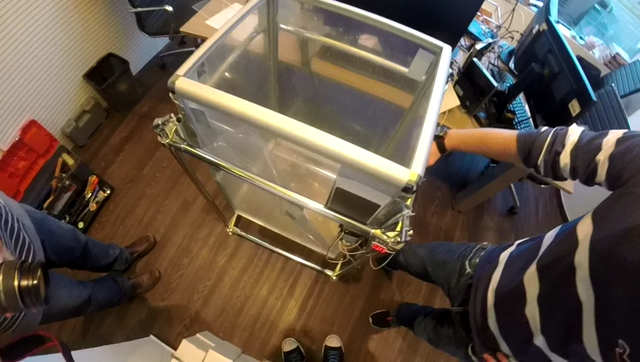
The second version of the urn and frame looks like this:
The urn was assembled from exhibition aluminum profiles and plexiglass, and the frame from structures known in the market as “Joker Uno”. More powerful springs were purchased in the construction market, with holders we connected them with flexible metal cables:
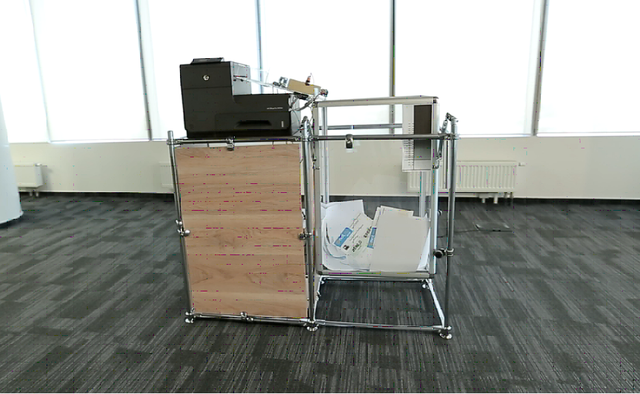
So that the frame with the urn is not accidentally moved relative to the printer, we decided to add a special nightstand for the printer to the design, as a result, everything began to look like this:
Server part
In parallel with the hardware, we worked on the "brains". And the special script written for UNIX became the brain of our entire system. Its task includes:- Getting data from Habr.
- Formation of the ticket of the participant on the basis of this data.
- The seal.
- Data exchange with Arduino.
- Video recording.
- Sending video to Habr.
- Trouble alert.
For convenience, we organized the script management via SSH access, this is how the project management panel looks like:
Data is transmitted in batches of 10 entries. After the information is received, the script launches the assembly of the PDF file for the first ticket, where it inserts the avatar, nickname, surname and name of the participant, as well as his karma and rating. The generated PDF is sent to the printer, and the waiting for the signal from the infrared obstacle sensor is triggered. As soon as the ticket is printed and comes into view of the sensor:
(we tested, of course, on our most favorite Habr users)
... starts recording from the camera located above the tray. After the recording is made, one of 30 video messages from Anatoly Wasserman is attached to it, and the file is put into the outbox daddy. The next time you access the Habr server, it will take these recorded videos. Next, we open the curtain and wait for the ticket to fall into the ballot box. As soon as the infrared sensor stops seeing the ticket, we recalculate the weight and start printing the next ticket.
If all the tickets received from Habr have already been printed, then we change the status to “0”, which means that we are ready to accept a new batch of data. Along the way, the script checks the camera, the printer and the Arduino for errors, and if suddenly there is something wrong with some of the devices, we will receive an SMS notification (you can't make the contestants wait!).
Project support
Probably, many of you are familiar with this feeling, when the project is launched and there is no longer any desire to work on it - all the most tasty things have already been passed, everything is working, and I want to switch to new tasks. And then some users are calling and want to fix it, or is it ...Honestly, we are no exception. The project lasted 45 days, and during this time, our adrenaline enthusiasm after the launch gradually changed to a slight apathy. Nevertheless, we regularly monitored the project, and if the server sent us an SMS, we honestly connected via SSH and watched what happened there. Sometimes it was necessary to simply restart the script, sometimes call the guard to feed the printer with paper (after hours security service performed this honorable mission, thank you so much!), Sometimes go down and pull out the stuck ticket or replace the cartridge. Sometimes an alarming SMS caught up with us in the most unexpected places, for example, in a fitness center:
Or driving:
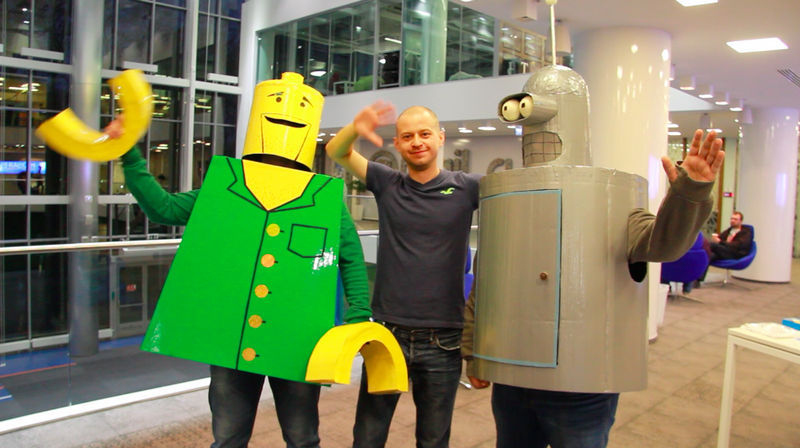
But now, when the project is finished, it is impossible not to admit that it was one of the most interesting in our life, and our hands are itching again to come up with something more fun! Thanks to all of you who are not indifferent to the project and have taken part in our competition. ;)
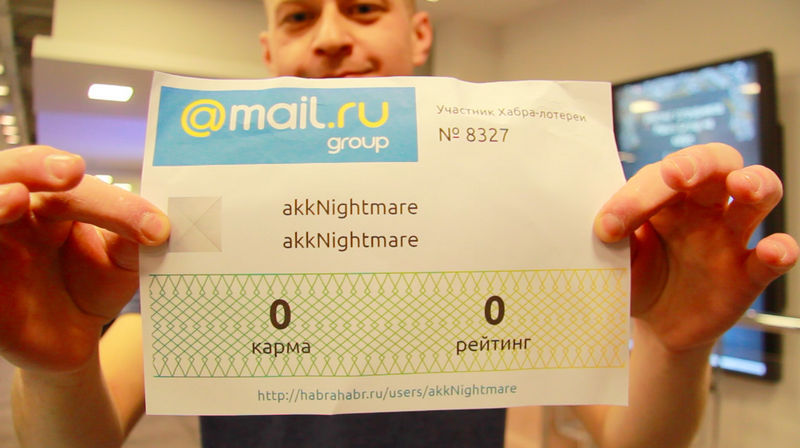
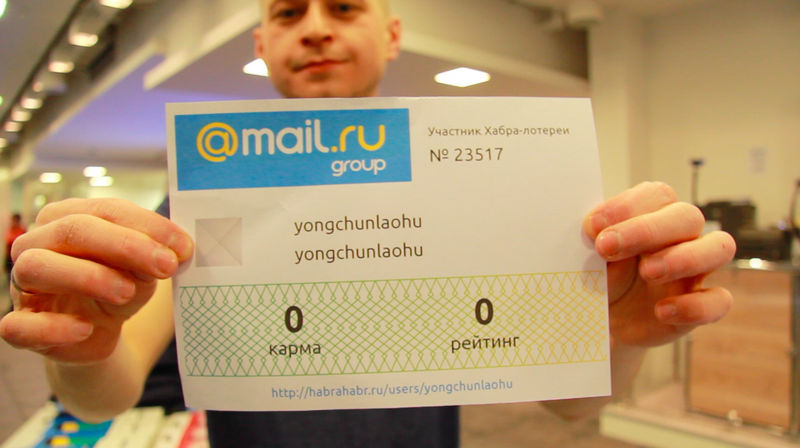
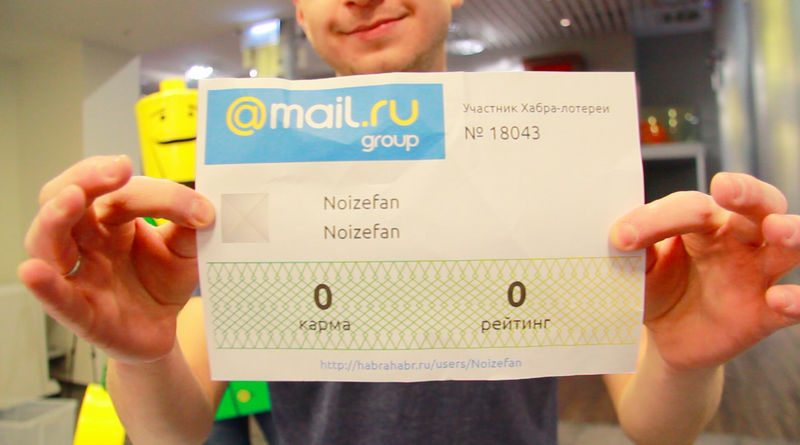
And now, under the crash of the drums, the list of winners of our geek contest!
| Prize | Winner |
|---|---|
| A laptop | @Noizefan |
| A laptop | @yongchunlaohu |
| A laptop | @akkNightmare |
| Samsung Galaxy S5 | @alexeyfdv |
| Samsung Galaxy S5 | @Malevolent |
| Samsung Galaxy S5 | @BVYU |
| Google nexus 7 | @iusfof |
| Google nexus 7 | @ zolt85 |
| Google nexus 7 | @rmq |
| Google nexus 7 | @mrise |
| Google nexus 7 | @TomashUA |
| Jawbone | @thepry |
| Jawbone | @zloi_ezhik |
| Jawbone | @msdrSoul |
| Jawbone | @SCIF |
| Jawbone | @ sveta0203 |
| Leap Motion | @ MrMeowington5 |
| Leap Motion | @jackee |
| Leap Motion | @Feanrez |
| Leap Motion | @verbaux |
| Leap Motion | @WizardOfRain |
| Leap Motion | @usupport |
| Backpack | @koltira |
| Backpack | @ldinc |
| Backpack | @Mikele |
| Backpack | @ Kag0r |
| Backpack | @shtepochka |
| Backpack | @julievstout |
| T-shirt | @SquareLemon |
| T-shirt | @homm |
| T-shirt | @Natasha_Tolstova |
| T-shirt | @Allesad |
| T-shirt | @pettson |
| T-shirt | @alex_trueman |
| T-shirt | @Gustychg |
| T-shirt | @SergMerlin |
| T-shirt | @gyok |
| T-shirt | @ graycat660 |
Source: https://habr.com/ru/post/241995/
All Articles