Visual Studio Express is a great free tool for web development.

I often attend web development conferences with great pleasure. At the last JSConf US, I met a huge number of developers who showed how easy it is to create websites using Visual Studio 2013.
Many of them said that they were completely unfamiliar with all the features of the free version of Visual Studio Express. But even in free form, VS Express is good. Let's take a look, starting from the installation process itself, at what is available in Visual Studio Express.
')
For those who prefer video tutorials, the material is available at the following link .
Installing Visual Studio 2013 Express Edition
First of all, you need to go to the website of Visual Studio 2013 Express: http://www.visualstudio.com/en-us/products/visual-studio-express-vs.aspx
Here are the various Visual Studio options. Choosing the appropriate version depends on what you are going to do.
For web developers, choose Express 2013 for the Web: http://www.visualstudio.com/downloads/download-visual-studio-vs#d-express-web
Supported operating systems:
- Windows 7 SP1 (x86 and x64)
- Windows 8 (x86 and x64)
- Windows 8.1 (x86 and x64)
- Windows Server 2008 R2 SP1 (x64)
- Windows Server 2012 (x64)
- Windows Server 2012 R2 (x64)
To install, you need a little more than 1.17 GB of hard disk space:

Once the installation is complete, you can run Visual Studio 2013 Express and get started:
Creating a website frontend from scratch
One of the main steps in creating a website is to set up a web server to publish your website files.
Setting up a web server with Visual Studio 2013 Express is easy. You need to create a folder and specify it in File => Open Web Site:
Visual Studio will automatically create a web server in the specified folder. Please note that you can also specify a local IIS (Internet Information Server) or FTP server. No need to separately install a web server, tomcat, node or something else.
Now let's say I want to add a regular HTML file to the project. In order to do this, I right-click on my site in Solution Explorer and select Add => New Item => Html Page:
Obviously, Visual Studio supports HTML / CSS / JS files, and also implements syntax highlighting and IntelliSense for them:
Successfully perform the same actions with the JavaScript file:
In order to add a link to this file from your HTML page, you just need to move it in Solution Explorer.
And, as I mentioned above, you also get all the benefits of IntelliSense for a JavaScript file:
With Visual Studio, you do not need to configure the web server because everything has already been done for the developer.
Just press the button

Visual Studio creates a local web server on localhost using a free port (here 2013), which is quite convenient for the developer.
Using “Stoppoints” is just as easy - to set a point, just click on the fields or use F9, and then start debugging:
Also for debugging your site you have access to the variables window, call stack, console and much more.
Version Control Systems
Visual Studio Express version supports interaction with both TFS (Team Foundation Server) and Git:
You can easily clone, fork, execute or send the code to the selected system without leaving the IDE.
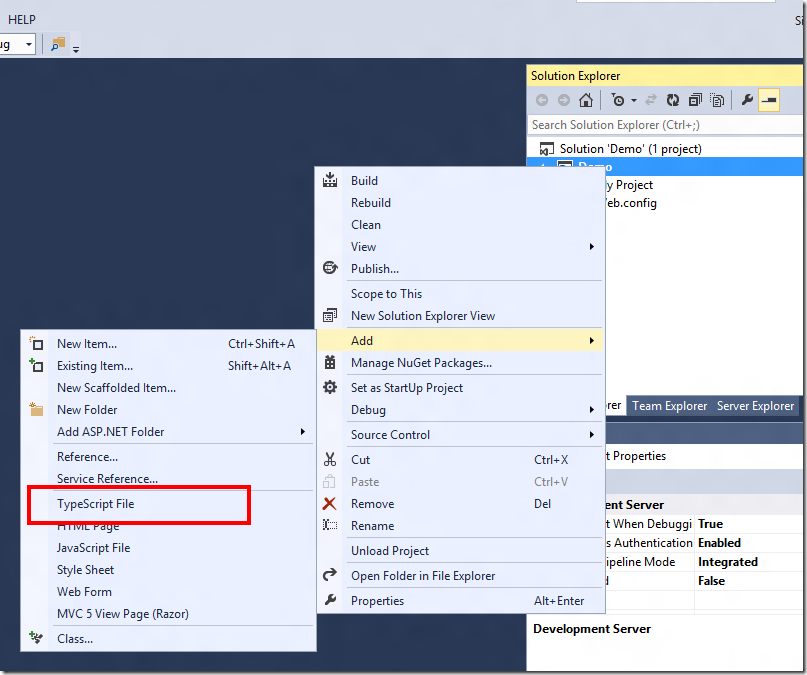
TypeScript
Maybe you know that I am a big fan of TypeScript (if not, you can read my article on why we decided to transfer babylon.js from JavaScript to TypeScript )
The good news is that when you install Visual Studio 2013 Update 2 , TypeScript support in Visual Studio is added for free.
Now you can add a TypeScript file to your project:
Obviously, IntelliSense is also supported for TypeScript, and more, for example, a drop-down list offering a selection of available functions:

Debugging also works great - thanks to the code map files generated by TypeScript.
Publish a website to Azure
Thanks to tight integration of the environment with Azure, a developer can create and publish a website directly from Visual Studio without having to go to the Azure portal. Also, using these VS features, you can debug a website directly in the cloud.
Right-click on the project build in the solution browser and select Publish Web Site:

Choose a site publishing using Microsoft Azure Websites:

Log in and create a new web site instance in Azure:

In the following Create Website in Azure dialog, you will need to select the resources you want to create:

After clicking the “Create” button in the web publishing wizard window, you will be able to test the connection to ensure that Visual Studio can connect to Azure to deploy the web project:
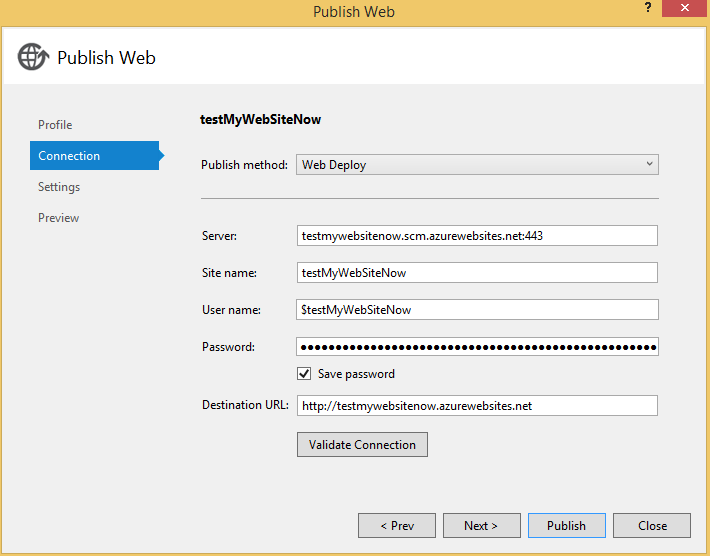
Click "Publish" and, after successful deployment, the URL of the published website is automatically opened in the browser, and the created website is now published in the cloud and accessible from the Internet:

Conclusion
You saw how quickly you can start working with Visual Studio and create a front end for your site. The features described in this article are only a small fraction of what you can do with Visual Studio Express. I myself use it for all stages of development - from text editing to writing code in C # / Python / JavaScript / TypeScript.
Below is a list of supported files:

In conclusion, I would like to advise you to give the free version a chance and try Visual Studio Express. You will not be disappointed.
useful links
- Try Azure for free for 30 days!
- Microsoft Azure Development Center (azurehub.ru) - scripts, tutorials, examples, design recommendations
- Twitter.com/windowsazure_ru - the latest Microsoft Azure news
- Microsoft Azure Community on Facebook - experts, questions
- Explore Microsoft Virtual Academy courses on cloud and other technologies
- Business and the cloud: best practices solutions
- Windows 8.1 Update for large organizations. Beginning of work
- Microsoft Hybrid Cloud: Typical Solutions Guide
- Toolkit for preparing users for Windows 8.1
- Introduction to the Win2D Graphic Library
- Download free or trial Visual Studio
- Become a universal Windows application developer
Source: https://habr.com/ru/post/241826/
All Articles