How to install Citrix Director 7.6 to monitor XenApp 6.5 sessions
With the release of the Citrix XenDesktop version 5.0 solution, the popularity of an additional management tool, the Desktop Director, included in the main product, began to grow. As you know, the Desktop Director component (the new name for Citrix Director) is designed to simplify the difficult life of the Technical Support Service in terms of serving user sessions in the XenDesktop virtual desktops environment. With it, you can not only get comprehensive information about active user sessions, but also perform basic operations on them.
But, what about the Citrix XenApp environments, when serviced by HelpDesk, the same tasks? The main AppCenter console is not the most convenient tool for this.
Fortunately, Citrix quite quickly eliminated the injustice and, starting from version 2.1, Citrix Director began to support the XenApp environment. However, for its integration it was necessary to resort to additional manipulations with the configuration of both the XenApp controllers and the Desktop Director itself. The latest version of Citrix Director 7.6, which is part of XenDesktop \ XenApp 7.6, also officially supports the XenApp 6.5 environment and requires additional configuration, but it is not devoid of pitfalls.
')
Therefore, the main purpose of this article is to describe the complete integration procedure of Citrix Director 7.6 with the XenApp 6.5 environment, which has been tested in practice and includes descriptions of possible problems and how to fix them.
Installing Citrix Director
Although you can install Citrix Director on any of the XenApp servers, it is highly recommended that you use a dedicated server for it, which is not burdened by Citrix services. In addition, to install Citrix Director, it is advisable to use the XenDeskop / XenApp 7.6 installation wizard, and not the DesktopDirector.msi MSI file, since This will allow you to correctly install all the necessary components (for example, .NET 4.5.1, ASP.NET 2.0, etc.).

During the installation, in addition to the traditional parameters, such as accepting the license agreement and specifying the installation path, the wizard will prompt you to specify the names of the XenApp servers.
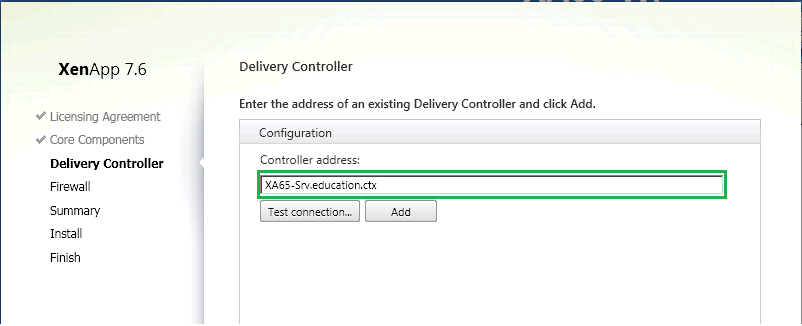
In principle, at the installation stage, this parameter can be ignored, since Upon completion, an additional setup will still be performed.
Values of other parameters can be accepted by default.
Citrix Director setup
Since Citrix Director was originally conceived for the XenDesktop environment, then for integration with XenApp it is necessary to make additional changes to its configuration from the IIS console.

In the "Application Settings" section you need to make the following changes:
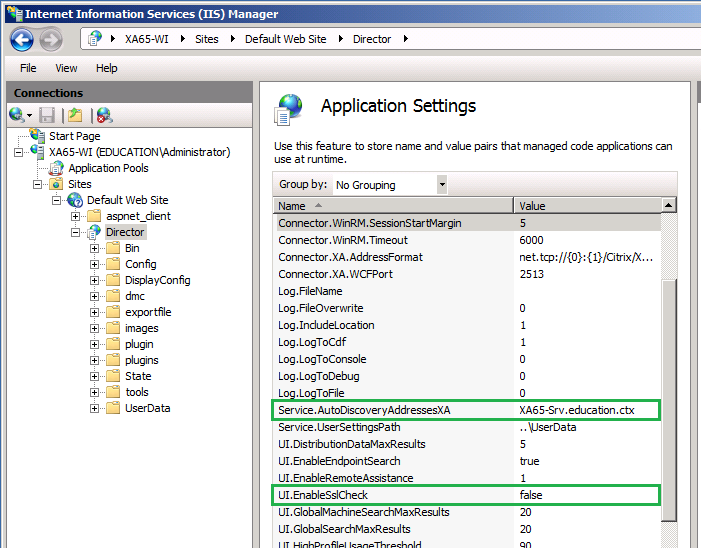
The Service.AutoDiscoveryAddressesXA parameter is introduced specifically to support XenApp environments and is not listed by default. Therefore, to configure it, you must rename the existing Service.AutoDiscoveryAddresses parameter or add it manually.
Alternatively, you can use the DirectorConfig.exe utility located in the “C: \ Inetpub \ wwwroot \ Director \ Tools \” folder:
DirectorConfig.exe / XenApp [XenApp Controller Name]
Changing the UI.EnableSslCheck parameter is optional, but avoids the difficulty if you do not have an SSL digital certificate on XenApp servers.
Finally, you must restart IIS to apply the changes.
Configuring XenApp
Now is the time to move on to preparing the XenApp environment. There is no need to configure each server in the farm; it suffices to restrict oneself to servers acting as controllers.
First of all, you need to install the .NET Framework 4.5.1 component, which can be found on the XenDesktop \ XenApp 7.6 installation disk, in the "\ Support \ DotNet451 \" folder. Without this component, it will not be possible to install other necessary components.
Then, to ensure normal interaction of XenApp with Citrix Director, the following components must be installed:
After installing these components, you must grant users permissions to the Windows Remote Management (WinRM) service. The easiest way for this operation is to use the ConfigRemoteMgmt.exe utility from the "... \ x64 \ Virtual Desktop Components \" folder on the installation disk. From the command line, run the following command:
ConfigRemoteMgmt.exe \ configwinrmuser [DOMAIN \ USER] / all
where, [DOMAIN \ USER] is the name of the user or group of users who need to provide access to Citrix Director data.

After performing all the above operations, the Citrix Director server will be able to interact with the XenApp environment and provide detailed information about user sessions.
Possible problems and their elimination
Given the variety of components involved in the integration of Citrix Director and XenApp, we cannot exclude the possibility of various problems. The most frequent of them are as follows:
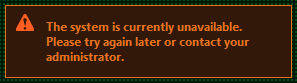
1. When you open the Citrix Director console, after you enter your credentials, the following message appears:
In this case, a warning appears in the Application log:

2. Instead of the user's session data, the following message is displayed in the Citrix Director console:

The study of these problems in different scenarios and environments XenApp was able to identify the following possible causes:
Enabling the log file
For more detailed information on the interaction between XenApp and Citrix Director, you can customize logging. To do this, you must perform the following steps on the server with Citrix Director:
But, what about the Citrix XenApp environments, when serviced by HelpDesk, the same tasks? The main AppCenter console is not the most convenient tool for this.
Fortunately, Citrix quite quickly eliminated the injustice and, starting from version 2.1, Citrix Director began to support the XenApp environment. However, for its integration it was necessary to resort to additional manipulations with the configuration of both the XenApp controllers and the Desktop Director itself. The latest version of Citrix Director 7.6, which is part of XenDesktop \ XenApp 7.6, also officially supports the XenApp 6.5 environment and requires additional configuration, but it is not devoid of pitfalls.
')
Therefore, the main purpose of this article is to describe the complete integration procedure of Citrix Director 7.6 with the XenApp 6.5 environment, which has been tested in practice and includes descriptions of possible problems and how to fix them.
Installing Citrix Director
Although you can install Citrix Director on any of the XenApp servers, it is highly recommended that you use a dedicated server for it, which is not burdened by Citrix services. In addition, to install Citrix Director, it is advisable to use the XenDeskop / XenApp 7.6 installation wizard, and not the DesktopDirector.msi MSI file, since This will allow you to correctly install all the necessary components (for example, .NET 4.5.1, ASP.NET 2.0, etc.).
During the installation, in addition to the traditional parameters, such as accepting the license agreement and specifying the installation path, the wizard will prompt you to specify the names of the XenApp servers.
In principle, at the installation stage, this parameter can be ignored, since Upon completion, an additional setup will still be performed.
Values of other parameters can be accepted by default.
Citrix Director setup
Since Citrix Director was originally conceived for the XenDesktop environment, then for integration with XenApp it is necessary to make additional changes to its configuration from the IIS console.
In the "Application Settings" section you need to make the following changes:
| Parameter | Value |
|---|---|
| Service.AutoDiscoveryAddressesXA | [XenApp Controller Name] |
| UI.EnableSslCheck | False |
The Service.AutoDiscoveryAddressesXA parameter is introduced specifically to support XenApp environments and is not listed by default. Therefore, to configure it, you must rename the existing Service.AutoDiscoveryAddresses parameter or add it manually.
Alternatively, you can use the DirectorConfig.exe utility located in the “C: \ Inetpub \ wwwroot \ Director \ Tools \” folder:
DirectorConfig.exe / XenApp [XenApp Controller Name]
Changing the UI.EnableSslCheck parameter is optional, but avoids the difficulty if you do not have an SSL digital certificate on XenApp servers.
Finally, you must restart IIS to apply the changes.
Configuring XenApp
Now is the time to move on to preparing the XenApp environment. There is no need to configure each server in the farm; it suffices to restrict oneself to servers acting as controllers.
First of all, you need to install the .NET Framework 4.5.1 component, which can be found on the XenDesktop \ XenApp 7.6 installation disk, in the "\ Support \ DotNet451 \" folder. Without this component, it will not be possible to install other necessary components.
Then, to ensure normal interaction of XenApp with Citrix Director, the following components must be installed:
| Component | Location |
|---|---|
| Desktop WMI Provider | ... \ Support \ DesktopWMIProvider \ DirectorWMIProvider_x64.msi |
| Citrix HDX WMI Provider | ... \ x64 \ Virtual Desktop Components \ TS \ CitrixHDXWMIProvider-x64.msi |
After installing these components, you must grant users permissions to the Windows Remote Management (WinRM) service. The easiest way for this operation is to use the ConfigRemoteMgmt.exe utility from the "... \ x64 \ Virtual Desktop Components \" folder on the installation disk. From the command line, run the following command:
ConfigRemoteMgmt.exe \ configwinrmuser [DOMAIN \ USER] / all
where, [DOMAIN \ USER] is the name of the user or group of users who need to provide access to Citrix Director data.
After performing all the above operations, the Citrix Director server will be able to interact with the XenApp environment and provide detailed information about user sessions.
Possible problems and their elimination
Given the variety of components involved in the integration of Citrix Director and XenApp, we cannot exclude the possibility of various problems. The most frequent of them are as follows:
1. When you open the Citrix Director console, after you enter your credentials, the following message appears:
In this case, a warning appears in the Application log:
2. Instead of the user's session data, the following message is displayed in the Citrix Director console:
The study of these problems in different scenarios and environments XenApp was able to identify the following possible causes:
- The XenApp controller name in the Service.AutoDiscoveryAddressesXA parameter on the Citrix Director server is incorrect;
- Ports 2513 and 5985 on the XenApp controller are closed. Port 5985 is used by the WinRM service, and through port 2513, Citrix Director communicates with XenApp servers.
- The Citrix XenApp Commands Remoting service on the XenApp controller is disabled or stopped.
- The Citrix HDX WMI Provider is not installed on the XenApp server.
- The XenApp server contains several network cards. This problem can be solved in several ways:
Enabling the log file
For more detailed information on the interaction between XenApp and Citrix Director, you can customize logging. To do this, you must perform the following steps on the server with Citrix Director:
| one | Create a folder where the log file will be stored | 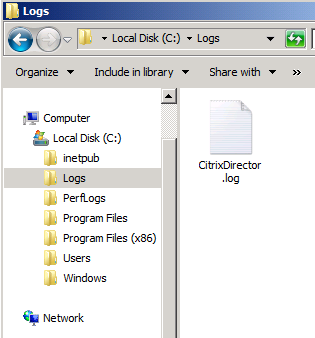 |
| 2 | In this folder, create an empty text file. | |
| 3 | Ensure that IIS (Local Account IIS_IUSRS) has permissions to write to this folder. | 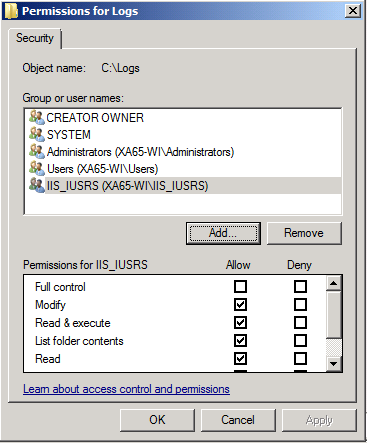 |
| four | Change the following CitrixDirector settings in the IIS console: Log.FileName = [path to log file]; Log.IncludeLocation = 1 Log.LogToCDF = 1 Log.LogToConsole = 1 Log.LogToDebug = 1 Log.LogToFile = 1 | 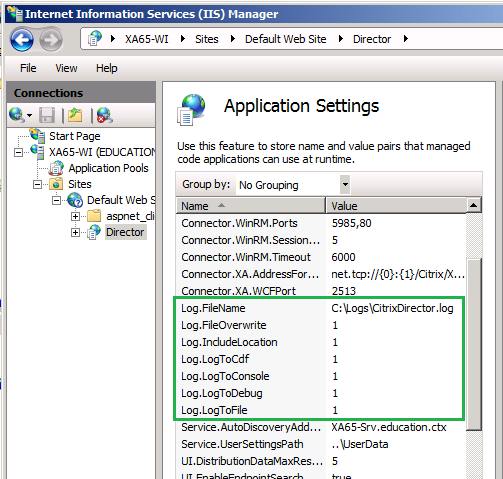 |
| five | Restart IIS | 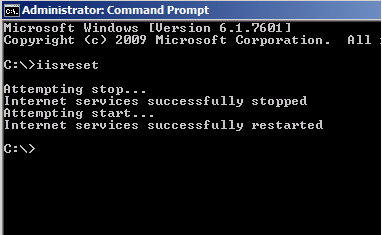 |
Source: https://habr.com/ru/post/241541/
All Articles