You want a delicious beer, Arduino to help
This publication is inspired by another. It's called the Mega Brewery Home Brewery Controller. Part I ” and published by megadenis .
I am a technical college student. One day, sitting in a cafe with a friend who then studied at a medical university, they decided to open a bar. There were many ideas that, in principle, deserved some attention. For example, the dance floor, which changes the angle of inclination depending on the style of music ... But, along with all the variety of ideas, there was one more -
After a couple of weeks, I brewed beer, taking the ingredients from the brewery, where my father's friend worked. But many processes were violated, so instead of beer there was something with a not very pleasant smell.
')
After a few years, I decided to repeat the process, automating it a little with Arduino UNO. And that's what happened.
To begin with, what the whole installation should do.
The first item is not currently implemented. So far, even thoughts are not how to implement.
The second one is also not implemented, but I will finish it in the near future, only I will wait for the pumps from ebay to be delivered.
The third point is quite simple.
The message from the system that it is necessary to pour water into the tank -> the program waits for the OK key -> the program sends the arduino a command to turn on the solid-state relay -> the solid-state relay turns on the one-kilo tenn in the tank, brings the temperature to 37 degrees, sends the program that everything is ready for cooking. Maintains a temperature of 37 degrees.
I want to check for water, but the sensor is still waiting for its departure from the “Chinese brothers”.
In principle, a simple procedure:
- Press the “Warm up” button in the control program, the rest of the control buttons are not active;
- After warming up, the program displays the message “Everything is ready, you can cook”;
- Fill up the ingredients, choose a program for brewing - the button "Brewing beer" becomes active;
- Press the "Brewing" button, the process has started;
- Further, the system will periodically notify with information messages what to do and when.
You need to follow the instructions.
This process allows you to set cooking parameters, change them in the cooking cycle. He has not reached him yet.
It's a dream. There are currently no components to implement. Not enough pumps, water level sensors. I do not know how to measure the density of the wort, how much alcohol is in a young beer and whatnot. But I do not despair and will automate gradually, until the brewing of beer looks like this:
I threw the ingredients into the appropriate trays, pressed the button and ... after a month and a half I received the finished beer.
This is a brief about the process, and now we come to the technical side.
As stated above, the arduino UNO is in favor of the control microcontroller. 2 relays connected to it, 2
digital thermometer DS18B20 .
Arduino communicates with the main program through the com port. Since I do not have a real-time Schild to arduino, I had to take timers from visual c #. I have no experience in writing programs, so if all of a sudden someone has ideas, the criticism is an honor. Criticize, fuck, so to speak, that suddenly do not like.
All is good, but for some reason, the third sensor shows constantly 85 degrees. I can not yet say why. And he needed for further automation - maintaining the temperature in the refrigerator.
Briefly describe what the program does.
The program is divided into subroutines, each of which is activated if a certain character appears on the com port. For example, if the letter “p” enters the port, the “Warm up” mode is activated. Or, if “a”, the subroutine avariya () is called and everything is turned off. When the temperature () subroutine is called, the data is written to global variables temp1, temp2. From there, and get into the right subroutine.
In the future, there will be routines for boiling different varieties and even moonshine.
Now, as for the main control program.
It is written in visual studio c #.
Source code of the program:
The program communicates with arduino through com port. The only thing I can’t win is that the program does not hang when the subroutine is executed when polling the com port. After the end of the subprogram, the program hangs down, but so far it is not critical and even a certain plus. Foolproof - not to press anything during a specific procedure.
- prepare the equipment for cooking;
- cook;
- write a simple log of work (very useful for further analysis of cooking);
- select the port to connect to the controlling controller (arduino UNO);
boil the cooker and the mash vats.
When pumps and solenoid valves come, I will automate further. In the meantime, every Sunday I will add one cooking program. In total there will be 5 programs. Also waiting for their turn implementation of the manual mode.
As the saying goes,
Here are some pictures of the brewery.
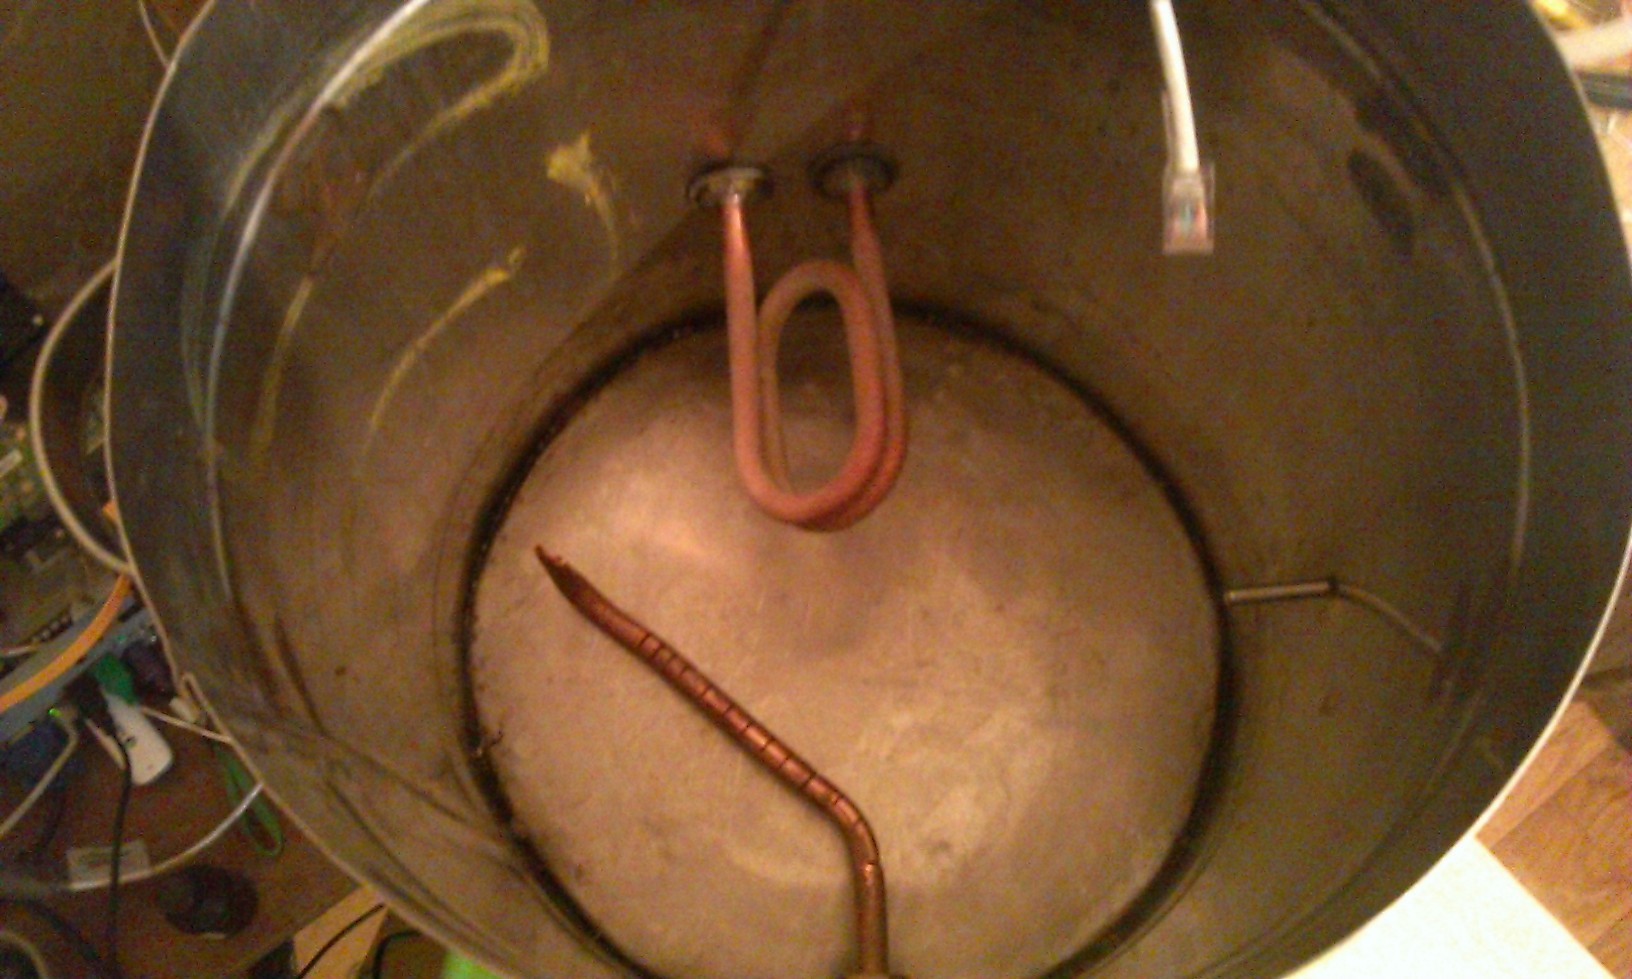
This is a cooking pot. I have two of them. With side mounted temperature sensor DS18B20 in an airtight frame.
I could not understand for a long time why periodically the arduino hangs until it dawned that everything needs to be grounded, but it punches on the case, then on the sensor case and on the arduino.
Copper tube inside - this is for filtering the wort. You can make it more beautiful, but it is better to use false. Unfortunately, the Chinese collect in no hurry to expel him.
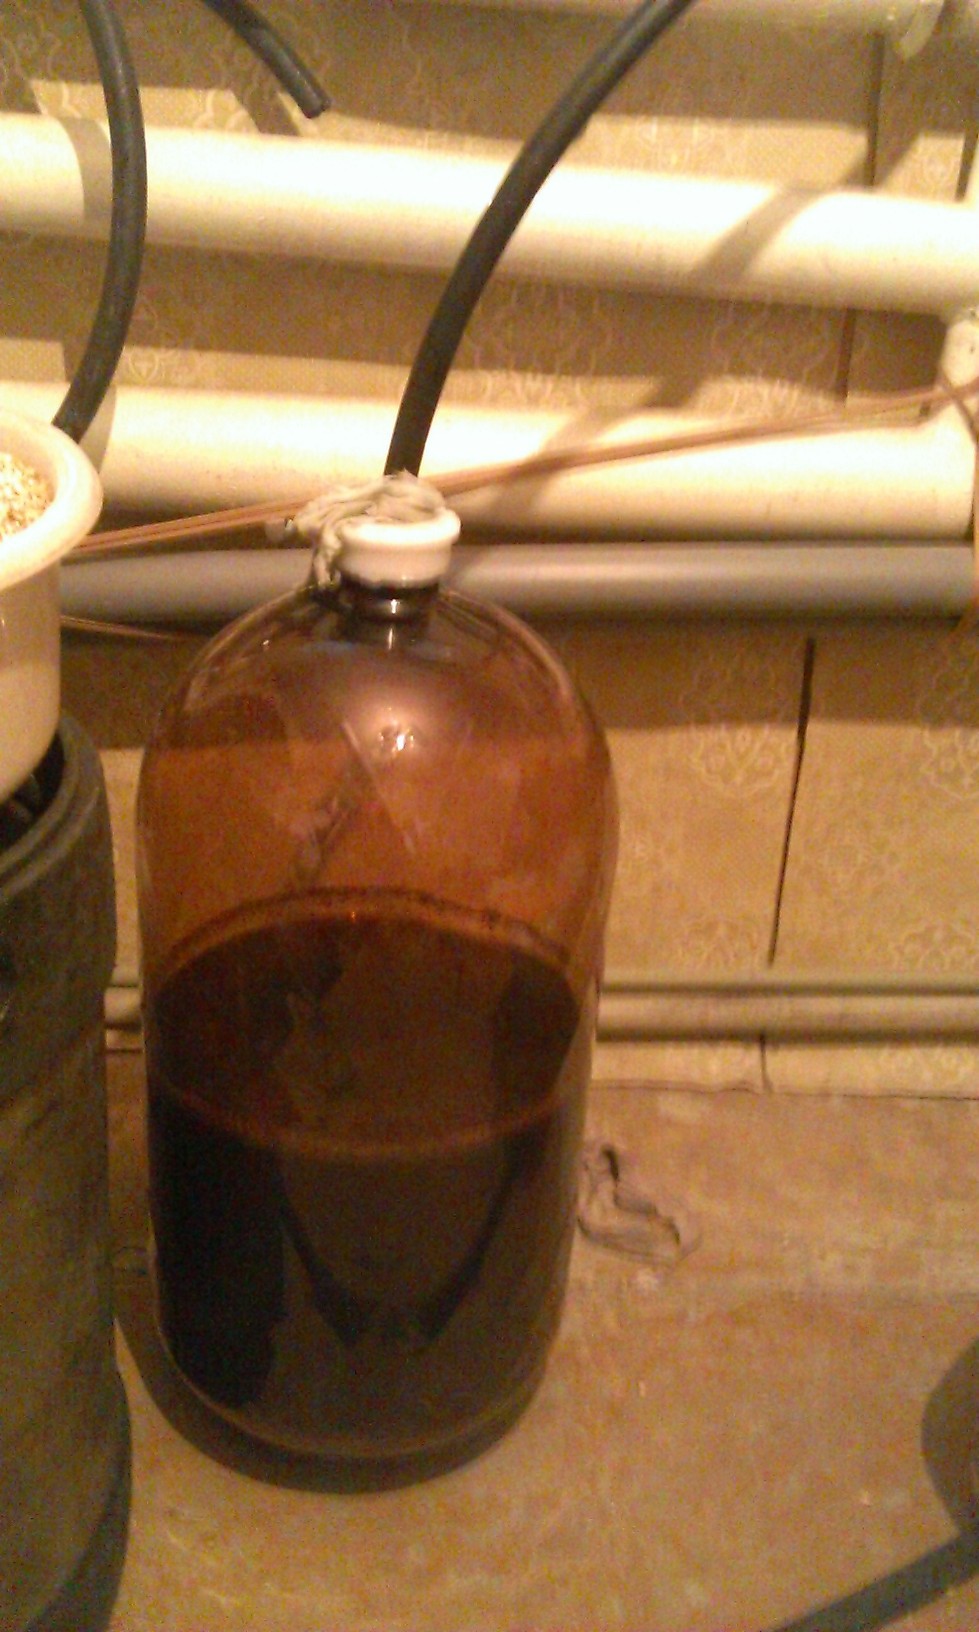
It's too early to talk about the result, that's what happened.
The general view of the vat looks like this.
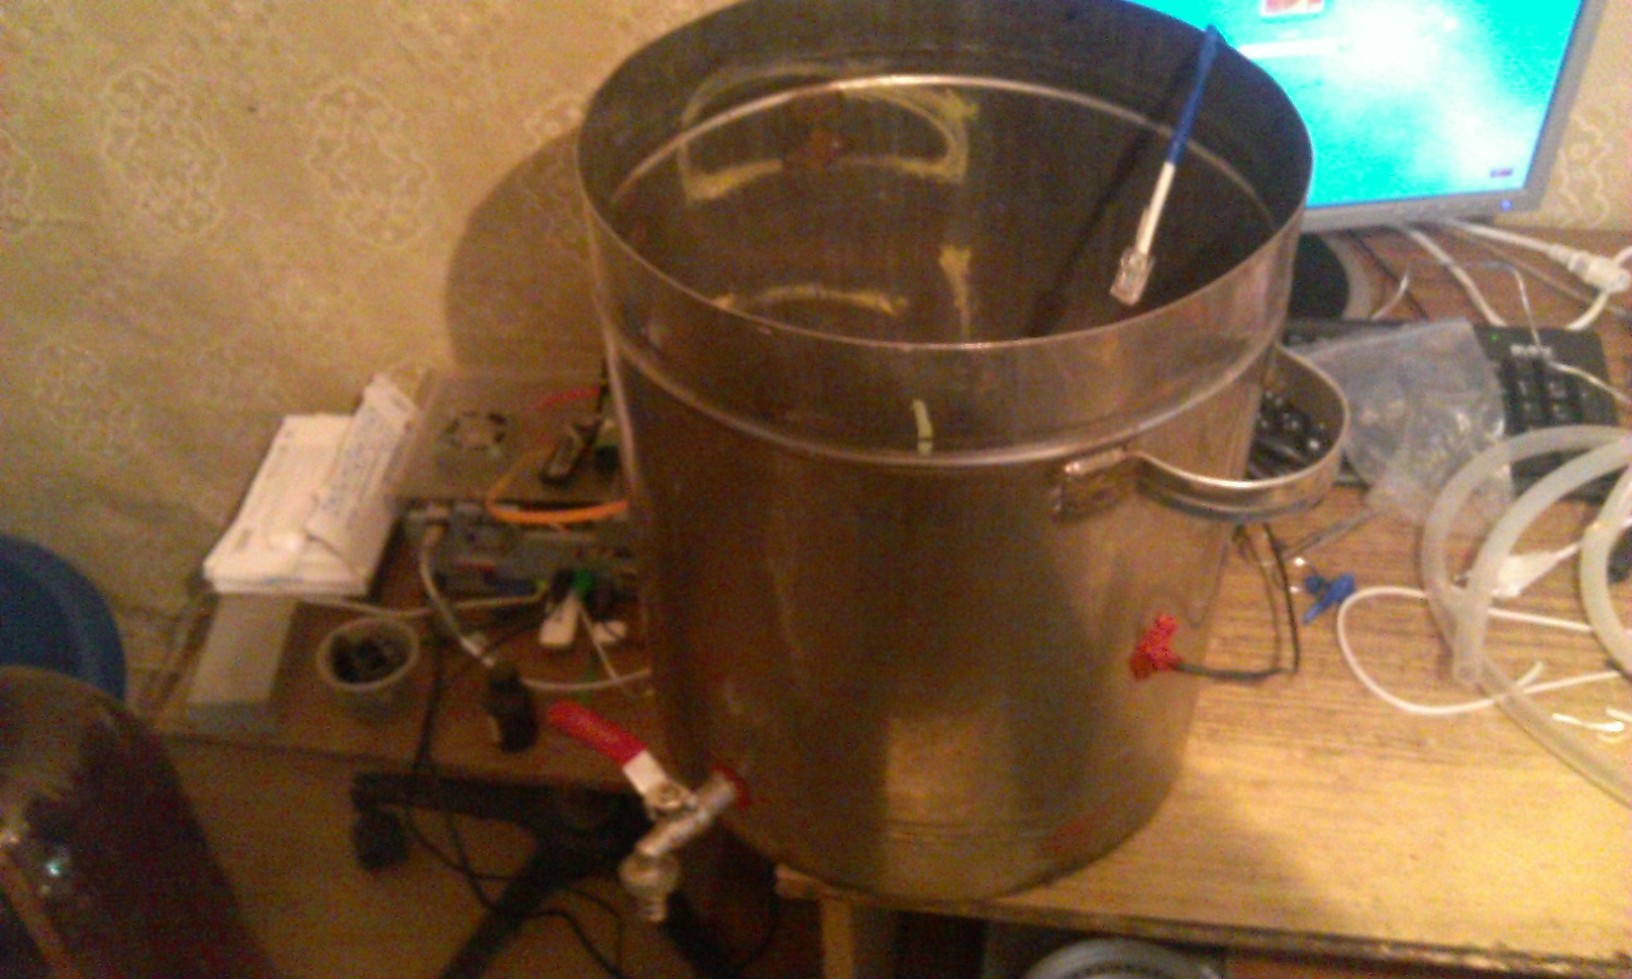
Used regular connectors
for connecting temperature sensors that connect to a double outlet. It is more convenient to wash the equipment. Disconnected, carried to the bathroom. Washed, connected and everything works.
Everything froze according to the schedule, it did not overflow. And the most immediate plans are to merge a batch of beer for the development of one more beer. The recipe, in principle, can be viewed in the code in the arduino varka () subroutine.
Finally came the solenoid valves. The automation process continues.
How did it all start?
I am a technical college student. One day, sitting in a cafe with a friend who then studied at a medical university, they decided to open a bar. There were many ideas that, in principle, deserved some attention. For example, the dance floor, which changes the angle of inclination depending on the style of music ... But, along with all the variety of ideas, there was one more -
... and not to make us your beer?
After a couple of weeks, I brewed beer, taking the ingredients from the brewery, where my father's friend worked. But many processes were violated, so instead of beer there was something with a not very pleasant smell.
')
After a few years, I decided to repeat the process, automating it a little with Arduino UNO. And that's what happened.
To begin with, what the whole installation should do.
- Check yourself - everything works, everything is connected;
- Clean yourself;
- Preparing for the brewing process;
- Brew beer in semi-automatic mode;
- Brew beer in manual mode;
- Brew beer in automatic mode (as a washing machine washes clothes).
The first item is not currently implemented. So far, even thoughts are not how to implement.
The second one is also not implemented, but I will finish it in the near future, only I will wait for the pumps from ebay to be delivered.
The third point is quite simple.
Preparing for the brewing process
The message from the system that it is necessary to pour water into the tank -> the program waits for the OK key -> the program sends the arduino a command to turn on the solid-state relay -> the solid-state relay turns on the one-kilo tenn in the tank, brings the temperature to 37 degrees, sends the program that everything is ready for cooking. Maintains a temperature of 37 degrees.
I want to check for water, but the sensor is still waiting for its departure from the “Chinese brothers”.
Beer brewing in semi-automatic mode
In principle, a simple procedure:
- Press the “Warm up” button in the control program, the rest of the control buttons are not active;
- After warming up, the program displays the message “Everything is ready, you can cook”;
- Fill up the ingredients, choose a program for brewing - the button "Brewing beer" becomes active;
- Press the "Brewing" button, the process has started;
- Further, the system will periodically notify with information messages what to do and when.
You need to follow the instructions.
Manual brewing
This process allows you to set cooking parameters, change them in the cooking cycle. He has not reached him yet.
Automatic cooking
It's a dream. There are currently no components to implement. Not enough pumps, water level sensors. I do not know how to measure the density of the wort, how much alcohol is in a young beer and whatnot. But I do not despair and will automate gradually, until the brewing of beer looks like this:
I threw the ingredients into the appropriate trays, pressed the button and ... after a month and a half I received the finished beer.
This is a brief about the process, and now we come to the technical side.
The technical side of the process
As stated above, the arduino UNO is in favor of the control microcontroller. 2 relays connected to it, 2
digital thermometer DS18B20 .
Arduino communicates with the main program through the com port. Since I do not have a real-time Schild to arduino, I had to take timers from visual c #. I have no experience in writing programs, so if all of a sudden someone has ideas, the criticism is an honor. Criticize, fuck, so to speak, that suddenly do not like.
Here is the text of the program on arduino
#include <OneWire.h> OneWire ds(8); // 8 int reley1 = 13; int reley2 = 12; int reley3 = 11; int reley4 = 10; int reley5 = 7; // int reley6 = 6; // float temp1; float temp2; void setup(void) { Serial.begin(9600); pinMode(reley1,OUTPUT); pinMode(reley2,OUTPUT); pinMode(reley3,OUTPUT); pinMode(reley4,OUTPUT); pinMode(reley5,OUTPUT); pinMode(reley6,OUTPUT); digitalWrite(reley1,LOW); digitalWrite(reley2,LOW); digitalWrite(reley3,LOW); digitalWrite(reley4,LOW); digitalWrite(reley5,LOW); digitalWrite(reley6,LOW); } void loop(void) { if (Serial.available()) { switch (Serial.read()){ case 'i': infuz(); break; case 'p': progrev(); break; case 'a': avariya(); break; case 'v': varka(); break; case 't': temperature(); break; } } } void varka() { digitalWrite(reley6, HIGH); while(Serial.read()!='m') { temperature(); if (temp1 >= 52.00) digitalWrite(reley6,LOW); else digitalWrite(reley6,HIGH); } while(Serial.read()!='n') { //digitalWrite(reley6,HIGH); temperature(); if(temp1>= 62.00) digitalWrite(reley6,LOW); else digitalWrite(reley6,HIGH); } while(Serial.read()!='b') { //digitalWrite(reley6,HIGH); temperature(); if(temp1 >= 75.00) digitalWrite(reley6,LOW); else digitalWrite(reley6,HIGH); } digitalWrite(reley6,LOW); while(Serial.read()!='c') delay(1000); while(Serial.read()!='x') { digitalWrite(reley5,HIGH); temperature(); } digitalWrite(reley5,LOW); } void infuz() { //temperature(); //Serial.available(); while (Serial.read()!='s'){ // if (temp<=69.50) digitalWrite(reley5,HIGH); else digitalWrite(reley5,LOW); } digitalWrite(reley5,LOW); } void progrev() { while (temp1 <=36.00) temperature(); digitalWrite(reley6,HIGH); digitalWrite(reley6,LOW); //while (temperature() >40.0) //delay(1000); Serial.println('s'); } void avariya(){ digitalWrite(reley1,LOW); digitalWrite(reley2,LOW); digitalWrite(reley3,LOW); digitalWrite(reley4,LOW); digitalWrite(reley5,LOW); } void temperature() { byte i; byte present = 0; byte data[12]; byte addr[8]; byte zator[8] = {40, 23, 218, 43, 6, 0, 0, 22}; // byte varilka[8] = {40, 255, 240, 115, 59, 4, 0, 234}; // float celsius; // float temp; boolean gde; if ( !ds.search(addr)) { //Serial.println("No more addresses."); //Serial.println(); ds.reset_search(); delay(250); // return; } if (OneWire::crc8(addr, 7) != addr[7]) { Serial.println("CRC is not valid!"); // return; } ds.reset(); ds.select(addr); ds.write(0x44, 1); // start conversion, with parasite power on at the end delay(840); // maybe 750ms is enough, maybe not // we might do a ds.depower() here, but the reset will take care of it. present = ds.reset(); ds.select(addr); ds.write(0xBE); // Read Scratchpad for ( i = 0; i < 9; i++) { // we need 9 bytes data[i] = ds.read(); } int16_t raw = (data[1] << 8) | data[0]; byte cfg = (data[4] & 0x60); if (cfg == 0x00) raw = raw & ~7; // 9 bit resolution, 93.75 ms else if (cfg == 0x20) raw = raw & ~3; // 10 bit res, 187.5 ms else if (cfg == 0x40) raw = raw & ~1; // 11 bit res, 375 ms celsius = (float)raw / 16.0; for(i = 0; i<8; i++) { if (addr[i] == zator[i]) gde = true; else { gde = false; break; } } if (gde) { Serial.print("t2 "); //temperatura temp2 = celsius; Serial.print(temp2); Serial.println(); } else { Serial.print("t1 "); // temp2 = celsius; Serial.print(temp1); } } All is good, but for some reason, the third sensor shows constantly 85 degrees. I can not yet say why. And he needed for further automation - maintaining the temperature in the refrigerator.
Briefly describe what the program does.
The program is divided into subroutines, each of which is activated if a certain character appears on the com port. For example, if the letter “p” enters the port, the “Warm up” mode is activated. Or, if “a”, the subroutine avariya () is called and everything is turned off. When the temperature () subroutine is called, the data is written to global variables temp1, temp2. From there, and get into the right subroutine.
In the future, there will be routines for boiling different varieties and even moonshine.
Now, as for the main control program.
Main management program
It is written in visual studio c #.
Source code of the program:
Source code of the program
using System; using System.Collections.Generic; using System.ComponentModel; using System.Data; using System.Drawing; using System.Linq; using System.Text; using System.Threading.Tasks; using System.Windows.Forms; using System.IO.Ports; namespace WindowsFormsApplication1 { public partial class Form1 : Form { // String portnumber; SerialPort Port1 = new SerialPort("COM5", 9600); int s=0; public Form1() { InitializeComponent(); } /*private const int CP_NOCLOSE_BUTTON = 0x200; protected override CreateParams CreateParams { get { CreateParams myCp = base.CreateParams; myCp.ClassStyle = myCp.ClassStyle | CP_NOCLOSE_BUTTON; return myCp; } }*/ private void Form1_Load(object sender, EventArgs e) { label2.Text = Port1.PortName; Port1.Open(); } // private void button1_Click(object sender, EventArgs e) { if (Port1.IsOpen == false) { try { // podrugomu.com/node/987 Port1.PortName = label2.Text; Port1.Open(); Port1.Write("Check"); //SerialPort Port2 = new SerialPort("COM4", 9600); //Port2.Open(); //label3.Text = Convert.ToString(Port2.ReadByte()); // MessageBox.Show(" ", " "); richTextBox1.Text = richTextBox1.Text + "\n" + " "+" "+DateTime.Now.ToString("HH:mm"); button1.Enabled = false; button2.Enabled = false; button3.Enabled = false; if (Port1.ReadByte() == 1000) { richTextBox1.Text = richTextBox1.Text + "\n" + " "+" "+DateTime.Now.ToString("HH:mm"); button1.Enabled = true; button2.Enabled = true; button3.Enabled = true; Port1.Close(); MessageBox.Show(" " +" "+ DateTime.Now.ToString("HH:mm")); richTextBox1.SaveFile("CheckLOG.rtf"); } } catch { richTextBox1.Text = richTextBox1.Text + "\n" + " " +" "+ DateTime.Now.ToString("HH:mm"); MessageBox.Show(" . ", "Warninig"); richTextBox1.SaveFile("log/Check_"+DateTime.Now.ToString("ddMMyyyy")+".rtf"); } } } // private void button3_Click(object sender, EventArgs e) { if (Port1.IsOpen == false) { try { // podrugomu.com/node/987 MessageBox.Show(" ", "WARNING", MessageBoxButtons.OK, MessageBoxIcon.Warning); Port1.PortName = label2.Text; Port1.Open(); Port1.Write("Clean"); MessageBox.Show(" ", " "); button1.Enabled = false; button2.Enabled = false; button3.Enabled = false; if (Port1.ReadByte() == 1000) { button1.Enabled = true; button2.Enabled = true; button3.Enabled = true; Port1.Close(); MessageBox.Show(" "); } } catch { MessageBox.Show(" . ", "Warninig"); } } } private void contextMenuStrip1_Opening(object sender, CancelEventArgs e) { } private void cOM1ToolStripMenuItem_Click(object sender, EventArgs e) { SerialPort Port1 = new SerialPort("COM1", 9600); // MessageBox.Show(" COM1"); label1.Visible = true; label2.Text = "COM1"; } private void label2_Click(object sender, EventArgs e) { } private void cOM2ToolStripMenuItem_Click(object sender, EventArgs e) { SerialPort Port1 = new SerialPort("COM2", 9600); // MessageBox.Show(" COM2"); label1.Visible = true; label2.Text = "COM2"; } private void cOM3ToolStripMenuItem_Click(object sender, EventArgs e) { SerialPort Port1 = new SerialPort("COM3", 9600); // MessageBox.Show(" COM3"); label1.Visible = true; label2.Text = "COM3"; } private void cOM4ToolStripMenuItem_Click(object sender, EventArgs e) { SerialPort Port1 = new SerialPort("COM4", 9600); // MessageBox.Show(" COM4"); label1.Visible = true; label2.Text = "COM4"; } private void cOM5ToolStripMenuItem_Click(object sender, EventArgs e) { SerialPort Port1 = new SerialPort("COM5", 9600); // MessageBox.Show(" COM5"); label1.Visible = true; label2.Text = "COM5"; } private void cOM6ToolStripMenuItem_Click(object sender, EventArgs e) { SerialPort Port1 = new SerialPort("COM6", 9600); // MessageBox.Show(" COM6"); label1.Visible = true; label2.Text = "COM6"; } private void cOM7ToolStripMenuItem_Click(object sender, EventArgs e) { SerialPort Port1 = new SerialPort("COM7", 9600); // MessageBox.Show(" COM7"); label1.Visible = true; label2.Text = "COM5"; } private void ToolStripMenuItem_Click(object sender, EventArgs e) { } // private void button2_Click(object sender, EventArgs e) { // if (Port1.IsOpen == false) //{ // try //{ // podrugomu.com/node/987 //Port1.PortName = label2.Text; //Port1.Open(); switch (label3.Text) { case " ": MessageBox.Show(" ", " "); Port1.WriteLine("i"); timer1.Start(); break; case " Cooper": MessageBox.Show(" Cooper ", " "); Port1.WriteLine("v"); timer3.Start(); break; } button1.Enabled = false; button2.Enabled = false; button3.Enabled = false; // button5.Enabled = false; // richTextBox1.Text = Port1.ReadLine()+"\n"; /* if (Port1.ReadLine() == "e\r") { button1.Enabled = true; button2.Enabled = true; button3.Enabled = true; button5.Enabled = true; */ //Port1.Close(); // MessageBox.Show(" "); // } // } // catch //{ // MessageBox.Show(" . ", "Warninig"); //} // } } private void button5_Click(object sender, EventArgs e) { Port1.Write("p"); button1.Enabled = false; button2.Enabled = false; button3.Enabled = false; timer2.Start(); richTextBox1.Text = richTextBox1.Text + "\n" + " 37 " + " " + DateTime.Now.ToString("HH:mm"); /* Port1.Open(); //Port1.Open(); //richTextBox1.Text = richTextBox1.Text + "\n" + Port1.ReadLine(); Port1.WriteLine("o"); Port1.Close(); */ } private void ToolStripMenuItem_Click(object sender, EventArgs e) { Close(); } private void button4_Click(object sender, EventArgs e) { } private void ToolStripMenuItem_Click(object sender, EventArgs e) { label3.Text = " "; } private void timer1_Tick(object sender, EventArgs e) { textBox1.Text = Convert.ToString(Convert.ToInt32(s / 60)); textBox2.Text = Convert.ToString(Convert.ToInt32((s))); s++; label5.Text = Port1.ReadLine(); if (s==4200){ //70 4200 timer1.Stop(); //timer2.Start(); //Port1.Open(); Port1.WriteLine("s"); // Port1.Close(); MessageBox.Show(" "); button1.Enabled = true; button2.Enabled = true; button3.Enabled = true; button5.Enabled = true; textBox1.Text = ""; textBox2.Text = ""; } //Port1.Close(); } private void label4_Click(object sender, EventArgs e) { } private void timer2_Tick(object sender, EventArgs e) { label5.Text = Port1.ReadLine(); if (Port1.ReadLine() == "s\r") { timer2.Stop(); MessageBox.Show(" 37 . "); richTextBox1.Text = richTextBox1.Text + "\n" + " . =37 " + " " + DateTime.Now.ToString("HH:mm"); button2.Enabled = true; } } private void ToolStripMenuItem_Click(object sender, EventArgs e) { Port1.WriteLine("a"); MessageBox.Show(" "); } private void ToolStripMenuItem_Click(object sender, EventArgs e) { Port1.WriteLine("k"); MessageBox.Show(" . 60 "); richTextBox1.Text = richTextBox1.Text + "\n" + " . 60 " + " " + DateTime.Now.ToString("HH:mm"); } private void timer3_Tick(object sender, EventArgs e) { string s1 = ""; Port1.ReadLine(); if (s1.Substring(0, 2) == "t1") label5.Text = s1.Substring(4, 5); if (s1.Substring(0, 2) == "t2") label9.Text = s1.Substring(4, 5); s++; if (s == 900) { Port1.WriteLine("m"); MessageBox.Show(" 62 "); richTextBox1.Text = richTextBox1.Text + "\n" + " 62 " + " " + DateTime.Now.ToString("HH:mm"); } if(s== 2250) { Port1.WriteLine("n"); MessageBox.Show(" 78 "); richTextBox1.Text = richTextBox1.Text + "\n" + " 78 " + " " + DateTime.Now.ToString("HH:mm"); } if (s ==2700) { Port1.WriteLine("b"); MessageBox.Show(" , "); richTextBox1.Text = richTextBox1.Text + "\n" + " . " + " " + DateTime.Now.ToString("HH:mm"); } } private void ToolStripMenuItem_Click(object sender, EventArgs e) { label3.Text = " Cooper"; } } } The program communicates with arduino through com port. The only thing I can’t win is that the program does not hang when the subroutine is executed when polling the com port. After the end of the subprogram, the program hangs down, but so far it is not critical and even a certain plus. Foolproof - not to press anything during a specific procedure.
Total, the program can
- prepare the equipment for cooking;
- cook;
- write a simple log of work (very useful for further analysis of cooking);
- select the port to connect to the controlling controller (arduino UNO);
boil the cooker and the mash vats.
When pumps and solenoid valves come, I will automate further. In the meantime, every Sunday I will add one cooking program. In total there will be 5 programs. Also waiting for their turn implementation of the manual mode.
As the saying goes,
to be continued ...
UPD:
Here are some pictures of the brewery.
This is a cooking pot. I have two of them. With side mounted temperature sensor DS18B20 in an airtight frame.
I could not understand for a long time why periodically the arduino hangs until it dawned that everything needs to be grounded, but it punches on the case, then on the sensor case and on the arduino.
Copper tube inside - this is for filtering the wort. You can make it more beautiful, but it is better to use false. Unfortunately, the Chinese collect in no hurry to expel him.
It's too early to talk about the result, that's what happened.
The general view of the vat looks like this.
Used regular connectors
for connecting temperature sensors that connect to a double outlet. It is more convenient to wash the equipment. Disconnected, carried to the bathroom. Washed, connected and everything works.
Everything froze according to the schedule, it did not overflow. And the most immediate plans are to merge a batch of beer for the development of one more beer. The recipe, in principle, can be viewed in the code in the arduino varka () subroutine.
Finally came the solenoid valves. The automation process continues.
Source: https://habr.com/ru/post/241463/
All Articles