Pythonista. Writing in Python for iOS
IPad tablet from Apple is a well-known and ad-free device. But very often you want to use the full power of this device not only for games and entertainment, but for serious work. For example, for writing programs. Despite the 4-x-year history of the development of this gadget and the availability of different models of convenient environments for programming for iOS, there are extremely few. (I’ll make a reservation right away to avoid further confusion: programming on iOS means writing code and launching a program on an iPad or iPhone, and programming for iOS is writing an application that can be uploaded on the App Store.)
Recently, I came across a great Pythonista program that allows you to write on iOS for iOS.
As the creators of this program write:
')
In my opinion, the best this application do 3 things:
The environment is focused on Python 2.7. But there are some chips from the 3rd branch. For example, this code will also work:
In addition to standard libraries, there are several libraries for direct development for iOS. I will stop on one. It is called ui and is responsible for the GUI.
Consider a few examples of working with this library. It is very interesting that in Pythonista you can set the graphical interface programmatically, but you can natively:
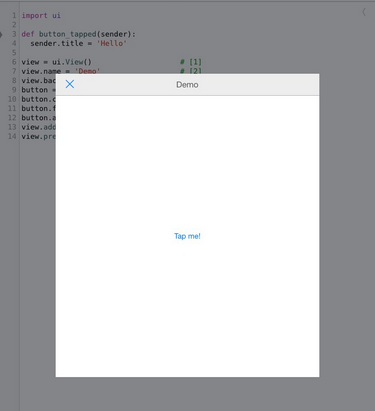
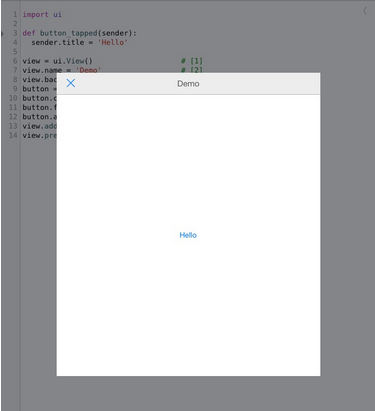
This is the first example of working with the ui library. Let's sort the program line by line:
1) First create the View object;
2) Then we set the name of this object, it will be displayed in its title;
3) Set the background color of the object - white, you can set the word, but you can with the help of RGB;
4) Create a button that says "Tap me!";
5) Place the button on the object;
6) Set the function that will be executed when you click on the button. (In this case, the inscription on the button will change);
7) We clarify that the “button” is the heir to the “view”;
8) Finally, call the view.present () method to display the object on the iOS device screen.
Here is what will happen on the iPad:
But the same can be done natively:
1) Create a script with UI:
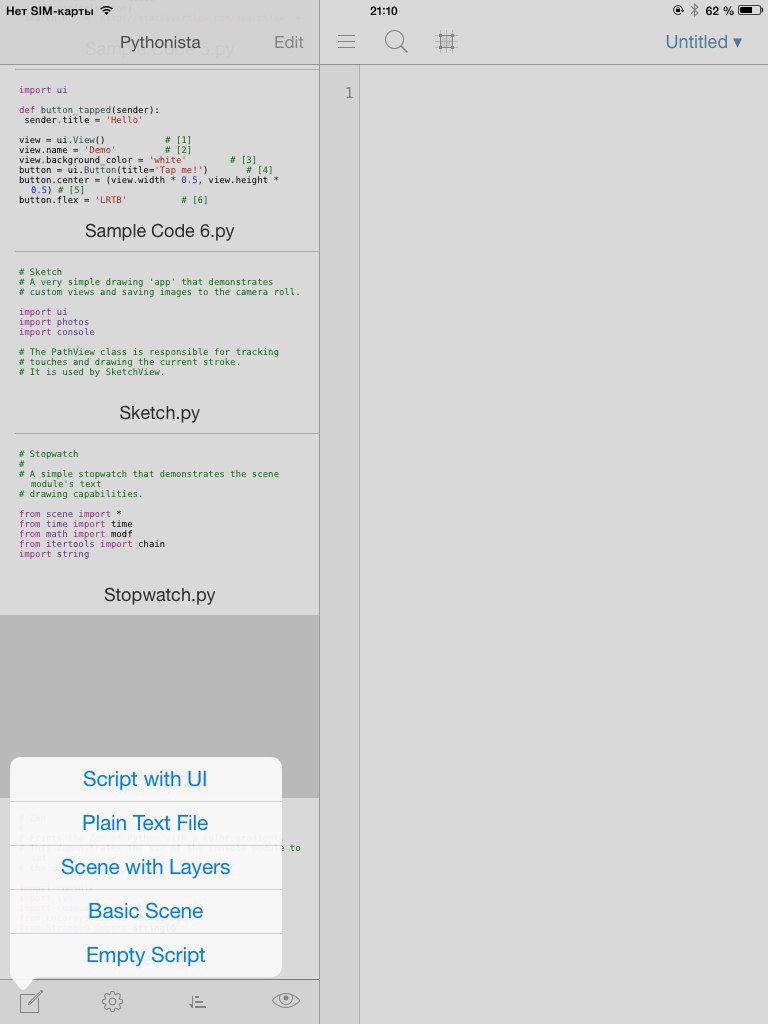
2) After opening the UI, click on the "+" button and select the button:

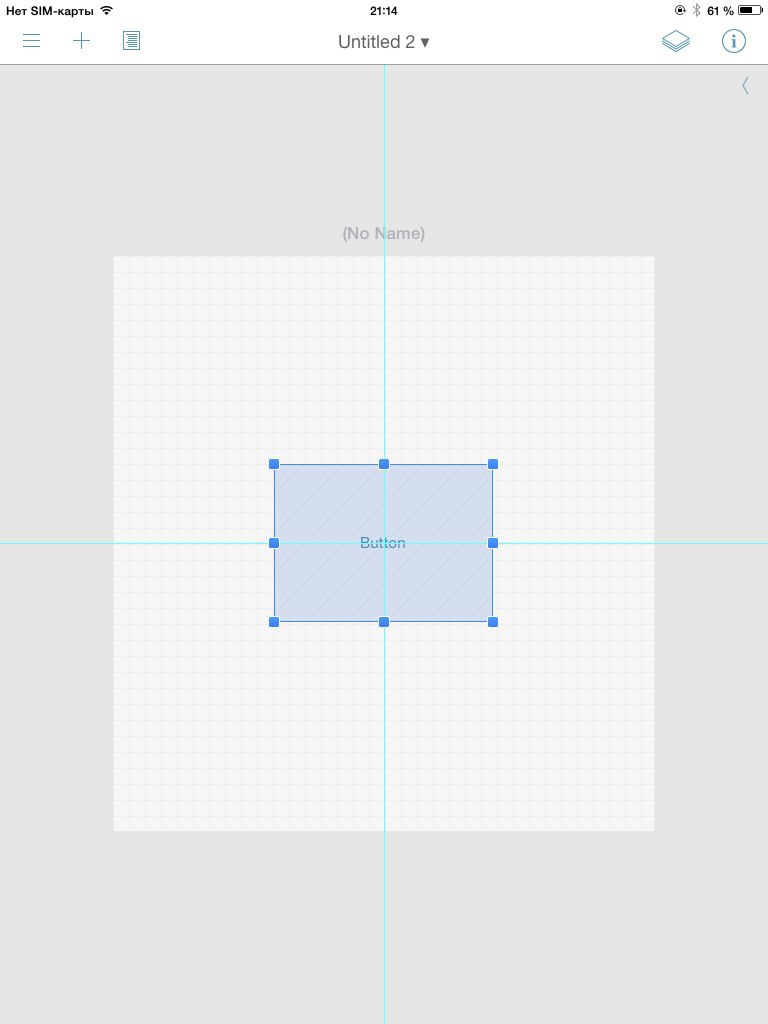
3) Stretch the button and place it in the center of the screen:
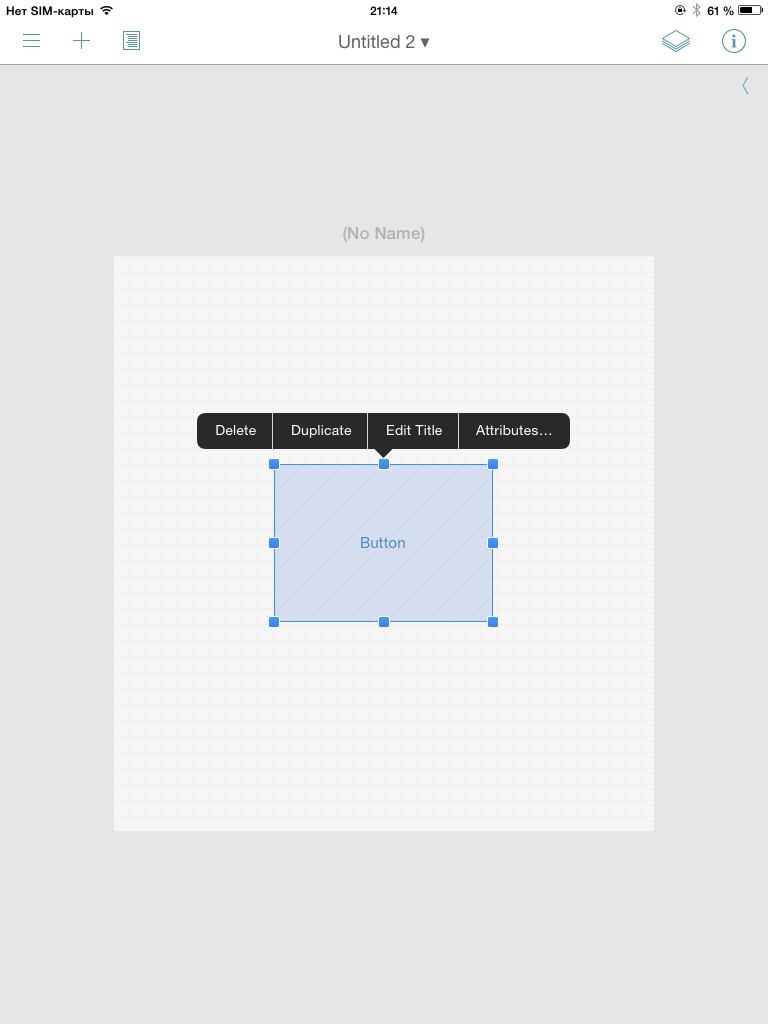
4) Open the attributes of the button and set the function that works when it is pressed:

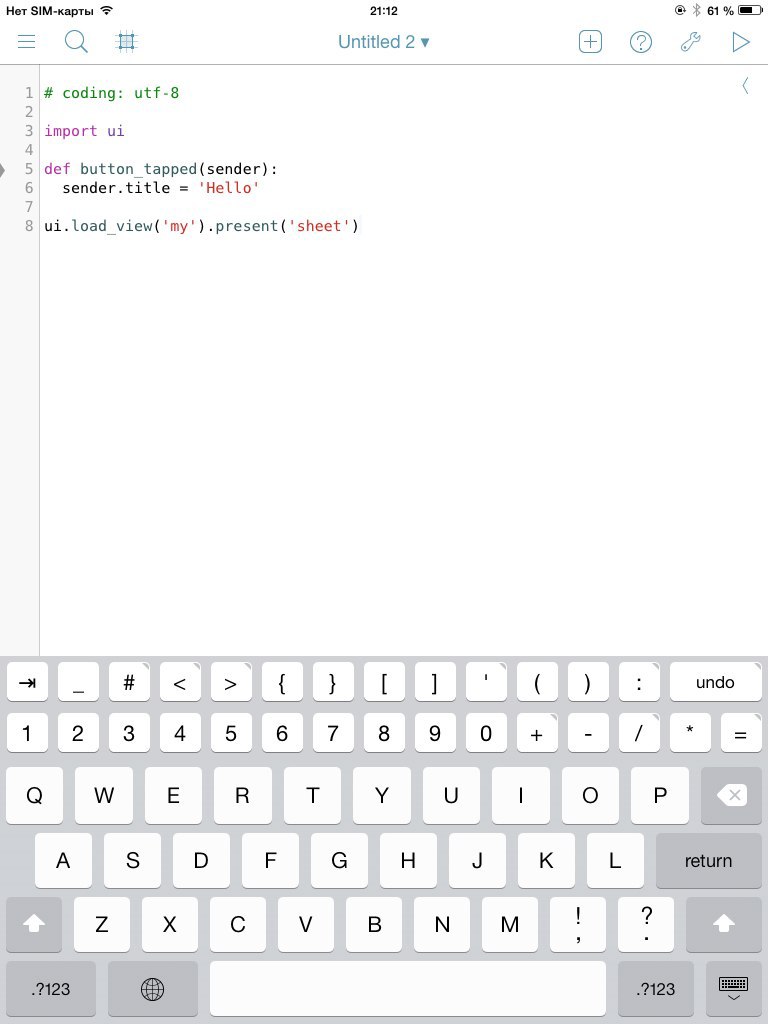
4) Go to the script editor and write the function:
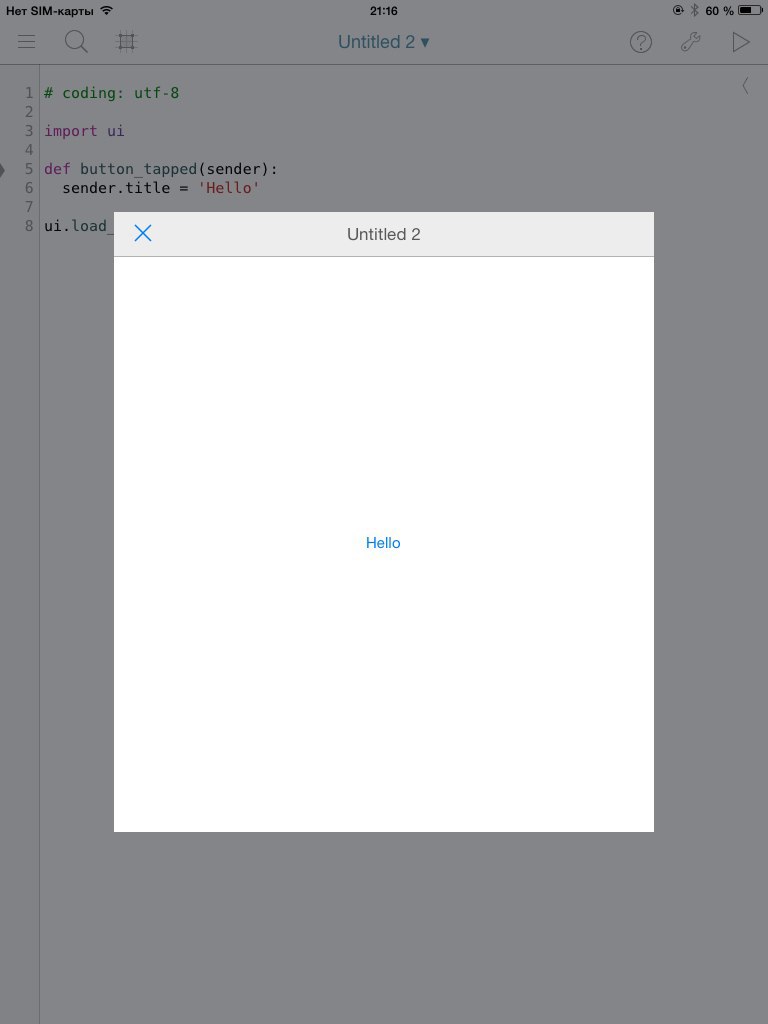
Let's say to which UI to attach this script:
5) Run the program:

In conclusion, I want to say that the review I submitted is far from complete and does not reveal all the functions of this program. Many examples, excellent description of libraries - all this will allow pretty quickly to understand all the properties of this application.
I recommend to visit the site of the creators of Pythonista. It has documentation , unfortunately, only in English.
UPD: Read my article on this program and iOS automation in the February issue of the magazine] [aker
Recently, I came across a great Pythonista program that allows you to write on iOS for iOS.
Short description
As the creators of this program write:
Pythonista brings your Zen of Python to your iPad or iPhone.And indeed it is. The program is the best compiler for Python.
')
In my opinion, the best this application do 3 things:
- You do not need an Internet connection to run the program. The iPad really becomes a workstation;
- There are tooltips and built-in documentation (again, without access to the Internet);
- And, of course, the most important thing is the ability to export to XCode.
Overview
The environment is focused on Python 2.7. But there are some chips from the 3rd branch. For example, this code will also work:
print "Hello, world" print ("Hello, world") In addition to standard libraries, there are several libraries for direct development for iOS. I will stop on one. It is called ui and is responsible for the GUI.
Consider a few examples of working with this library. It is very interesting that in Pythonista you can set the graphical interface programmatically, but you can natively:
import ui def button_tapped(sender): sender.title = 'Hello' view = ui.View() # [1] view.name = 'Demo' # [2] view.background_color = 'white' # [3] button = ui.Button(title='Tap me!') # [4] button.center = (view.width * 0.5, view.height * 0.5) # [5] button.action = button_tapped # [6] view.add_subview(button) # [7] view.present('sheet') # [8] This is the first example of working with the ui library. Let's sort the program line by line:
1) First create the View object;
2) Then we set the name of this object, it will be displayed in its title;
3) Set the background color of the object - white, you can set the word, but you can with the help of RGB;
4) Create a button that says "Tap me!";
5) Place the button on the object;
6) Set the function that will be executed when you click on the button. (In this case, the inscription on the button will change);
7) We clarify that the “button” is the heir to the “view”;
8) Finally, call the view.present () method to display the object on the iOS device screen.
Here is what will happen on the iPad:
But the same can be done natively:
1) Create a script with UI:
2) After opening the UI, click on the "+" button and select the button:
3) Stretch the button and place it in the center of the screen:
4) Open the attributes of the button and set the function that works when it is pressed:
4) Go to the script editor and write the function:
def button_tapped(sender): sender.title = 'Hello' Let's say to which UI to attach this script:
ui.load_view('My UI').present('sheet') 5) Run the program:
In conclusion
In conclusion, I want to say that the review I submitted is far from complete and does not reveal all the functions of this program. Many examples, excellent description of libraries - all this will allow pretty quickly to understand all the properties of this application.
I recommend to visit the site of the creators of Pythonista. It has documentation , unfortunately, only in English.
UPD: Read my article on this program and iOS automation in the February issue of the magazine] [aker
Source: https://habr.com/ru/post/241229/
All Articles