Signature of object code with a certificate from StartSSL. Steps - paid, received, signed
Greetings I want to share my experience as I received a certificate for signing the object code. Many articles and posts are written about digital signatures, and budget StartSSL. I decided to spend almost $ 60, try to go this way and share my experience with the community.
To treat everything described below exclusively to my personal experience and applies to Windows.
StartSSL
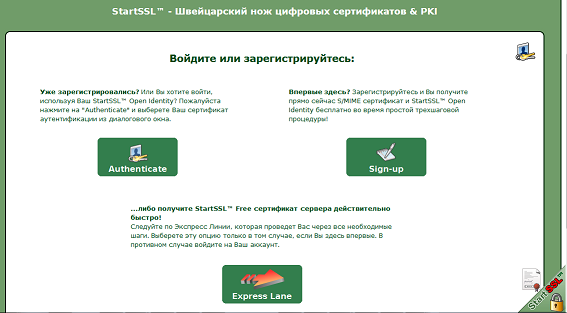
Step one - Obtaining a personal certificate - on the website www.startssl.com you can enter your personal account using a certificate. On the main page, click "Sign-up" and fill in all the fields. We receive the nominal certificate and we install. Immediately I ran into a problem - it works correctly - only in Mozilla Firefox, in other browsers there are problems logging into my account. Make a backup copy of the certificate and save it to external media.
Certificate in the browser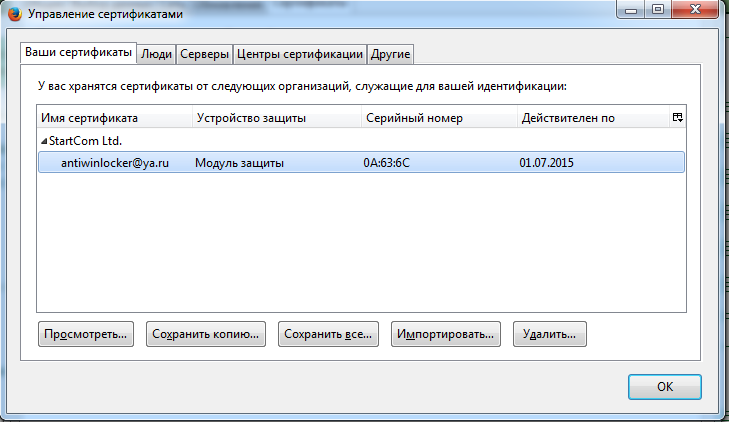
Step two - confirmation of identity - class 2. This step requires payment. In fact, to obtain a certificate, this is a necessary item. Quote from the site: "The cost of checking individuals and organizations is US $ 59.90 each check." At this stage, you need to provide copies of documents - a passport, if you have a driver's license, you can ask for documents during the correspondence - I was asked for some document with a seal and my passport data. Payment was made through “PayPal” - in the “Tool Box” - “Add Credit Card | PayPal | Ticket "you can choose several payment methods. They invoice and wait for payment. After payment is confirmed - send a registered letter with a verification code by mail. This is the longest stage - the letter is about a month. The notification comes to the electronic box that was sent by mail. After 3 weeks, I began to get nervous and wrote in support - in response they sent a mailing number for which you can track where the letter is.
Path letters across Russia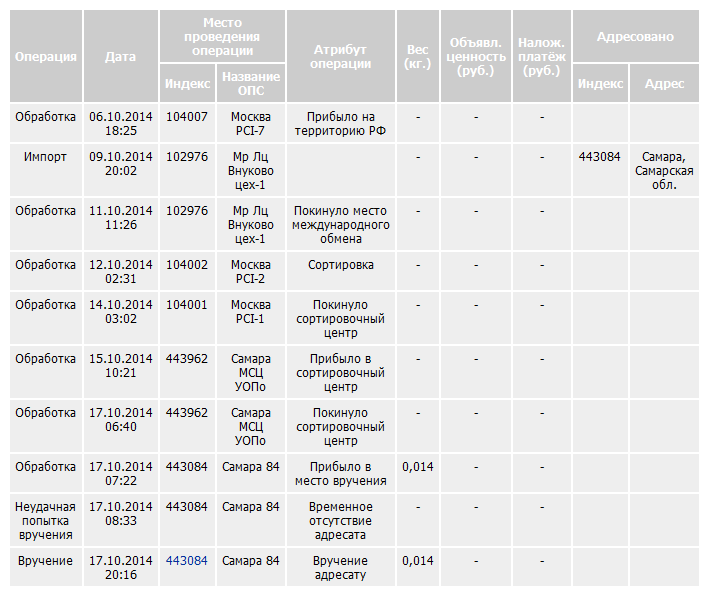
Letter itself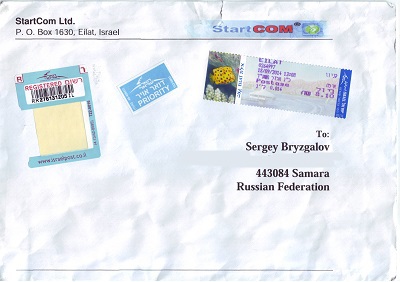
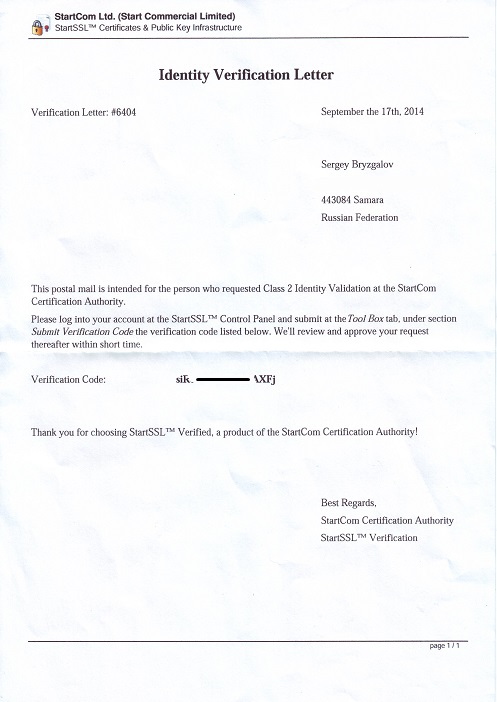
Step three - confirmation of the code from the received “Tool Box” letter - “Submit Verification Code”
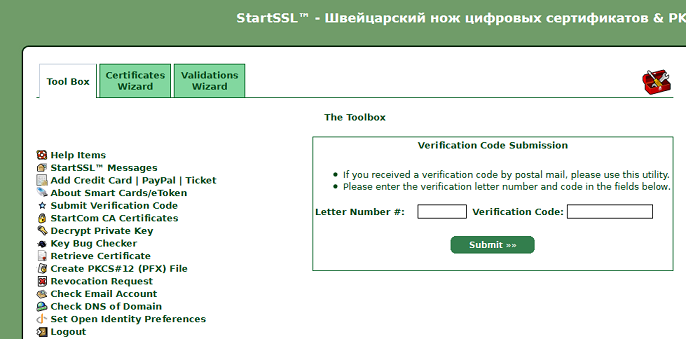
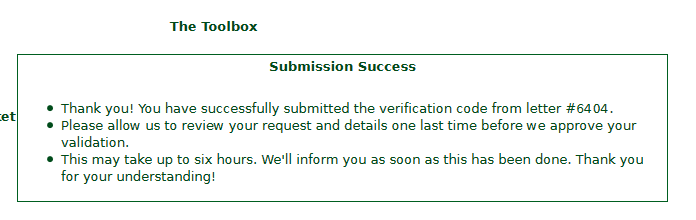
Enter the letter number and confirmation code. And if everything is correct, then we are congratulated and asked to be patient until 6 o'clock.
After some time, we receive a letter with the contents:
“Congratulations! Your Class 2 Identity Validation has been confirmed and approved. You are eligible for certificates at Class 2 level until 2015-10-04. ”- Bingo !!! Now you can get a long-awaited certificate for signing code!
Personal identification card
The fourth step - I asked the support in advance how to make a signature - and they sent me a link to the forum.
At first I started to do everything according to the first instruction, but not successfully. In order:
')
Files that I needed:
1. OpenSSL for windows version 0.9.8 or higher. I used OpenSSL version 1.0.1 32 bit - full.
2. signtool.exe is a utility from the .NET Framework. I downloaded separately from somewhere on the Internet.
Install OpenSSL - the default path for me is C: \ OpenSSL-Win32 \ bin - in this folder are the binary files needed to create the certificate. Then open the command line and go to this folder and start openssl:
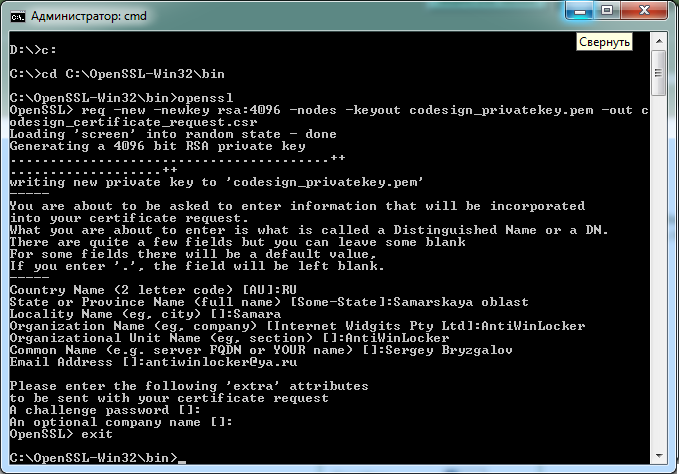
req -new -newkey rsa:4096 -nodes -keyout codesign_privatekey.pem -out codesign_certificate_request.csr The process will ask questions:
1.Country 2 letters - in our case: RU
2. State or province - the full name.
3. City.
4. Name of organization.
5. The name of the unit.
6. Domain Name or Name.
7. Email address.
- The rest can not be filled.
In order to leave the field empty, you can put a dot instead of a value.
The password for the private key can not be set, or rather, it is not recommended to be set, although I set it, I did not read the instructions well, but I did not notice any problems, I don’t forget the main password - the certificate is issued once.
In the current folder, in my case “C: \ OpenSSL-Win32 \ bin”, two new files will appear:
codesign_privatekey.pem - private key.
codesign_certificate_request.csr - certificate request file.
Both of these files can be opened with a text editor. We need codesign_certificate_request.csr open it with a text editor - for example, a notepad, and copy all the contents into the clipboard <ctrl-a> <ctrl-c>.
On the website www.startssl.com we go to the “Certificates Wizard” section, some items become only after passing the validation and in the “Certificate Target:” field in the drop-down menu, select the item “Object Code Signing Certificate” - then the window where you need to paste the previously copied text <ctrl-v>. Then press the button to continue. And again we see a sign asking you to wait a few hours while the request is checked. After verification, a notification mail arrives with congratulations. And now you can get a certificate in the “Tool Box” - “Retrieve Certificate” - then select your certificate, click next and copy all the text from the “Certificate:” field - and then save it into a file as a text document, for example: codesign_certificate.crt . Then run OpenSSL again from the command line.

openssl pkcs12 -export -out codesign.pfx -inkey codesign_privatekey.pem -in codesign_certificate.crt You will be asked for the password for the private key, if you set it, enter, then ask for the password to export the key - leave it blank.
There should be one more file codesign.pfx - with which we will sign the programs.
The fifth step , the final.
Now we have codesign.pfx in it contains everything we need to digitally sign the file.
To sign the file you need to run this command.
signtool.exe sign /d "% %" /du "%http://%" /f "codesign.pfx" /t "http://timestamp.verisign.com/scripts/timestamp.dll" /v "% %" Naturally, the fields need to be filled in according to your tasks.
I first had a problem trying to sign the file - it turned out that signtool.exe required capicom.dll after installation, you may have to register this library in the system - run the command line as Administrator, then go to the folder where capicom.dll is located and execute
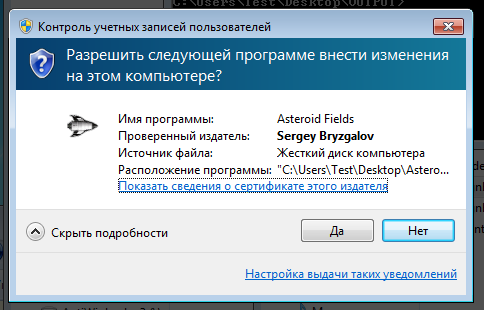
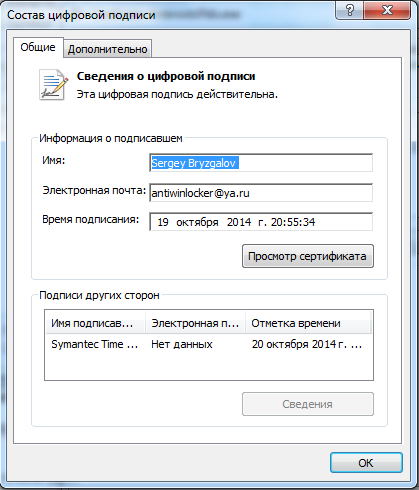
regsvr32 capicom.dll - after that, everything began to work and the files began to subscribe.Screenshots of the signed file:
For convenience, I wrote a small utility in which you can specify all the data and files and sign in batches.
This certificate is created once, for one year. The signature is valid in WindowsXP SP3 and higher.
You can sign such a program with programs, dlls, services. To sign the drivers will not work.
Do I need a digital signature or not? Everyone decides for himself. For example, some antiviruses ruthlessly remove any unknown program from a flash drive, which happened in my practice - it is possible that their behavior will change when they see that the file has a signature.
You need $ 60 and a month of time - and you are a happy owner of a digital signature.
But you need to understand - if the certificate is not used for peaceful purposes - then it can be revoked and the signature will cease to be valid.
If you have questions, welcome comments than I can - I will help. Find errors - write in a personal.
I hope this post will help those who doubt and do not dare to take such a step.
Source: https://habr.com/ru/post/240871/
All Articles