How to create a blog on imtqy.com using CMS Ghost

Github provides all its users to create a static blog in the imtqy.com domain. When this suggests using Jekyll. But today we will talk about how to make a github blog with cms ghost.
I do not want to create, I want a demo !
To create a blog, we need 3 stages:
')
Stage I
You need to create an open repository on Git that will create a subdomain with your username (http://username.imtqy.com). Follow the instructions and create a repository with the name of our user on github.
Stage II
Setting up a local environment and creating a blog.
We need Node.js 0.10.x (latest stable). Node.js 0.10.30 and package manager npm 1.4.21 are recommended for working with Ghost. Below are examples of code under Linux. Links for other platforms: Mac and Windows .
Install ghost:
mkdir ghost wget "http://ghost.org/zip/ghost-latest.zip" unzip ghost-latest.zip -d ghost cd ghost cp config.example.js config.js Install nodejs & npm:
sudo apt-get update sudo apt-get install nodejs sudo apt-get install npm Change the URL address in the development.js Development section from localhost : 2368 to username.imtqy.com :
// ### Development **(default)** development: { // The url to use when providing links to the site, Eg in RSS and email. // Change this to your Ghost blogs published URL. url: 'http://username.imtqy.com', // Example mail config // Visit http://support.ghost.org/mail for instructions // ``` // mail: { // transport: 'SMTP', // options: { // service: 'Mailgun', // auth: { // user: '', // mailgun username // pass: '' // mailgun password // } // } // }, // `` Go to the ghost folder, install and run npm:
npm install
npm start
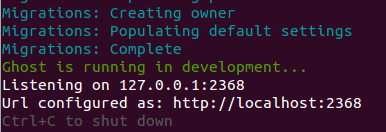
Go to 127.0.0.1 : 2368 / ghost /:

Creating and setting up a block as well as editing posts (following the example of a template) is intuitive. You can always find information on ghost.org .
Stage III
Creating a static blog and 'commit' on github.
To make ghost static we need Buster :

Installation:
sudo apt-get update sudo apt-get install wget sudo apt-get install python sudo apt-get install python-pip pip install buster Check that our blog is running 127.0.0.1 : 2368 or run:
cd ghost npm start Booster will create a new folder for the static version of the blog (static):
cd ghost cd buster setup Specify the link to the github repository: github.com/username/username.imtqy.com
Booster generated a static folder. Now grab the booster cast, i.e. our local ghost:
buster generate --domain=http://127.0.0.1:2368 For preview, run:
buster preview Now our static blog can be viewed: 127.0.0.1 : 9000
Stop the display of the Control + C preview. We load a blog on Git:
buster deploy Now or after a couple of minutes it will be available here: username.imtqy.com
A spoon of tar
I didn’t manage to deploy to Git via buster. I made a 'commit' through the terminal. Also, buster does not want to catch static ghost pages. I decided to just make them posts.
Daily use
We start ghost and we edit posts 127.0.0.1 : 2368 / ghost:
nmp start Buster generates a static version and
buster generate --domain=http://127.0.0.1:2368 buster deploy Conclusion
The advantages of using a static blog on Github:
- Is free;
- Do not need a database;
- High performance;
- The possibility of easy backup;
- Ability to create posts offline.
Links
- Original article: How to: Host a Ghost Blog for Fre e;
- Set of installation links for cms ghost: Ghost How to install Ghost blogging platform ;
- Git repository buster .
Source: https://habr.com/ru/post/240733/
All Articles