Activate multisite support in a Wordpress installation on a VPS from Infobox in 5 minutes
In this article, we will look at how to quickly launch multiple sites on a VPS and a cloud-based VPS from Infobox. Since the Wordpress MU project appeared and later became part of Wordpress, this process has been simplified. We have already added a template with Wordpress installation for 1 click (with FTP, database and phpmyadmin) in all VPS locations and clouds. The user only needs to configure Wordpress to support launching multiple sites when needed. The article also shows a cloud VPS management interface.

On a clean server, the multisite configuration process takes much longer than at this point, but we have already added a significant portion of the configuration to the Wordpress template, so the settings will take only 5 minutes. After ordering Ubuntu VPS from Wordpress or creating a server in the cloud from such a template, log in to the server via SSH using email access data. You will see the Infobox greeting and FTP access data and MySQL access data.

')
Access data is unique and is generated at the time the server is created.
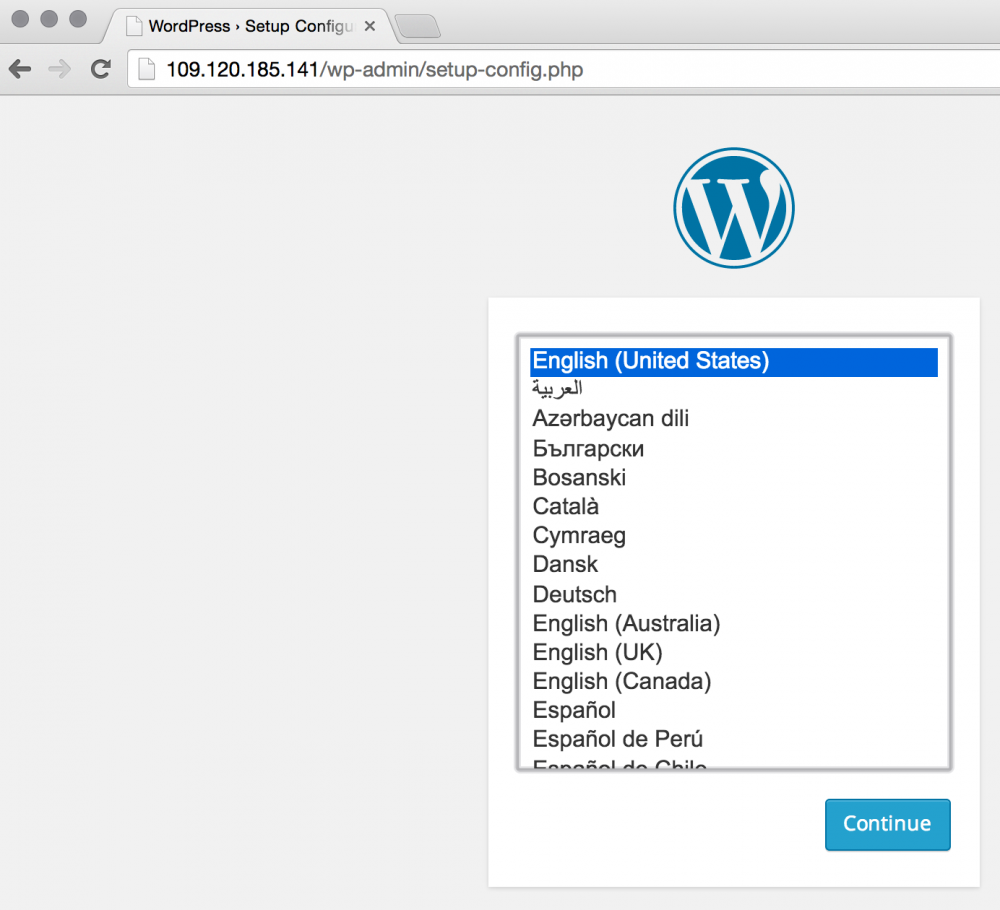
Open the Wordpress installer web interface by going to the server ip – address from a letter or from the control panel.
During the installation of Wordpress will be requested data access to the server. All settings can be left by default, but you must specify the username and password from the database, which were displayed in the server's welcome message (if you change them, then you need to specify the changed ones).

Get to the WordPress installation phase. Stop here. First we need to enable multi-site.
Let's return to our ssh – session to the server. Edit /var/www/html/wp-config.php and add the line above the phrase "/ * That's all, stop editing! Happy blogging. * /":
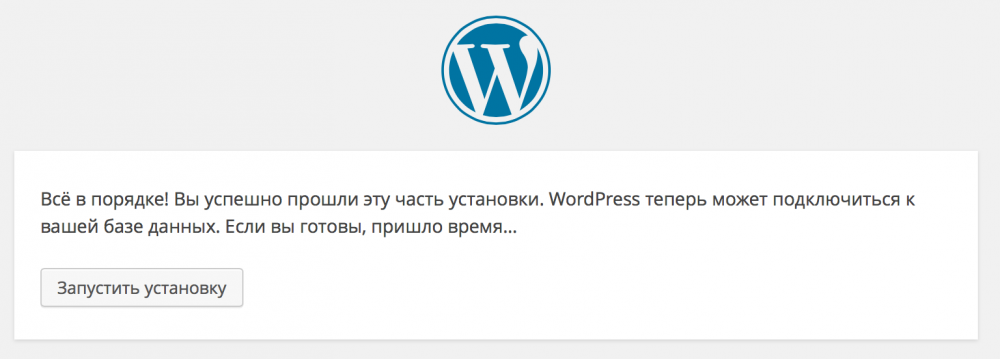
Open the site again at the ip – address in the browser, set the settings for the first site and install Wordpress.

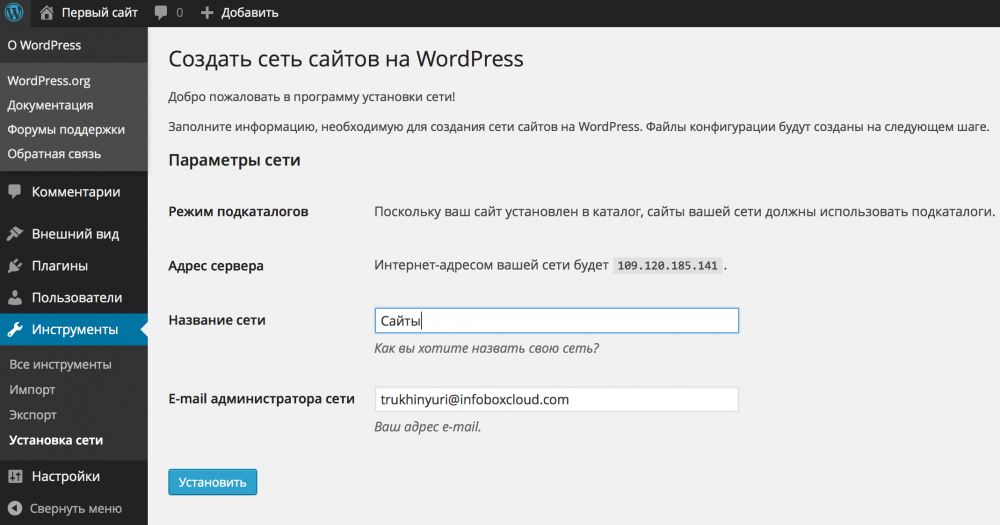
Log in. Go to "Tools" -> "Network Installation".
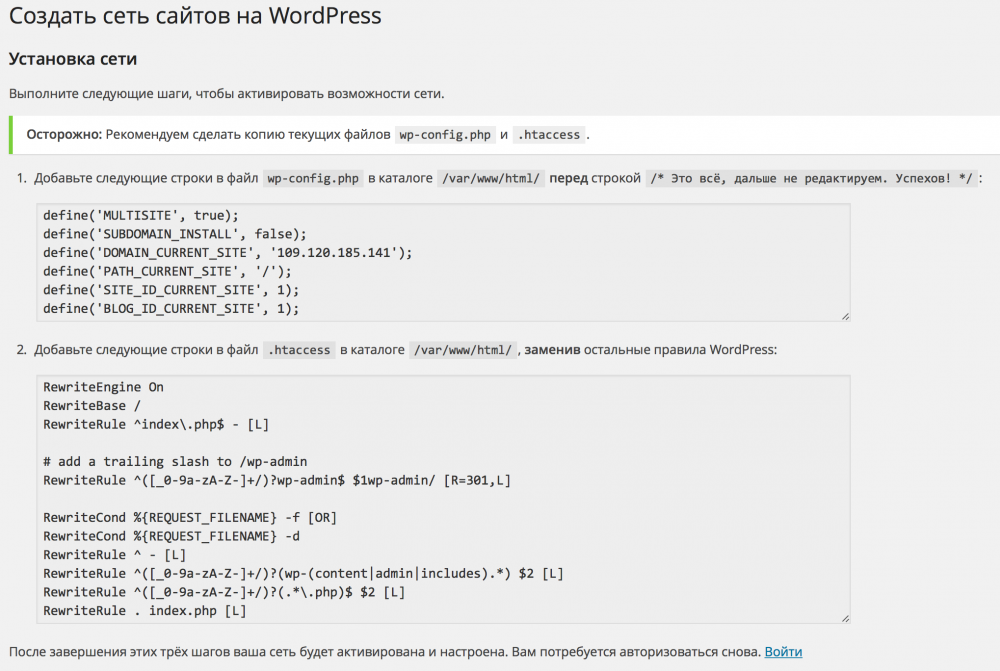
Wordpress will tell you what to add to .htaccess and wp-config.php . Do this (in .htaccess, replace the contents of the <IfModule mod_rewrite.c> section). Please note that if the server’s ip address changes, you will need to register a new one in wp-config.php. It is very important, writing the settings in wp – config.php to register them above the phrase "/ * That's all, stop editing! Happy blogging. * /" .
Sign out and sign in to Wordpress again.

Now support for creating multiple sites on Wordpress is activated.
To be able to bind different domains to a multi-site configuration, install the WordPress MU Domain Mapping plugin. Copy and enable sunrise.php:
Edit /var/www/html/wp-config.php and add the line above the phrase "/ * That's all, stop editing! Happy blogging. * /":
Now log out and log in to your Wordpress control panel again.
Go to the “Settings” section -> Domain mapping and register the server ip.
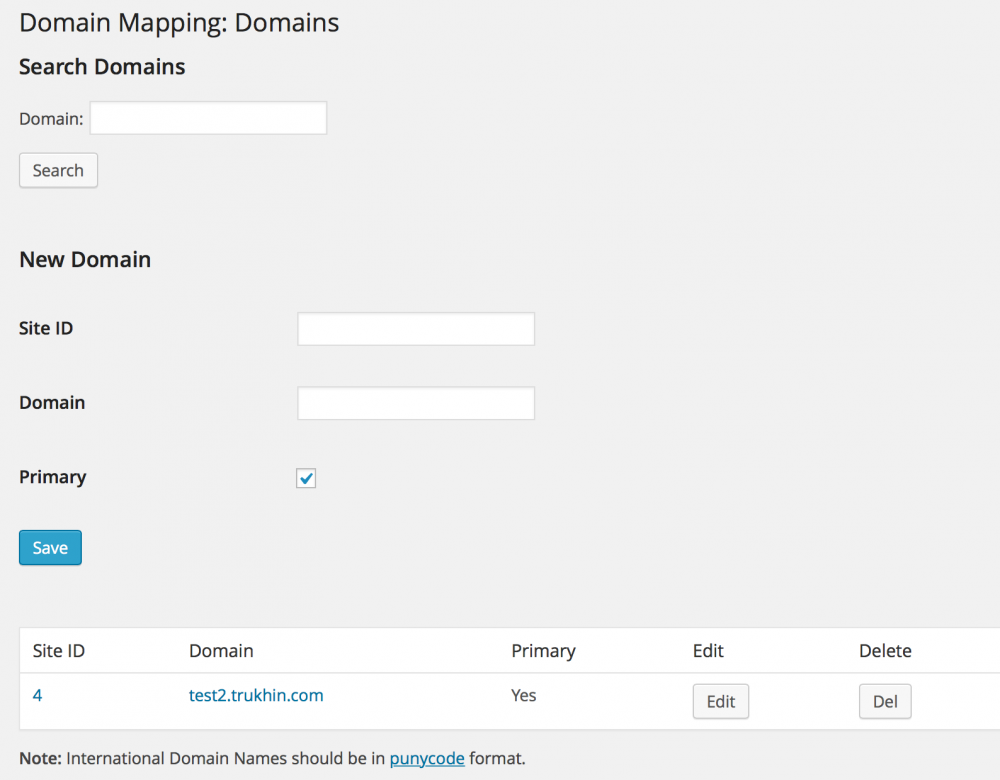
Now go to “Settings” -> Domains.

Here you can add arbitrary domains to various sites. To find out the site ID, go to the “Sites” -> “All Sites” section and click “Edit” next to the added site.

In the address bar of the browser you will see the site ID.

Return to the "Settings" -> Domains and list the link ID and domain. Set the site as primary so that the selected domain is displayed in the address bar when entering the site. Also, do not forget to send a DNS domain record to the ip – address of the server.
Now, when entering the domain, the required site opens.
We recommend that you create your own template in the future to install support for multiple sites on Wordpress for 1 click, changing only the ip – address in wp-config. To do this, go to the settings of the created server in the Infobox control panel, as shown at the beginning of the article. Click "Create Image".

Give the image a name and click Create. Now, if you need to deploy new servers with support for hosting multiple sites on Wordpress, you will not need to do all the settings from this article. You can simply go to the “Server images” section in the Infobox control panel and create a server from the prepared image.

In order for you to try to enable multi-site in Wordpress, we activated a free trial version of our VPS and, at the request of users, wrote a promotional code for registration directly on the service page.
If you can not leave comments on Habré, you can write them in the InfoboxCloud Community .
If you find a mistake or typo in the article, the author will fix it with pleasure. To do this, please write in the LAN.
Successful use of cloud VPS from Infobox.
Configuring support for multiple sites in Wordpress on one server
On a clean server, the multisite configuration process takes much longer than at this point, but we have already added a significant portion of the configuration to the Wordpress template, so the settings will take only 5 minutes. After ordering Ubuntu VPS from Wordpress or creating a server in the cloud from such a template, log in to the server via SSH using email access data. You will see the Infobox greeting and FTP access data and MySQL access data.
')
Access data is unique and is generated at the time the server is created.
Open the Wordpress installer web interface by going to the server ip – address from a letter or from the control panel.
During the installation of Wordpress will be requested data access to the server. All settings can be left by default, but you must specify the username and password from the database, which were displayed in the server's welcome message (if you change them, then you need to specify the changed ones).
Get to the WordPress installation phase. Stop here. First we need to enable multi-site.
Let's return to our ssh – session to the server. Edit /var/www/html/wp-config.php and add the line above the phrase "/ * That's all, stop editing! Happy blogging. * /":
/* Multisite */ define('WP_ALLOW_MULTISITE', true); Open the site again at the ip – address in the browser, set the settings for the first site and install Wordpress.
Log in. Go to "Tools" -> "Network Installation".
Wordpress will tell you what to add to .htaccess and wp-config.php . Do this (in .htaccess, replace the contents of the <IfModule mod_rewrite.c> section). Please note that if the server’s ip address changes, you will need to register a new one in wp-config.php. It is very important, writing the settings in wp – config.php to register them above the phrase "/ * That's all, stop editing! Happy blogging. * /" .
Sign out and sign in to Wordpress again.
Now support for creating multiple sites on Wordpress is activated.
To be able to bind different domains to a multi-site configuration, install the WordPress MU Domain Mapping plugin. Copy and enable sunrise.php:
cp /var/www/html/wp-content/plugins/wordpress-mu-domain-mapping/sunrise.php /var/www/html/wp-content/sunrise.php (you need to copy the file every time you update the plugin).Edit /var/www/html/wp-config.php and add the line above the phrase "/ * That's all, stop editing! Happy blogging. * /":
define( 'SUNRISE', 'on' ); Now log out and log in to your Wordpress control panel again.
Go to the “Settings” section -> Domain mapping and register the server ip.
Now go to “Settings” -> Domains.
Here you can add arbitrary domains to various sites. To find out the site ID, go to the “Sites” -> “All Sites” section and click “Edit” next to the added site.
In the address bar of the browser you will see the site ID.
Return to the "Settings" -> Domains and list the link ID and domain. Set the site as primary so that the selected domain is displayed in the address bar when entering the site. Also, do not forget to send a DNS domain record to the ip – address of the server.
Now, when entering the domain, the required site opens.
Creating a Cloud VPS Template with Wordpress and Multi-Site Support
We recommend that you create your own template in the future to install support for multiple sites on Wordpress for 1 click, changing only the ip – address in wp-config. To do this, go to the settings of the created server in the Infobox control panel, as shown at the beginning of the article. Click "Create Image".
Give the image a name and click Create. Now, if you need to deploy new servers with support for hosting multiple sites on Wordpress, you will not need to do all the settings from this article. You can simply go to the “Server images” section in the Infobox control panel and create a server from the prepared image.
Testing VPS for free
In order for you to try to enable multi-site in Wordpress, we activated a free trial version of our VPS and, at the request of users, wrote a promotional code for registration directly on the service page.
If you can not leave comments on Habré, you can write them in the InfoboxCloud Community .
If you find a mistake or typo in the article, the author will fix it with pleasure. To do this, please write in the LAN.
Successful use of cloud VPS from Infobox.
Source: https://habr.com/ru/post/240161/
All Articles