Work with sprites (Unity3d)
Introduction
Hello.
Initially, a small excursion.
This article is a kind of translation of the tutorial from Jesse Freeman. Thanks to him for my current opportunity to get an invite. The rest of you, thanks for understanding that this is my first article.
In the utopian world inhabited only by habrami, I will try to make this article followed by another 9, but the world is not perfect, so it is not yet known how everything goes. Like everything, then let's go.
Importing sprites
To import sprites to your project in Unity, simply drag the necessary files to any folder you choose in the Project tab. Below is an illustration.
Gif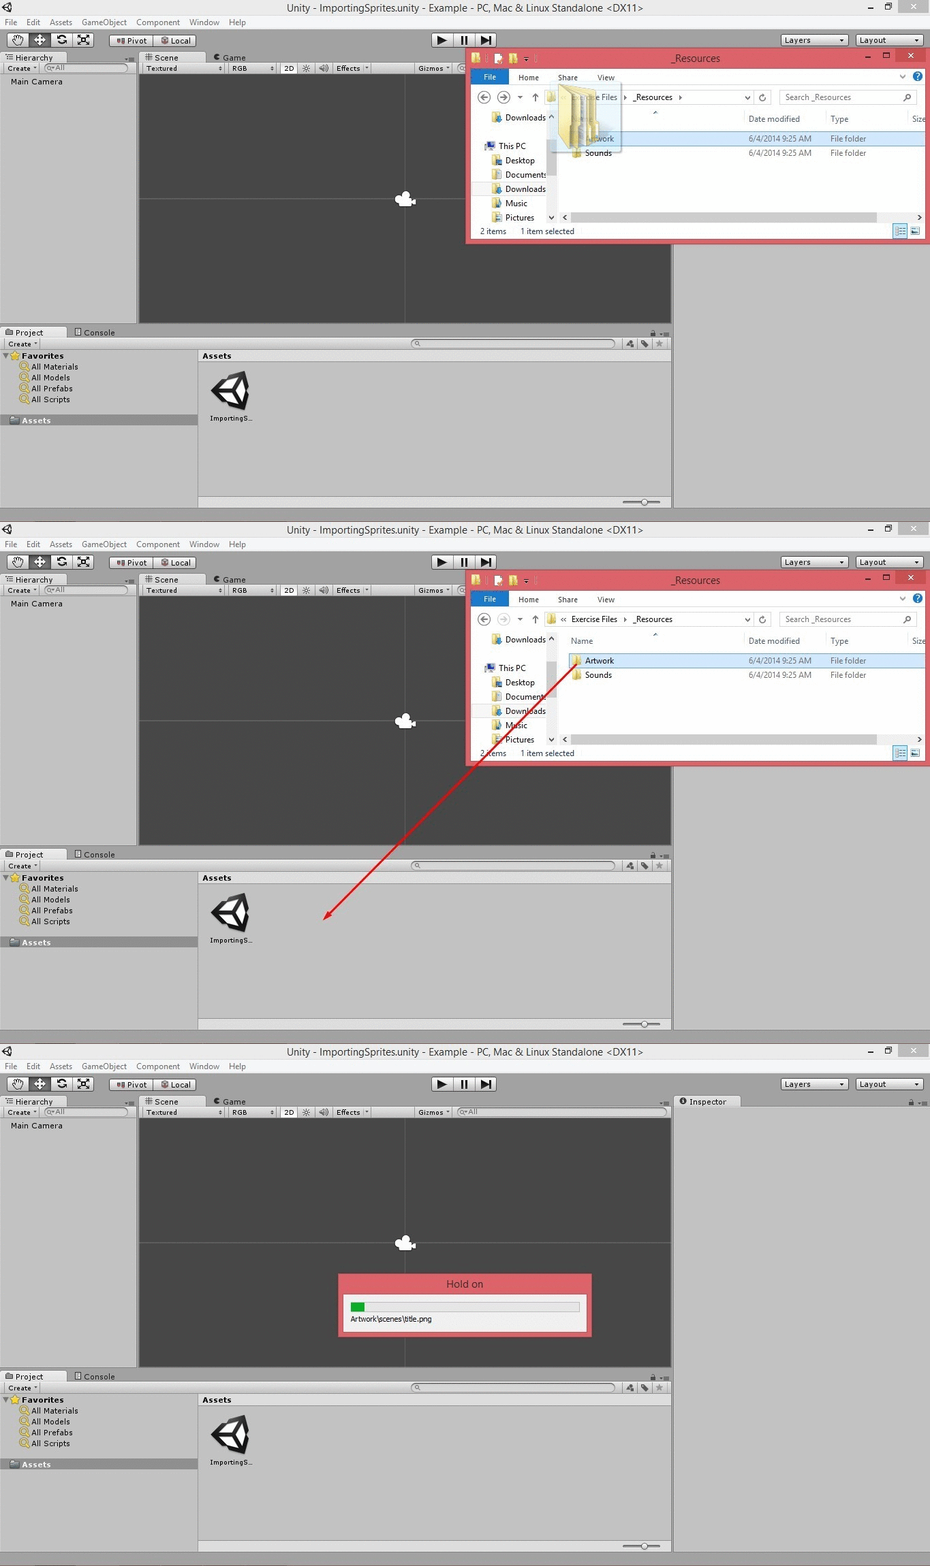

As you can see everything is ugly simple. Now let's take a look at the settings using the example of some sprite. Let's go to Assets \ Artwork \ Sprites \ Player and click on the player texture. A menu will open in the inspector. If for any reason in the menu that opens next to the Texture Type tab, Texture is indicated, then you are currently using a 3D project, this can be easily fixed simply by creating a new project, not forgetting to switch to 2D. Below is an illustration.
How to fix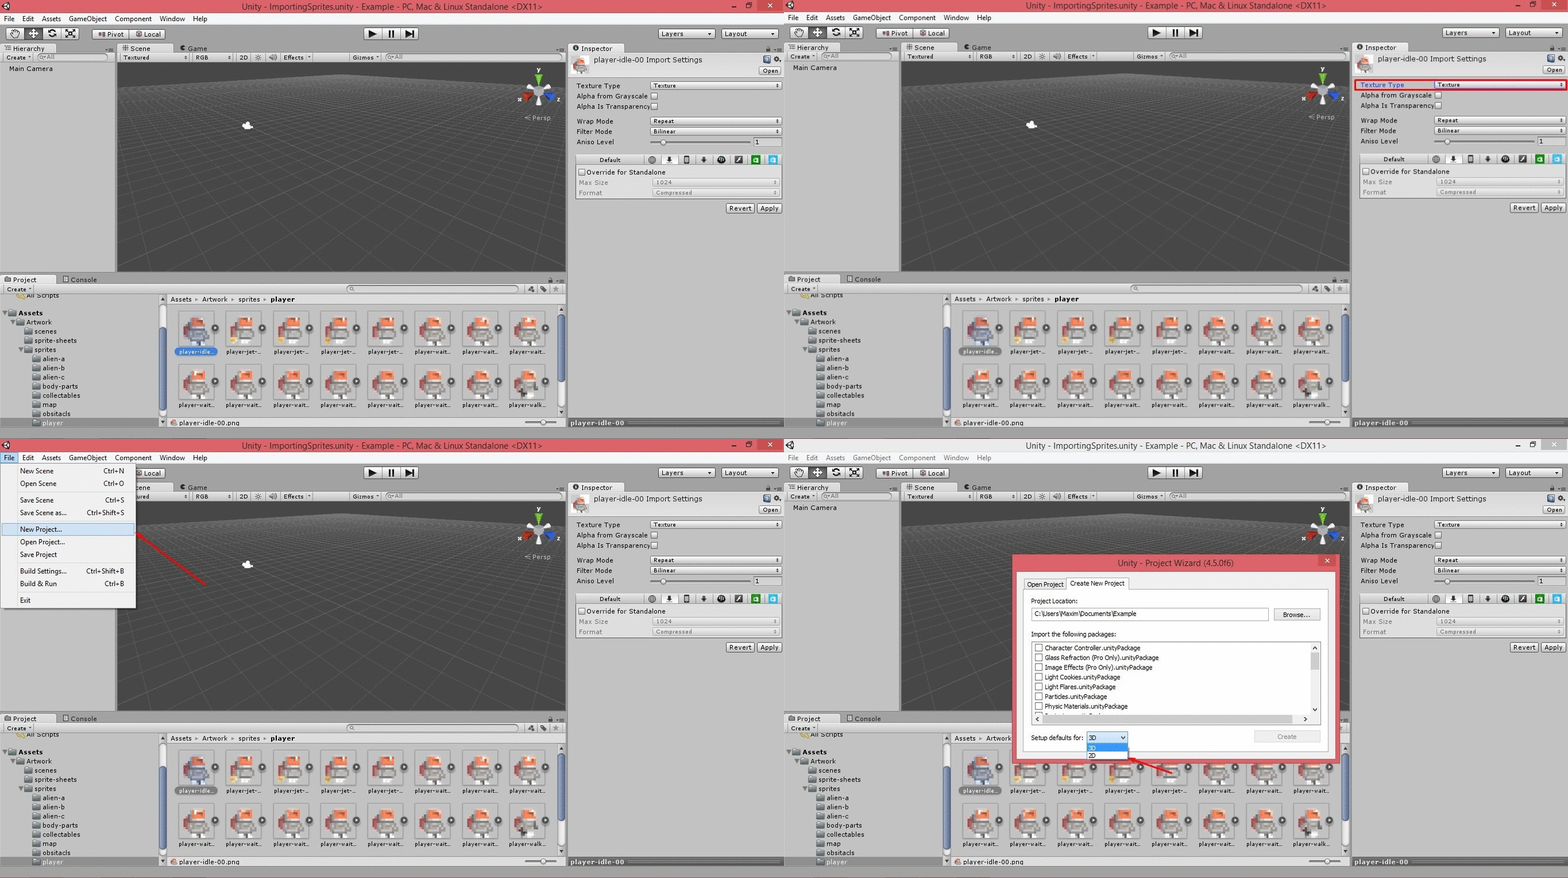

If everything is correct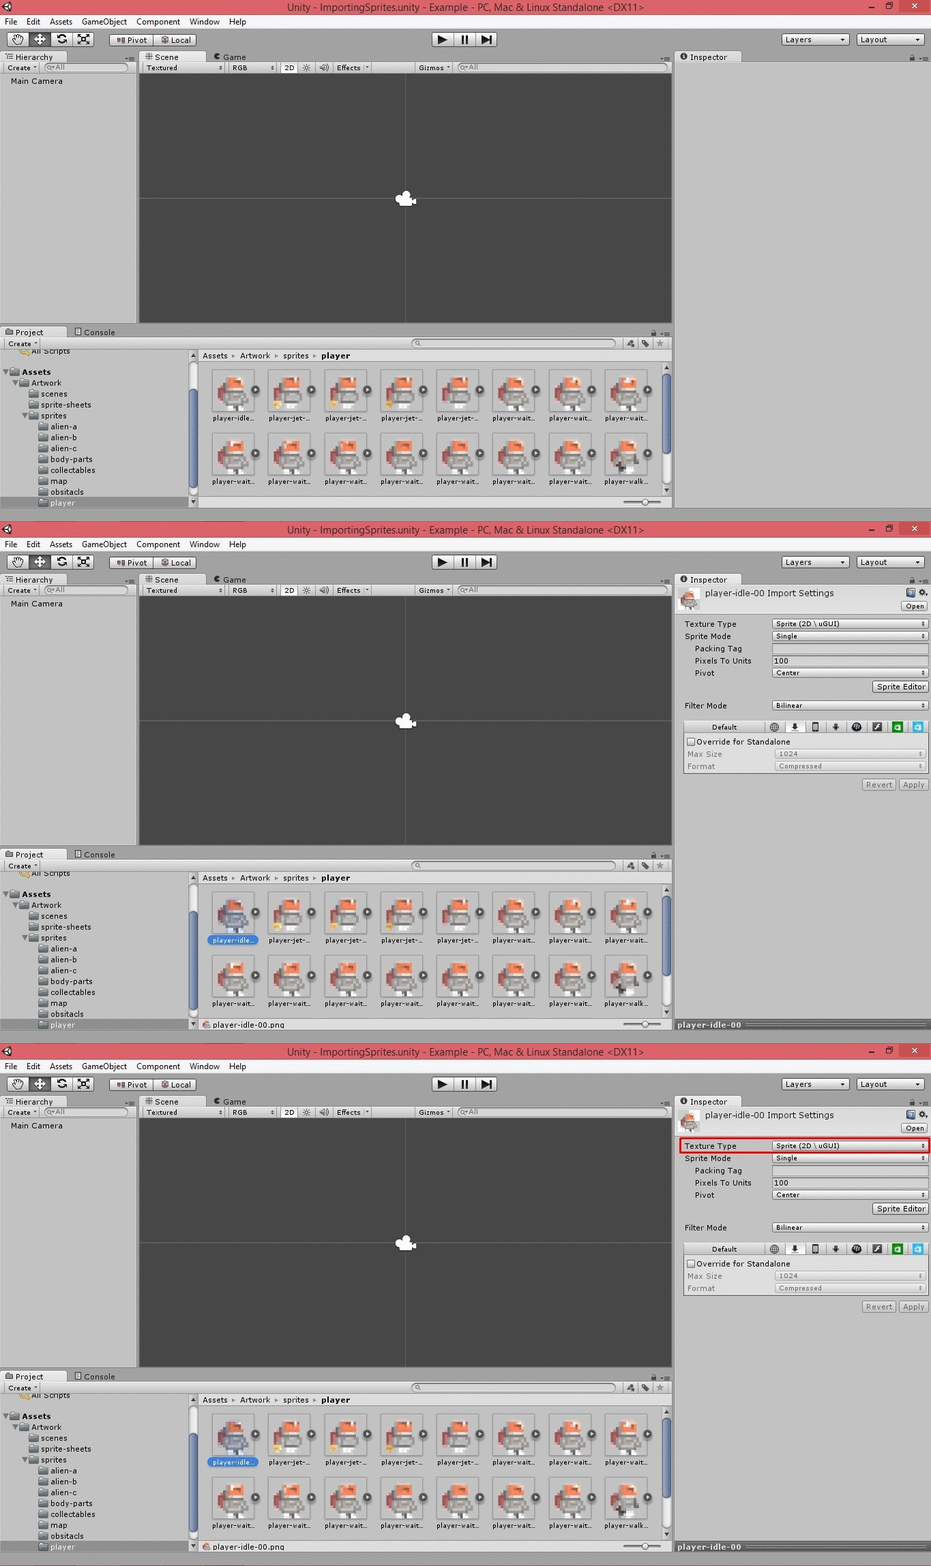

Great, now drag the sprite player onto the stage and what we see the sprite has become a gameobject.

The next property of the sprites I’m talking about is called Pixels To Units . As you can see the player sprite is 80x80 pixels, and in Unity 100x100 pixels correspond to one square meter, so going to the settings for importing the sprite in the Pixels To Units line you will see the value 100, which means that the sprite is displayed correctly. In case you see the player sprite has increased, it now takes up one square unit.
Gif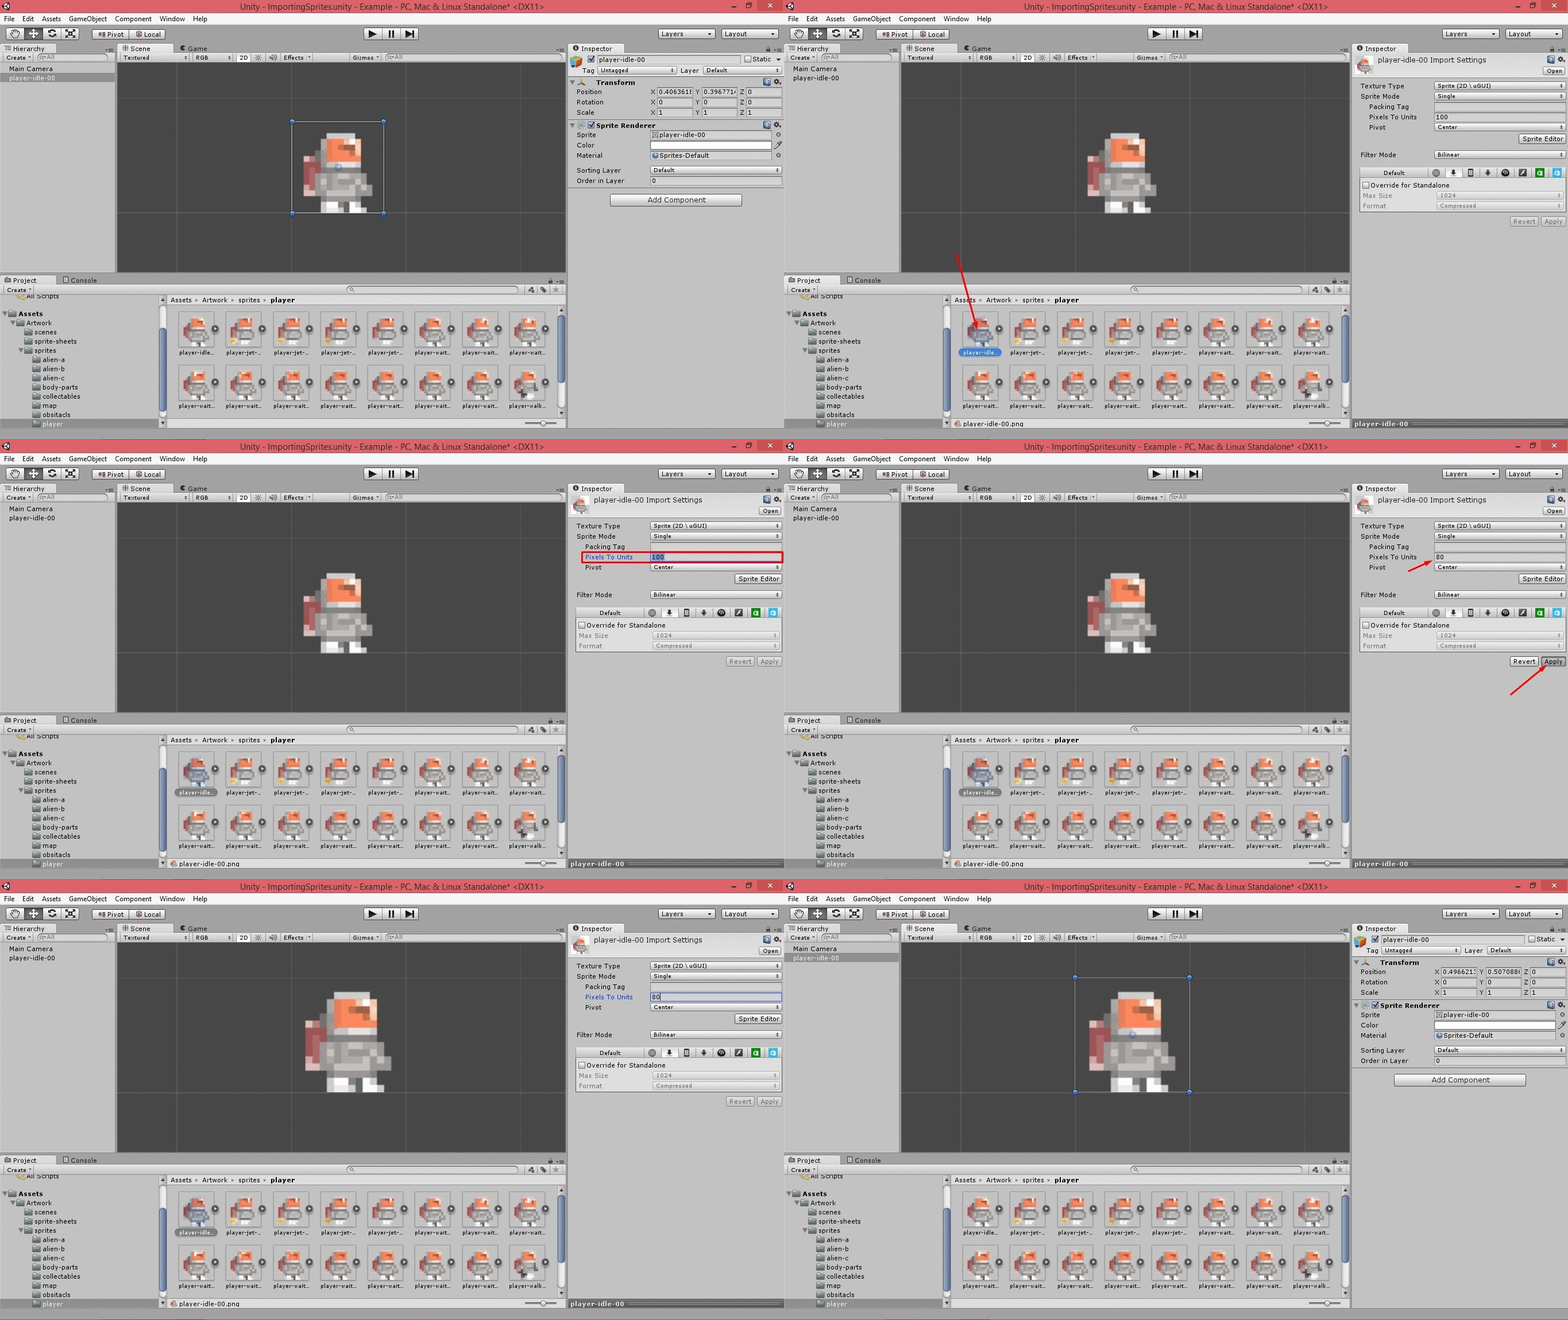

')
The next property of the sprites that I’m going to talk about is called Pivot . In short, this is the anchor point. The default is set to center. You can change it if necessary, but in most cases the reference in the center is appropriate. We will do without illustrations here.
We go further.
The Filter Mode field defaults to Bilinear, but since we have Pixel Art we need to change its value to Point, after applying the changes, you see that the sprite began to look better, but when approaching, anomalies are visible, in order to get rid of them we change the value Format fields on TrueColor.
Now the sprite has no anomalies. Remember these settings, because they need to be applied every time you work with Pixel Art.
Gif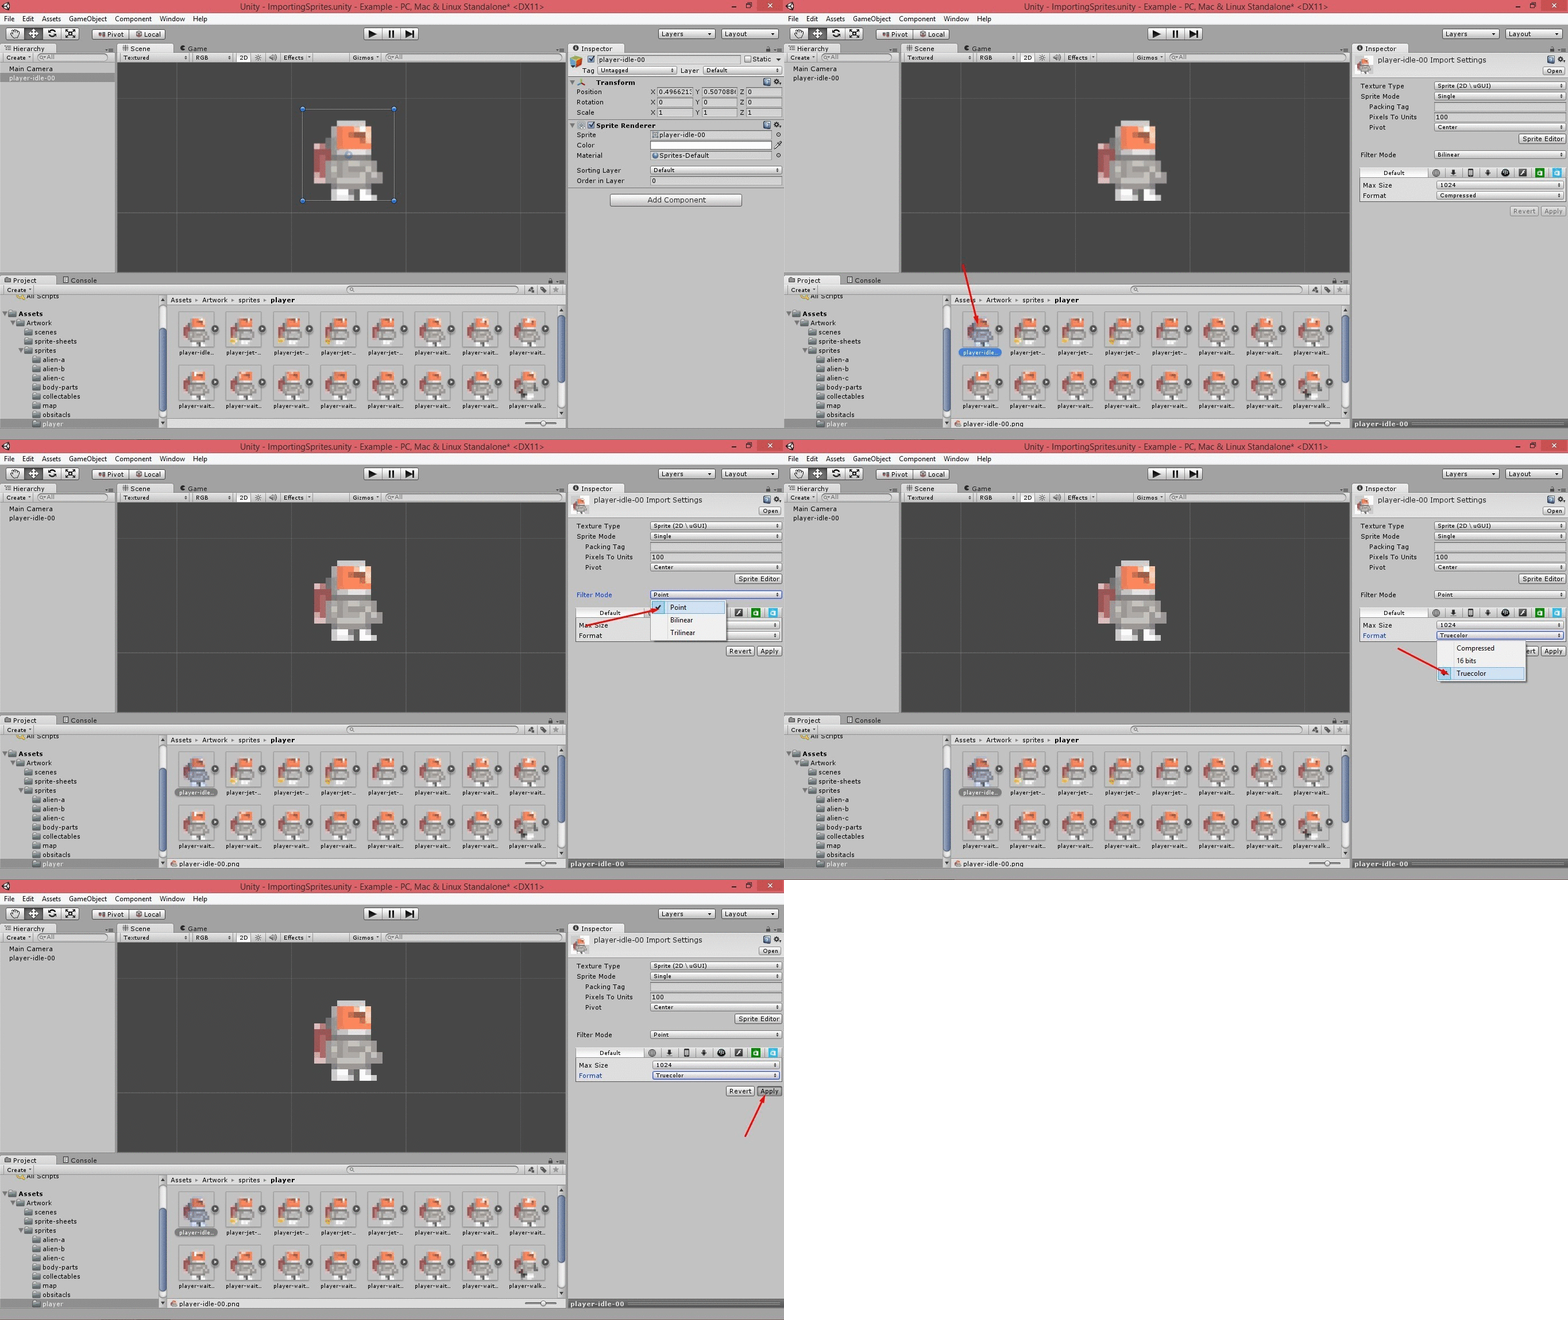

Attention:
This add-on must be applied to all sprites, and there are many of them and they are arranged in folders. An illustration of how you can save yourself a lot of time will be attached at the bottom.Gif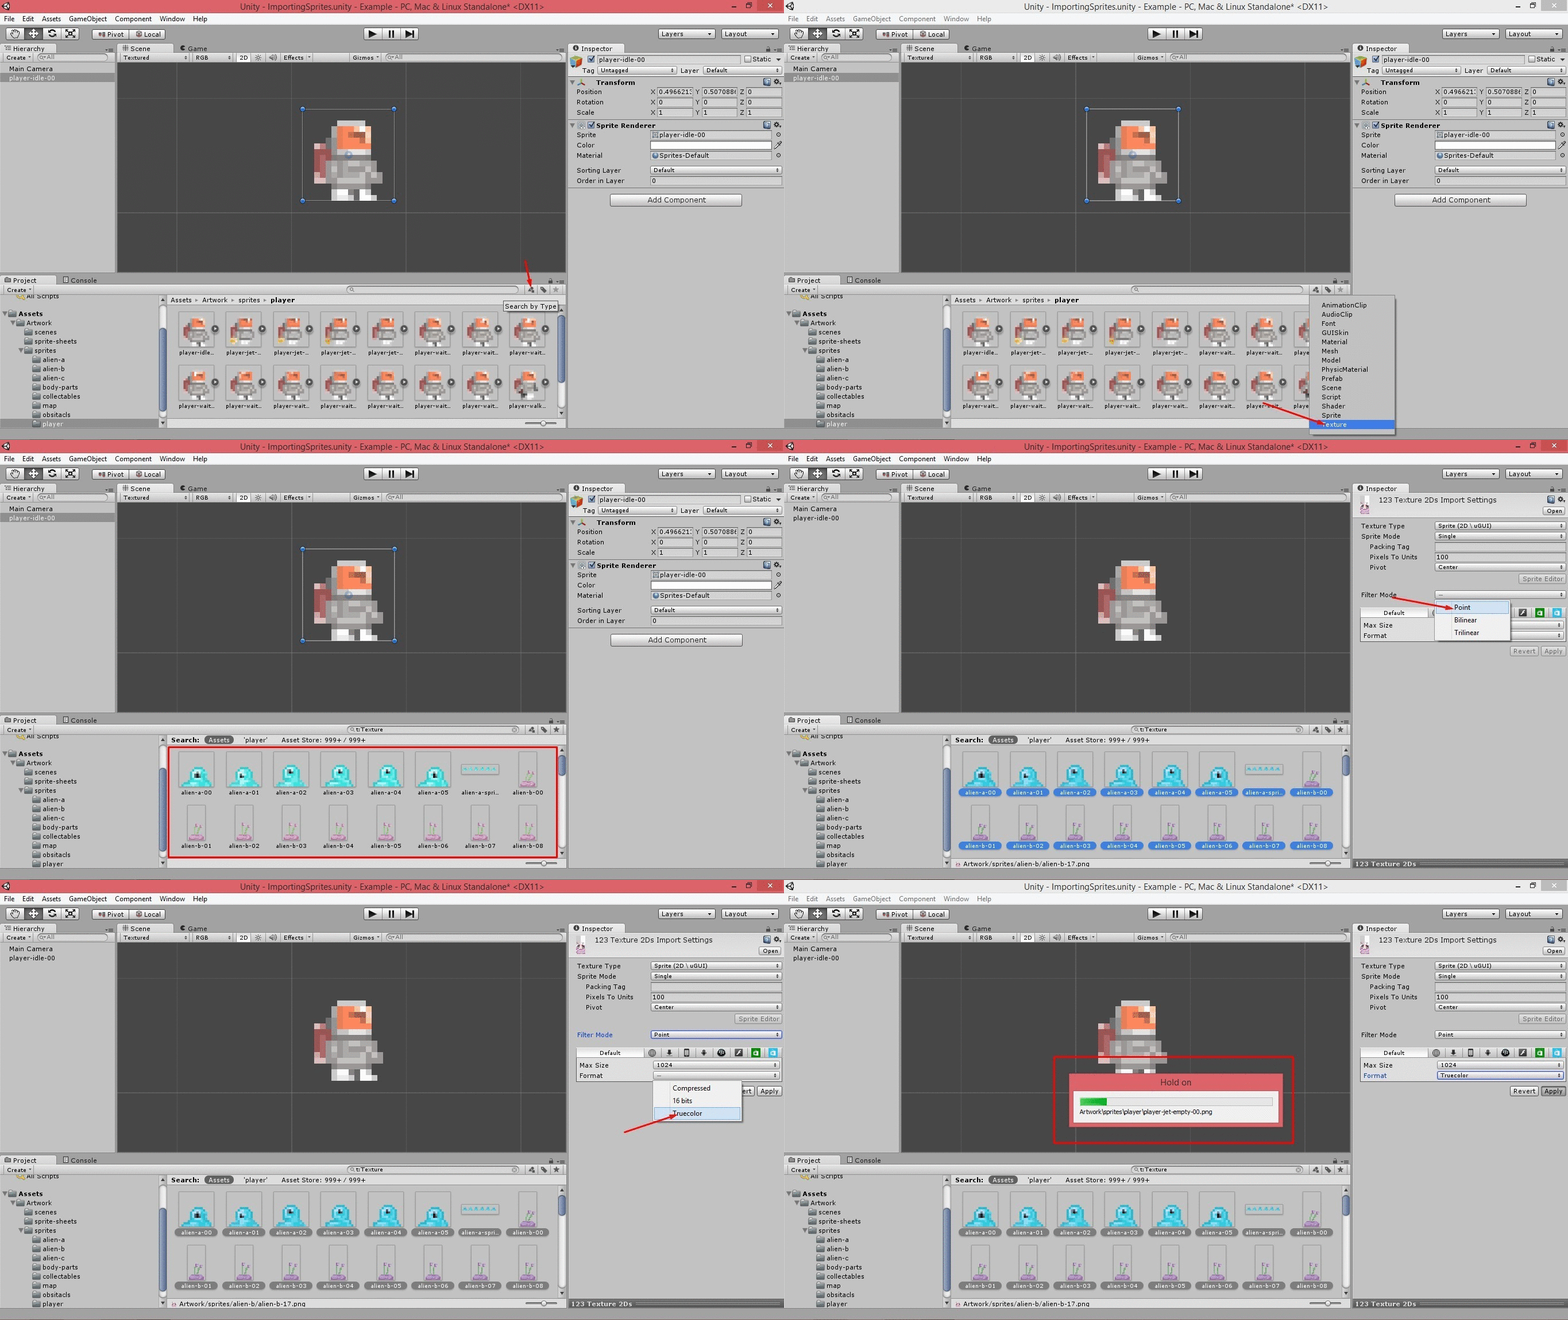

Perhaps the following lessons will be more voluminous, but for now everything.
That is all folks.
Source: https://habr.com/ru/post/240105/
All Articles