Remote surveillance based on Synology EDS14 NAS
First-hand history:
How convenient it is to always be able to control the situation at remote sites online and immediately receive notifications in the event of threats. For example, such video surveillance systems are relevant in the summer country house, which is empty in the winter, in the technical premises, office or garage.
In such places there is unstable air temperature, and electricity may be absent or limited, therefore, the equipment requirements are special.
I faced the need to organize such a system personally, having inherited a garage next to the house. Having invested a certain amount in its re-equipment from a warehouse with unnecessary junk to the room for spending time on car and computer iron, I began to worry about the safety of my property. Buying a new car was an additional signal to action, so it was no longer possible to postpone the issue of organizing video surveillance, so I decided not to spare money and ensure peace of mind )). I'll tell you about what I came up with.
')
The main task was to establish round-the-clock access to the video surveillance system and receive instant notifications in case of motion detection.
As a monitoring server, I used diskless Synology EDS14.
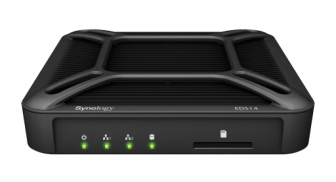
Main characteristics:
| CPU clock frequency | 1.2 GHz |
| ram ram | ddr3 512mb |
| external connection interface hdd | usb 3.0, usb 2.0 |
| number of usb 3.0 ports | one |
| number of usb 2.0 ports | one |
| size (mm) | 31 mm x 125 mm x 125 mm |
| Weight, kg | 295 g |
| type and number of network ports | gigabit x 2 |
| operating temperature | from -20 to 50 ° c |
My scheme of the system:
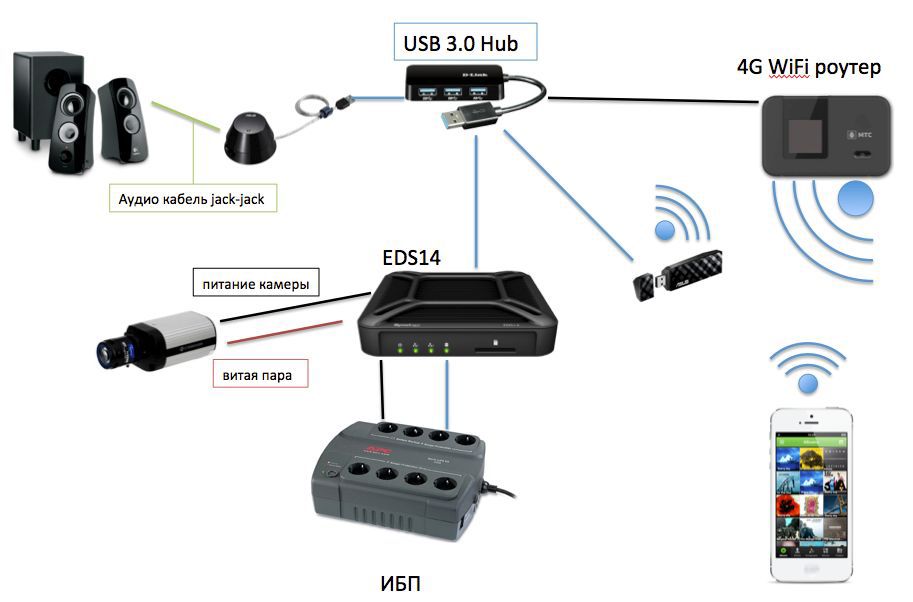
Used equipment:
NAS Synology EDS14
IP camera Etrovision EV8180A
UPS APC BACK ES 550VA
USB WiFi Asus USB-N53
4G WiFi router
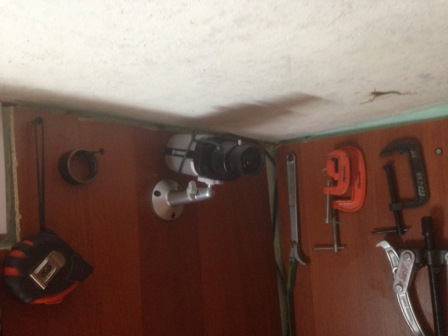
The main "chip" Synology EDS14 - the ability to work in a wide range of temperatures (from -20 to + 50C). Another of its nice features is the presence of a 12V 1A DC output, which I used to connect the power supply to the camera (black cable in the diagram). In parallel, he was thrown through a twisted pair, successfully hidden behind a laminated panel on the wall along with the rest of the wires:
About configuring EDS14. Step by step.
I carried out the initial configuration at home, logging into the control panel through the NAS web interface. First I connected Synology to the router, and then I connected a USB hub to it, into which I inserted the WiFi adapter.
For those who want to repeat my crazy trick, I will describe the configuration process in detail.
1) To connect Synology to the 4G router's network, assign the static address of another subnet (where the camera will be connected) to the second LAN port and assign the static address to the camera itself.
2) Connect to WiFi, for this:
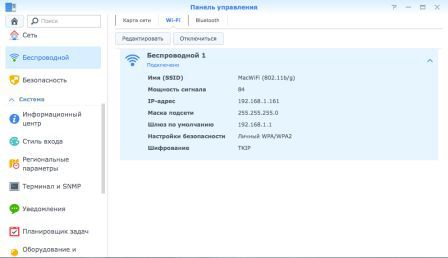
a) Open the control panel - Wireless - WiFi - Connect
b) Select the desired network from the list, enter the key
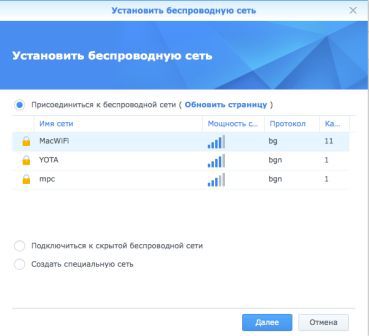
c) Check
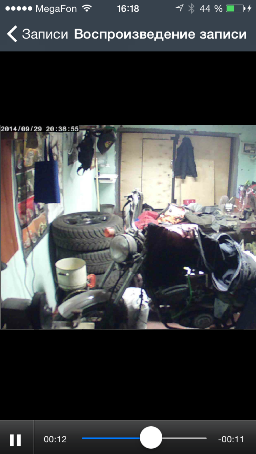
3) Download Surveillance Station for video surveillance from the Pack Center, but I also downloaded AudioStation for music.
4) Open SurveillanceStation and add a camera. The application interface is user-friendly, so there shouldn't be any difficulties with adding. Nevertheless, I will explain the values of some recording parameters:
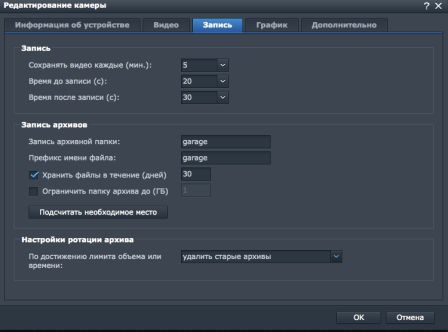
Save video every (min) - the maximum duration of one video file. If the recorded event lasts a longer period of time, the video is cut every (5) minutes.
The time before recording is the duration of the recording that is saved before the event.
The time after recording is the duration of the recording after the event.
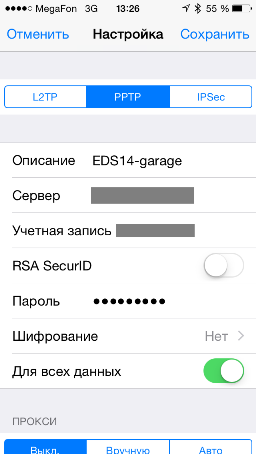
For greater reliability, I organized a VPN to my home NAS, allowing you to connect to the device in case of a failure of the QuickConnect service.
Configure the VPN server on the home Synology, standing in the garage of the EDS14 and the client program on the smartphone:
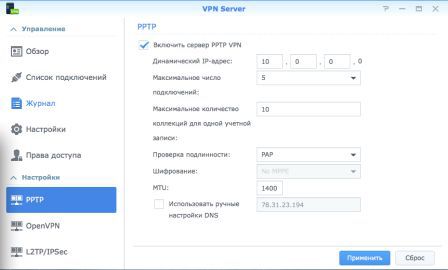
a. Server. Download the VPN server package, put a tick "enable PPTP VPN server". At least settings, it remains only to forward port 1723 outside.
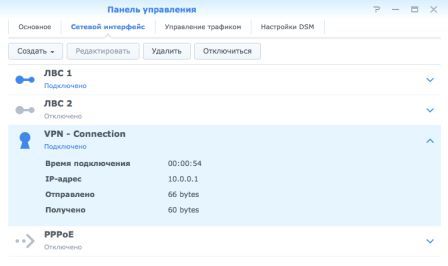
b. Customer. Open the Control Panel - Network - Network Interface - Create. Type - PPTP, fill in the address, name and password. In the next step, we tick the checkbox “Restore connection after losing the connection”. Click the "Connect" button is already on the installation site.
c. Client on a smartphone.
To access the external network, I used a 4G-WiFi router, to which Synology and mobile clients are connected via WiFi.
A USB hub and a cable from the UPS are connected to the EDS14. We connect a WiFi whistle, an audio card, an external HDD to the hub and additionally power a 4G WiFi router.
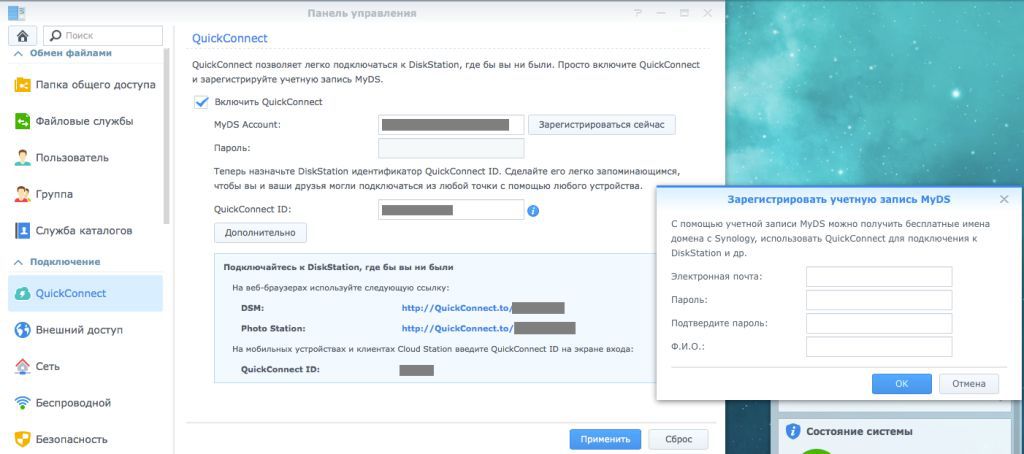
To access Synology's external network, I used the QuickConnect built-in service. Its convenience lies in the absence of the need to specify an external IP address and port forwarding on the router.
I also connected a sound card to the EDS14 USB to play my music from the HDD to create the right atmosphere ;-) You can control playback from the DS Audio mobile application optimized for iOS, Android and WindowsPhone.
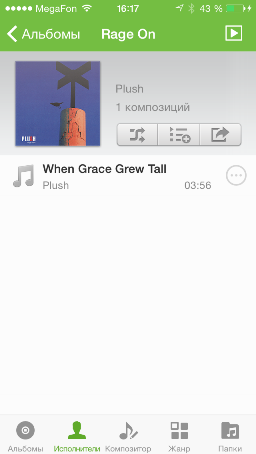
I immediately came up with the idea of using this feature as a kind of alarm. Now, before leaving the premises, the volume on the speakers is automatically set to maximum, so in case of a penetration or other alarming situation that requires maximum attention, open the DS Audio application, connect via QuickConnect to Synology, launch the siren file and select Speaker as the source Usb

Mobile View Example
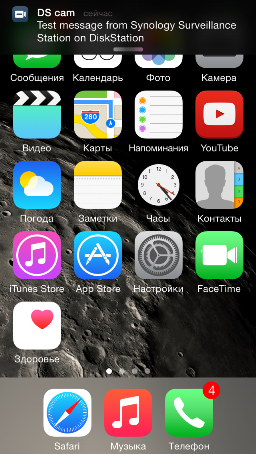
Check notifications - send a test message
Preparation and connection took only 2.5 hours. As a result, I received a system that allows you to monitor the garage around the clock and turn on the siren in case of penetration or other danger (because motion detection will also work in case of fire). Even now you can listen to music :)
Source: https://habr.com/ru/post/240007/
All Articles