Features of cloning in an educational institution
We have 300 computers united in a corporate network and 48 hours to install an operating system and 65 software on these computers. How we will try to accomplish this feat will be described below.
Of course, Clonnezilla , intended for cloning and creating disks and / or partitions, will help us in accomplishing the feat. We will also focus on some of the nuances of installing software within computer classes. But before we clarify the conditions of our problem. 300 computers are computers located in 16 computer classes of our university. Within one computer class are computers of the same configuration. In general, the classes differ from each other by different iron and, of course, by age. Computers are included in the windows domain.
We randomly select a computer (of course, from the newer ones, from the class that is closer to our department). We will use this computer to create a base image.
There is no useful data on the computer, so immediately insert the installation disc with Windows XP and proceed to the installation process. Yes Yes. We are aware that Windows XP is no longer supported. But due to the requirement for uniformity, we are forced to use this operating system. In older classes, newer operating systems will not feel comfortable, and installing different operating systems in different classes we risk confusing users. In general, "the herd runs at the speed of the slowest animal."
')
So, install the operating system. There are no secrets here.
Loading. Install all drivers.
Be sure to install all the latest updates. If you do not take this step, then on September 1, 300 computers that want to upgrade will obviously interfere with other users of the network. If for some reason the update process does not start automatically, you can force it by going to www.update.microsoft.com and following these instructions.
Install all the necessary software. Here again, there are no secrets. Today, the size of the hard drives of even the “slowest animals” allows us to install all software locally.
Having dealt with the programs, it's time to add the machine to the domain and proceed to the most interesting part of the Marlezonsky ballet - user profile settings.
Each student is a domain user, he must have his own personalized profile. By default, he will try to change this profile or even break it. For example, he may accidentally delete all tags. Here it is important that other users and, of course, he himself should not suffer from his actions. This is on the one hand. On the other hand, the question arises how to provide the user with a personal profile? If we consider that in our database about 12 thousand users. The option of local storage (on each computer) of profiles disappears. But even if it was possible, there would be a problem with the synchronization of the profile on all the machines. Fully network solutions are also not suitable here, since at the beginning of each training pair, 300 users would “go” for their network profiles, paralyzing the network operation.
We solved this problem simply. Each user we have is the default guest of the domain. When logged in, he will be created a profile from Default usera, and after completion of the profile will be deleted. Even if the user deletes all shortcuts, he will receive his profile in its original form in the next session. Thus, the current task is reduced to the correct setting of the Default usera profile and the allocation of some place to store personal files.
The latter is very relevant, since having saved his thesis in the my documents folder, with the next login, the user is unlikely to be able to find it, because by default this folder is in the user profile, which, as you remember, will be deleted.
This problem is solved quite simply - we simply reassign the folder my documents to a network drive, which is personal to each user and is automatically mounted upon login.

Stop! Stop! You say. After all, this setting will be applied only to the current user. How to make so that the default setting applies to all users? The answer is simple: you need to apply this setting to the Default User profile. Make it simple enough.
We go under any domain user (preferably not a guest of the domain), set up a profile. Then we end the session, log in again to the system, already under a user with administrator privileges, and simply copy the created profile into the default usera profile, which we do not forget to backup beforehand. Of course, the desired effect can be achieved by editing the necessary registry keys, but this method is more simple and intuitive.
But before we copy the current user profile to the default usera profile, we’ll complete its configuration. We will take out the necessary shortcuts on the desktop and arrange them in a beautiful order. With a high degree of probability during cloning the order of labels will be broken. This is due to a change in the resolution of the desktop. If the permissions change to smaller ones and some of the markets are outside of this resolution, their order changes and labels are placed from top to bottom, starting from the upper left corner.
This situation will occur in our country with a high degree of probability, because when cloning an image on a computer with a different hardware configuration (monitor, video card), the resolution of the desktop will be replaced with the default resolution. In order to avoid disturbing the order of labels in this situation, we try to locate them in an area of 800 by 600, starting from the upper left corner.
Having dealt with the labels, go to the environment variables. We fix all tempo paths on C: \ TEMP (we pre-grant this folder write access). Why do we do this? For two reasons. First, it is good to have a dustbin in one place, then it will be easier to clean. Secondly, tempo folders that are in a user profile can sometimes be blocked by some programs that continue to use them after the user’s session is over, and as a result, the profile will not be deleted, and the documents and settings folder will grow.
When the user profile is ready, you can start moving it to the default usera profile. But there is one pitfall. The default usera profile will be copied with each new session with each new user, and this will take a certain amount of time, which will increase with increasing profile size and decreasing computer power. Therefore, you need to try to make the profile as small as possible. To do this, all the things that can be transferred from the Default Usera profile to the All users profile are better transferred. Painlessly, this can be done for all objects that need only read access. These are shortcuts, start menu items, static program elements, etc.
It is also necessary to pay attention to the fact that some programs, when they are first launched, create in the profile the necessary file structure for the work. At the same time, some bulky packages may record a significant amount of information in a profile (this usually happens when the message “I will start up a couple of minutes soon” when the program starts) appears.
In order for the deafault usera profile to weigh as little as possible, the most logical decision suggests itself - do not run any program from under the current user. Nothing terrible will happen, just each program will copy its set of files into the profile when it starts. And this will happen all the time, since after the session the profile is removed from us. And everything would be fine, but, as I already wrote, there are such bulky packages that, besides the fact that they will copy a lot, will also be copied for a long time. Very often, this is not just copying, but pre-extracting the necessary files from the archive, checking them - and only then copying. In some cases, on rather weak machines, the launch time of such applications reached 20 minutes. Teachers and students were extremely dissatisfied with this.
Thus, we have a dilemma. On the one hand, the bulky profile of default usera will be copied for a long time, which will increase the login time. On the other hand, in the bare profile, some programs will run for a long time.
We solve this problem with each program individually, if it takes 15 minutes for it to start the first time, we launch it from under the current user and then copy everything that it created in the profile to the default usera profile. If the launch time is acceptable, then we do not start this program from under the current user, so that the excess overhang is not created in the profile.
Do not forget to test everything.
When the default usera profile is ready, we go under one of the student accounts and check the login time, the program launch time, the performance of all applications (in some cases you will need to give them a little more rights). Finally, if everything is ready, proceed with the creation of the image.
Stop!
Before creating an image, you need to remember to do one very important thing. Delete all drivers in the configured operating system. Otherwise, if you unwrap the resulting image on machines with another iron, you can get a blue screen of death.
After we create the image, it can be deployed in each specific computer class. Under the terms of the problem, we rni have the same iron. Therefore, to start, install the image on only one computer in the class, then install the actual drivers. Re-create the image, already for the desired class - and then quickly enough we will be able to deploy it to all the computers in this class.
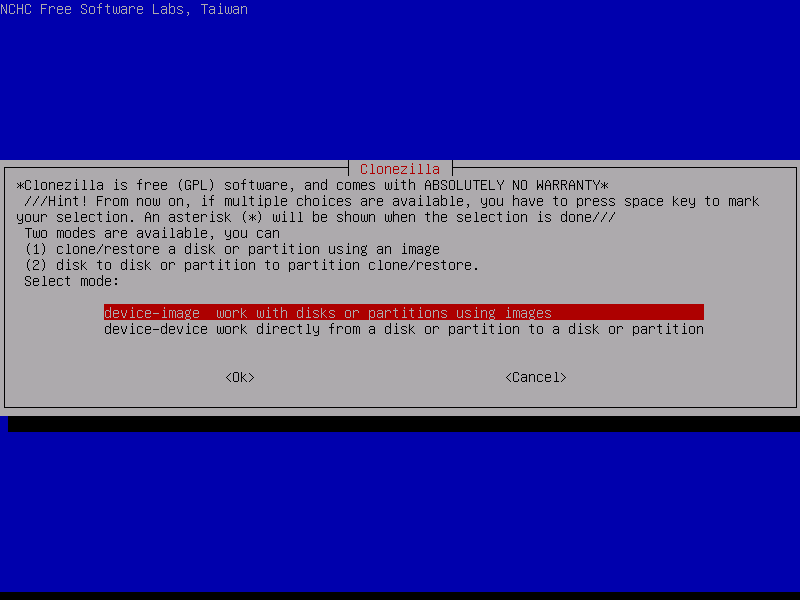
This process, as I said, we will do with Clonezilla. Free, intuitive, there is a Russian interface that runs from a flash drive, can load itself into RAM, which allows you to immediately remove the flash drive from the computer and shove it into the next one.
In the end, all that remains is to rename the computers and add them to the domain.
Of course, Clonnezilla , intended for cloning and creating disks and / or partitions, will help us in accomplishing the feat. We will also focus on some of the nuances of installing software within computer classes. But before we clarify the conditions of our problem. 300 computers are computers located in 16 computer classes of our university. Within one computer class are computers of the same configuration. In general, the classes differ from each other by different iron and, of course, by age. Computers are included in the windows domain.
Time has gone
We randomly select a computer (of course, from the newer ones, from the class that is closer to our department). We will use this computer to create a base image.
There is no useful data on the computer, so immediately insert the installation disc with Windows XP and proceed to the installation process. Yes Yes. We are aware that Windows XP is no longer supported. But due to the requirement for uniformity, we are forced to use this operating system. In older classes, newer operating systems will not feel comfortable, and installing different operating systems in different classes we risk confusing users. In general, "the herd runs at the speed of the slowest animal."
')
So, install the operating system. There are no secrets here.
Loading. Install all drivers.
Be sure to install all the latest updates. If you do not take this step, then on September 1, 300 computers that want to upgrade will obviously interfere with other users of the network. If for some reason the update process does not start automatically, you can force it by going to www.update.microsoft.com and following these instructions.
Install all the necessary software. Here again, there are no secrets. Today, the size of the hard drives of even the “slowest animals” allows us to install all software locally.
History reference
This was not always the case. When the computers were not so fast, but the hard drives were big, we had to install programs on a network drive. Some programs were set up without problems by regular copying, while some required the presence of certain keys in the registry. We solved this problem simply. When creating the base image, we mounted a network drive and installed the necessary program on it. All newly cloned computers had the necessary paths and turned to the program as if it was installed directly from this computer. Here, however, there was another problem. Some programs did not support sharing and complained when several users tried to access the files of these programs simultaneously. We solved this problem in a more coordinate way. We installed the program in the folder C: \ TEMP, the default folder for temporary files, and then transferred all its contents to a network drive. The launch shortcut was replaced with a batch file, clicking on which caused the entire contents to be copied back and the subsequent launch of the desired file.
Having dealt with the programs, it's time to add the machine to the domain and proceed to the most interesting part of the Marlezonsky ballet - user profile settings.
Each student is a domain user, he must have his own personalized profile. By default, he will try to change this profile or even break it. For example, he may accidentally delete all tags. Here it is important that other users and, of course, he himself should not suffer from his actions. This is on the one hand. On the other hand, the question arises how to provide the user with a personal profile? If we consider that in our database about 12 thousand users. The option of local storage (on each computer) of profiles disappears. But even if it was possible, there would be a problem with the synchronization of the profile on all the machines. Fully network solutions are also not suitable here, since at the beginning of each training pair, 300 users would “go” for their network profiles, paralyzing the network operation.
Secret one - all users are guests.
We solved this problem simply. Each user we have is the default guest of the domain. When logged in, he will be created a profile from Default usera, and after completion of the profile will be deleted. Even if the user deletes all shortcuts, he will receive his profile in its original form in the next session. Thus, the current task is reduced to the correct setting of the Default usera profile and the allocation of some place to store personal files.
The latter is very relevant, since having saved his thesis in the my documents folder, with the next login, the user is unlikely to be able to find it, because by default this folder is in the user profile, which, as you remember, will be deleted.
This problem is solved quite simply - we simply reassign the folder my documents to a network drive, which is personal to each user and is automatically mounted upon login.
Stop! Stop! You say. After all, this setting will be applied only to the current user. How to make so that the default setting applies to all users? The answer is simple: you need to apply this setting to the Default User profile. Make it simple enough.
The second secret is to set the Default User profile.
We go under any domain user (preferably not a guest of the domain), set up a profile. Then we end the session, log in again to the system, already under a user with administrator privileges, and simply copy the created profile into the default usera profile, which we do not forget to backup beforehand. Of course, the desired effect can be achieved by editing the necessary registry keys, but this method is more simple and intuitive.
But before we copy the current user profile to the default usera profile, we’ll complete its configuration. We will take out the necessary shortcuts on the desktop and arrange them in a beautiful order. With a high degree of probability during cloning the order of labels will be broken. This is due to a change in the resolution of the desktop. If the permissions change to smaller ones and some of the markets are outside of this resolution, their order changes and labels are placed from top to bottom, starting from the upper left corner.
Secret Three - Label Order
This situation will occur in our country with a high degree of probability, because when cloning an image on a computer with a different hardware configuration (monitor, video card), the resolution of the desktop will be replaced with the default resolution. In order to avoid disturbing the order of labels in this situation, we try to locate them in an area of 800 by 600, starting from the upper left corner.
Secret Four - TEMP Folder
Having dealt with the labels, go to the environment variables. We fix all tempo paths on C: \ TEMP (we pre-grant this folder write access). Why do we do this? For two reasons. First, it is good to have a dustbin in one place, then it will be easier to clean. Secondly, tempo folders that are in a user profile can sometimes be blocked by some programs that continue to use them after the user’s session is over, and as a result, the profile will not be deleted, and the documents and settings folder will grow.
Secret Five - quick login, quick launch of programs
When the user profile is ready, you can start moving it to the default usera profile. But there is one pitfall. The default usera profile will be copied with each new session with each new user, and this will take a certain amount of time, which will increase with increasing profile size and decreasing computer power. Therefore, you need to try to make the profile as small as possible. To do this, all the things that can be transferred from the Default Usera profile to the All users profile are better transferred. Painlessly, this can be done for all objects that need only read access. These are shortcuts, start menu items, static program elements, etc.
It is also necessary to pay attention to the fact that some programs, when they are first launched, create in the profile the necessary file structure for the work. At the same time, some bulky packages may record a significant amount of information in a profile (this usually happens when the message “I will start up a couple of minutes soon” when the program starts) appears.
In order for the deafault usera profile to weigh as little as possible, the most logical decision suggests itself - do not run any program from under the current user. Nothing terrible will happen, just each program will copy its set of files into the profile when it starts. And this will happen all the time, since after the session the profile is removed from us. And everything would be fine, but, as I already wrote, there are such bulky packages that, besides the fact that they will copy a lot, will also be copied for a long time. Very often, this is not just copying, but pre-extracting the necessary files from the archive, checking them - and only then copying. In some cases, on rather weak machines, the launch time of such applications reached 20 minutes. Teachers and students were extremely dissatisfied with this.
Thus, we have a dilemma. On the one hand, the bulky profile of default usera will be copied for a long time, which will increase the login time. On the other hand, in the bare profile, some programs will run for a long time.
We solve this problem with each program individually, if it takes 15 minutes for it to start the first time, we launch it from under the current user and then copy everything that it created in the profile to the default usera profile. If the launch time is acceptable, then we do not start this program from under the current user, so that the excess overhang is not created in the profile.
Do not forget to test everything.
When the default usera profile is ready, we go under one of the student accounts and check the login time, the program launch time, the performance of all applications (in some cases you will need to give them a little more rights). Finally, if everything is ready, proceed with the creation of the image.
Stop!
Important secret
Before creating an image, you need to remember to do one very important thing. Delete all drivers in the configured operating system. Otherwise, if you unwrap the resulting image on machines with another iron, you can get a blue screen of death.
After we create the image, it can be deployed in each specific computer class. Under the terms of the problem, we rni have the same iron. Therefore, to start, install the image on only one computer in the class, then install the actual drivers. Re-create the image, already for the desired class - and then quickly enough we will be able to deploy it to all the computers in this class.
This process, as I said, we will do with Clonezilla. Free, intuitive, there is a Russian interface that runs from a flash drive, can load itself into RAM, which allows you to immediately remove the flash drive from the computer and shove it into the next one.
In the end, all that remains is to rename the computers and add them to the domain.
Source: https://habr.com/ru/post/239857/
All Articles